
that looks gorgeous.... the gamble payed off by the looks of it.... are u rebuilding the turbo?

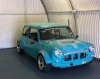
1976 clubman
Started by
1976 clubamn
, Jun 28 2004 12:22 AM
159 replies to this topic
#47

1976 clubamn
-
- Members
-

- 467 posts
1 Gold star
- Location: Shrewsbury
- Local Club: None yet
Posted 09 November 2004 - 05:15 PM
i love the way it turned out, i think the stripes and the colour go really well together.
i have re-built the engine to standard spec acept for the 1.5.1 roller rockers i have added.
i have re-built the engine to standard spec acept for the 1.5.1 roller rockers i have added.
Attached Files
-
 turbo_rebuild_4.JPG 140.58K
60 downloads
turbo_rebuild_4.JPG 140.58K
60 downloads
#48
1976 clubamn
-
- Members
-
- 467 posts
1 Gold star
- Location: Shrewsbury
- Local Club: None yet
Posted 09 November 2004 - 05:23 PM
last night i installed the lights, what do you think?
the top two rows are the indicators and the others are split into sides and brake. i have wired them so that when the side lights are on and you apply the brakes, the side lights get brighter and the brake light comes on aswell, making one large brake light.
the top two rows are the indicators and the others are split into sides and brake. i have wired them so that when the side lights are on and you apply the brakes, the side lights get brighter and the brake light comes on aswell, making one large brake light.
Attached Files
-
DSC01054.JPG 157.26K
43 downloads
#49
Jordie
-
- TMF+ Member
-
- 13,567 posts
Traders Area Specialist Mod, North and Scotland Area Manager
- Name: Jordan
- Location: North East
Posted 09 November 2004 - 06:38 PM
looks cool.
#50
Kustom
-

- Noobies
-
- 36 posts
On The Road
Posted 10 November 2004 - 12:35 AM
What paint did you use fot the engine above and did you have the paint striped off first or just paint over the top. The silver sections look mint, i take it that is paint too.
Matt
Matt
#51
1976 clubamn
-
- Members
-
- 467 posts
1 Gold star
- Location: Shrewsbury
- Local Club: None yet
Posted 10 November 2004 - 12:42 AM
i used high temp paint for the lot. i striped back as muck of the old paint as i could first. yes the silver is also paint. the bell housing and gearbox wouldnt clean up as i would have liked so i decided to paint it.
just wating for a few turbo bits now. when i get then it can be fitted.
just wating for a few turbo bits now. when i get then it can be fitted.
#52
Mincento
-

- Members
-
- 443 posts
Speeding Along Now
- Location: Stoke-On-Trent
Posted 10 November 2004 - 12:45 AM
it is starting to look pretty smart but just wondering what you used to strip the crd and old paint off the engine block before you painted it
#53
Dom
-
- TMF+ Member
-
- 10,685 posts
Moved Into The Mazda
- Location: Nürburgring
Posted 10 November 2004 - 07:51 AM
last night i installed the lights, what do you think?
the top two rows are the indicators and the others are split into sides and brake. i have wired them so that when the side lights are on and you apply the brakes, the side lights get brighter and the brake light comes on aswell, making one large brake light.
thats cool, very unique, havent seen them before.
could you get a picture of them lit up?
#54
Sam
-
- Members
-
- 2,323 posts
Wish i was in T.O.W.I.E
- Location: Basingstoke
Posted 18 February 2005 - 02:08 PM
Any news on how this one turned out?
#55
Boab
-

- Members
-
- 1,610 posts
Camshaft & Stage Two Head
- Local Club: E*S*M*O*C
Posted 18 February 2005 - 03:51 PM
Thanks :tongue:i like it, glad you didn't go with viper stripes there so poogeut 306
Looking real good 1976 clubman. Get some pics up as soon as you get the lights working. They look mint.
#56
1976 clubamn
-
- Members
-
- 467 posts
1 Gold star
- Location: Shrewsbury
- Local Club: None yet
Posted 01 March 2005 - 10:42 PM
hi guys
sorry i havent updated for a while. Whilst reading the last couple of replys to my post i realised that my last reply was not on hear.
The last post i made said that i had finished putting in all the light and that they where now ready for testing.
[SIZE=14]Disaster!!!!!
when i was working out the resisters that i needed to use my mate desided he would be clever and spike the whole lighting circuit with 12v.... with no resisters.
needless to say every LED went bye bye.
not cool. so now i have a fresh batch of LEDs and tonight i have the great task of soldering cables on every bloody one of them then heat shrinking each one ready for them to be installed again.
this time i will complete the whole job befor i let anyone int to the garage.
will let you know soon how it went.
#57
Boab
-
- Members
-
- 1,610 posts
Camshaft & Stage Two Head
- Local Club: E*S*M*O*C
Posted 01 March 2005 - 11:14 PM
I hope he paid for them.
#58
Alburglar
-
- Members
-
- 3,331 posts
Das Pingu's
- Location: Dover Kent
- Local Club: Kentish Mini Club
Posted 02 March 2005 - 01:11 AM
Looks great mate. It's extra nice because it's a little different too!
#59
1976 clubamn
-
- Members
-
- 467 posts
1 Gold star
- Location: Shrewsbury
- Local Club: None yet
Posted 02 March 2005 - 01:22 AM
yah he did pay for them, put its the time it takes to produce the little buggers that im bothered about. from componant bits to one complete unit takes around 4 minutes, so you can imagin how long it takes to re-do the whole lot.
then you have to test each unit to make sure the connections are sound.... and so on.
made a good start on them tonight though.
then you have to test each unit to make sure the connections are sound.... and so on.
made a good start on them tonight though.
#60
1976 clubamn
-
- Members
-
- 467 posts
1 Gold star
- Location: Shrewsbury
- Local Club: None yet
Posted 04 April 2005 - 07:39 PM
hear it a pic of the engine in

oil cooler fitted

this one shows how i modified the angle of the radiator to fit a pacet fan so it does'nt foul on the water pump pully

kad solid engine steady

dash almost complete
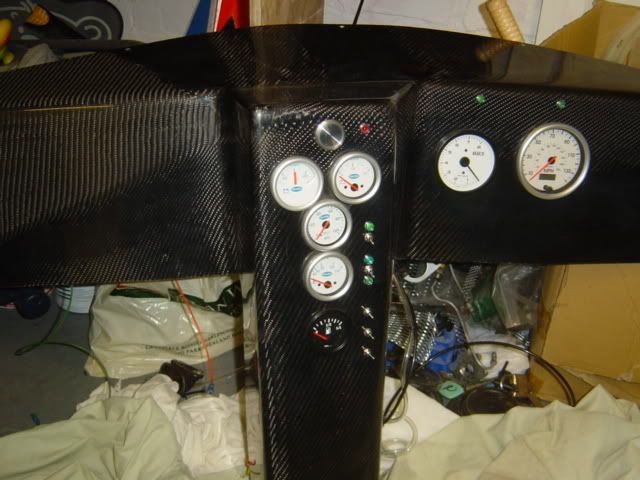
steering wheel with indicator buttons installed

sump guard

oil cooler fitted
this one shows how i modified the angle of the radiator to fit a pacet fan so it does'nt foul on the water pump pully
kad solid engine steady
dash almost complete
steering wheel with indicator buttons installed
sump guard


1 user(s) are reading this topic
0 members, 1 guests, 0 anonymous users


