Re-torque the head to make sure it is seated properly.
Once the head is re-torqued, adjust the valves. This is a must-do step.
Since you have replaced the ignition parts, make sure you put them on in the correct order.
Recently there have been several threads about checking ignition timing and firing order. Please search for a few of them as they will prove helpful. I will paraphrase checking the firing order below. If you need information on setting static timing post that request and I'll add it.
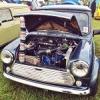
- Remove the spark plug from cylinder #1 (water pump end of engine).
- Turn the engine over by hand until you can see the timing marks line up (for a first start 5 to 8 degrees BTDC) and see the piston in cylinder #1 coming to the top.
- Remove the valve cover and grab the two rocker arms above cylinder #1. Try to wiggle the rocker arms. If they cannot be moved, turn the engine through one more complete turn until #1 piston is again at the top of its bore with the timing marks lined up and the rocker arms loose where you can wiggle them. (Don't try doing this until AFTER you have adjusted the valves as I suggested above).
- With the engine sitting like this (again 5 to 8 degrees BTDC with the rocker arms for cylinder #1 loose) remove the distributor cap and look at where the rotor is pointing on the cap.
- The cap terminal where the rotor is pointing should have the wire that will connect to spark plug #1. If not, make it so.
- The remaing plug wires go on the cap in the order 1-3-4-2 COUNTERCLOCKWISE around the distributor cap. Move the plug wires if necessary so the firing order is correct.
If you have moved the distributor in the block during this engine work, it will be necessary to set the static timing. That is a separate topic and rather than go into it here I will wait to hear if you have need of that information.