Thanks fellas.


Three Classics. One Passion.
Started by
Stu.
, Nov 10 2014 10:45 PM
160 replies to this topic
#151

Stu.
-
- Members
-

- 912 posts
One Carb Or Two?
- Location: My workshop.
Posted 11 December 2015 - 08:50 PM
#152
Archived1
-

- Archived
-
- 619 posts
Super Mini Mad
Posted 22 December 2015 - 08:38 PM
Just been through the whole thread. Great work fella, especially as youre doing it at home.
#153
Stu.
-
- Members
-
- 912 posts
One Carb Or Two?
- Location: My workshop.
Posted 22 December 2015 - 11:38 PM
Thanks mate. It's coming along slowly but I'm enjoying myself.
Really glad you got sorted with your V5 by the way, and sorry if my post was innacurate, I got mixed up with the facts a bit 
#154
Stu.
-
- Members
-
- 912 posts
One Carb Or Two?
- Location: My workshop.
Posted 31 December 2015 - 02:17 PM
Not got much done due to the holidays but did get the passenger floorpan painted and the other side cut out.

Also had to make up a new section to extend the corner of the bulkhead.


I've also been working on the gear selector and cable for the auto box.


The gear selector cable seems to be ok, and just needed a little tlc. Good job as these are £140 odd new!

The outer sleeve had torn in some places so I managed to cover the bare outer with thick heatshrink.


Next I'll be cleaning up the upper suspension arms and continuing with the drivers side floorpan and bulkhead.
I'm also off to Machine Mart in a few days for a spot welder 
Thanks for reading.
Edit Update.
Just realised I've missed a bit from Felix's progress. The front panel, scuttle and outer wings are now all on and welded up. I also got the drivers floor pan in. So apart from a little finishing it'll be the inner and outer sills and door steps next.
In the back of my mind I've had a niggling worry that the windscreen won't fit in since I've done the front end and bulkhead work. I've also had concerns that the door gaps are far too tight, so before I got cracking on Molly to finish her this year I thought I'd better put my worries to rest and get it sorted and checked.
The great news is that the screen fits in with the trim spreader, so I'm very happy and relieved.

Feeling positive, I then had a theory about the door gaps. As the car's on a rollover jig I thought it might be inducing a little bit of sagging in the body which might be the cause of the tight gaps. I took the car off the jig and supported it on the front of the inner sills. When I tried the door on it fitted perfectly with gaps most restorers fettle to get for weeks. I also tried the new door skins I've bought and they were great too, so now I can move onto getting Molly finished without worrying.


If you squint a bit it looks a little bit like a Mini 
So with things left positive on Felix, I started to strip out Molly's interior and get her ready for body prep and paint. I knew I'd need to do some work to the doorstep and after looking at the drivers side boot floor corner it seems I'll need to put a repair section there too, I just hope I don't need to go near the subframe mount.

So work will stop there on Felix for a while, so I can concentrate on completing the bodywork and paint on Molly, and get her completely finished this year.
Edited by Stu., 27 June 2016 - 05:56 PM.
#155
Stu.
-
- Members
-
- 912 posts
One Carb Or Two?
- Location: My workshop.
Posted 27 June 2016 - 04:50 PM
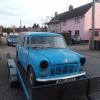
OK so update time. Over the Winter and Spring as you can see from the above pic's, I managed to get the front end of Felix complete except for a few small areas to finish.
I didn't realise it's been so long since my last update, but I haven't got much done to my Minis, mainly because of my Austin A30 purchase which needed some mechanical and electrical work doing. It's getting there now and the bodywork and mechanicals are in superb shape. The interiors pretty good too but needs a little attention here and there, but that'll have to wait until later.
Meet Burzi 

So I've resumed the bodywork on Molly now the weathers getting warmer and have started stripping the rear to prep for paint. I'll probarbly strip and prepare the remaining near side and spray the whole lot in one go and do the roof last. That'll leave the doors and boot lid to do plus the interior bits
I found out the valance was only fixed on with 4 screws and had a load of filler slapped in the lip gaps. The boot & rear panel lips are also a bit bent. I'll need to straighten them out and possibly seam weld the edge if my spot welder wont do the business.


The valance is in good condition so I see some dolly and hammer work to make all the lips good and straight.

It's amazing how much you sweep up after removing just a small valance.

So now that's off I need to drain and remove the fuel tank. take off the passenger door, remove the quarter glass and begin machine sanding the panels back. I hope to be posting plently now as I plan to be working back on the cars for the foreseable future
Edited by Stu., 27 June 2016 - 06:02 PM.
#156
Stu.
-
- Members
-
- 912 posts
One Carb Or Two?
- Location: My workshop.
Posted 27 June 2016 - 06:34 PM
So I decided to strip out the interior and roof lining to see where all the stains had come from on the vinyl.

As I thought, the bitumen sheets used to brace the roof had melted in the sun at some point and dropped onto the rear of the roof lining, staining the material and bleeding through. I'll need to remove this as I don't want it happening on the new lining after I've fitted it.


I also found some of the skim filler had de-bonded from the A panel previously repaired and sprayed by me, which I'm pretty anoyed about as I'm always careful, but hey ho thats life, no biggie.


Once I'd stripped the interior I could start on replacing the corroded passenger door step. I found this was a previous repair and had been poorly welded, with around 300mm of the seam between the door step and outer sill not welded at all.

I cut out the bad section and prepared the surfaces for the new one. While the cavity was open I gave it a good dose of Dynax S50

With the new section in place I trial fitted the door to make sure it all lined up.


Then spot welded it all in place, before butt welding the joints at each end.


Once all ground down, I gave it a couple of coats of Electrox to protect the metal until I spray it proper.

As I thought, the bitumen sheets used to brace the roof had melted in the sun at some point and dropped onto the rear of the roof lining, staining the material and bleeding through. I'll need to remove this as I don't want it happening on the new lining after I've fitted it.
I also found some of the skim filler had de-bonded from the A panel previously repaired and sprayed by me, which I'm pretty anoyed about as I'm always careful, but hey ho thats life, no biggie.
Once I'd stripped the interior I could start on replacing the corroded passenger door step. I found this was a previous repair and had been poorly welded, with around 300mm of the seam between the door step and outer sill not welded at all.
I cut out the bad section and prepared the surfaces for the new one. While the cavity was open I gave it a good dose of Dynax S50
With the new section in place I trial fitted the door to make sure it all lined up.
Then spot welded it all in place, before butt welding the joints at each end.
Once all ground down, I gave it a couple of coats of Electrox to protect the metal until I spray it proper.
Edited by Stu., 28 June 2016 - 06:41 AM.
#157
Stu.
-
- Members
-
- 912 posts
One Carb Or Two?
- Location: My workshop.
Posted 27 June 2016 - 07:34 PM
Plotting the far far away refit for Felix, I needed to get a full interior as he was sold without one, probably sold on well before I bought him as an abandoned project.
I fell into some luck and managed to get this lovely set, which is in great condition.


The steering wheel needs some restoration but I'm sure I can get it looking mint again soon
I fell into some luck and managed to get this lovely set, which is in great condition.
The steering wheel needs some restoration but I'm sure I can get it looking mint again soon
Edited by Stu., 28 June 2016 - 06:42 AM.
#158
Stu.
-
- Members
-
- 912 posts
One Carb Or Two?
- Location: My workshop.
Posted 28 June 2016 - 03:27 PM
Back onto Molly and I started work on the boot floor sections needing attention. I removed the valance which was only screwed on with four self tappers  and found the left and right corners of the floor have had previous repairs. These seemed ok but have not been welded to the boot lip, so I've had to fix that on the left side, and had to replace a section on the right altogether as it was beginning to corrode again at the rear of the wheel arch.

Spot welded back together.

Right side repair.


Repair section in place with joggled joints ready for plug and seam welding.


Bang up to date now. Just need some spare time to get back out there and continue now 
#159
wingnut
-
- Members
-
- 464 posts
Speeding Along Now
- Location: bury st edmunds
Posted 28 June 2016 - 09:24 PM
Nice repair,love the A30
#160
Stu.
-
- Members
-
- 912 posts
One Carb Or Two?
- Location: My workshop.
Posted 28 June 2016 - 09:58 PM
Thanks pal.
#161
Stu.
-
- Members
-
- 912 posts
One Carb Or Two?
- Location: My workshop.
Posted 29 June 2016 - 02:47 PM
I received some nice memorabilia in the post today


3 user(s) are reading this topic
0 members, 3 guests, 0 anonymous users


