Jump to content


Photo
- - - - -

95 Sprite Rebuild & 16V Conversion


  • Please log in to reply
691 replies to this topic

#91 alchall

alchall

    Super Mini Mad

  • Just Joined
  • PipPipPipPipPipPip
  • 604 posts
  • Location: Chorley

Posted 10 May 2015 - 08:41 AM

Small but important update today, I've now completed the bulkhead repairs inside and out with the exception of half of the plug welds where the new dash tray meets the bulkhead, I need my new skin pins to arrive to complete these but I can do this at my leisure.


Firstly the new and final upper bulkhead patches were completed.....

Attached File  mini-196.jpg   53.07K   24 downloads


I have left the welds very slightly proud both inside and out as I didn't want to go back a step and thin the metal around them, I may go back at some point and tidy up with a little filler but they aren't too visible anyway with the primer in place as you can probably see from the pictures below.


Dash tray installed....

Attached File  mini-197.jpg   72.3K   36 downloads


Just some pesky plug welds in the middle of each side section to complete the job, tricky to get to these things! think I should have tackled them from outside rather than in as I did for those in the centre section, but too late now.


Bonnet brackets re-attached, passenger side upright welded back in place and all cleaned up and painted....

Attached File  mini-198.jpg   66.62K   26 downloadsAttached File  mini-199.jpg   62.47K   22 downloadsAttached File  mini-200.jpg   69.19K   18 downloads


Hopefully the bonnet brackets are in the right place and my measuring was up to scratch!


All now ready for the inner wing fitment which shall begin next Sunday all being well!


#92 markyB

markyB

    Stage One Kit Fitted

  • Noobies
  • PipPipPip
  • 93 posts
  • Location: Sale
  • Local Club: Bomber County Minis

Posted 10 May 2015 - 11:45 AM

Great work,
Loving your progress, wish I had half your motivation !!

#93 alchall

alchall

    Super Mini Mad

  • Just Joined
  • PipPipPipPipPipPip
  • 604 posts
  • Location: Chorley

Posted 10 May 2015 - 09:25 PM

Thanks MarkyB! it's either motivation or obsession, I know what my girlfriend calls it  :lol:


#94 Hendred

Hendred

    Speeding Along Now

  • Members
  • PipPipPipPipPip
  • 484 posts
  • Location: Cleobury Mortimer Nr Ludlow, Shropshire Name: John

Posted 11 May 2015 - 07:10 AM

You welders looking nicely used now!


#95 alchall

alchall

    Super Mini Mad

  • Just Joined
  • PipPipPipPipPipPip
  • 604 posts
  • Location: Chorley

Posted 11 May 2015 - 02:37 PM

You welders looking nicely used now!


You should see my grinder, by which of course I refer to a power tool!


#96 Hendred

Hendred

    Speeding Along Now

  • Members
  • PipPipPipPipPip
  • 484 posts
  • Location: Cleobury Mortimer Nr Ludlow, Shropshire Name: John

Posted 12 May 2015 - 07:00 AM


You welders looking nicely used now!


You should see my grinder, by which of course I refer to a power tool!


ha ha


#97 alchall

alchall

    Super Mini Mad

  • Just Joined
  • PipPipPipPipPipPip
  • 604 posts
  • Location: Chorley

Posted 15 May 2015 - 03:24 PM

Well I've used a couple of spare hours over the past couple of evenings followed by a couple of hours this afternoon to get busy clamping up all of the new front end panels, I installed the front subframe to enable me to do this properly with the front panel in the correct position.


I'm pretty pleased with how it's come together, there's a bit of an issue which actually is only there I think because I can't get clamps in all the necessary places and all the panels on together (more of that to follow).


So here's it is all looking a lot like a car again (more importantly, like a mini!)....

Attached File  mini-202.jpg   76.55K   32 downloads


The gaps to the front panel look pretty much spot on to me, some minor fettling and they will be perfect, no point doing that now though....

Attached File  mini-201.jpg   63.8K   20 downloadsAttached File  mini-203.jpg   65.6K   15 downloads


Alignment of wing to apex panel in the wheel arch looks good too....

Attached File  mini-204.jpg   46.4K   24 downloadsAttached File  mini-207.jpg   52.11K   17 downloads


Scuttle gaps not perfect but the inner wing will pull over a few mm and resolve this once welded up, this is part of the problem with clamping all the panels in that I can't pull the inner wing to tight to the bulkhead and clamp up the outer wings at the same time, so I think this will come good (in fact these gaps were poor on the car as it started, so I am expecting this to be better that it was!)....

Attached File  mini-205.jpg   50.21K   17 downloadsAttached File  mini-208.jpg   44.51K   17 downloads


From inside (you can't really see it but there is a gap between inner wing and bulkhead as I described above on both sides, passenger side slightly worse)....

Attached File  mini-210.jpg   60.63K   18 downloadsAttached File  mini-211.jpg   60.26K   18 downloads


Lastly the only bit of any concern is how the A post is coming together, again I think this is much to do with not being able to clamp everything up perfectly, I can certainly get it better than this by fully clamping the inner wing and not installing the outer wing, I just hope that the outer wing and front panel will come together just as well with the inner wing welded into the "correct" position....

Attached File  mini-213.jpg   28.51K   16 downloadsAttached File  mini-214.jpg   31.65K   17 downloads


Unfortunately I did manage to drop the driver side wing and it's now got a minor dent in it to be fixed, bit of a shame but should be easily resolved.


#98 Hendred

Hendred

    Speeding Along Now

  • Members
  • PipPipPipPipPip
  • 484 posts
  • Location: Cleobury Mortimer Nr Ludlow, Shropshire Name: John

Posted 15 May 2015 - 03:35 PM

Are you working on the Mini over the weekend?


#99 alchall

alchall

    Super Mini Mad

  • Just Joined
  • PipPipPipPipPipPip
  • 604 posts
  • Location: Chorley

Posted 15 May 2015 - 03:50 PM

Should get a few hours in on Sunday, hope I can make some good progress with the inner wing installations!


#100 Hendred

Hendred

    Speeding Along Now

  • Members
  • PipPipPipPipPip
  • 484 posts
  • Location: Cleobury Mortimer Nr Ludlow, Shropshire Name: John

Posted 15 May 2015 - 04:03 PM

Great look forward to the next update.


#101 johnR

johnR

    Up Into Fourth

  • Members
  • PipPipPipPipPipPipPipPipPip
  • 2,244 posts
  • Location: Dorset

Posted 15 May 2015 - 04:09 PM

Doing well, especially for a first time welder!

The BMW head conversion looks very neat and seems to be a good way to get more power.  Do you know what the cost is?

John


#102 alchall

alchall

    Super Mini Mad

  • Just Joined
  • PipPipPipPipPipPip
  • 604 posts
  • Location: Chorley

Posted 15 May 2015 - 08:23 PM

Doing well, especially for a first time welder!

The BMW head conversion looks very neat and seems to be a good way to get more power.  Do you know what the cost is?

John

Thanks!


It ain't cheap; SC do a package that includes the head, throttle bodies, ECU, etc. plus machining of the head, block and pistons for about £3K plus VAT for the 16v version. You have to assemble it yourself, which I'm fine with. They also do packages that exclude the machining so you can do it yourself or get somebody local to do it or at the other end of the scale fully built engines.


I've still not decided if this is the route I want to take or not yet.


#103 alchall

alchall

    Super Mini Mad

  • Just Joined
  • PipPipPipPipPipPip
  • 604 posts
  • Location: Chorley

Posted 17 May 2015 - 06:36 PM

Well today I was mostly drilling holes!


Attached File  mini-216.jpg   58.75K   17 downloadsAttached File  mini-219.jpg   62.5K   8 downloads


All the holes now drilled, cleaned up and covered with weld through zinc primer ready to be installed, I applied some etch prime and a couple of coats of top coat to the A post components that are attached to the panel and the section that will be inside the cross member too to add some protection.


I also painted the inside of the A posts on the car and drilled many more holes here too....


Attached File  mini-215.jpg   35.89K   16 downloadsAttached File  mini-217.jpg   41.37K   10 downloads


I also painted inside the cross member at each end....


Attached File  mini-220.jpg   51.53K   22 downloadsAttached File  mini-221.jpg   44.39K   10 downloads


So now I'm all ready to install the inner wings and hopefully these layers of paint will help to prevent (or at least postpone as long as possible) future rust!


And while I was doing this I also did a couple of extra finishing touches to the gear linkage, firstly I painted the outside of the lid (for want of a better name for this part) with Eastwood golden CAD, it looks much better in real life!...


Attached File  mini-222.jpg   103.46K   9 downloads


And installed what I think is now the correct sleeve bearing held in place with loctite....


Attached File  mini-223.jpg   27K   12 downloads


That's it for today, what a long job all that drilling, de-burring, and painting was!


#104 Hendred

Hendred

    Speeding Along Now

  • Members
  • PipPipPipPipPip
  • 484 posts
  • Location: Cleobury Mortimer Nr Ludlow, Shropshire Name: John

Posted 17 May 2015 - 07:52 PM

It's those jobs that take the time, welding is much less time than people think its the prep, which you are clearly doing properly


#105 alchall

alchall

    Super Mini Mad

  • Just Joined
  • PipPipPipPipPipPip
  • 604 posts
  • Location: Chorley

Posted 25 May 2015 - 02:54 PM

I'm still waiting for some skin pins to arrive so haven't welded those inner wings on yet, however, I did use saturday to progress with completing my gear linkage and cleaing up the windscreen surround and A posts....


So here's the complete gear linkage, I am trying to source new screws for the under side cover but no luck as yet, two missing as you can see as I've been carting them round with me to try and find some, but otherwise I have the new sleeve bearing installed, all re-assembled, another couple of coats of Aluma Blast paint as I damaged it taking it apart and putting it all back together again (but, it's pretty tough stuff and takes quite a beating before damage takes hold), and the restored and painted bracket and new cotton real bushes are all in place....


Attached File  mini-235.JPG   52.81K   13 downloadsAttached File  mini-236.jpg   83.3K   14 downloads


Very happy with this now, it all operates very smoothly without lots of slack and play, result, now it's safely tucked away for another day.


Next job, I did as much as I could with a long wire brush, deox gel and a power hose to remove as much rust and crud as I could from inside the box sections at each side of the windscreen surrounds, once dry I then gave it 3 coats of internal frame coating paint...


Attached File  mini-230.jpg   42.91K   45 downloads


This looks to be very good, it's very runny and seeps into all the gaps, it's supposed to encapsulate and prevent rust spreading so hopefully this will be just the trick, I ran the paint bottom to top and top to bottom to get good coverage, once the scuttle is in place I'll give it another blast from the top to cover up the insides of the welds. I'll also be using this in other box sections as it comes together for peace of mind. Here's how it looks.....


Attached File  mini-229.JPG   44.72K   46 downloads

Not sure why that's come out sideways.


Next up giving my new filament brushes a really good trial, stripped all the paint from the windscreen surround on the outside and all around the A pillars at either side of the screen left and right (I didn't do along the top on the inside, this is for another day. I have to say that I was pleasantly surprised with what I found under here, was expecting a nightmare...


Attached File  mini-225.jpg   61.99K   13 downloads


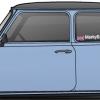
Right hand side very clean....


Attached File  mini-227.jpg   32.24K   6 downloads


Except the top corner which is going to need a small repair to the gutter, but nothing too horrendous and it doesn't appear to have spread too far....


Attached File  mini-226.jpg   75.36K   19 downloads


Left had side did have some rust, took a couple of doses of Deox gel and some wire brushing to get rid of it, it is pitted but nothing that needs repairing....


Attached File  mini-228.jpg   39.52K   12 downloads


All then cleaned up and given a coat of electrox....


Attached File  mini-234.jpg   66K   7 downloads


Oh I forgot, I did do some in fill sections in the bottom corners, and a small seam section that needed replacing on the passenger side so the welder has had some use, the corners will need a trim to the shape of the screen but I figured I would do that when the scuttle goes on....


Attached File  mini-232.JPG   45.2K   9 downloadsAttached File  mini-233.JPG   43.28K   7 downloads


Now, for those of you that wonder (like I was) how long a filament brush will last, here's a clue....


Attached File  mini-231.jpg   63.59K   13 downloads


There's two sets of paint on this car as it was sprayed a different colour to the original, and I have had to get into tricky sections here so it probably would last a bit longer on a large panel with only one lot of normal layers of paint.


0 user(s) are reading this topic

0 members, 0 guests, 0 anonymous users