Jump to content


Photo
- - - - -

Rear Subframe Repair - After Some Advice ...

suspension

  • Please log in to reply
20 replies to this topic

#16 Sabre75

Sabre75

    Learner Driver

  • Noobies
  • PipPip
  • 21 posts
  • Location: South/South-West

Posted 04 February 2015 - 01:26 AM

Right - tonight's update ... which should really have been at the weekend but I was tired!  -_-


So - Saturday night I realised the upper sections of the subframe arms where they join to the bulkhead beam were a little suspect too, so as I said I did some digging. One was entirely shot through so I cut out the tin-worm and Sunday morning made up another patch piece:

16438194962_570dafeae9_z.jpg

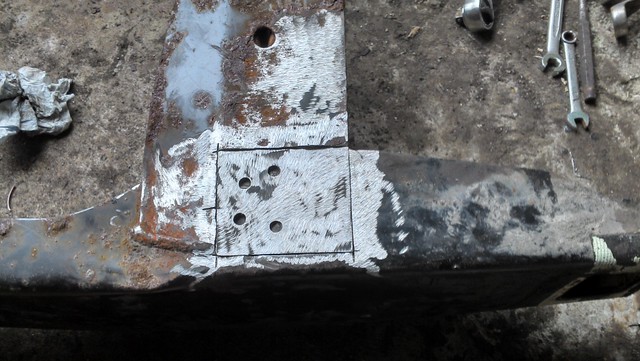
subbie_upper-patch by Sabre75, on Flickr


The other side needed some work, but it was only the overlapping piece that was knackered, so I cut it back and ground away the junk to allow me to butt-weld the 2 pieces back together. And yes that gap is a little wide in the middle - I was a bit gung-ho with the cutting disc there  :ohno:

16252883869_ebd4555115_z.jpg

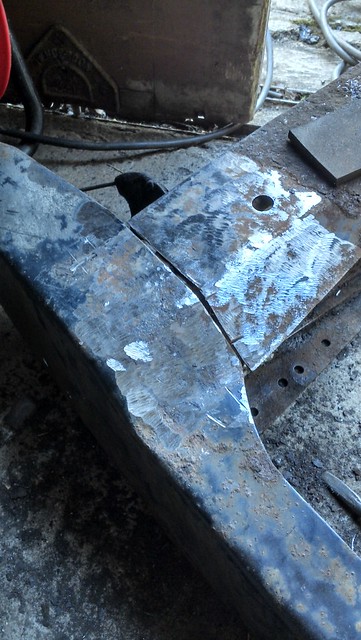
subbie_upper-overlap-trimmed by Sabre75, on Flickr


So here's the patch plate plug- and butt-welded into place. As you can see the 'flat' upper section has been patched but I left the angled section as it was ok; I did seam-weld all around it though (including inside the arm) to prevent any water getting into the overlap and causing the same kind of problems again.

15816619614_667d4ff3fb_z.jpg

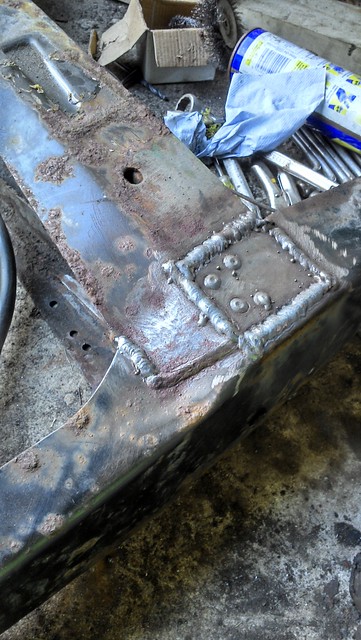
subbie_upper-patch-tacked-and-seamed by Sabre75, on Flickr


... and here's the other arm all welded up too; you can also see the seam-weld penetration from inside the arm ... and my foot.

16251729620_75e98d90b8_z.jpg

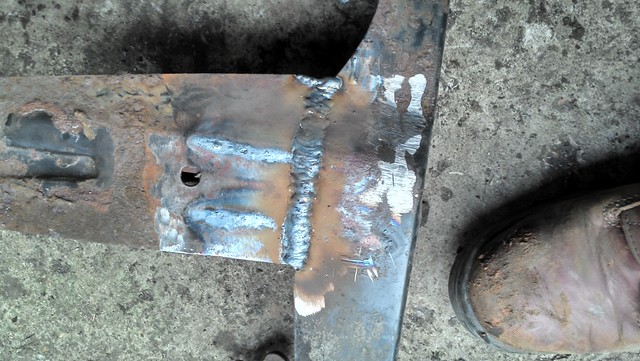
subbie_upper-overlap-fully-welded by Sabre75, on Flickr


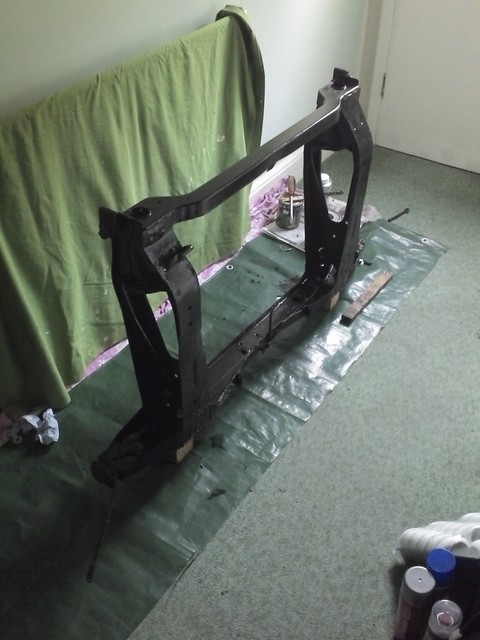
With all the main welds done I then seam welded all the flanges & edges inside the subframe around the areas I'd done the repairs; these weren't all perfect as it's tricky to clean the areas properly before you weld, but I got it done. One I've cleaned the frame for painting I'll go over all the seams with seam-sealer too, just to be on the safe side. But anywhere, here's where I am now - the subbie is all welded and hopefully won't need any more attention any time soon!


Here's the top of the frame:

16437372431_a8ea5b8355_z.jpg

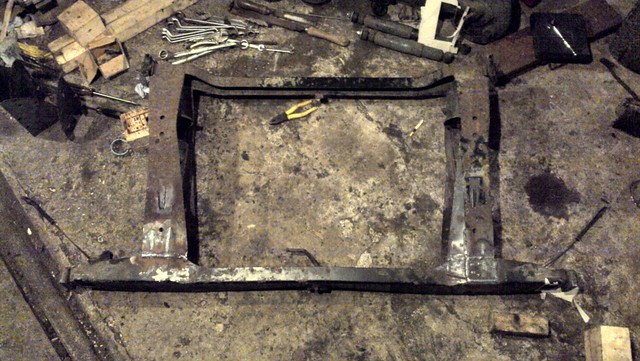
subbie_upper-completely-welded by Sabre75, on Flickr


And here's the underneath:

16439142035_b9506663b4_z.jpg

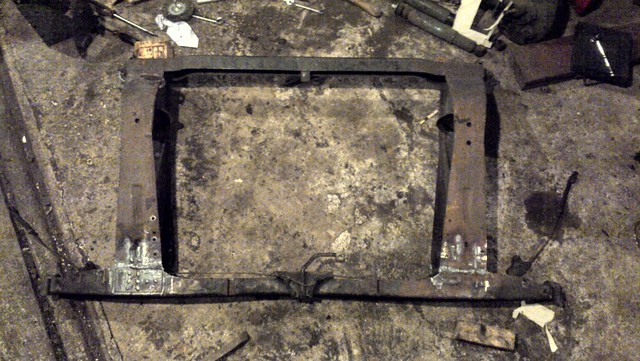
subbie_lower-completely-welded by Sabre75, on Flickr


So apart from entirely rebuilding the top and bottom sections of both arms, the subbie was fine! - sealer and painting next ...


And Shawbags; cheers for that mate - I decided a while back that knowing how to weld would be handy, so I did an introductory evening course which I'd highly recommend to get the basics down and to learn the proper techniques from a expert. I then bought a cheap-y welder from ebay, which I wouldn't recommend. To cut a long story short the wire feed wasn't smooth so I could never run a decent bead, but I didn't know enough to realise that! Recently when my old machine died completely I went out and bought myself a Sealey MightMIG 150, which is a decent piece of kit and worth the £200 I paid. Apart from getting yourself a decent welder (and an auto-darkening mask; it's invaluable) it's just practice after that ... apart from the mini here's my practice piece ...

16252886209_26a2098b14_z.jpg

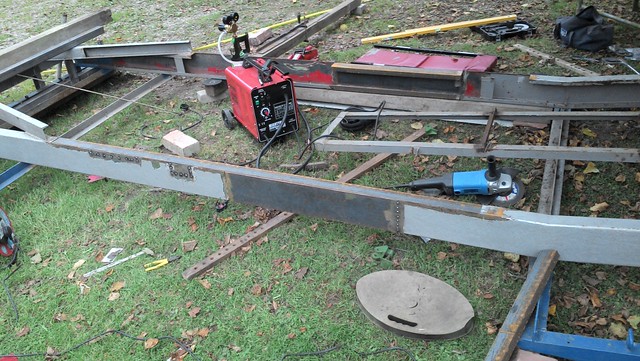
trailer_frame-in-progress by Sabre75, on Flickr


... extending my 3.65m trailer out to 4.4m (and totally rebuilding what turned out to be a very moth-eaten frame) - hopefully it won't snap in half once it's done!  O_O


Right - need to sleep again - cleaning, sealing & painting next - watch this space. 


#17 gazza82

gazza82

    Up Into Fourth

  • Members
  • PipPipPipPipPipPipPipPipPip
  • 2,919 posts
  • Location: Bucks
  • Local Club: TMF+

Posted 06 February 2015 - 12:44 PM

Looks like you got the gas conversion kit for the MightyMig too ... how much extra was that?


#18 ChopperHarris

ChopperHarris

    One Carb Or Two?

  • Members
  • PipPipPipPipPipPipPip
  • 1,139 posts
  • Location: By the sea

Posted 06 February 2015 - 01:48 PM

What a pleasure to read a well documented and photographed thread. Plus quality work.

Makes a pleasant change from "My Mini Wont Start" with no other info

Or "whats the best cupholder"!


#19 Sabre75

Sabre75

    Learner Driver

  • Noobies
  • PipPip
  • 21 posts
  • Location: South/South-West

Posted 09 February 2015 - 07:23 PM

Evening folks - no more progress to report at the moment, or for a while actually as I'll be away from my projects for the next month! :'( - I just wanted to post a quick reply to the last few comments; Chopper - thanks for the kind words - this thread started off as "I think this'll work but am I missing something?" but then I thought I'd do it step-by-step; partly to show what I was doing and partly to keep my motivation up!
gazza; yup I have converted the welder to gas - I've heard nothing good about the gasless wire, plus all my experience was with gas. I bought a twin-gauge (bottle pressure & flow-rate) single-stage regulator from ebay for about £25 and the hose for about a fiver. The bottle is one of the 'hobby-size' (can't remember the actual code) BOC ones; it's about £20 a refill, but I have 2 as one *always* runs out on Saturday afternoon once every where's closed. I've also been told HobbyWeld do a good rental deal for us DIY-ers, but I need to look into that. Either way the proper regulator & refillable bottles are much better & work out cheaper than the throwaway ones.

I'm afraid there'll be no more until March now, but then it's frame repaint & refit with the -1.5deg camber kit =)

Bye for now,
Tom

#20 Sabre75

Sabre75

    Learner Driver

  • Noobies
  • PipPip
  • 21 posts
  • Location: South/South-West

Posted 04 April 2015 - 08:12 AM

Morning folks  :-)

I thought it was about time I brought you up to speed on progress (whether you like it or not!). The subframe repair is now complete so after cleaning it up I gave it several coats of hammerite to keep the tin-worm at bay! Given the rubbish weather and low temperatures of late this did require the understanding of my family ...!

17001850976_fd48fd6b44_z.jpg

rear_subbie_painted by Sabre75, on Flickr


I'd like to tell you the frame is now back in-situ ... but sadly I can't. Since the frame was out I decided to underseal the rear 'well' where it lives, and that opened up a whole new can of worms!  :( I've started writing a project thread on it now (!) so I'll post a link to that here later.


Thanks for looking  :thumbsup:


Edited by Sabre75, 04 April 2015 - 08:12 AM.


#21 Sabre75

Sabre75

    Learner Driver

  • Noobies
  • PipPip
  • 21 posts
  • Location: South/South-West

Posted 05 April 2015 - 12:29 AM

Evening - no wait - morning!  :blink:

If anyone's interested in what else I've had to do to the car of late, the project thread is now here: http://www.theminifo...ayfairsidewalk/

Hopefully it's interesting - and now I'm off to bed!  -_-


Also tagged with one or more of these keywords: suspension

1 user(s) are reading this topic

0 members, 1 guests, 0 anonymous users