Had a bit of a play about today, with good results. The front n/s arch wasn't lining up properly where its split for the flip front, so I ground a bit off it and it fits perfectly. The passenger door didn't really fit very well either - turned out the frame had bent a little when we re-skinned it. Straightened it out with the BFH and it was much better. Next time I'm in there I will get all the latches fitting so we can make sure it all lines up properly without the help of G clamps.


My Mini van
Started by
minivanman
, Jul 14 2006 08:02 PM
575 replies to this topic
#226

minivanman
-
- TMF+ Member
-

- 3,454 posts
Up Into Fourth
- Local Club: Backstreet Minis
Posted 02 August 2007 - 06:07 PM
#227
minivanman
-
- TMF+ Member
-
- 3,454 posts
Up Into Fourth
- Local Club: Backstreet Minis
Posted 06 August 2007 - 07:01 PM
 What a day! While I was at SMD my dad and uncle spent a day and a bit working on it and got loads of things sorted. 99% of the welding is done now, the front is nearly perfect, loads of the filler work is done and the doors are all on. Today we sorted the fitting of the doors and hinges, welded in the load floor mod for the passenger seat and sorted out a spare wheel bracket. And got almost everything filled nicely.
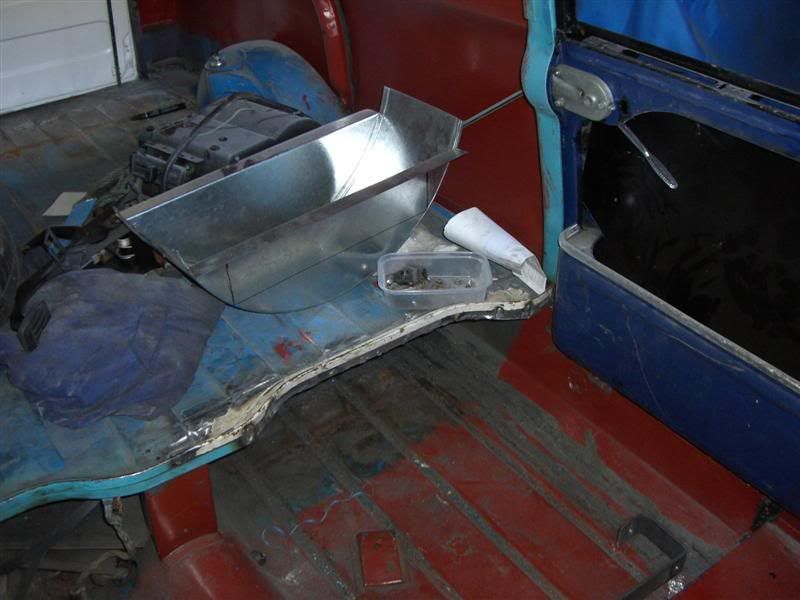
 Passenger side modification to the load floor. The floor was originally straight here, which placed the passenger seat too far forward. So we cut the section from the driver's side out of the half van I have and put it in this one. Looks like its original fit! In the background is the box I was going to use for the spare wheel. The more we looked at it, it wasn't going to work so we've made up a new bracket which will go on tomorrow.
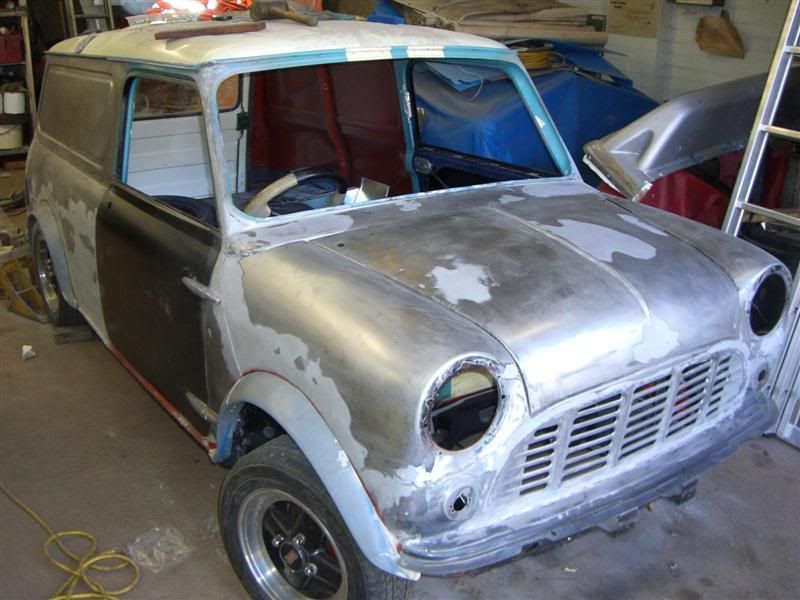
Front end, all filled and fitting nicely. I couldnt fit the door lock on this side because I don't have the silly little UNF countersunk screws. Damn.
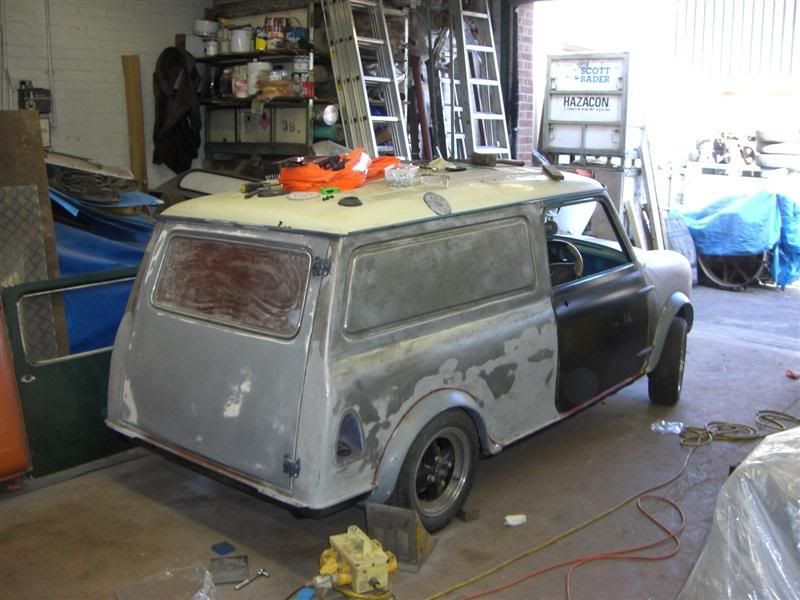
Rear end with single piece door fitting nicely. I've lost the outside piece of the lock though, which is a bit of a PITA. I dont know where to put the numberplate either - on the rear door or in the proper place on the rear valence - any opinions?
Getting sooo near to the painting stage now, I've got to make a decision on colour. Any and all ideas are welcome!

#228
andywaller
-

- Members
-
- 1,636 posts
Camshaft & Stage Two Head
- Local Club: turbominis.co.uk
Posted 06 August 2007 - 08:03 PM
all coming together well now!
have you seen the minispeed van thats blue and silver? i think taht works well.
or a classic van colour!
have you seen the minispeed van thats blue and silver? i think taht works well.
or a classic van colour!
#229
ed4ran
-

- Members
-
- 2,849 posts
Cadwell Event organiser
- Location: Stoke On Trent
Posted 06 August 2007 - 08:28 PM
Shame you cant get a mk1 FG bootlid and cut out the number plate recess and bond that into your back door, i think that would work well 

#230
minivanman
-
- TMF+ Member
-
- 3,454 posts
Up Into Fourth
- Local Club: Backstreet Minis
Posted 06 August 2007 - 09:28 PM
Cheers guys. Can't believe how quick its come together in the last few days. I think theres too much curve on a mk1 bootlid for that to work Ed. I just dont know whether to put the plate on the door to break up that big open area, or put it on the valence and have a sticker on the door. Have you got a picture of the minispeed van Andy? I need inspiration!
Tomorrows jobs are to get the passenger seat fitting, spare wheel bracket and fit the dash. After that, there really isnt much work left to do.
Tomorrows jobs are to get the passenger seat fitting, spare wheel bracket and fit the dash. After that, there really isnt much work left to do.
#231
roofless
-

- Traders
-
- 7,216 posts
Sticker Pimp
- Local Club: central minis
Posted 06 August 2007 - 10:03 PM
Getting sooo near to the painting stage now, I've got to make a decision on colour. Any and all ideas are welcome!
[/quote]
candy orange. blue detailing. sweeeeeet.
[/quote]
candy orange. blue detailing. sweeeeeet.
#232
ed4ran
-
- Members
-
- 2,849 posts
Cadwell Event organiser
- Location: Stoke On Trent
Posted 06 August 2007 - 10:05 PM
I suppose, but i was still thinking about just the basic inset part then if its fiberglassed in then you can sand it etc. would be unique!!
#233
mad4mins
-

- Members
-
- 1,396 posts
One Carb Or Two?
- Location: Andover
- Local Club: WAMO!
Posted 06 August 2007 - 10:32 PM
looking good tom! ready for the show and shine at mitp then???
#234
minivanman
-
- TMF+ Member
-
- 3,454 posts
Up Into Fourth
- Local Club: Backstreet Minis
Posted 07 August 2007 - 07:28 PM
Nahh, want it to look kinda old/classy. I'm thinking graphite grey with a black roof would look quite nice.... Arrgghhh decisions!candy orange. blue detailing. sweeeeeet.
Anyway - todays progress:
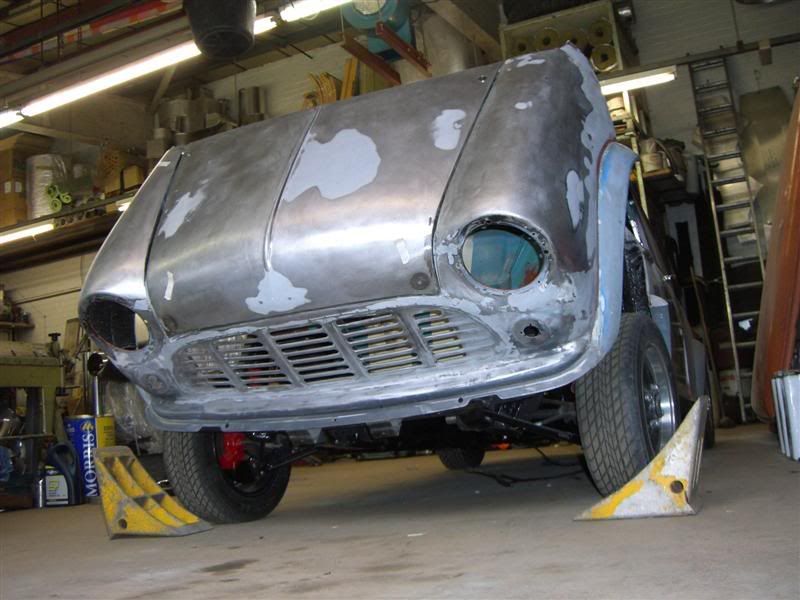
Bonnet fitting on the flip front, and all locked in place.
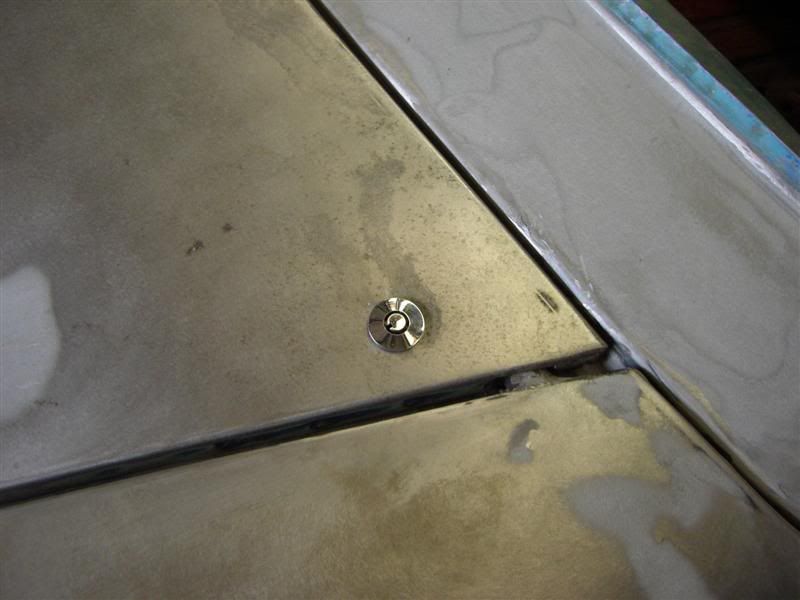
Close up of the locks at the back of the bonnet. Looks much neater than big dzus or aero fasteners IMHO.
Spare wheel bracket. Made from various pipe fittings and bits of steel hanging around the unit. And no, it wasn't us who ignited the foam behind the brace its welded to, honest!


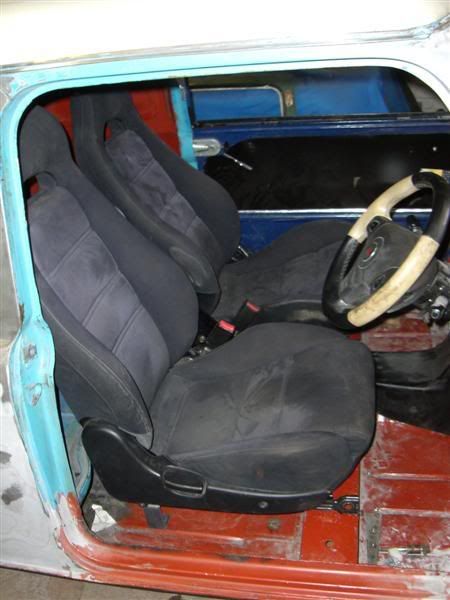
RX7 seats both fitted on their proper brackets - just need bolting down to the floor.
Minisave dash roughly fitting, steering column mounted properly - not hanging off bits of rope
and the heater is also mounted at the back, just needs a hole cutting in the console before the front can be mounted.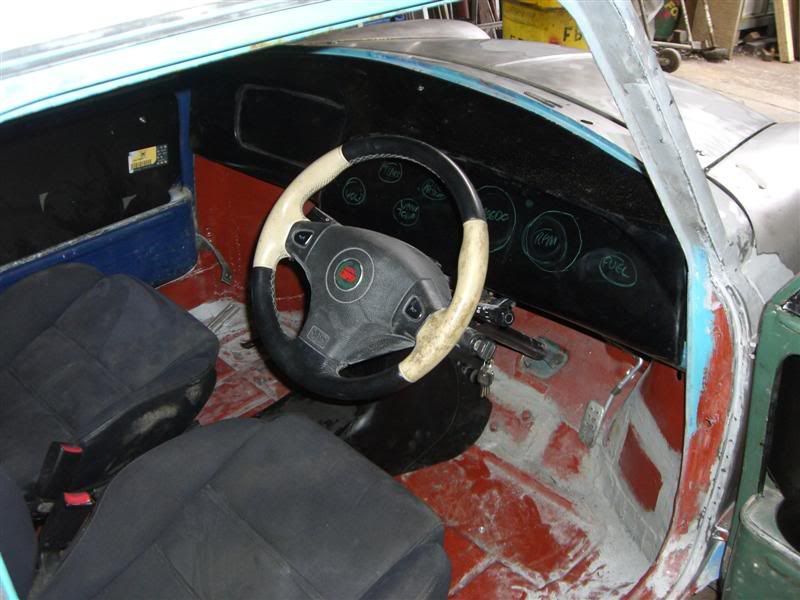
Its all coming together now! Just a shame we've got to do proper work tomorrow

#235
minivanman
-
- TMF+ Member
-
- 3,454 posts
Up Into Fourth
- Local Club: Backstreet Minis
Posted 09 August 2007 - 10:56 PM


photoshops courtesy of tlarsen and mad4mins - cheers guys.
Whats best? almond green and cream, or anthracite and black? decisions

I've also just bought these little beauties. If I'm doing it, I may as well do it right!
I've got to stretch the door frame a little as well, because the panel gaps are waaay to tight. Damn mini.
#236
Dog
-
- Banned from Buying/Selling
-
- 9,550 posts
Deathwish Fairy
- Local Club: Shatrats.com
Posted 09 August 2007 - 10:59 PM
I certainly like my Van grey n black!!
Infact he looks quite shexy there!
I'd say go black, as green is getting boring now..
Infact he looks quite shexy there!
I'd say go black, as green is getting boring now..
#237
minivanman
-
- TMF+ Member
-
- 3,454 posts
Up Into Fourth
- Local Club: Backstreet Minis
Posted 09 August 2007 - 11:12 PM
Cheers dude, I really do like the grey and black. looks quite classy. And it would match the wheels...
#238
mini93
-

- Members
-
- 8,615 posts
He's just too casual!
- Location: Warwick
- Local Club: Medievil minis of Warwickshire
Posted 09 August 2007 - 11:13 PM
agreed on the black, not often seen ether
#239
minivanman
-
- TMF+ Member
-
- 3,454 posts
Up Into Fourth
- Local Club: Backstreet Minis
Posted 10 August 2007 - 05:54 PM

Bumperettes and rear lights fitting, I've sorted the hole for the door handle and drilled the door for my numberplate lamp. I'm using a standard mini one I had lying around, seems to fit quite well. We've got nearly everything done now - the seats fit, the panel gaps are good, the flip front is about right, the roof gutter is all sorted, the steering wheel is good, the back end is almost done and nearly all the filler work is done. A day of rubbing down and tarting about tomorrow should see it ready for the paint shop. I can't believe I'm nearly at this stage. Its gonna start getting expensive soon.
#240
ed4ran
-
- Members
-
- 2,849 posts
Cadwell Event organiser
- Location: Stoke On Trent
Posted 10 August 2007 - 08:33 PM
Looking lovely 


0 user(s) are reading this topic
0 members, 0 guests, 0 anonymous users


