looks likes a new motor now
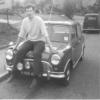

Retirement Project Rover Sprite
Started by
spraybeater
, May 12 2016 10:19 AM
96 replies to this topic
#61

Sag
-
- Noobies
-

- 59 posts
Stage One Kit Fitted
- Location: Huddersfield
Posted 28 October 2016 - 09:03 PM
#62
mini_matt_106
-
- Members
-
- 599 posts
Super Mini Mad
- Location: Andover
Posted 31 October 2016 - 12:01 PM
Wow!! Spot on, retirement sounds fantastic
#63
spraybeater
-
- Members
-
- 468 posts
Speeding Along Now
- Location: west yorkshire
- Local Club: Mcr
Posted 09 November 2016 - 10:28 PM
Thanks for the comments! yeah retirement is fantastic but soon got bored doing nowt, spent a
couple of years living the dream in Cyprus, where I played about building a 1/14th scale Tamiya
Man truck and trailer and Wheeled loader with hydraulics ! moved back to the UK and got back
into minis after 40yrs . So hear we are the story continues.
Ordered trim materials at Utoxeter in September before going on holiday for a few weeks.
after a 350mls round trip to collect started to strip and fit,


old trim a bit dirty and stained but very little damage, just didn't fit in with the Finnish I was after,


seat back re trimmed,


rear seat squab re trimmed


drivers seat was in quite a bad shape diaphragm split ,

covers ready to fit ,

bad angle on this photo, must go on photography course?? makes head rest look squinty!

Managed to get the trimming done indoors as to cold in garage 
front seats trimmed and ready for fitting , also picked up door cards ect , got carpet underlay and carpets fitted
and seat belts in , all seat frames and plastic seat parts cleaned and painted and fitted,,
Next job to get brake callipers rebuilt and get engine running .
Thanks again for looking and comments.
#64
Sag
-
- Noobies
-
- 59 posts
Stage One Kit Fitted
- Location: Huddersfield
Posted 10 November 2016 - 01:28 PM
Well that turned out good Frank they look brand new now buddy,is they anything you can't do lol
#65
Alice Dooper
-

- Members
-
- 391 posts
Speeding Along Now
- Location: Co. Antrim
- Local Club: Minis in Northern Ireland
Posted 10 November 2016 - 11:24 PM
Really enjoying following your thread. Brilliant work, looking forward to seeing the end result.
#66
mini_matt_106
-
- Members
-
- 599 posts
Super Mini Mad
- Location: Andover
Posted 11 November 2016 - 09:59 AM
Wow! All home made? Any tips? They do look fantastic
#67
Northernpower
-

- Members
-
- 2,414 posts
Mr. 7-Port
- Name: Graham
- Location: North Yorkshire (God's County)
- Local Club: Its out there somewhere
Posted 11 November 2016 - 10:22 AM
I'm looking for some new covers, is the quality as good as it looks and if so, where did you get them from?
#68
spraybeater
-
- Members
-
- 468 posts
Speeding Along Now
- Location: west yorkshire
- Local Club: Mcr
Posted 11 November 2016 - 08:49 PM
The covers are not home made! just home fitted .
The quality is very good and not the most expensive, don't know if I am allowed to give the
name of the supplier on here . I will PM you the details if you want just let me know.
my old hands are just about back to normal after fitting .
#69
spraybeater
-
- Members
-
- 468 posts
Speeding Along Now
- Location: west yorkshire
- Local Club: Mcr
Posted 19 November 2016 - 05:59 PM
Once again folks thanks for the views and comments, hope its been some help!
So on with the story got most of interior in, took a bit of time to seal up doors
used to spend a lot of time years ago fixing water ingress problems on various
vehicles! minis being no exception , so ,

inner was given a coat of Dynax wax round the edges,

then all openings sealed up with duck tape,

then vapour barrier made with thick poly theen sheet glued on ,this should keep the new trims good for a few years??

door trim fitted ,and alloy door furniture just waiting on exceptions for lock sliders ,


couple of shots of seats got to say am really happy with them, just hope not over done the red/black theme !!


couple of under bonnet shots nearly there ,
Visit to Minispares York on the cards for next week! pick up parts to finish it!!!!
More to follow.
#70
Marco1972
-

- Members
-
- 822 posts
One Carb Or Two?
- Location: Birmingham
Posted 24 November 2016 - 02:33 PM
Stunning looking car
Like the polished rad look
Mark
Like the polished rad look
Mark
#71
elliot341
-

- Just Joined
-
- 214 posts
Mini Mad
- Location: Blackrod, Bolton
Posted 24 November 2016 - 02:49 PM
Hi where did you get the covers from? I'm sure you can mention it on the thread, I'd only say theres an issue when people start bad mouthing people, good traders should be promoted! Cheers
#72
spraybeater
-
- Members
-
- 468 posts
Speeding Along Now
- Location: west yorkshire
- Local Club: Mcr
Posted 24 November 2016 - 09:44 PM
Thanks for the comments, folks in answer to the trim supplier, did not like to mention name
of them on here as they are not on Traders list! but I don't have any connection with them
other than being a customer.but as I am very pleased with the out come Hey Ho
I spoke to Darryl at Utoxeter Bmc show in September and liked what he said
www.minitrimmings.com mob no 07856686595.
#73
spraybeater
-
- Members
-
- 468 posts
Speeding Along Now
- Location: west yorkshire
- Local Club: Mcr
Posted 01 December 2016 - 10:35 PM
Hi folks! just getting to the end of this project a bit of an update, mostly let the pictures do
the talking,


some of the rear underside, picked up a RC40 stainless rear box and intermediate pipe
all though engine was left standard the should help it breathing and is not to noisy wit cat still fitted!


spent a couple of hours today giving the underside of wings a coat of Dynax clear,


under bonnet finished, new oil and filter started and running, brakes and clutch bled and all
rubber brake pipes replaced with braided from Goodridge!


need to change H/lamp bulbs fit no plates and get it MOT,d
Thanks for looking
#74
Northernpower
-
- Members
-
- 2,414 posts
Mr. 7-Port
- Name: Graham
- Location: North Yorkshire (God's County)
- Local Club: Its out there somewhere
Posted 01 December 2016 - 10:48 PM
Just great workmanship, as we have now come to expect.
#75
Sag
-
- Noobies
-
- 59 posts
Stage One Kit Fitted
- Location: Huddersfield
Posted 02 December 2016 - 03:04 PM
Wow Frank that's mint so when you starting your next one


0 user(s) are reading this topic
0 members, 0 guests, 0 anonymous users


