I was hoping to get it done for the thistle run but missed my deadline by miles. Appears to be pretty common!
Always next year and I also faced IMM in Ireland next year.

Mcmini Micra Conversion
Started by
McMini 22
, May 17 2016 10:31 PM
308 replies to this topic
#47

micraminiman
-

- Members
-

- 151 posts
Mini Mad
- Location: Scottish Highlands
Posted 09 August 2016 - 02:15 PM
IMM in Ireland sounds ace. I was at the last one in Scotland, way back in 2002, it was amazing, but muddy as hell. Pure steaming all weekend!
#48
McMini 22
-
- Members
-
- 289 posts
Mini Mad
- Location: East lothian
Posted 10 August 2016 - 03:03 PM
Well its raining and I can't get on with my diy.
So I've been painting my engine bay. 2 good coats of marine epoxy primer and a couple of base coat. Still needs a dropper coat and a couple of 2k lacquer.
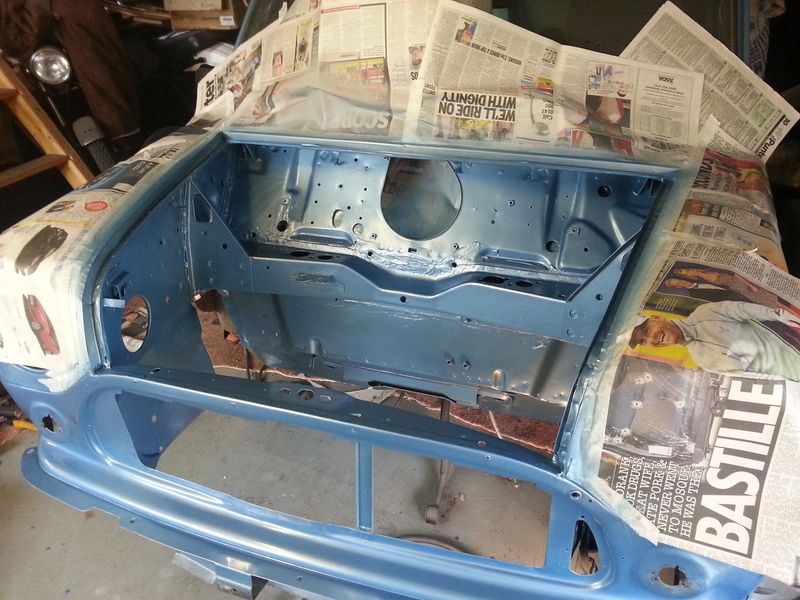
So I've been painting my engine bay. 2 good coats of marine epoxy primer and a couple of base coat. Still needs a dropper coat and a couple of 2k lacquer.

#49
McMini 22
-
- Members
-
- 289 posts
Mini Mad
- Location: East lothian
Posted 11 August 2016 - 08:25 AM
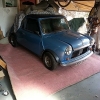
Engine bay is now complete and looking factory fresh. I had about 2 litres of basecoat left from when I did the car up about 18 years ago and it looks like its blended in well to the front panel. We will see how the edge polishes up. There are still some rust bubbles under the headlight but I will tackle them (and any other body work) when the car is on the road.

Cheers Micramini! You jinxed my gearshift clearance.

I will modify the gearshift bracket as it's a neater solution than modifying the frame.
#50
McMini 22
-
- Members
-
- 289 posts
Mini Mad
- Location: East lothian
Posted 12 August 2016 - 08:46 AM
Gearshift bracket is now modified and looks like it will clear the frame.
I spent a couple of hours tidying up i the garage last night and putting all the wee brackets, bits and pieces and nuts and bolts that were scattered all over the floor in boxes. I am not the tidiest of workers and usually leave a mess at my backside, but I know roughly where everything is. I was also looking for suspension bits I had "lost", namely one bottom arm pivot pin that needs modified.
Still had a bit of spare time so I tried the Ali Bright (which arrived yesterday) on a small part of the engine. Watered it down with 4 parts water and then I applied it with a brush and left it for 10 minutes. Applied some more and left another 10 minutes. You can smell that there is some chemical reaction going on! Washed it off with a sponge and this is the result.

I will try to get the engine and box done this weekend. It's a face shield and gloves job as I don't fancy getting this stuff on me. I will post up some before and after photos but so far it looks like a success.
#51
micraminiman
-
- Members
-
- 151 posts
Mini Mad
- Location: Scottish Highlands
Posted 12 August 2016 - 10:53 AM
Sorry for that one! lol
I have cut and modified my selector fitting, by slicing the top left corner off it to give more clearance for a bit of thickening up of that area of subframe. It looks like you could do the same and have the required clearance to move freely.
Yer engine bay is looking ace, as is the bit of the engine you cleaned. Have to get me some of that stuff!
Barry
#52
McMini 22
-
- Members
-
- 289 posts
Mini Mad
- Location: East lothian
Posted 13 August 2016 - 06:50 PM
quote name="micraminiman" post="3410390" timestamp="1470999239"]Sorry for that one! lol
I have cut and modified my selector fitting, by slicing the top left corner off it to give more clearance for a bit of thickening up of that area of subframe. It looks like you could do the same and have the required clearance to move freely.
Yer engine bay is looking ace, as is the bit of the engine you cleaned. Have to get me some of that stuff!
Barry[/quote]
Like this?
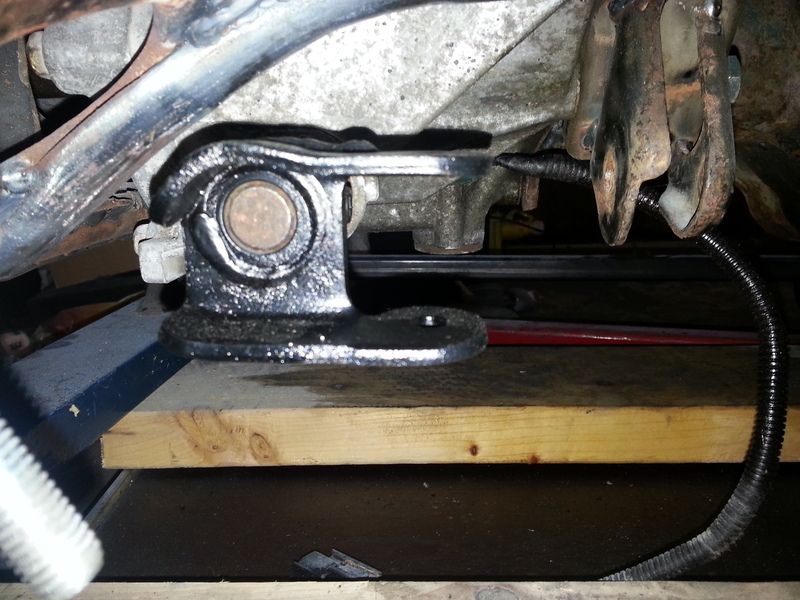
Sand blasted and painted. Had to make it look pretty!
Started working out the driveshaft in plastic pipe to get the length correct. That left one is going to be a wee short thing. The boots look like the will just about touch. I hope I have enough room for the welded sleeve.
#53
micraminiman
-
- Members
-
- 151 posts
Mini Mad
- Location: Scottish Highlands
Posted 15 August 2016 - 09:27 AM
Yup, looks brilliant! Should do the job nicely alright. Plenty clearance there hopefully.
Been away with the caravan this weekend so no more progress on mine. Still waiting on My Herpes couriers to deliver some steel plate for me yet. Today hopefully.....
#54
McMini 22
-
- Members
-
- 289 posts
Mini Mad
- Location: East lothian
Posted 19 August 2016 - 02:45 PM
Driveshafts -
I hadn't been looking forward to making these but they need to be done before I get on with some more painting (subframe and engine) and then the final build.
Started off with some plastic pipe that was a snug fit in the mini CV joint. Had to make up the other end (Micra pot joint) to correct diameter with masking tape. Also put some on to replicate the collar. Fitted this into the pot joint and marked the required position for the collar on the other end. Turns out that these do not have to be super accurate as long as the pot joint doesn't "bottom out". There is not as much in/out movement at the pot joint as I would have expected!

Once I worked out the length I decided where the join should be. Turned it in the lathe so that the pin (Micra end) is a press fit in the hole (Mini end). I would have liked the sleeve to be longer but there is not a lot of space on the left hand side.

Pressed it together after heating the Mini end ... then realised that the I had forgotten the sleeve! Doh! Luckily it was still pretty hot and came apart again. Tacked it with the TIG and then check it on the lathe for true. MIG welded the V and then skimmed it down in the lathe to allow the sleeve to slide over.

There was some damage to one of the ends. No idea what this was but it looks like it's been hitting the outer edge of the CV joint. Checked the CV joint and there is no sign of damage so it must be historical. I can't remember where the mini driveshafts came from but it could be something like a failed ball joint? Anyhow touched this up with some TIG and skimmed it.

Driveshafts completed and hopefully strong enough!

#55
McMini 22
-
- Members
-
- 289 posts
Mini Mad
- Location: East lothian
Posted 22 August 2016 - 09:26 AM
Couldn't get much done on the mini this weekend as Mrs McMini was away with her friends and I had to look after mini McMini.
However I did manage to get my ball joints lapped in whilst having a drink and watching a film. Not often I get to do car work indoors and it took me back to my carefree bachelor days when stripping, cleaning and building motorbike carbs in the living room was perfectly acceptable!
#56
McMini 22
-
- Members
-
- 289 posts
Mini Mad
- Location: East lothian
Posted 23 August 2016 - 09:36 AM
Before I take the engine out the frame for painting I have a wee bit work to do on the engine mounts. I have added a second rear engine mount under the water pump. It is more like an engine steady and should save the water pump from hitting the tower on the subframe.
This is probably overkill but it can't hurt. My only concern is that it is too stiff as the casting resin I used in the bush is a bit hard. Something like sickaflex would be better.
It is adjustable in all directions as the holes are slotted. I can fine tune the engine position when it is finally in the car.

Now concentrating on the main rear engine mount and trying to get some more adjustability in to it.
#57
McMini 22
-
- Members
-
- 289 posts
Mini Mad
- Location: East lothian
Posted 30 August 2016 - 09:41 AM
At last I am as happy as I am ever going to be with the subframe. No more tweaking so it was time to paint it. A good wire brush down and a degrease. a couple of good heavy coats of epoxy primer. I did this in at work hanging the frame on a wire from the crane. Turns out the wire was not strong enough and the subframe fell about a foot and a half on to the old curtain I had place underneath it. Lots of swearing wearing a face mask!
Picked it up and managed to hang it the other way up to get all the bits I'd missed.
Took it home to give it a rub down and shoot some 2 pack black on to it.

After a good couple of coats of black it looked fine (except the bits I missed as I didn't turn it the other way up this time - doh!). Gloss black does not do it justice in the photos! Photo makes the welds look all crap and splattery but they look better in real life


It's a heavy beast at 24kg and was a nightmare to get into position without scratching anything. New steering rack fitted first and then with two scissors jacks carefully lifted up it without too much damage. Need to touch up the bits I missed anyway so I'll try brushing the 2 pack on.
I had intended to fit the refurbished top suspension arms before I fitted the subframe but forgot in all my excitement! Anyhow it's a good feeling knowing that it doesn't have to come back out again - hopefully.

#58
micraminiman
-
- Members
-
- 151 posts
Mini Mad
- Location: Scottish Highlands
Posted 30 August 2016 - 03:36 PM
Looks smart like. Its a solid frame alright, yer no worrying about it flexing or breaking in a hurry, thats for sure!
I bet it feels good to have it done. I cant wait to get my frame finished. Its taking so much time to get it all done, folk that just use an Allspeed frame kit dont know theyre living! haha.
Keep up the fine work..... 
#59
smudger068
-

- Members
-
- 344 posts
Speeding Along Now
- Location: Ipswich
Posted 30 August 2016 - 03:49 PM
Looks smart like. Its a solid frame alright, yer no worrying about it flexing or breaking in a hurry, thats for sure!
I bet it feels good to have it done. I cant wait to get my frame finished. Its taking so much time to get it all done, folk that just use an Allspeed frame kit dont know theyre living! haha.
Keep up the fine work.....
It's why I bought one haha...
#60
micraminiman
-
- Members
-
- 151 posts
Mini Mad
- Location: Scottish Highlands
Posted 30 August 2016 - 03:53 PM
I wish I did as well sometimes! Would make life so much easier at the moment! haha


0 user(s) are reading this topic
0 members, 0 guests, 0 anonymous users


