Jump to content


Photo

Mk1 Austin Countryman


  • Please log in to reply
155 replies to this topic

#76 KTS

KTS

    Up Into Fourth

  • TMF+ Member
  • PipPipPipPipPipPipPipPipPip
  • 2,272 posts
  • Location: Herts

Posted 21 January 2019 - 03:05 PM

..as above, before you start modifying what they've supplied, give them a call, and start having a conversation with them about the problems you've found and establish what they are willing to do to rectify the situation


appreciate you just want to get on after waiting for so long, but if they haven't assembled the floor correctly on the jig before welding it up you're going to struggle to get anything to line up.  even if you reset the upper captive nuts, your next challenge is going to be getting the inner sill/foor returns (..which appear to be buckled..) to line up properly against the door step and quarter panel returns..


#77 minimikej

minimikej

    Speeding Along Now

  • Members
  • PipPipPipPipPip
  • 346 posts
  • Location: Derbyshire

Posted 26 January 2019 - 05:36 PM

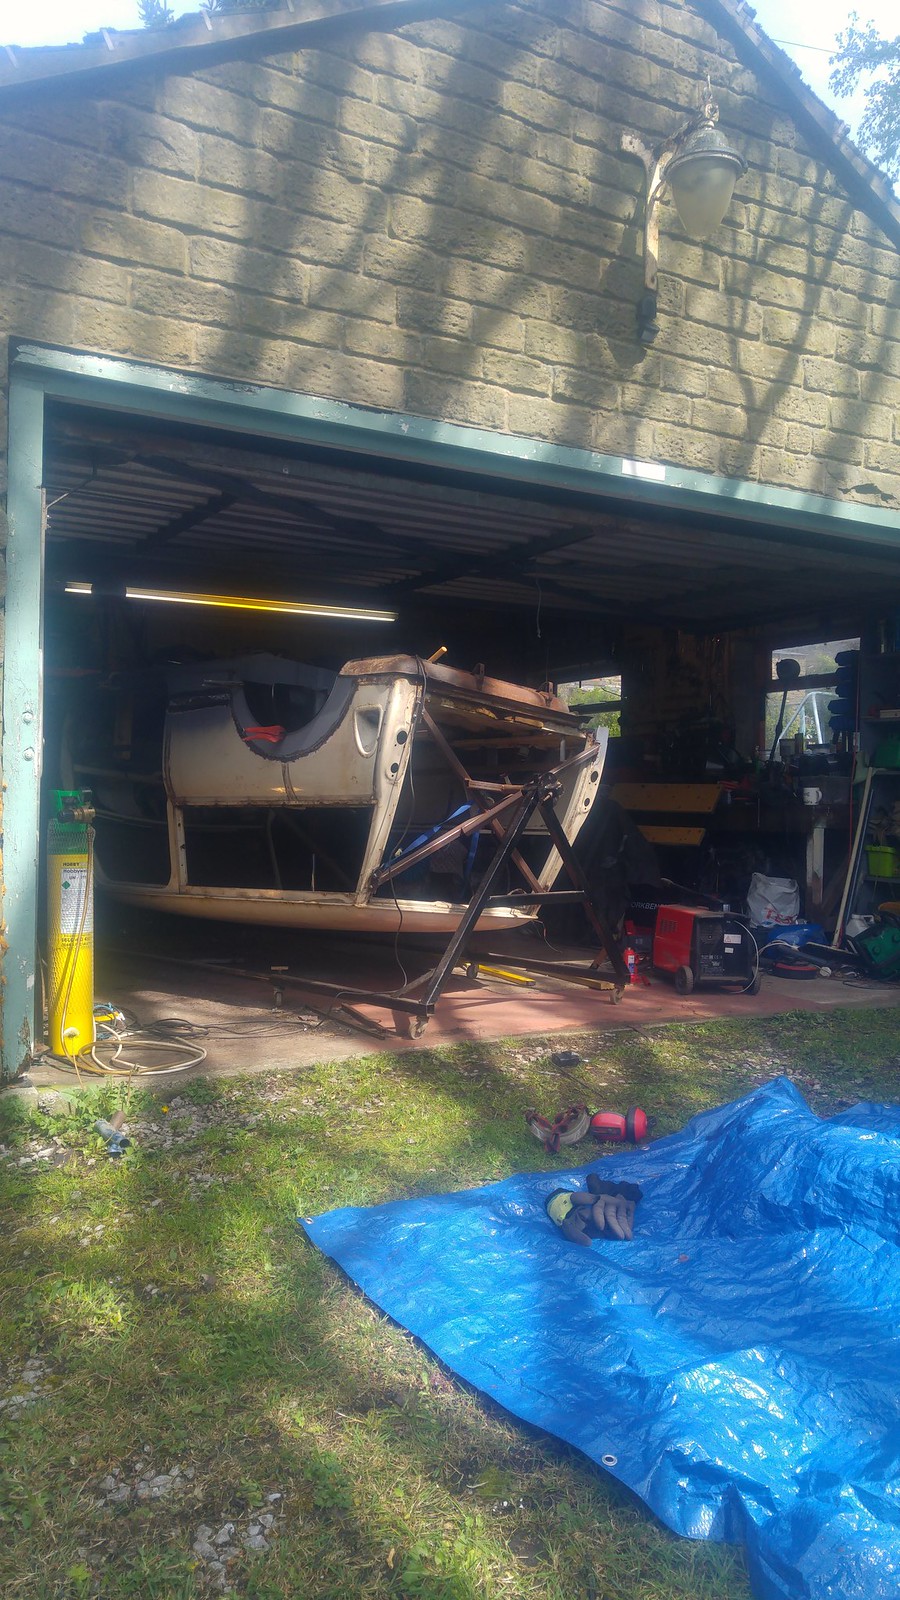
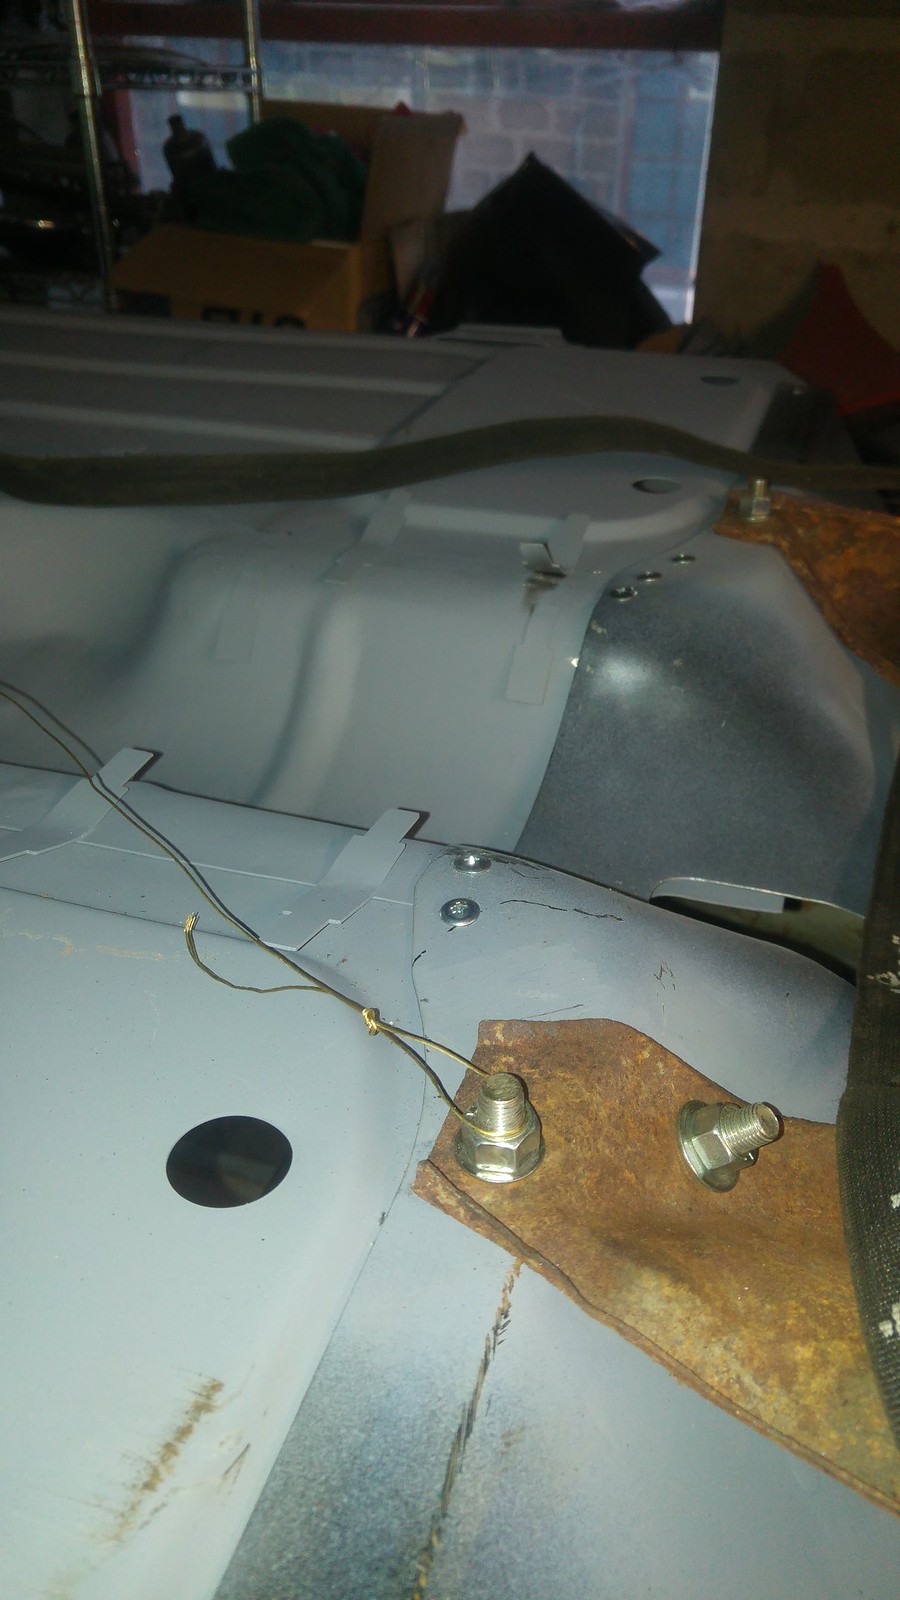
Spent a few hours today working out what to do. I managed to get the rear subframe front mount pins out, along with the old bushes. The bushes are about half as thick round the rim and twice as flexible as the new ones.


I reassembled with the new pins and tightened it all up. It looked like it was going to fit between the mount holes and so I ran long bolts down the captive nuts and used a combination of hammer and crowbar from behind between inner and outer sills to make the axis of the captive nut orthogonal to the heelboard.


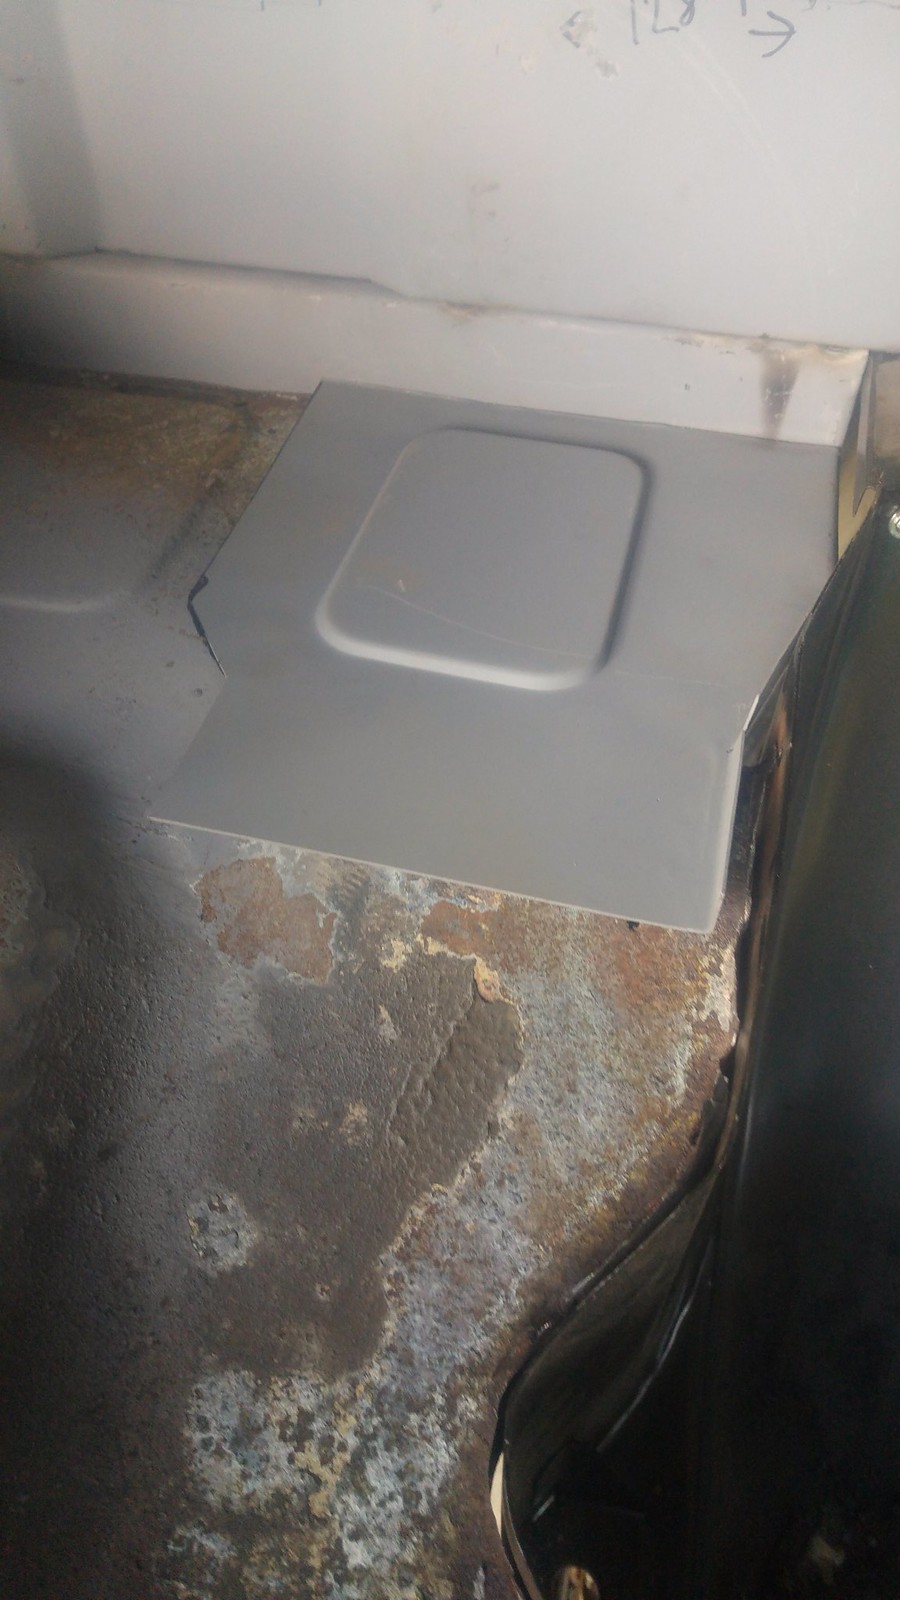
Then, with a bit of persuasion, it dropped into place. I had to use the tiny bottle jack to push the front of the floor outwards to achieve a consistent gap between the top of the door frame and the sill line.


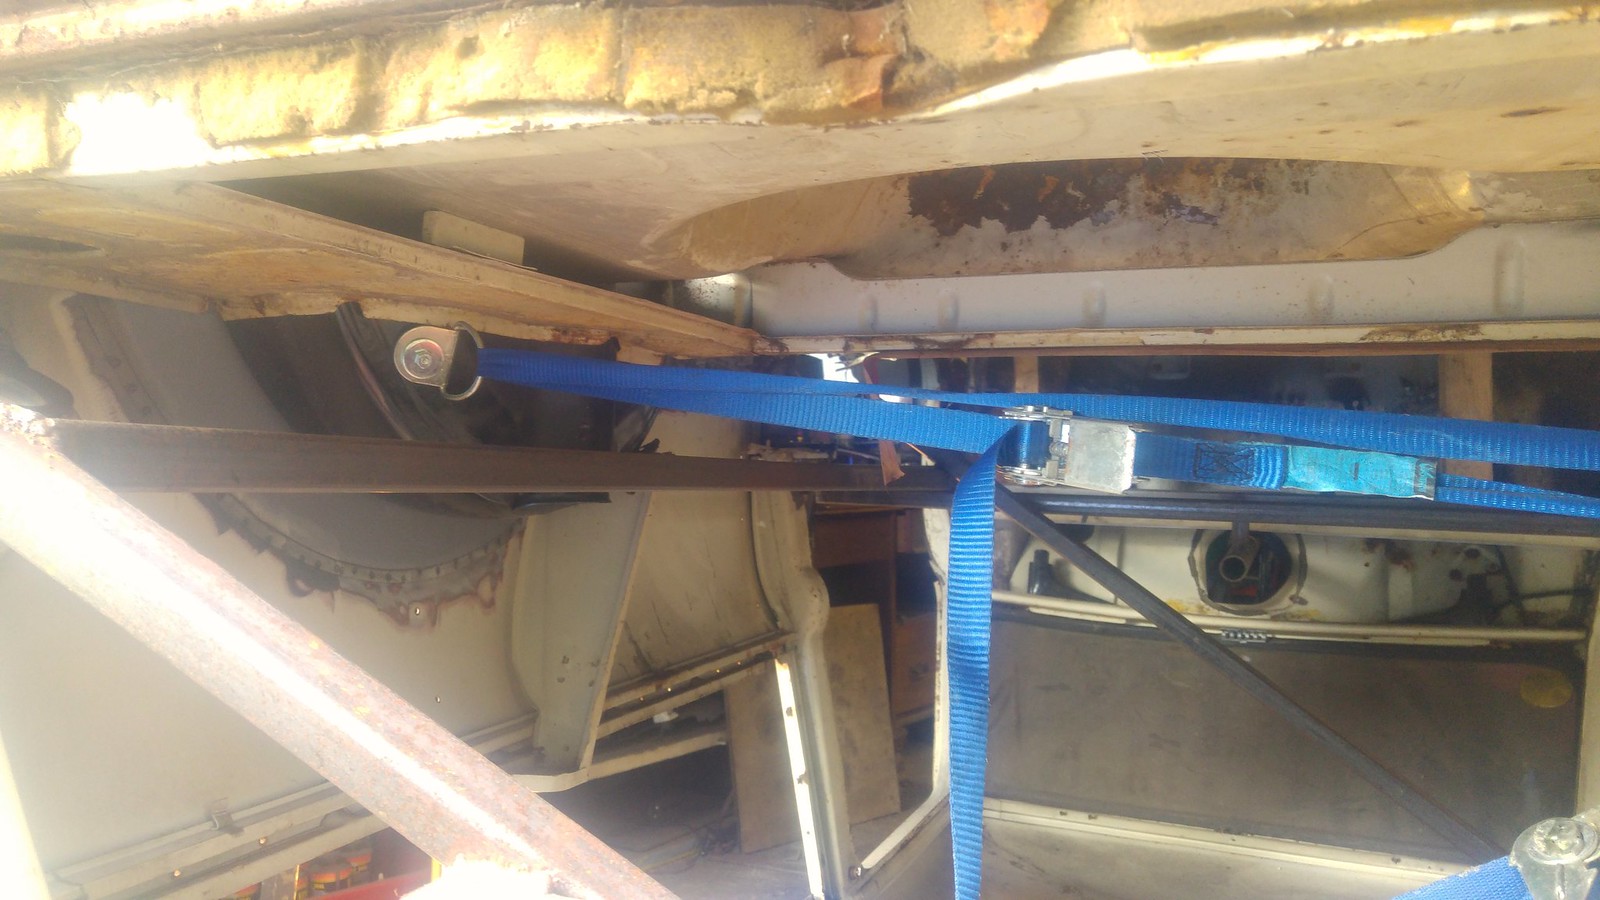
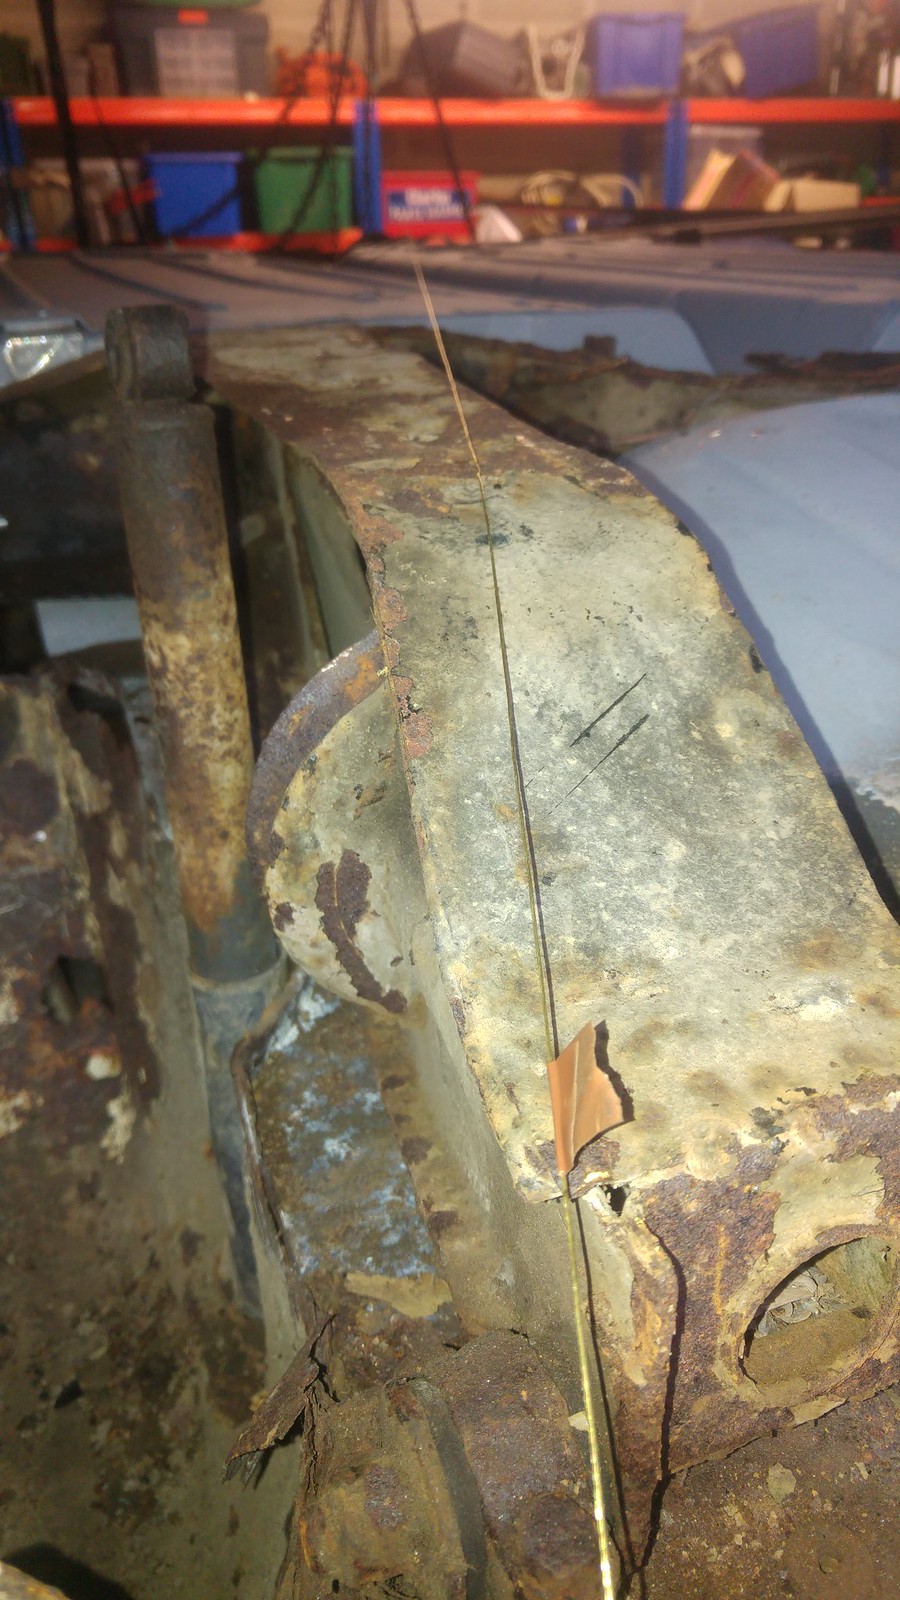
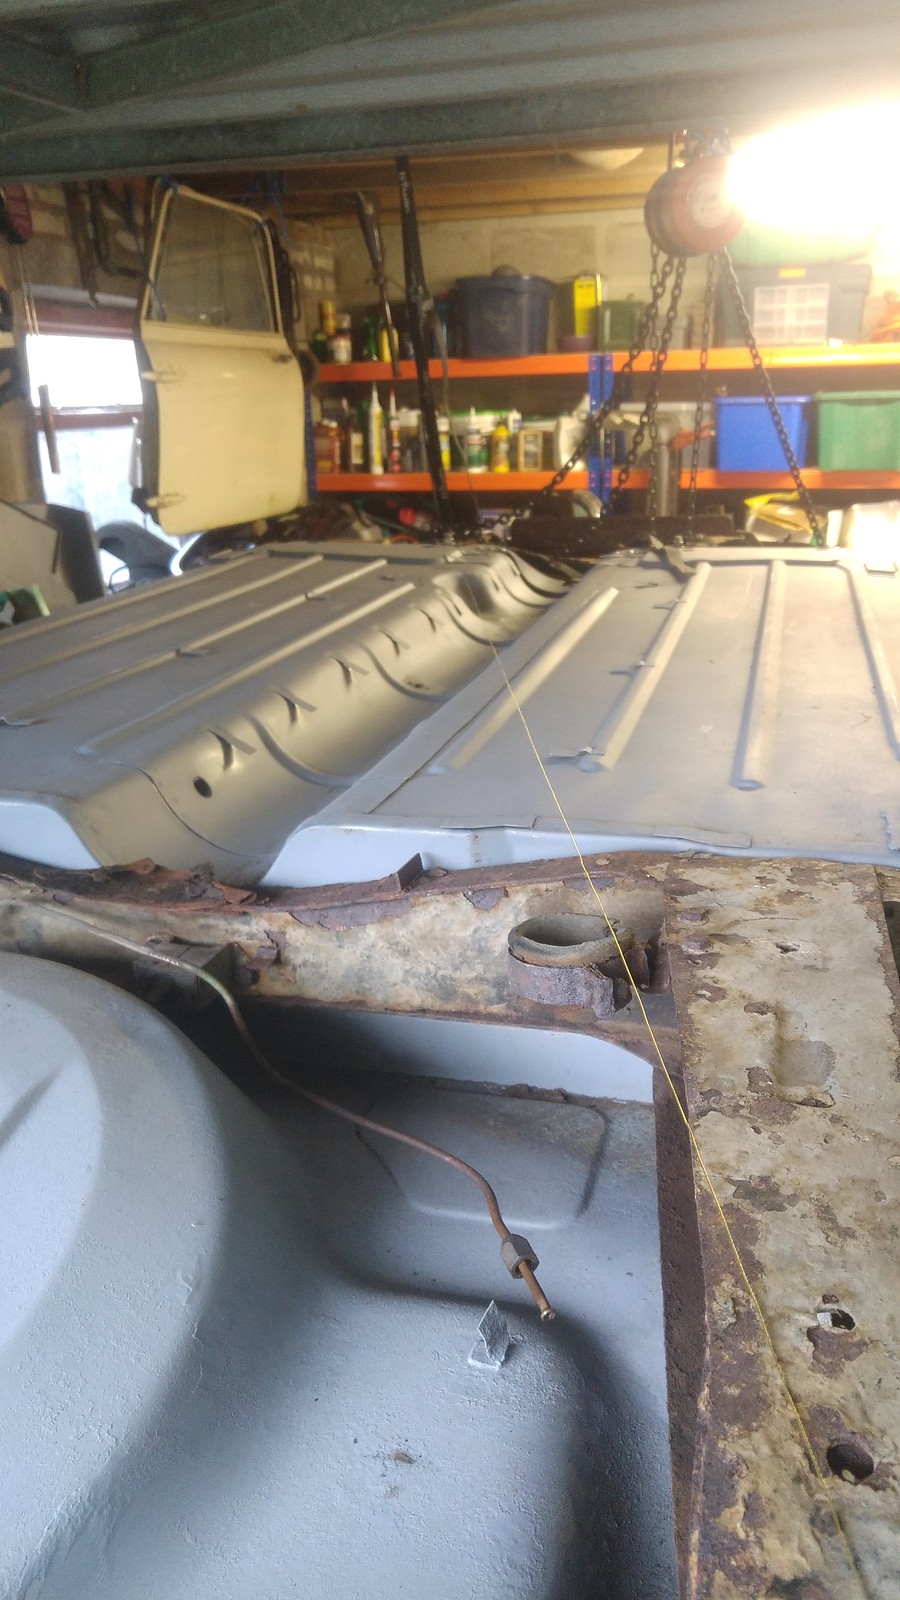
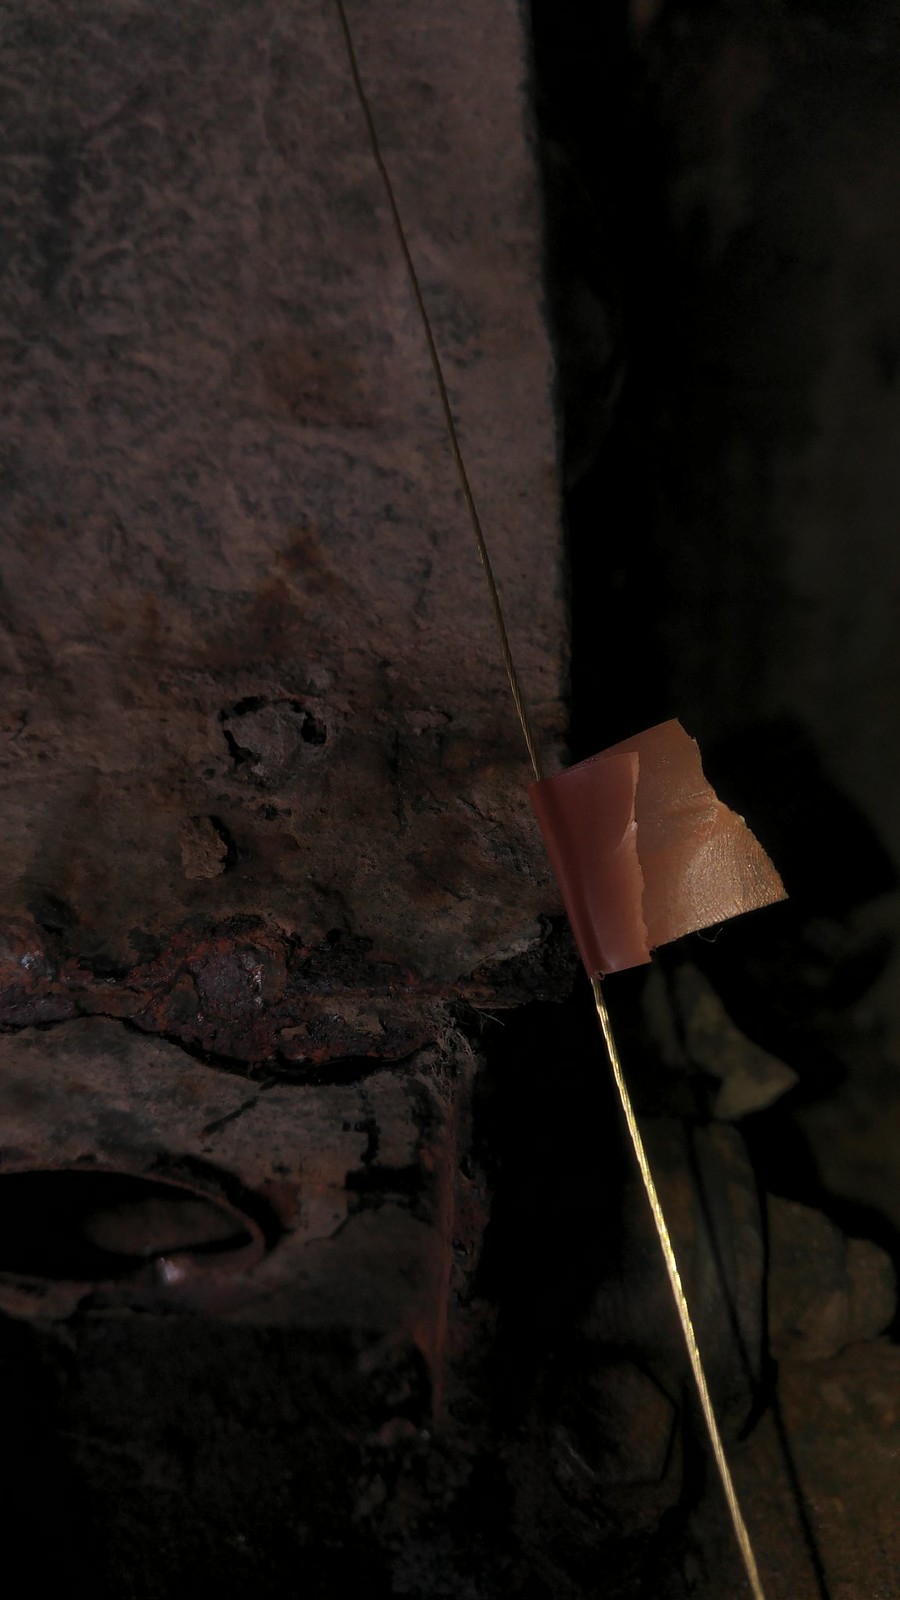
I fitted a few tech-screws around, and then thought about how to check for squareness. I used some picture wire between the front subframe bolt holes and the rear corners of the rear subframe:


39918892573_843c74dbec_h.jpg20190126_150556 by Mike Jackson, on Flickr


33008397088_9fba48b572_h.jpg20190126_150352 by Mike Jackson, on Flickr


46831791042_faeff3af5e_h.jpg20190126_150250 by Mike Jackson, on Flickr


Seems to be bang-on square:

39918899273_41f904cd73_h.jpg20190126_150309 by Mike Jackson, on Flickr


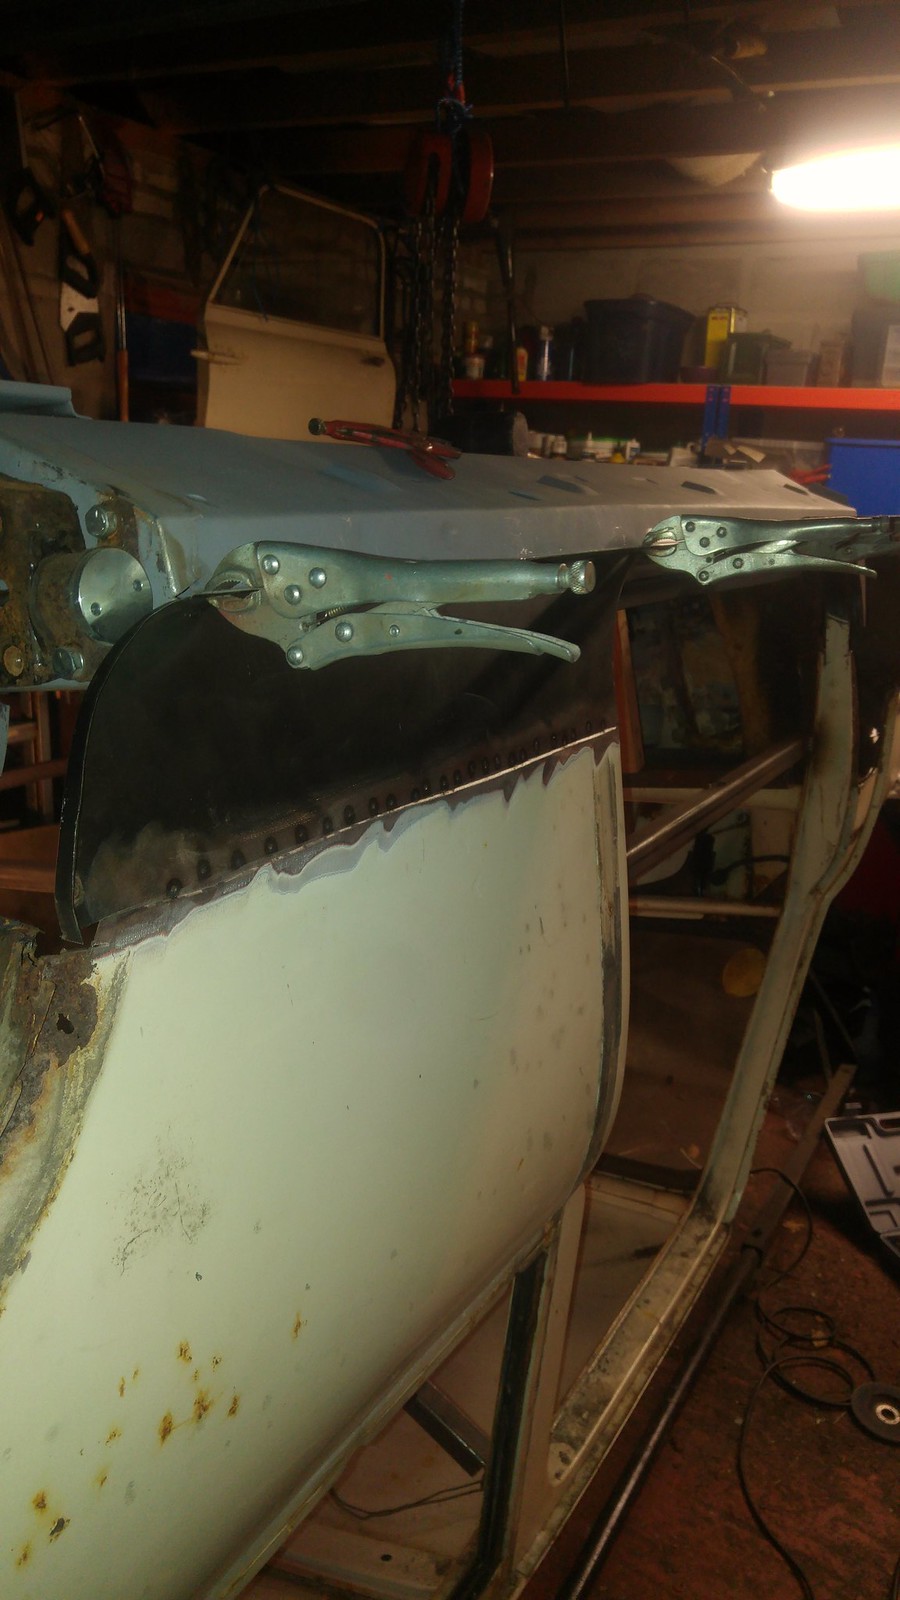
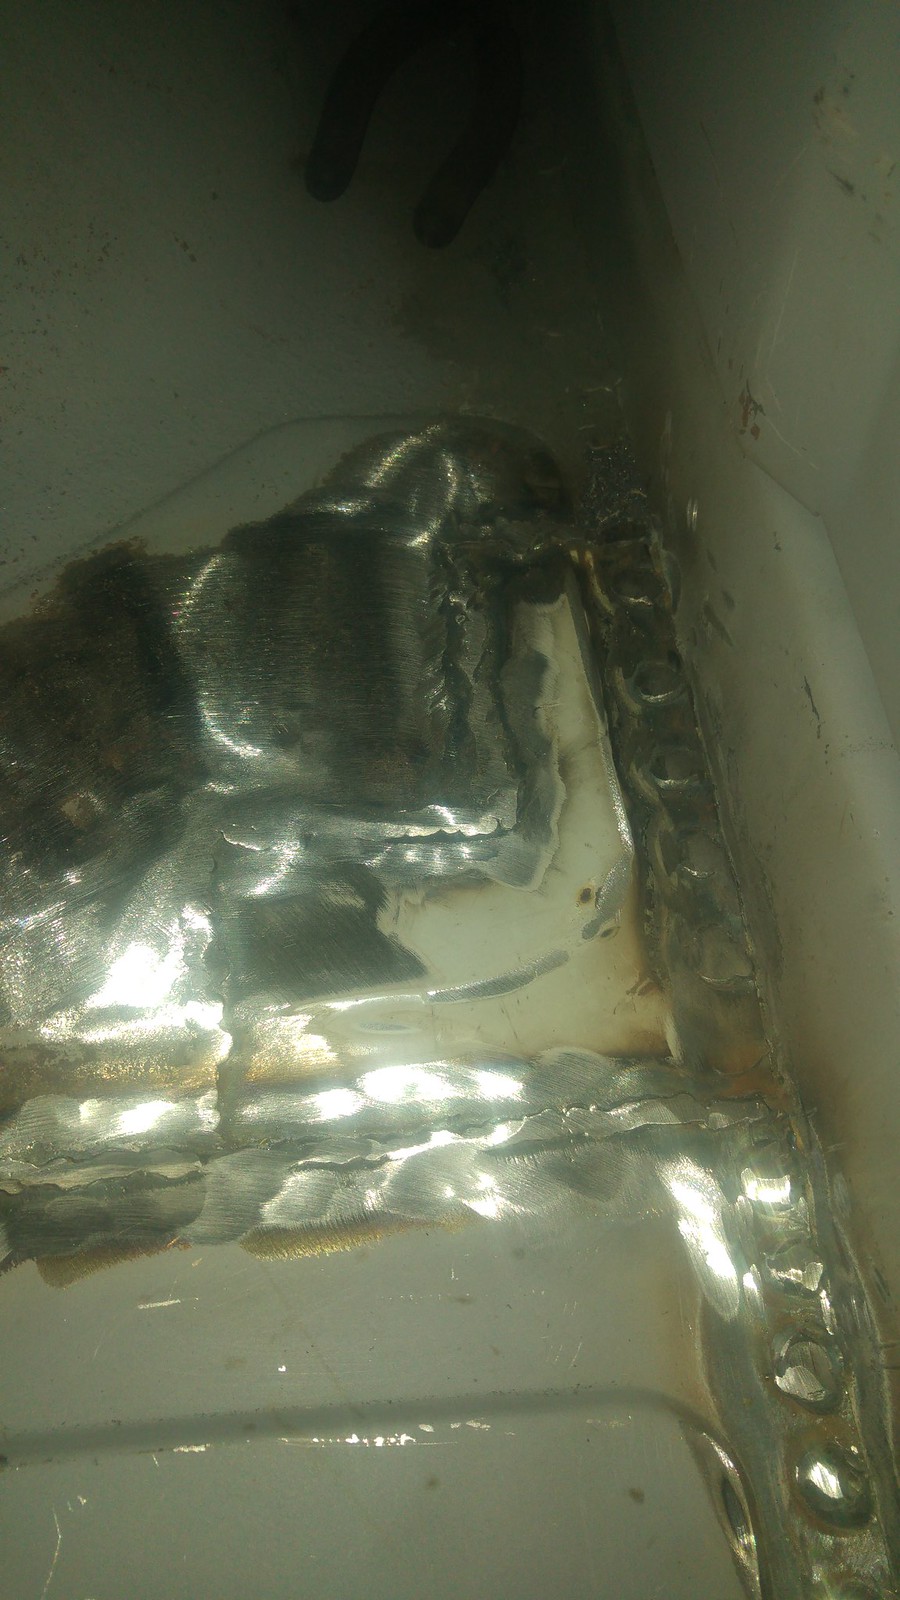
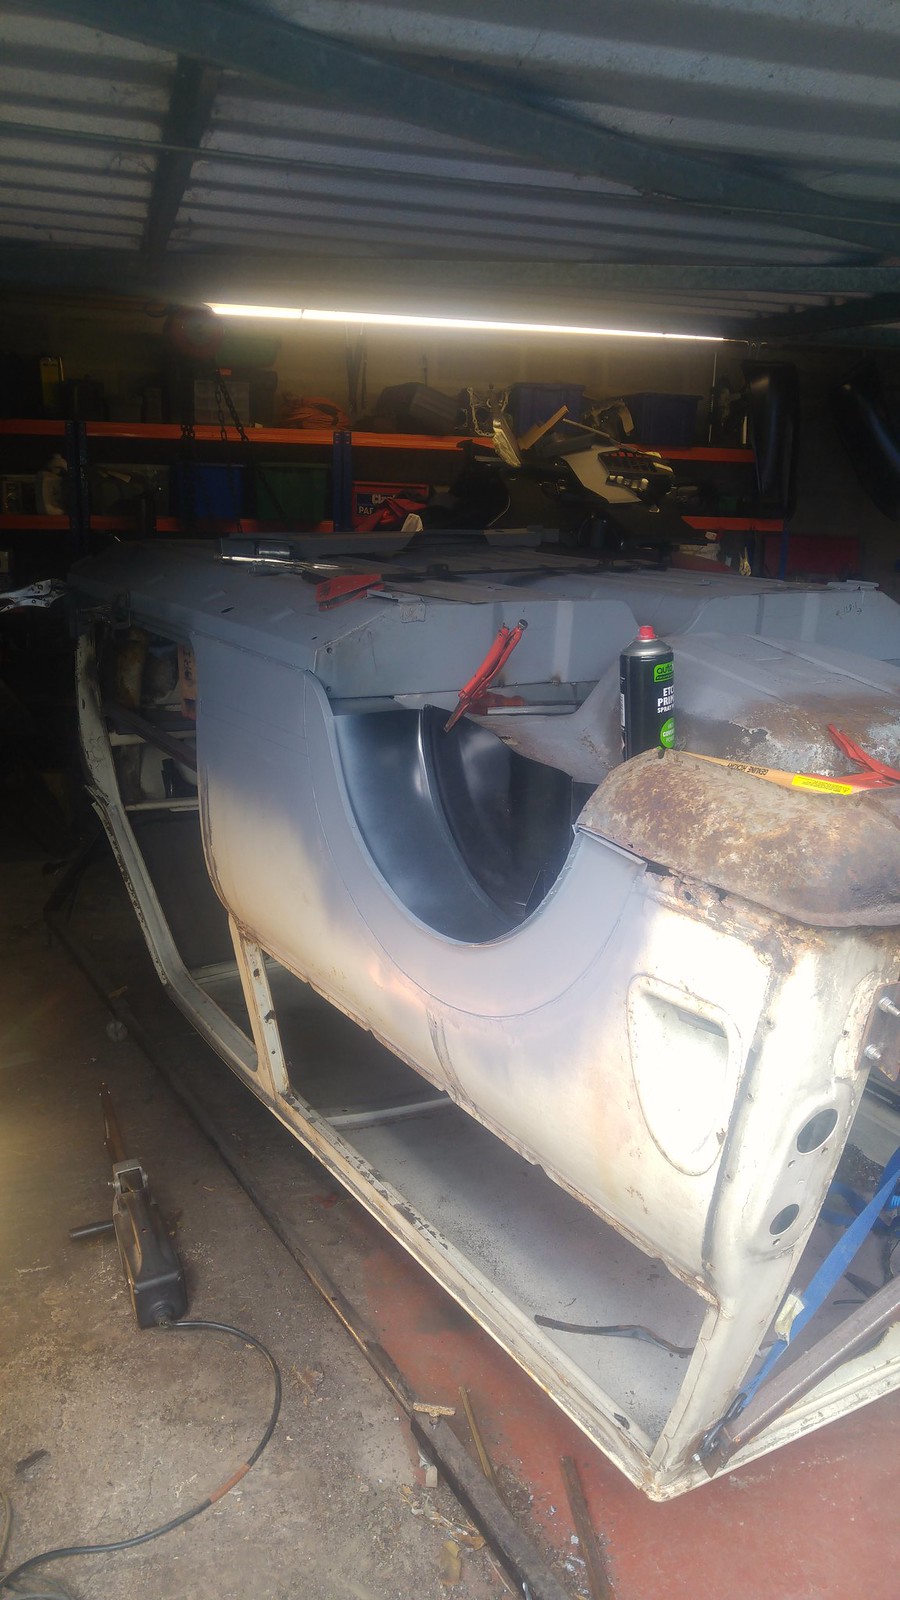
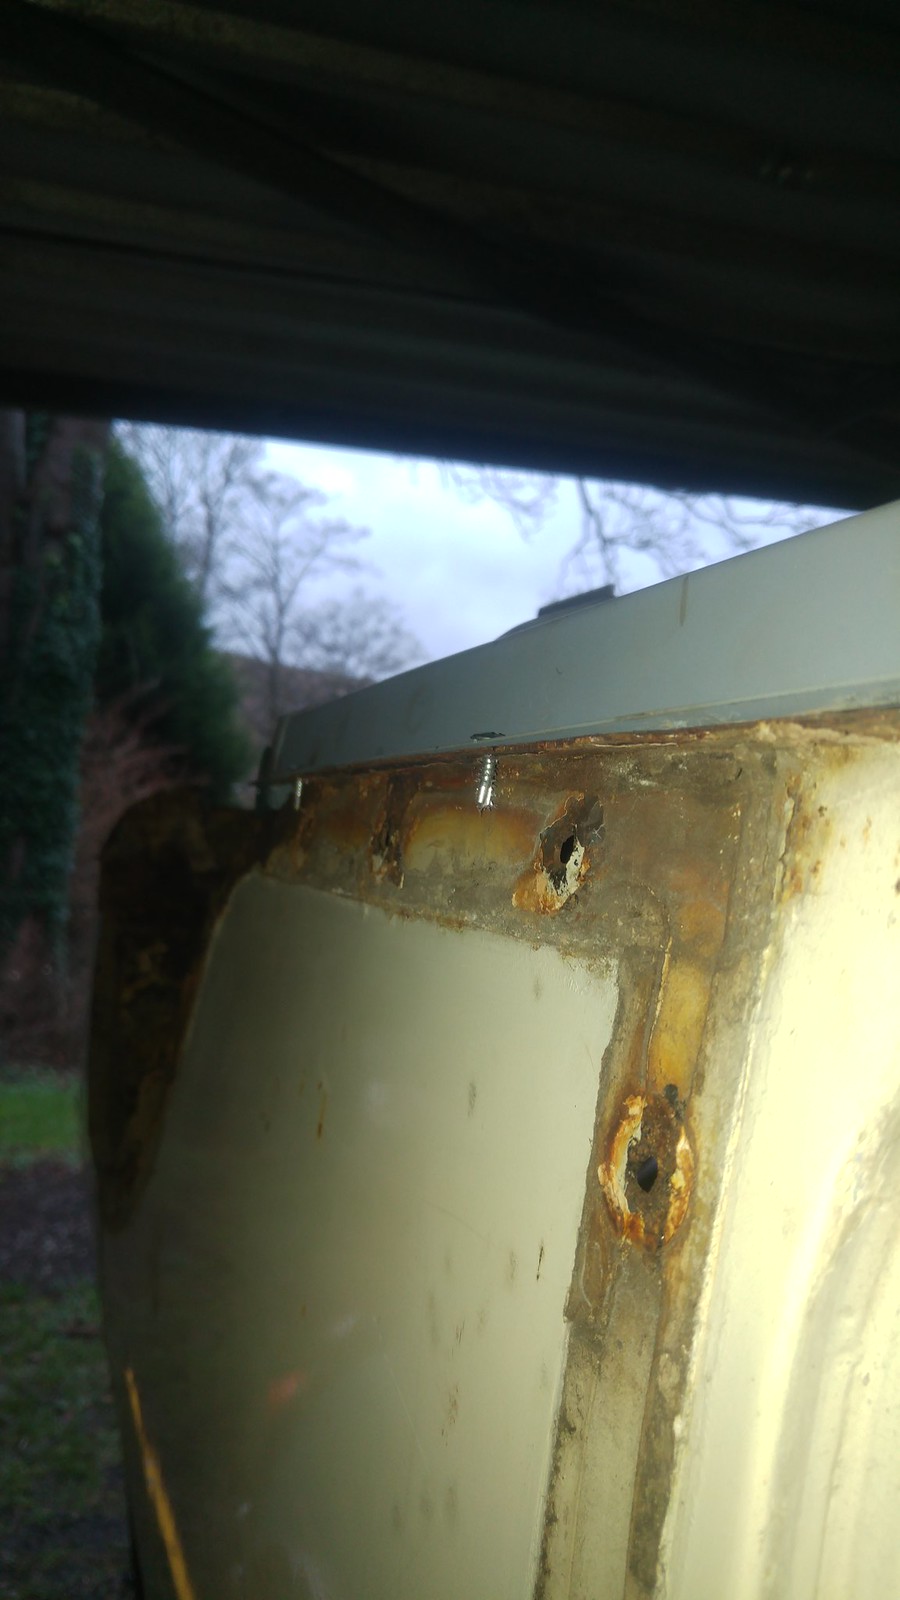
Replaced the various mole-grips along the sides with tech-screws:

46883692481_4af2aa5570_h.jpg20190126_151943 by Mike Jackson, on Flickr


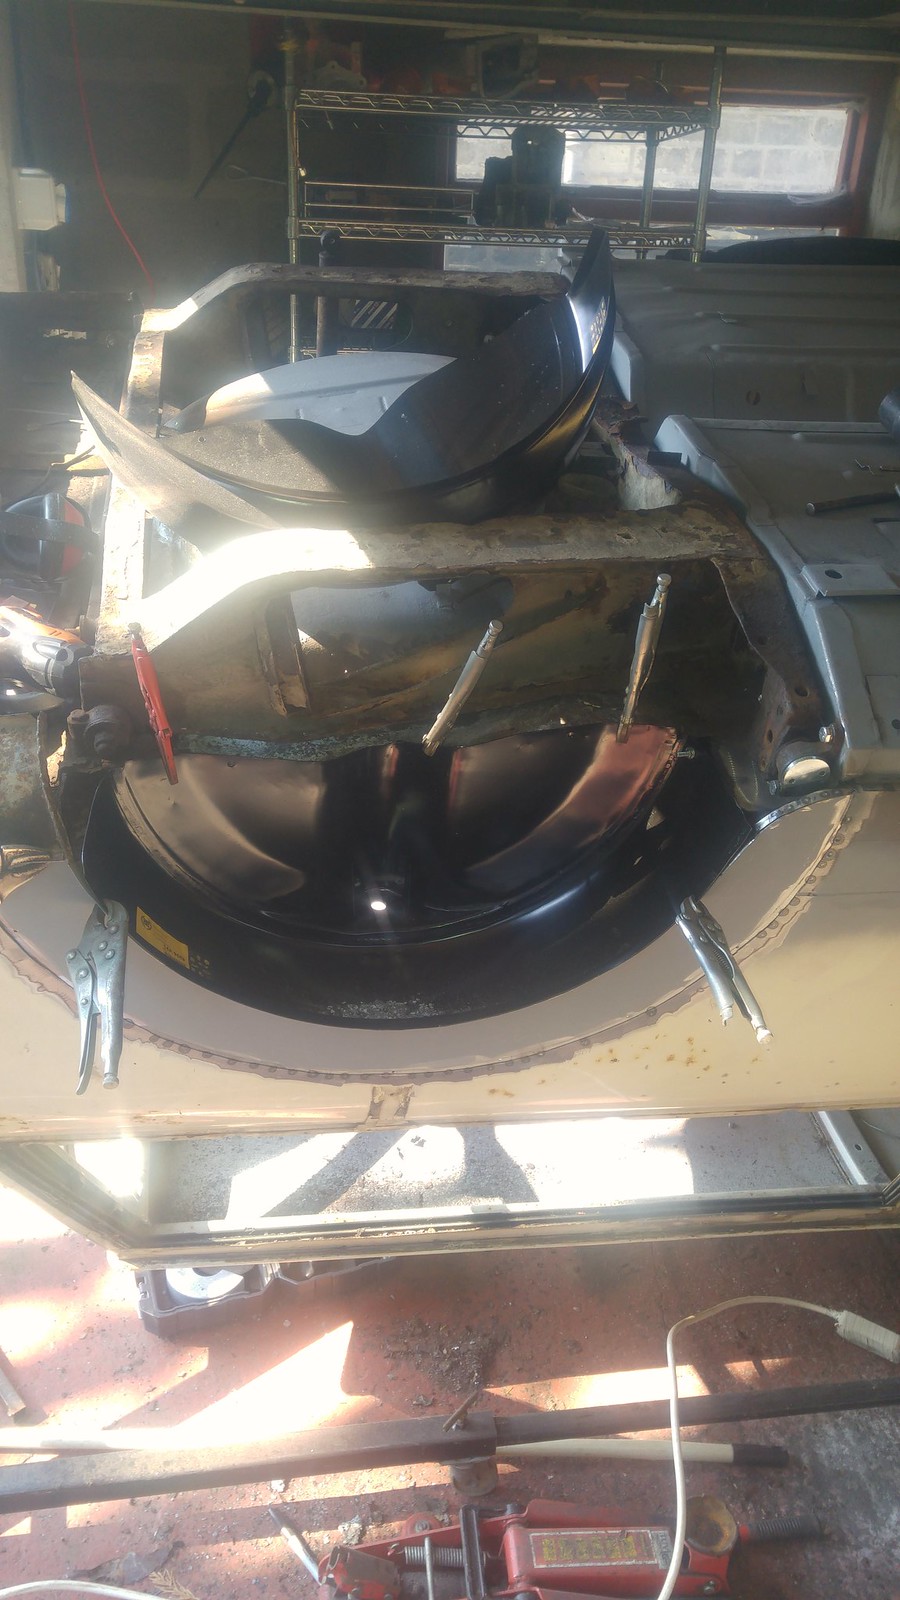
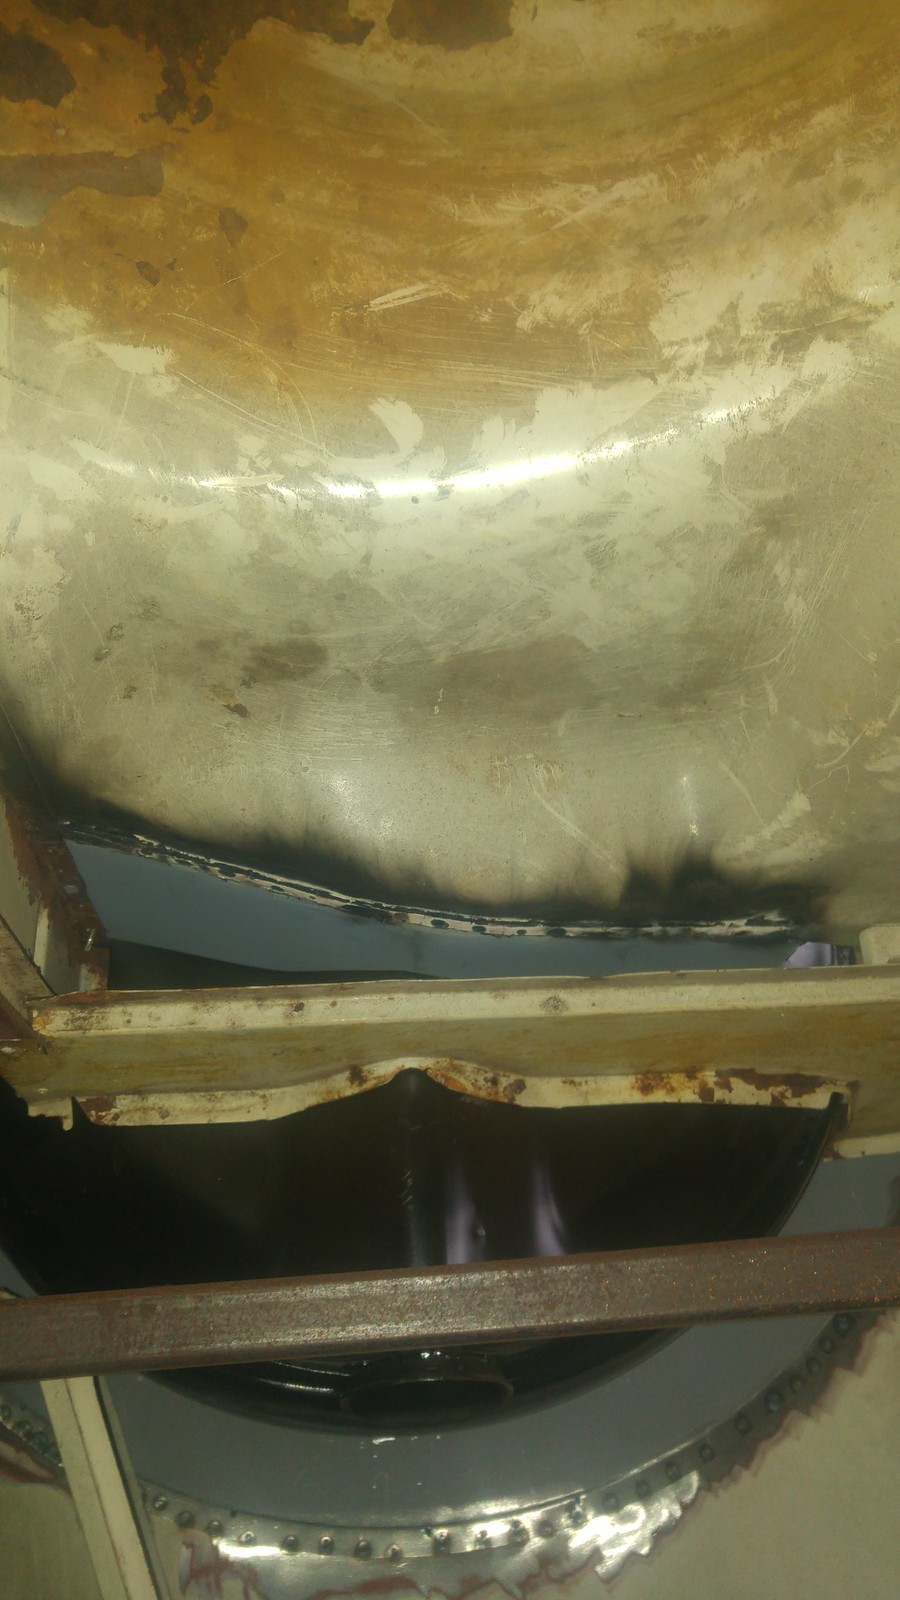
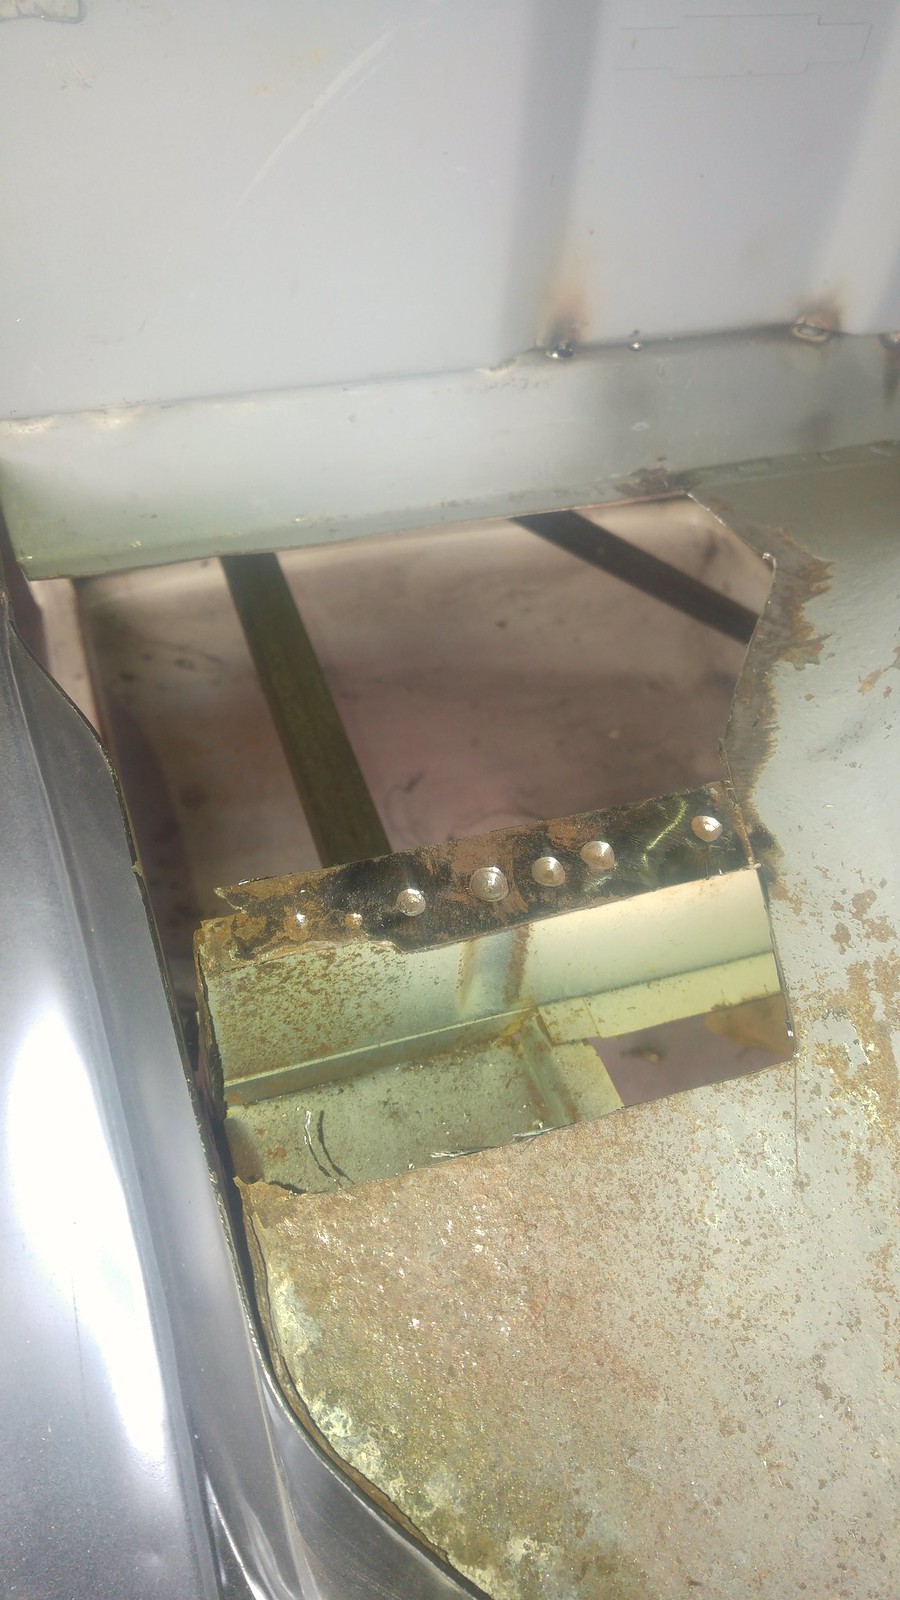
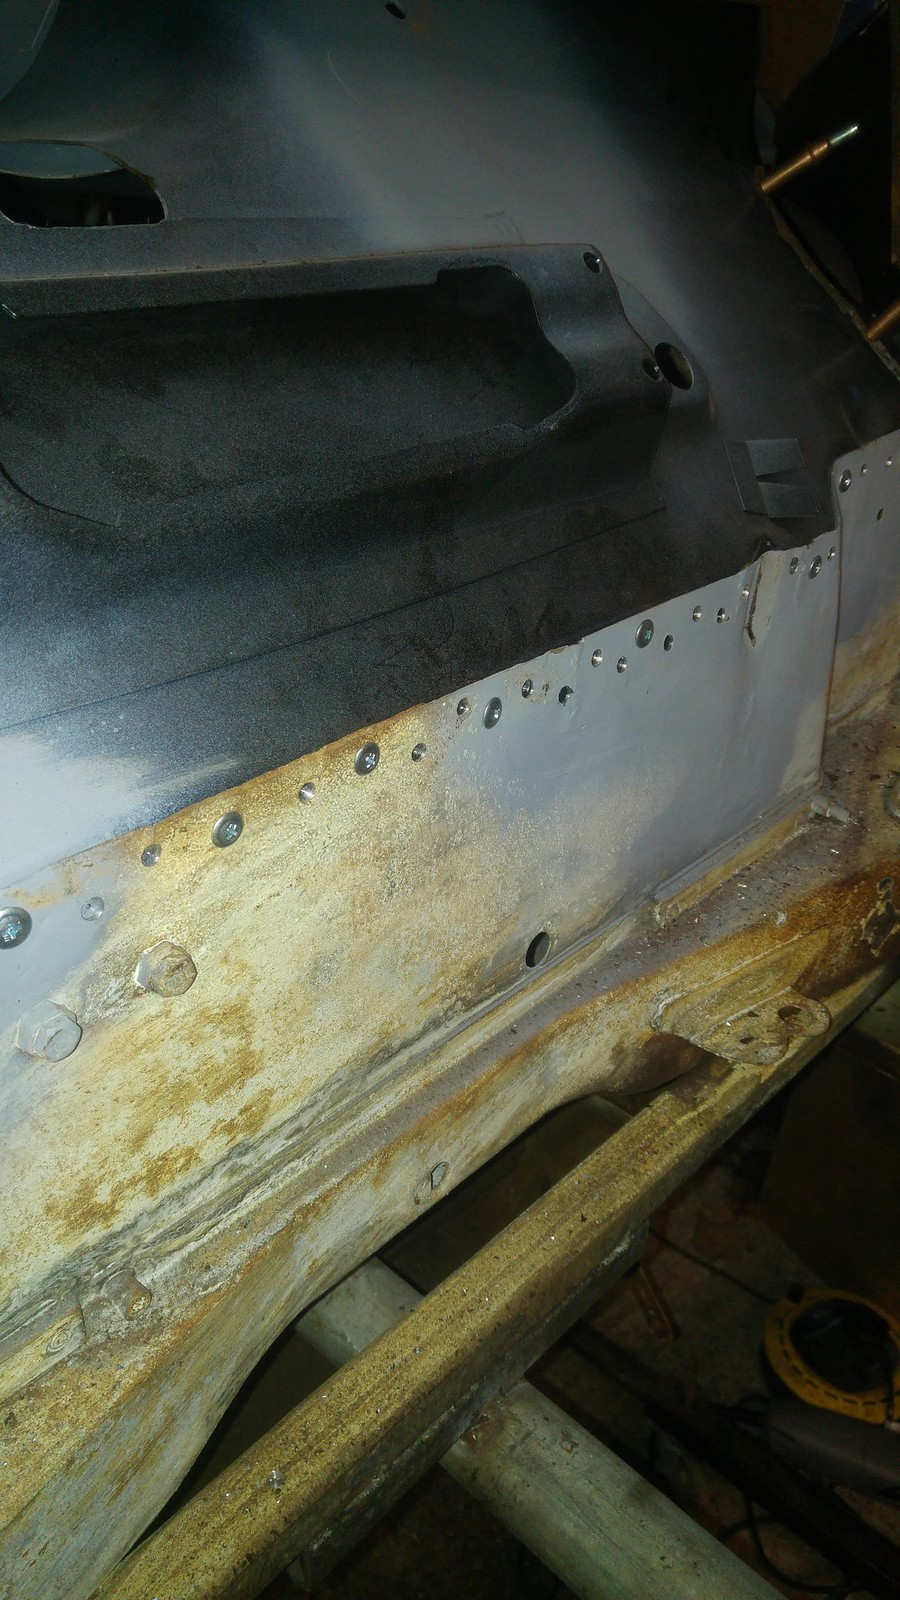
Then hoisted the front subframe off, again, and drilled some holes for plug-welding the toe board:

33008376788_f2c1d073fd_h.jpg20190126_160047 by Mike Jackson, on Flickr


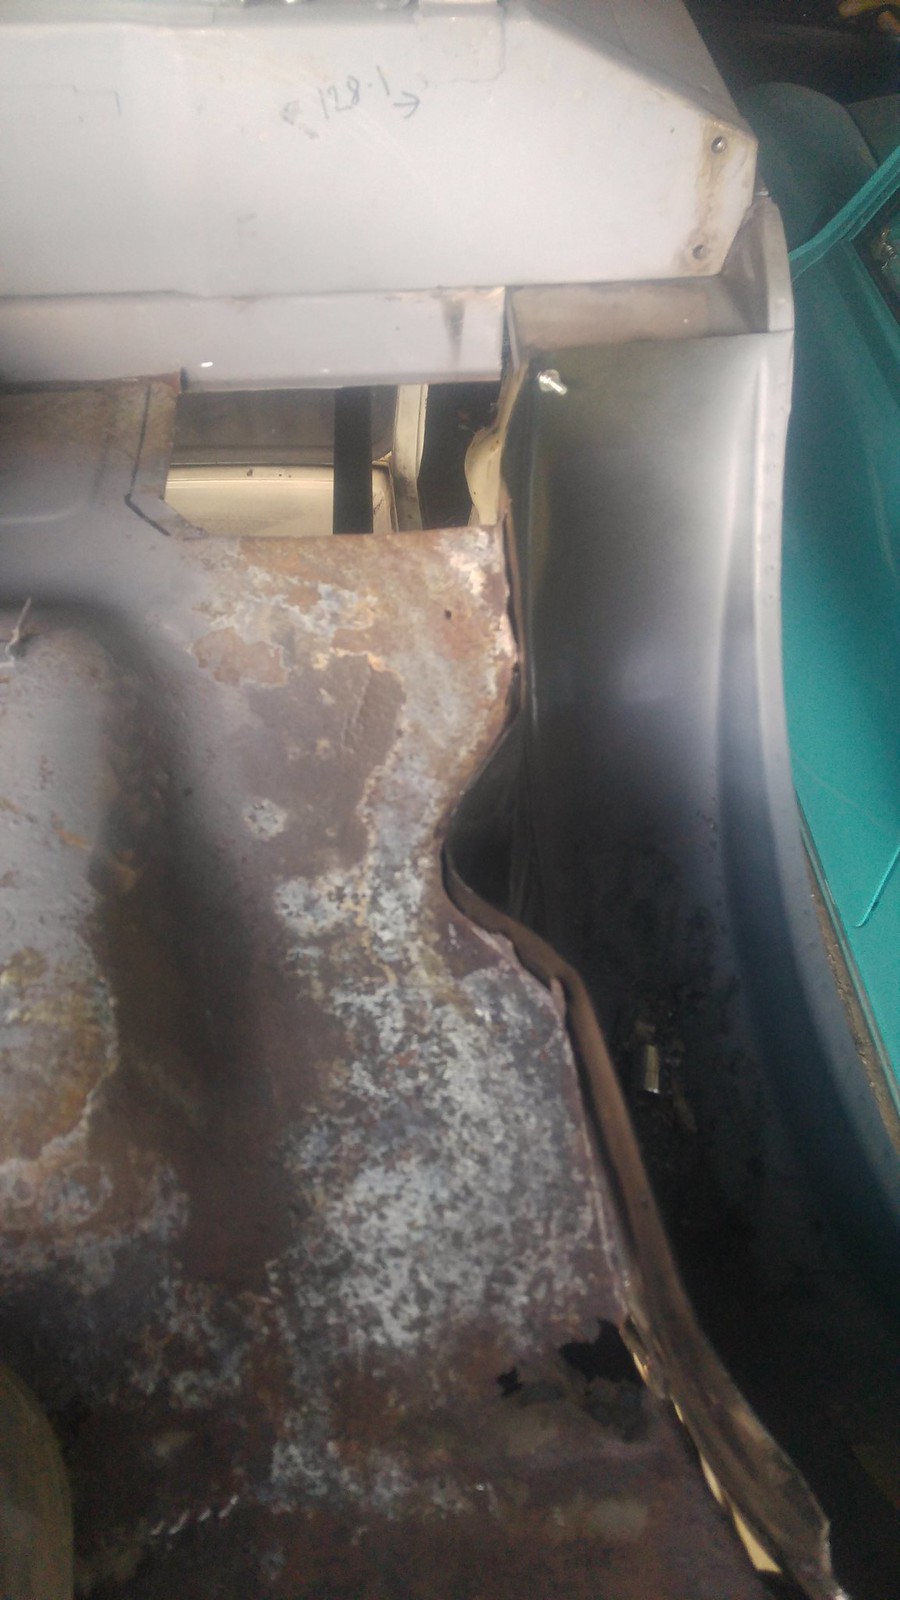
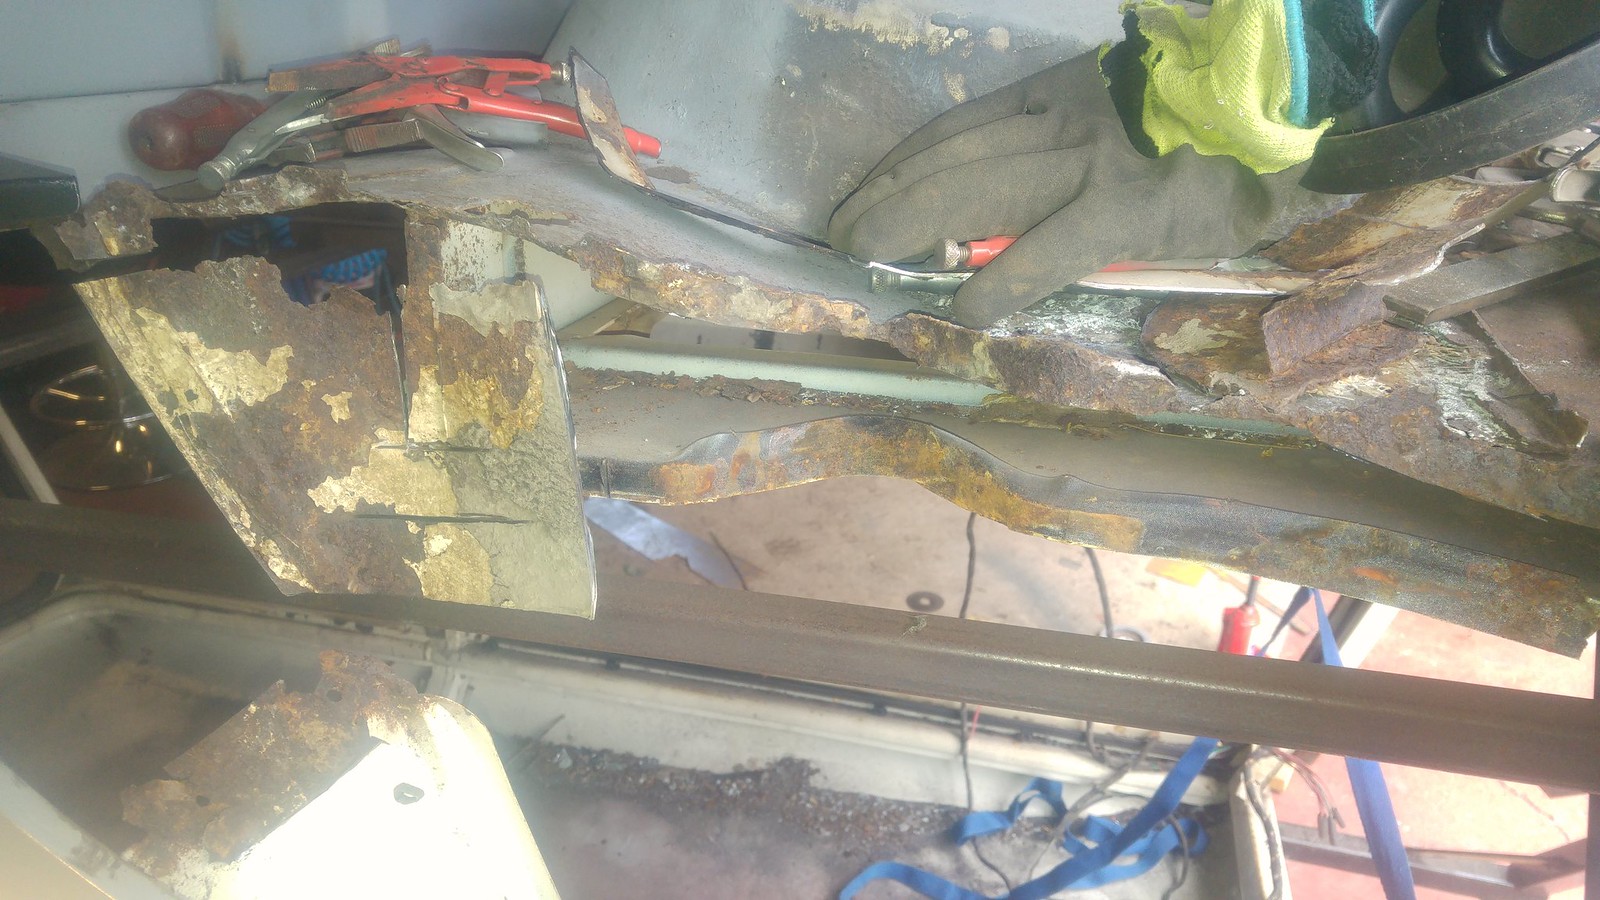
I've used welding clamps to pull the boot floor repairs I made to the heelboard, they all line up nice but I forgot to take a pic.


I'll spin the shell over next and see if I can sort out the warps on the inner sills.


#78 minimissions

minimissions

    Up Into Fourth

  • Members
  • PipPipPipPipPipPipPipPipPip
  • 3,427 posts
  • Location: North West
  • Local Club: M.M.O.C

Posted 30 January 2019 - 07:04 AM

Glad this is lining up now mate, you going to get some welds on it to hold it all down, or you still playing with the fitment?


#79 minimikej

minimikej

    Speeding Along Now

  • Members
  • PipPipPipPipPip
  • 346 posts
  • Location: Derbyshire

Posted 05 February 2019 - 08:10 PM

Glad this is lining up now mate, you going to get some welds on it to hold it all down, or you still playing with the fitment?


I've welded the toe board in now and flipped the shell over. But then I had to go into hospital for a hernia op and now I'm out of action for a few weeks :/


Next job is to weld along the heelboard and then it'll have to be the door step and rear quarter repairs. I've measured the door frame top to doorstep and gutter to sill seam from what was the old doorseps on both sides and they're all different. guess I'll have to drop what's left of the doors in place and measure by eye...


#80 minimissions

minimissions

    Up Into Fourth

  • Members
  • PipPipPipPipPipPipPipPipPip
  • 3,427 posts
  • Location: North West
  • Local Club: M.M.O.C

Posted 06 February 2019 - 06:47 AM


Glad this is lining up now mate, you going to get some welds on it to hold it all down, or you still playing with the fitment?


I've welded the toe board in now and flipped the shell over. But then I had to go into hospital for a hernia op and now I'm out of action for a few weeks :/


Next job is to weld along the heelboard and then it'll have to be the door step and rear quarter repairs. I've measured the door frame top to doorstep and gutter to sill seam from what was the old doorseps on both sides and they're all different. guess I'll have to drop what's left of the doors in place and measure by eye...


Sorry to hear your out of action for a bit mate, hope the recovery goes well.


Sounds like you have a clear plan now and should have the bottom end all sorted out soon. I look forward to seeing it, I have also managed to get a rollover jig now for project wedding car so thats my next job set that up and get going with the floors finally haha


#81 minimikej

minimikej

    Speeding Along Now

  • Members
  • PipPipPipPipPip
  • 346 posts
  • Location: Derbyshire

Posted 17 February 2019 - 06:37 PM

Long shot - Has anybody here got a front bulkhead panel or section from a scrapper for sale? Something like https://www.minispar...ic/CZH3216.aspx


I'll have to make mods anyway so a later model might do. I'm not happy with the number of repairs I've had to let into mine, the metal is too thin. I think I really need to replace the lot, it's an important area.


#82 minimissions

minimissions

    Up Into Fourth

  • Members
  • PipPipPipPipPipPipPipPipPip
  • 3,427 posts
  • Location: North West
  • Local Club: M.M.O.C

Posted 18 February 2019 - 06:41 AM


Long shot - Has anybody here got a front bulkhead panel or section from a scrapper for sale? Something like https://www.minispar...ic/CZH3216.aspx


I'll have to make mods anyway so a later model might do. I'm not happy with the number of repairs I've had to let into mine, the metal is too thin. I think I really need to replace the lot, it's an important area.


I will have a look Mike, best to have a look for some shells being cut up. There is a few on facebook I think


#83 minimikej

minimikej

    Speeding Along Now

  • Members
  • PipPipPipPipPip
  • 346 posts
  • Location: Derbyshire

Posted 23 February 2019 - 06:18 PM

And I'm back in action again.


I decided to get the plastic out and bought the full bulkhead panel. I ordered from Bull Motif over ebay and I have to say that their prices and service are amazing, it arrived next day.


I will fit it in one piece, I've decided not to split the toe-board and retro-fit the M-Machine panel that I already have. Instead I'll modify the > 76 toe board in situ to take the solid mount subframe and direct gear change and the only difference will be the wider recess on the near side for the fuel return lines for injection models. But with the engine and carpet in place it'll not be seen so I'll take that hit. Not decided how to tackle the bulkhead cross-member mods needed for the subframe bolts yet.


However, I decided not to tackle the bulkhead right now because that would involve taking the shell off the spit, and would make the front worryingly wobbly.

So instead, I carefully measured up the Magnum doorstep & rear quarter repairs and got the o/s fitted.

It's only tacked in place to the outer sill, I want to do these seams with the spot welder but I haven't done the necessary wiring work in the garage yet, parts on order.

I decided to do a butt weld, took my time, and used a length of copper pipe, flattened and doubled as a heat-sink along with the panel clamps I have.
I don't have any photos of the process unfortunately, my phone died.


But cleaned up and primed it looks like this:

46464516414_f157677e15_h.jpgDSC_0695_ by Mike Jackson, on Flickr


Quite happy with the result, I left a few inches gap at the rear because that area is too rusty and I have a rainbow arch repair to let in later.


I also plug-welded the heelboard to the repair section I folded up and described in an earlier post.


Main thing is that getting the floor in place is stiffening up the shell enough for me to tackle the front bulkhead.


Passenger side next.


#84 minimikej

minimikej

    Speeding Along Now

  • Members
  • PipPipPipPipPip
  • 346 posts
  • Location: Derbyshire

Posted 02 March 2019 - 07:59 PM

Other side today. To be honest it was a right pain butt-welding the repair to the o/s. And I'm still not 100% happy with it.

So on the n/s, after watching Matt Green working on his pickup on YouTube I decided to use the edge setting tool and spot welded it in using the long arms.

(I re-wired the garage electrics onto a new 16A breaker so that I could run the spot welder - previously off a 13A fused spur from the house)


40294188803_55a08a717b_h.jpg2019-03-02_06-08-29 by Mike Jackson, on Flickr


Having tried this method I'll never use another. Zero distortion, no pin holes, no grinding, 5 times quicker.


#85 minimissions

minimissions

    Up Into Fourth

  • Members
  • PipPipPipPipPipPipPipPipPip
  • 3,427 posts
  • Location: North West
  • Local Club: M.M.O.C

Posted 05 March 2019 - 06:46 AM

I looks like its coming together though :gimme:


#86 minimikej

minimikej

    Speeding Along Now

  • Members
  • PipPipPipPipPip
  • 346 posts
  • Location: Derbyshire

Posted 13 April 2019 - 08:57 PM

Some more progress: N/S wheel arch and rear quarter repairs...


32634738657_3e97f1bf9f_h.jpg2019-04-10_07-55-39 by Mike Jackson, on Flickr


47524270332_6d6ea1b734_h.jpg2019-04-10_07-55-57 by Mike Jackson, on Flickr


33700306958_f291be89d3_h.jpg2019-04-10_07-56-18 by Mike Jackson, on Flickr


Then, finally off with the rear subframe to get access to the boot floor. Just had time to offer the repairs up but not started fitting yet:


40634934753_1101b73d56_h.jpg2019-04-13_08-44-24 by Mike Jackson, on Flickr


33724113238_b6bb472316_h.jpg2019-04-13_08-45-40 by Mike Jackson, on Flickr


46685561875_84f9558685_h.jpg2019-04-13_08-44-46 by Mike Jackson, on Flickr


46685563845_83ce189e65_h.jpg2019-04-13_08-45-06 by Mike Jackson, on Flickr


#87 minimissions

minimissions

    Up Into Fourth

  • Members
  • PipPipPipPipPipPipPipPipPip
  • 3,427 posts
  • Location: North West
  • Local Club: M.M.O.C

Posted 14 April 2019 - 07:18 AM

Nice to see you back on it Mike and some new steel going in is always a good feeling. I need to get back on with the 89 but saving for panels now...


#88 minimikej

minimikej

    Speeding Along Now

  • Members
  • PipPipPipPipPip
  • 346 posts
  • Location: Derbyshire

Posted 16 April 2019 - 07:36 PM

These also from Sunday, crappy pictures from phone.


Here is a close up of inner indented section of the nearside floor repair. This inner bit isn't part of any available repair section. But a friend is doing a Fiat Ducato camper conversion and gave me his unwanted bulkhead panel for free and it has some really nice useful forms pressed into it. I used one such area to repair the section to something approximating the right profile (I have no wheel or other forming tools)


47571463552_1575ecc0d8_h.jpg20190416_191505 by Mike Jackson, on Flickr


This is what it looks like from inside (car upside down on spit)
 

32681605557_57a79b1349_h.jpg20190416_190043 by Mike Jackson, on Flickr


The floor repair panel from the rear step to the forward edge of the wheel arch is a really primitive pressing, you might be better making your own if the edge at the rear door step is sound, that's the only formed edge. I decided to split the repair into two halves because the bend/indent around the shock-absorber recess didn't seem sufficient and prevented lining up nicely both fore and aft of the shock-absorber at the same time. I plug and seam lap-welded this one. It will clean up okay from beneath and is hidden from view by the pop-riveted mezzanine load floor inside.


47624241711_e27dd5c42c_h.jpg20190416_190022 by Mike Jackson, on Flickr


and


32681606667_c61f38bb97_h.jpg20190416_190118 by Mike Jackson, on Flickr


I think everything will line up okay, might have to rig a compression strap to pull the wheel arch in by 5mm though at the rear. But it all looks right to me.


#89 minimissions

minimissions

    Up Into Fourth

  • Members
  • PipPipPipPipPipPipPipPipPip
  • 3,427 posts
  • Location: North West
  • Local Club: M.M.O.C

Posted 24 April 2019 - 05:44 AM

Awesome progress mike this is coming together fast now.


#90 minimikej

minimikej

    Speeding Along Now

  • Members
  • PipPipPipPipPip
  • 346 posts
  • Location: Derbyshire

Posted 28 April 2019 - 05:54 PM

Tucked myself away in the garage through the storms and got some more done.


O/s wheel arch repair positioned against remains of old inner wheel arch, tacked into place, and old wheel arch removed. In this shot, the car is upside down and we're looking at the mezzanine load floor edge. Its flange seems to be covered (from new, presumably) with a fabric tape for some reason:

47671150732_05cce33d77_h.jpg2019-04-28_06-26-58 by Mike Jackson, on Flickr


47671170102_55f392677c_h.jpg2019-04-28_06-27-12 by Mike Jackson, on Flickr


With the inner wheel arch out the way, I could spot weld the wing arch repair fully into place. The trailing edge towards the rear I could not get parallel with the existing line. But I'll be replacing this area anyway so it won't matter.


47724156391_0dbfbd5de5_h.jpg2019-04-28_06-27-22 by Mike Jackson, on Flickr


I wasn't happy with the butt-welded repair on the o/s rear quarter repair so I chopped it out and re-did it. Sunshine!


33847014148_a765c79784_h.jpg2019-04-28_06-27-33 by Mike Jackson, on Flickr


Wheel arches need pulling into position to meet the old join lines of the boot floor and mezzanine:

32780785267_ca48581066_h.jpg2019-04-28_06-27-44 by Mike Jackson, on Flickr


Then clamp up the flanges to check that they will pull together for welding against the original lines:

33847037038_b36cc1c833_h.jpg2019-04-28_06-28-06 by Mike Jackson, on Flickr


Then start work on the mirror-image boot floor repairs on the o/s:

40757612113_55958abde3_h.jpg2019-04-28_06-28-21 by Mike Jackson, on Flickr


33847046148_cf153c59f6_h.jpg2019-04-28_06-28-29 by Mike Jackson, on Flickr


Some tidying up to do on the front mezzanine cross-member. No idea how, but I have this full cross-member as a repair panel, but I don't think I'll need to use it; only the very edges where is spots to the wheel arches are gone.


46807695225_b8150580d4_h.jpg2019-04-28_06-28-39 by Mike Jackson, on Flickr


Cheers


0 user(s) are reading this topic

0 members, 0 guests, 0 anonymous users