Jump to content


Photo
- - - - -

1983 Mini City


  • Please log in to reply
523 replies to this topic

#136 colinf1

colinf1

    One Carb Or Two?

  • Members
  • PipPipPipPipPipPipPip
  • 902 posts
  • Location: Dundalk

Posted 10 July 2021 - 05:18 PM

Some more cleaning done around mating faces for the inner wing. Cleaned up around the upper shock mount then cut out the rust from the middle.

51301768157_6ce8c9cf57_b.jpg

Once I could see into the crossbeam I noticed some rust on the upper bulkhead just below dash shelf.

51302703083_173ed428bd_b.jpg

Cut out the rust and made a patch. Tried to butt weld it, but thinking now I should have made the patch bigger and toggled it.

Also tried to drill out the snapped bolts in the shock mount, got 1 drilled then dril bit broken inside the 2nd one. Managed to pop the entire piece off, I'll make up a replacement

Taking some annual leave next week, hopefully get something productive done!

#137 colinf1

colinf1

    One Carb Or Two?

  • Members
  • PipPipPipPipPipPipPip
  • 902 posts
  • Location: Dundalk

Posted 13 July 2021 - 06:33 PM

First day of annual leave...

Started by looking at the door frame and step. Welded in a support bar, cross member to A pillar, then started chopping. Step didn't give too much trouble, hinge panel wasn't too bad either. Had a replacement A post stiffener so left it attached to hinge panel.

Chopped up the inner wing repair panel and clamped that in place to use as a guide for the hinge holes.

Once I'd the step off I could see what was left of the cross beam closing panel, not much at all...

51310370245_af05d2c3a0_b.jpg

51309366976_0bbac32dba_b.jpg

Also noticed that the sill was partially replaced, from step to start of the lower section and then had some patch repairs in parts. Surely would have made more sense to replace the entire sill, but at least I know it's being fully replaced now.

Had to make up a panel for the inner sill from front of crossbeam to about 4inches into the rear floor pan. I had bought inner sill covers, but decided against using them so have been used for patching material.

I offered up the sill, step and full inner wing and everything looks to line up, some tweaking needed around toe board to inner wing but just thankful I didn't put anything out of alignment (I hope)...

51308624352_cbf4ffab45_b.jpg

Plan for tomorrow is to make the crossbeam closing panel, then set about welding step and sill on.

#138 colinf1

colinf1

    One Carb Or Two?

  • Members
  • PipPipPipPipPipPipPip
  • 902 posts
  • Location: Dundalk

Posted 14 July 2021 - 10:07 PM

Day 2 of annual leave, didn't go as good as yesterday and feeling a little less motivated now...plus it was scorchingly hot especially when welding!

Started by getting the car into its side...but that meant emptying the shell as it was full of all the panels, doors, boot, 2 bonnets, front and rear subframe. Guess the lawnmower won't be moving for a while...

51312602344_28132efdde_b.jpg

So much for the rotisserie I built, I just tipped it over and let it sit on sill seam on the floor then on some metal beam along its roof gutter.

51311864746_340c321d55_b.jpg

Then set about removing the driver's side floor pan. Added some bracing to keep A post in place. It was a real struggle to find all the spot welds as the floor was very corroded, but not corroded enough that it would just fall out.

51312866165_600973a488_b.jpg

Some rust along lower edge of cross member, cut that out and patched it up. Then set about cutting the floor, lots of lining up, checking, lining up again and finally cutting.

The flutes along the floor and repair panel don't line up, so will need to sort that, then front section along sill went out of line by about 5mm, only realised once I had welded most of it in.

Think I should be able to make a relief cut to pull it back it without having to remove it all...

51312866765_f394dfe936_b.jpg

#139 T.Harper

T.Harper

    One Carb Or Two?

  • TMF+ Member
  • PipPipPipPipPipPipPip
  • 714 posts
  • Location: New Jersey

Posted 15 July 2021 - 10:06 AM

Get yourself an old mattress to flip it onto - most people use a double but you might eb able tog et away with a single


#140 colinf1

colinf1

    One Carb Or Two?

  • Members
  • PipPipPipPipPipPipPip
  • 902 posts
  • Location: Dundalk

Posted 19 July 2021 - 07:55 PM

Get yourself an old mattress to flip it onto - most people use a double but you might eb able tog et away with a single


It's hard enough not to set fire to the shed without adding a mattress to the mix 🤣

#141 colinf1

colinf1

    One Carb Or Two?

  • Members
  • PipPipPipPipPipPipPip
  • 902 posts
  • Location: Dundalk

Posted 19 July 2021 - 07:58 PM

Quick question regarding the inner wing and outer sill. I had thought it went behind the inner wing as I cut off a bit of the lip, but now realise it goes on the outside of the inner wing and the step goes on the inside??

Like this?
51322466908_f0347c586e_b.jpg

#142 colinf1

colinf1

    One Carb Or Two?

  • Members
  • PipPipPipPipPipPipPip
  • 902 posts
  • Location: Dundalk

Posted 07 August 2021 - 06:09 PM

Not much done the last few weeks, ordered a new steel workshed, 6m X 3m, so should have more room for workbench, storage and more importantly, room to work.

But quite a long lead time of 15weeks!

Plan is to get a bit more done on the shell over the next few weeks, then start emptying the garden shed into crates, then on the day that the new shed arrives - move the mini car-port and hopefully they can erect shed around the shell.

Now if it would only stop raining I might be able to muster up some motivation to do something...

#143 colinf1

colinf1

    One Carb Or Two?

  • Members
  • PipPipPipPipPipPipPip
  • 902 posts
  • Location: Dundalk

Posted 19 September 2021 - 07:55 PM

Back at it today after not having much motivation to do much.

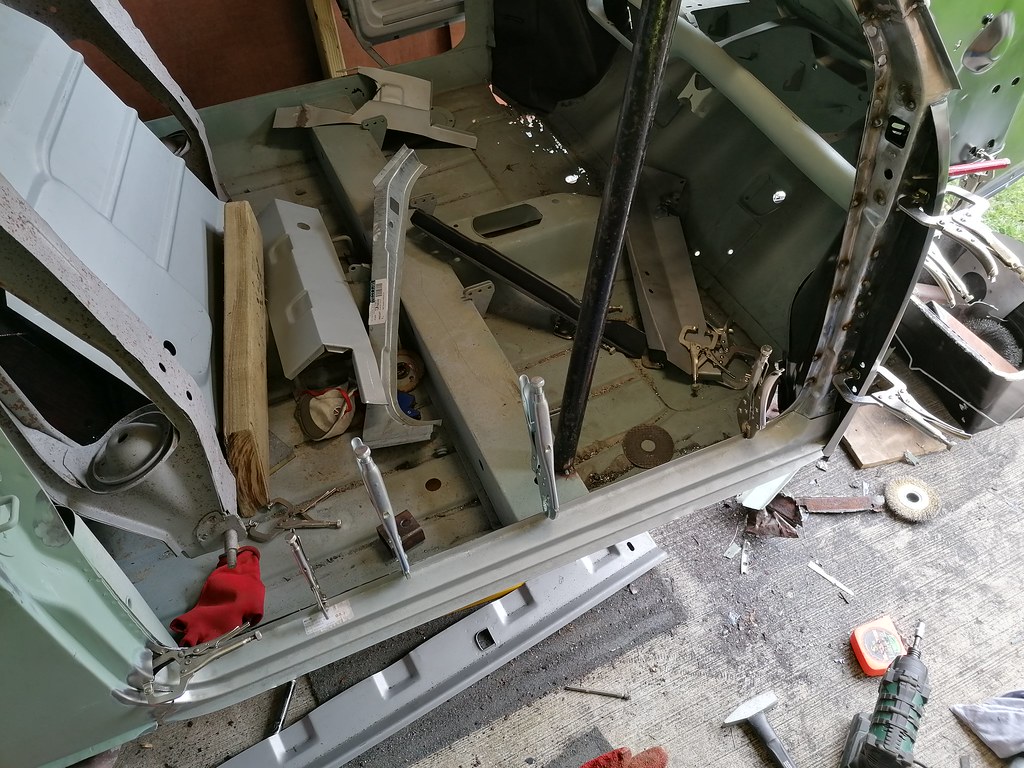
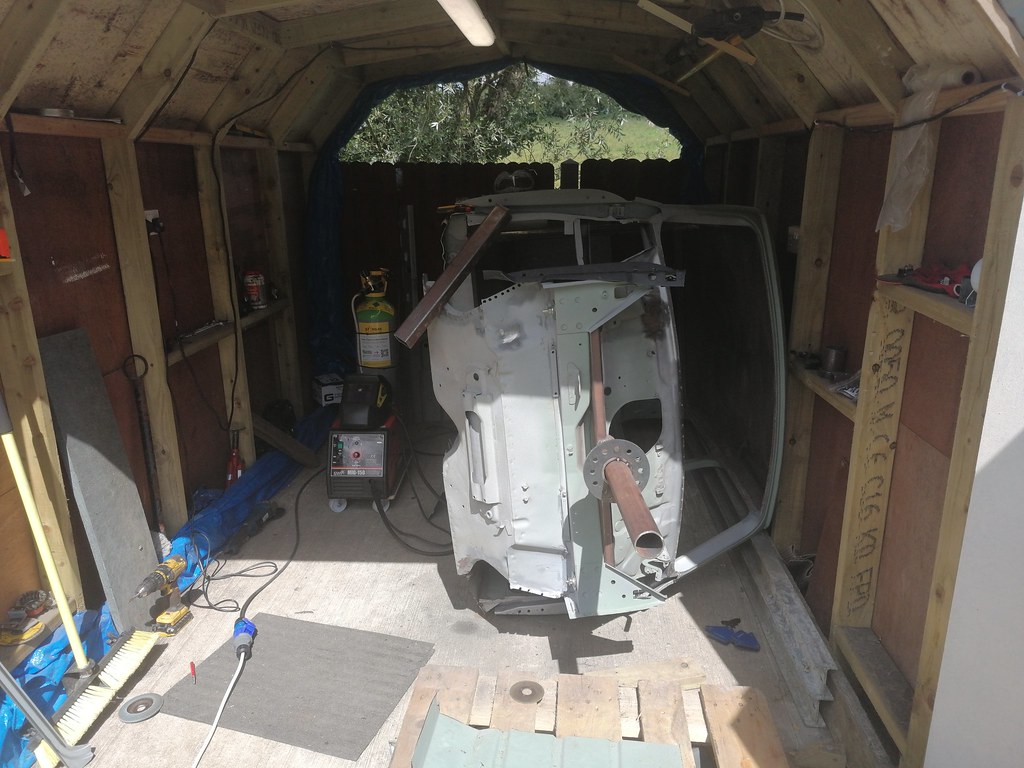
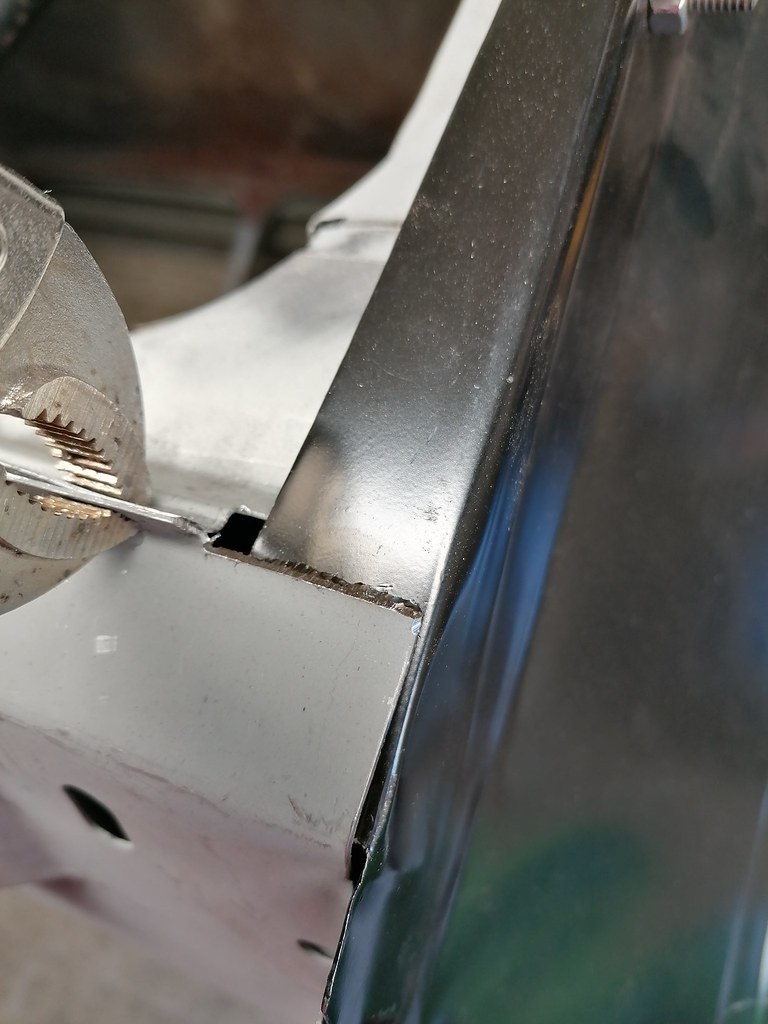
Decided to try and get inner wing full fitted, but first had to close off end of bulkhead cross member.

51493974419_044c348a76_b.jpg

Once that was done I offered up the inner wing and clamped it all in position. Then scribed the inside to mark where I needed to drill for plug welds, the got on with drilling.

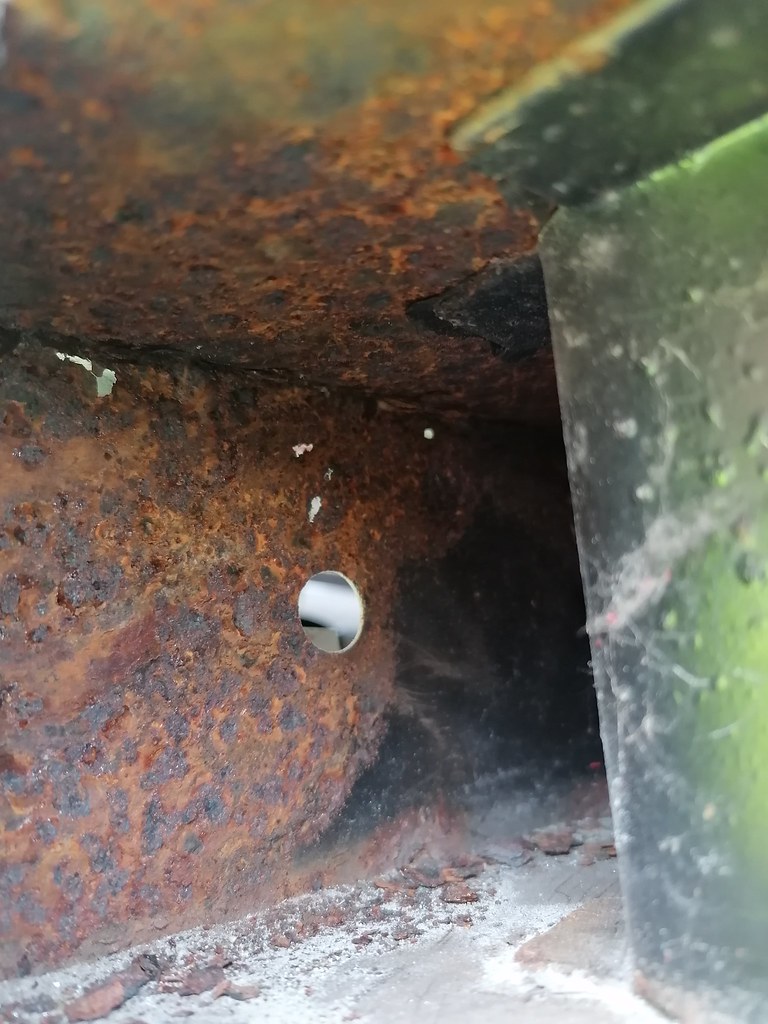
Didn't feel right drilling into a new panel :(

51492459647_529f79bac0_b.jpg

I went 8mm for the holes, but think I could have done them 6mm, would have been quicker to fill.

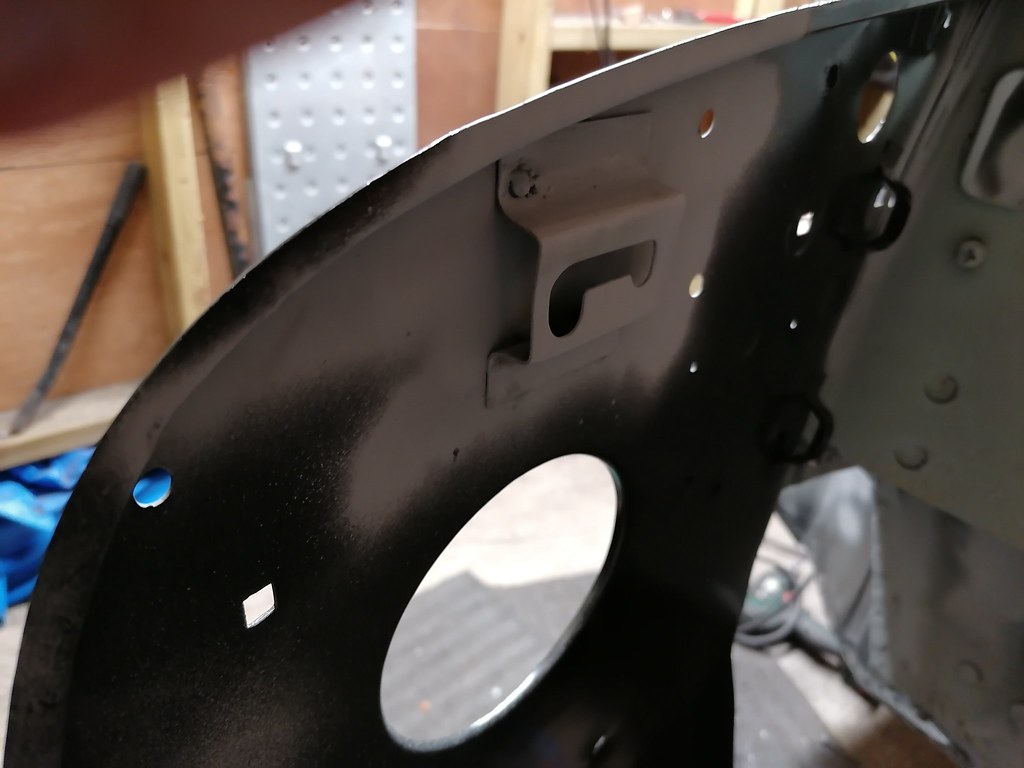
Took it nice and slow with the dressing down as to not put too much heat into the welds, a few pin holes here and there but overall I'm happy, feels like it's fully secured. Ran out of time to dress off the last of the welds, so cleaned them up and gave them a coat of zinc primer til I can finish them.

51493267316_8762e840a6_b.jpg

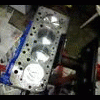
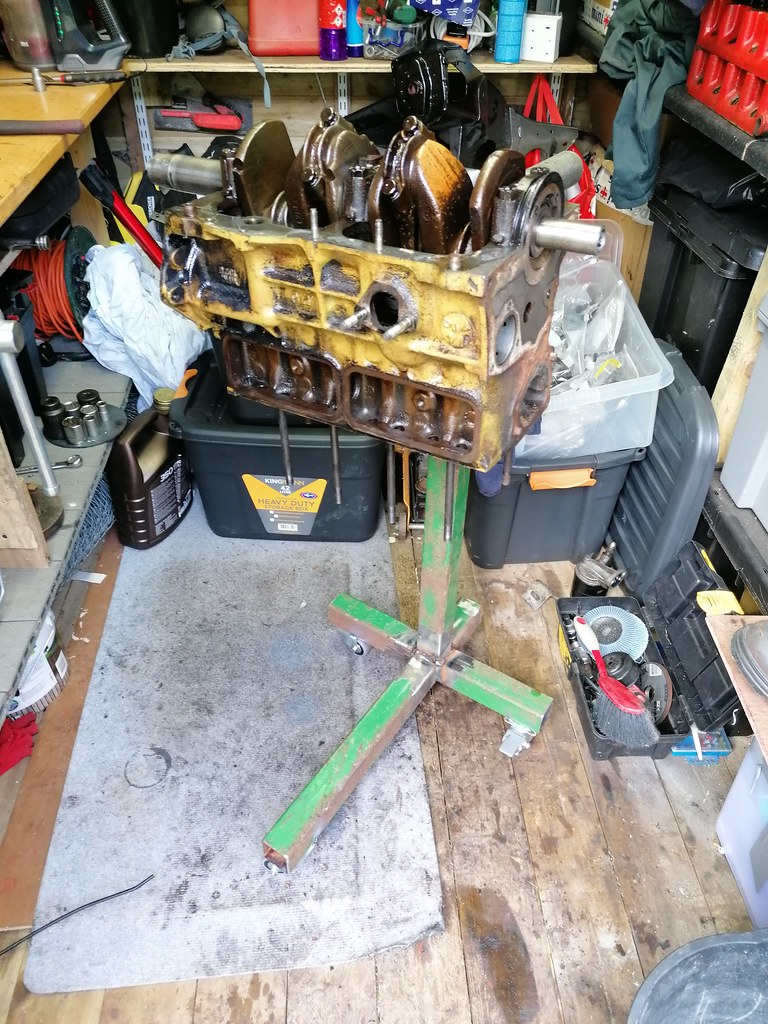
I took a look at the engine during the week, took off clutch cover, lots and lots of clutch dust build up, lots of crud lying at the bottom of the housing too so will need a good clear out before digging deeper. Stripped down the head ready for cleaning, very pitted around thermostat housing, I have a spare head of the same CAM4810 so will use that as it looks in better condition.

Valves have F and H stamped on them, any ideas?

#144 Viktor

Viktor

    Super Mini Mad

  • Members
  • PipPipPipPipPipPip
  • 619 posts
  • Location: London

Posted 24 September 2021 - 06:51 PM

That inner wing is looking really good!


Cheers.


Victor.


#145 colinf1

colinf1

    One Carb Or Two?

  • Members
  • PipPipPipPipPipPipPip
  • 902 posts
  • Location: Dundalk

Posted 25 September 2021 - 07:11 PM

Finished dressing off the plug welds, then went over any pin holes. Also welded on the bonnet support bracket. Still have to weld on the washer bottle bracket and plug weld along floor and toe board but nearly there with that side. I definitely will be increasing the distance between the plug welds, don't think I needed as many.

51515898651_3fd854ddd3_b.jpg

Still a bit of dressing off a filled hole on the top of the bracket where I accidentally drilled through when removing it from old wing.

51516824715_9ae760eef9_b.jpg

#146 colinf1

colinf1

    One Carb Or Two?

  • Members
  • PipPipPipPipPipPipPip
  • 902 posts
  • Location: Dundalk

Posted 05 October 2021 - 07:56 PM

Made up a flywheel puller today, M16 center bolt and drilled with holes based on a pre-verto flywheel 🤦🏻‍♂️ redrilled to suit whatever pcd is on mine, maybe 90/95?

A bit of faffing about but eventually got it off, didn't make too much of a bang when it let go.

Small bit of damage on the crankshaft taper, so will need to dress it down.

51554813038_27c85036b3_b.jpg

#147 colinf1

colinf1

    One Carb Or Two?

  • Members
  • PipPipPipPipPipPipPip
  • 902 posts
  • Location: Dundalk

Posted 24 October 2021 - 08:53 PM

Got my engine stand made up during the week, and got the engine mounted onto it today.

Started taking apart the gearbox, bagging each part with the required nuts bolts and washers so I don't get anything mixed up.

On 1st inspection the gears look good, no sign of any grinding wear.

Gearbox exhaust hanger bracket needs replacing as it's been welded same as lower engine steady.

51626534755_454aeb6d45_b.jpg

Still waiting for my new shed to arrive, hopefully be within the next few weeks!

#148 Viktor

Viktor

    Super Mini Mad

  • Members
  • PipPipPipPipPipPip
  • 619 posts
  • Location: London

Posted 25 October 2021 - 06:03 PM

I will be doing the step and A-post shortly, so I will be back to your posts on that soon. Are you going to do the engine and the bodywork at the same time? New shed, that sounds exciting!


Cheers.


Victor.


#149 colinf1

colinf1

    One Carb Or Two?

  • Members
  • PipPipPipPipPipPipPip
  • 902 posts
  • Location: Dundalk

Posted 26 October 2021 - 09:27 AM

Are you going to do the engine and the bodywork at the same time?


Currently I have to move a lot of stuff out of the way to get space to do any bodywork. Its all very tight and restrictive so I have put off doing any more until my new shed arrives. That gives me some time to disassemble the engine and start inspecting and cleaning parts. Once I get a definite date for the shed arrival I will then start packing everything away into plastic storage boxes.


Continued to disassemble the gearbox, that big nut on the layshaft was extremely tight, had to wedge the casing under my workbench and use a breaker bar and an extra pipe!


Diff pin is the older crosshatch type, reading some related posts by guessworks suggest that its better to replace that part. 


Some damage on a few of the cogs, but no chips or missing teeth, will continue to strip it down to see if there are any fragments in the oil pickup.


Overall view


51630911895_cdc17421fa_k.jpg


Some slight marking on cogs,


51629162177_2f4dc1ee35_k.jpg


51630709304_92618ac1fb_k.jpg


51630709184_9ae5c2619a_k.jpg


None of the marks align with each other to suggest that something got caught? 


#150 GraemeC

GraemeC

    Crazy About Mini's

  • TMF+ Member
  • PipPipPipPipPipPipPipPipPipPip
  • 7,315 posts
  • Location: Carnforth

Posted 26 October 2021 - 10:11 AM

Those gears look fairly healthy to me, even the dog teeth aren't excessively worn.

If by marks you mean the groove cut into the top of the teeth then this is normal and done when the gear is manufactured - it is a way the different gear clusters are identified.


1 user(s) are reading this topic

0 members, 0 guests, 0 anonymous users


    Bing (1)