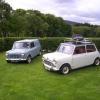
What a beaut! Trouble is you won't want to take it out of the garage!
1969 Mk2 850 Super Deluxe Gentle Enhancement Project
#16

Posted 21 June 2021 - 06:38 AM
#17

Posted 21 June 2021 - 07:02 PM
Beatiful car indeed. Love the small details on it.
#18

Posted 26 July 2021 - 09:58 AM
#19

Posted 26 July 2021 - 01:11 PM
#20

Posted 26 July 2021 - 05:17 PM
Brilliant work and you should be proud as punch to take the credit for this great example..
Keep it going and keep us informed..
#21

Posted 24 August 2021 - 03:31 PM
Not a huge update compared to some of the excellent projects on here, but an update none the less!
The recent works on the cooling system have proved really successful, the temperature gauge now sits in the middle (i know they're not wholly accurate) and there are no spikes in temperature at higher speeds.
The full service and new ignition components have made a difference to how it drives as well, feels a little more willing to pull, even with its meagre power output.
I had ordered previously the chassis number plate, commission number plate and the engine number tag from Mini sport, along with the correct for period Bluecol radiator sticker and Lucas coil sticker. Tiny points but they help in my eyes.
Before - see old plates on slam panel..
After
Engine number and scrivets...
Decals -
There has been one item of essential maintenance, on the return journey from the last Sunday car meet, i noticed the off side indicators stopped working, this was eventually traced to a failed indicator switch, so a new Lucas item has been bought and it waiting fitment. The reason it's not been fitted straight away is that while i was in the steering column area i'd look into the tiny bit of excess play in the column, and when i took the bushes out the top plastic one crumbled away and the lower felt one resembled a dried up old leaf.
New bushes are here now, but i've also fell down the rabbit hole of refurbing the steering wheel. It had been painted before, with a fire hose i think, and there was evidence of 2 small cracks so this is where i'm up to now..
The cracks have been enlarged slightly and filled with epoxy resin, the wheels now in primer and waiting the top coat of gloss black.
Hopefully all back together this week as we're at another meet on Sunday morning.
Matt
#22

Posted 24 August 2021 - 07:19 PM
Excellent work - what a lovely little car.
#23

Posted 13 September 2021 - 10:22 AM
Car is now back together, ended up replacing the top and bottom steering column bushes so that's firmed the feel at the wheel no end.
Done a few local shows recently, always fascinating to eavesdrop on what people are saying about the car, so many people who don't know that the MK2 was even a model, with comments ranging from "he's fitted the wrong rear lights" or "it's obviously a Mk1 with Mk3 bits on".
I just stand and smile ![]()
1 user(s) are reading this topic
0 members, 1 guests, 0 anonymous users


.JPG?width=960&height=720&fit=bounds)
.JPG?width=960&height=720&fit=bounds)
.JPG?width=960&height=720&fit=bounds)
.JPG?width=960&height=720&fit=bounds)
.JPG?width=960&height=720&fit=bounds)
.JPG?width=960&height=720&fit=bounds)
.JPG?width=960&height=720&fit=bounds)
.JPG?width=960&height=720&fit=bounds)
.JPG?width=960&height=720&fit=bounds)
.JPG?width=960&height=720&fit=bounds)
.JPG?width=960&height=720&fit=bounds)
.JPG?width=960&height=720&fit=bounds)
.JPG?width=960&height=720&fit=bounds)
.JPG?width=960&height=720&fit=bounds)
.JPG?width=960&height=720&fit=bounds)
.JPG?width=960&height=720&fit=bounds)
.JPG?width=960&height=720&fit=bounds)
.JPG?width=960&height=720&fit=bounds)
.PNG?width=960&height=720&fit=bounds)
.PNG?width=960&height=720&fit=bounds)
.PNG?width=1920&height=1080&fit=bounds)

.jpg?width=960&height=720&fit=bounds)
.JPG?width=960&height=720&fit=bounds)
.JPG?width=960&height=720&fit=bounds)
.JPG?width=960&height=720&fit=bounds)
.JPG?width=960&height=720&fit=bounds)
.JPG?width=960&height=720&fit=bounds)


