Jump to content


Photo
- - - - -

Italian Job Mini Project


  • Please log in to reply
42 replies to this topic

#1 supersimono

supersimono

    Stage One Kit Fitted

  • Noobies
  • PipPipPip
  • 92 posts

Posted 21 May 2022 - 03:33 PM

Hi all,


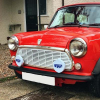
I’m taking on my first ‘mini’ project. I have a ‘92 Italian job which was my first car and I’ve had it for about 12/13 years. I had sills and one of the front wings replaced a few years ago.


this project stared as replacing front and back rubber cones and then has escalated by just a bit (the more I take off the more I think I could do other bits…)


List of jobs I’m hoping to do:

  • replace flywheel housing which has a crack near starter motor fixings
  • clean engine up and new paint job
  • replace front subframe rubber mounts 
  • Remove surface rust on bulkhead and repaint
  • replace stud on pedal box which I sheered off. Also have to do a second ad nut splitter didn’t work to had to cut through it…
  • remove rust on inner wing (around face vent ducting, both sides)
  • reupholster rear rear cushion - somehow when replacing rear cones my petrol tank leaked in the boot and cushion soaked it all up….
  • repaint boot floor because of petrol leak

as this is my first project I’m probably going to be learning a lot through this. It seemed daunting at first but I’m looking forward to it. Feel free to offer any advise 😁


Attached Files


#2 supersimono

supersimono

    Stage One Kit Fitted

  • Noobies
  • PipPipPip
  • 92 posts

Posted 22 May 2022 - 02:45 PM

Afternoon all, did a little more work today.

Wire brushed the bulkhead in preparation for priming and painting. I looked behind the wiper motor and saw the paint was a little flaky so I’ll try do that later this week.

Removed the hoses of the engine as these are going to be replaced. In doing so I saw that the water pump was blocked up so took it off to clean it. Body looked quite pited so not sure if it’s ok to use still? (See pictures).

Looking inside the engine block, the surfaces has a bit of build up. Is this a problem and how would I remove it?

Crankshaft cover looks like it could do with a paint job so I might do that.

I think at this rate I’ll end up with a complete strip down 😅

Attached Files


#3 sonscar

sonscar

    Up Into Fourth

  • Members
  • PipPipPipPipPipPipPipPipPip
  • 3,000 posts
  • Location: crowle
  • Local Club: none

Posted 22 May 2022 - 03:24 PM

Water pump is cheap insurance to replace.I might be tempted to poke some stiff wire inside the pump hole in the block and see if any sludge dislodges.Depending on your abilities and comfort zone I would replace the core plugs giving an opportunity to further clean the water jacket.Beware of dropping crud into the motor if you remove any covers,Have fun,Steve..

#4 supersimono

supersimono

    Stage One Kit Fitted

  • Noobies
  • PipPipPip
  • 92 posts

Posted 25 May 2022 - 01:26 PM

Hi all,

Got a few days of work (which is rare for me) so I thought I’d tackle some bodywork. I haven’t yet decided how far to go with the engine as the more I take off and advice I get it seems like I’ll be stripping it down completely 😅

Anyway, I’ve got some surface rust on the bulk head which I’ve wire brushed and I’m in the process of applying kurust and priming. It seems to be going pretty well but I can’t get the nut off the engine steady bracket for slave cylinder as it feels like I’m going to pull the bracket completely off 😅

Made some progress on trying to get the pedal box out as I’ve sheared/damaged the studs.. Got one of the dash rail shear bolts left to remove but I’ve made a terrible job of it and broke my drill bits in doing so. I see why people say it’s a horrible job…

Another job on the list is the corrosion around the air vent on the flitch panel. It’s looks pretty bad (I’m no expert in body repair) and seems to have extended to the dash. Any advise on this repair? How much bodywork do I need to take off? can I leave the wing on to do the repair or would that make it more difficult?

Some pictures attached

Attached Files


#5 KTS

KTS

    Up Into Fourth

  • TMF+ Member
  • PipPipPipPipPipPipPipPipPip
  • 2,430 posts
  • Location: Herts

Posted 25 May 2022 - 04:04 PM

personally; unless the engine or gearbox is obviously in need of a rebuild, i wouldn't be splitting it any more than you have to.


it's a good list of achievable jobs that should leave you plenty of time to enjoy the car over the summer months


if you haven't already done it, i would recommend anti-corrosion treatment to your list of jobs;


#6 sonscar

sonscar

    Up Into Fourth

  • Members
  • PipPipPipPipPipPipPipPipPip
  • 3,000 posts
  • Location: crowle
  • Local Club: none

Posted 25 May 2022 - 04:08 PM

With care and tenacity it is possible to repair the vent with the wings on from inside the car,the problem being that it could be more extensive,There is still too much rust on the bulkhead for my taste,wire brushes are OK for some types of rust but I like abrasives better.The more you remove noe the longer is may last.Keep the faith,Steve..

#7 sonscar

sonscar

    Up Into Fourth

  • Members
  • PipPipPipPipPipPipPipPipPip
  • 3,000 posts
  • Location: crowle
  • Local Club: none

Posted 25 May 2022 - 04:08 PM

Oops,double post

Edited by sonscar, 25 May 2022 - 04:09 PM.


#8 supersimono

supersimono

    Stage One Kit Fitted

  • Noobies
  • PipPipPip
  • 92 posts

Posted 25 May 2022 - 04:44 PM

With care and tenacity it is possible to repair the vent with the wings on from inside the car,the problem being that it could be more extensive,There is still too much rust on the bulkhead for my taste,wire brushes are OK for some types of rust but I like abrasives better.The more you remove noe the longer is may last.Keep the faith,Steve..


Yeah that’s my concern too. The wing looks ok and so does the inner wing but the scuttle infill looks like it could do with being replaced. I haven’t taken the undersell off yet or poked around too much either so there could be more…

Cheers for the tips on the bulkhead. By no means am I finished yet, just doing a bit at a time. I need to move wiring and stuff out the way to do a proper job

#9 supersimono

supersimono

    Stage One Kit Fitted

  • Noobies
  • PipPipPip
  • 92 posts

Posted 06 June 2022 - 12:41 PM

Little but of progress over the weekend:

  • removed the front subframe - overall looks ok, will probably strip it down, clean it up and repaint/powder coat. I can now replace the subframe rubber mounts with poly
  • I'll probably give the wheel hubs a looking over, replace swivel joints etc, It doesn't look like any of those parts have ever been touched since it was made
  • area behind the bulkhead looks good, bit of flaky paint/surface rust which will be easy to clean up especially now subframe is out
  • will probably remove the steering rack to clean up and check behind there (might as well)
  • My boss let me borrow the sand blaster at work so I've cleaned up a few parts ready to paint (didn't take pictures)
  • I also asked him to have a look at the engine to give some guidance as he had a mini when he was younger. But every time I talk to him he somehow convinces me to do some kind of upgrade which, to be fair I probably would too as it's out and might as well (we're currently thinking stage 3, twin SU carb, larger disc brakes, convert read drum to disc - but I need to do some research to figure it out  :techsupport:

photos attached

Attached Files


#10 supersimono

supersimono

    Stage One Kit Fitted

  • Noobies
  • PipPipPip
  • 92 posts

Posted 08 June 2022 - 02:45 PM

Took the cylinder head off at work today.


Looks like some build up but not too bad? The cylinders looked pretty good but the cylinder closest to water pump (number 4) l had an area which felt a bit rough so I'll need to investigate further whether to bore it out. I haven't measured it yet to see but as far as I'm aware it hasn't been.


As  we delve deeper into the engine strip, we are slowly beginning to think that this engine may have come from a scrapyard - no engine number plate and it may explain why the flywheel housing is cracked. The structural engineer at work gave his opinion on it and he thinks the way the crack has propagated would suggest it wasn't a a fatigue crack but something has had an impact.


On the cylinder head number 2 has quite a bit of carbon build up. Looking at the piston we think the gap seems a bit larger than the others? Hard to tell without measuring.


SO pan moving forward it to remove gearbox and get the cylinder cleaned up (Screwfix have a calcium, lime and rust removal product which I intend to use) and also get the bores CMM'd


pics attached

Attached Files


#11 supersimono

supersimono

    Stage One Kit Fitted

  • Noobies
  • PipPipPip
  • 92 posts

Posted 14 June 2022 - 01:14 PM

Had a spare half hour at work today so attempted to get the timing cover and crankshaft pulley off. Had to soak the bolt in WD40 for a few days as it looked pretty rusted on...


The cover looks pretty good on the inside, the outside however could do with a thorough brush down and new paint job (assuming it is still usable...)


I've obviously been starting a list of what I need to replace as I'm stripping the engine and I came across the MED timing cover - is this worth replacing the standard with this? it doesn't seem to accommodate a tensioner so does that mean I couldn't use it? 


Some pics attached

Attached Files


#12 supersimono

supersimono

    Stage One Kit Fitted

  • Noobies
  • PipPipPip
  • 92 posts

Posted 23 June 2022 - 02:47 PM

After a week of slows taking bits off the engine block in my lunch break, I've finally managed to separate the engine block from gearbox!!! Although we did have to grind off one of the bolt heads as it had rounded...


This being the first time I've ever attempted an engine refurb, I've learnt a tonne and I'm quite proud of myself  :proud:


The gearbox looks pretty good - no broken teeth or and other visible issues


The engine block doesn't look to bad and hopefully after a dip in some CLR it will clean up nicely. I haven't yet measured the bore/piston diameters yet to see if they are correct but I can definitely feel and edge from where the piston reaches the end of it's stroke. After many discussion with my boss and going to Brooklands last weekend (saw a mini do the hill and the courses) I think I want to go down the route of stage tuning probably stage 3).


So my current thinking is:

  • clean up engine block, measure and probably go up in size on the bore - is it better to have pistons to fit or oversize rings?
  • replace head with the the minisport stage 3 kit  - I already have a HIF44 carb so do I really need to go twin
  • replacement gaskets, seals, fixings etc (any advice of what to swap while I'm here appreciated)
  • reassemble and a new paint job - will replace with the original color, red.
  • will upgrade brake to suit but will go bigger discs, new calipers (I like the shinny red ones from minisport) and convert rear drum to disc

I need to carry on with the bulkhead work, not had much time to do it. But the I'll clean it all up, remove all rust (might remove steering rack to do the bit I can currently get to), new coat of paint and underseal up to the X-member. I might postpone repair work needed on air intake on the inner wing so I can build my confidence up to tackle body work (or figure out how to repair it)


Pics attached

Attached Files


#13 supersimono

supersimono

    Stage One Kit Fitted

  • Noobies
  • PipPipPip
  • 92 posts

Posted 27 June 2022 - 01:35 PM

afternoon all. Had some more spare time at work today so I did a little bit more on the engine disassembly (I promise I actually do work.... :shy: )


Following on from the last post, today we removed the crankshaft, pistons, camshaft and camshaft followers so the engine block is now ready to get cleaned up, measured and possibly bored out.


We did notice this on the shell bearing (closest to the oil pump) there was a lot of surface roughness in random direction rather than a circular. The camshaft however looked ok (see pictures). I assume the shells will have to be replaced but any reason why I would be seeing this? 

Attached Files


#14 supersimono

supersimono

    Stage One Kit Fitted

  • Noobies
  • PipPipPip
  • 92 posts

Posted 10 August 2022 - 02:36 PM

hi everyone, sorry for the lack of posting.


After stripping I took the engine to get measured and found that the bores were +10 thou so I went ahead with getting them bored out and the engine rebuilt. He did find after boring that there was still some corrosion so in the end I've gone +40.


Other bits include:

  • head ported to stage 3 with double springs
  • high lift cam shaft (ken 286)
  • crankshaft lightened and balanced
  • new bearings
  • new followers
  • new pistons
  • head skimmed
  • new clutch
  • new flywheel housing to replace the cracked one (annoyingly i got the MPi so need to add a blanking plate where there is an opening I don't need)

Overall I'm really happy with it. I need to finish of adding all the parts back onto it but it's one step closer to running again!  :D


One thing I have been considering is whether to go twin 1.25 carb or stick with a single 1.75 - would I see much benefit to justify spending the money on a new set of carbs? I don't fancy buying new so I've been trying to find a set on eBay...


Bulkhead had been cleaned up and primed, waiting for topcoat. I've stripped the subframe and I've booked it in for powder coating


Attached Files


#15 MrBounce

MrBounce

    Up Into Fourth

  • TMF+ Member
  • PipPipPipPipPipPipPipPipPip
  • 2,648 posts
  • Location: The Manroom in Ipswich

Posted 19 August 2022 - 10:30 AM

Unless you're particularly bothered about what it looks like under the bonnet, I would be sticking with a single 1.75" (or HIF44). You'll get similar performance and any of the perceived on paper gains would not really be noticeable to the average driver on the road. 


Twins do look good though.  ;D


1 user(s) are reading this topic

0 members, 1 guests, 0 anonymous users