Jump to content


Photo
- - - - -

A Clubman is Reborn!


  • Please log in to reply
116 replies to this topic

#46 Maxmini

Maxmini

    Speeding Along Now

  • Members
  • PipPipPipPipPip
  • 308 posts

Posted 17 December 2006 - 09:10 PM

Here are a few photos of the fitting of a custom made headlining, which covers A, B and C pillars. I first started off with glueing the two sound deadening pads to the roof and then I inserted the rods into the headlining, trimming the ends of the loops to the same width as the old headlining. The headlining was roughly positioned with the rods in place then it was fixed at the front and then pulled tight at the back, checking the seams on the rods were straight. Then the sides were stretched and when I was happy with the lining I glued the edges with Bodyline High Temp Trim Tack. I held the lining in position with old window aperture seals cut in six inch lengths to hold the headlining whilst the glue dried. The secret is not to rush and to take your time.


Posted Image
Posted Image
Posted Image
Posted Image
Posted Image

#47 miniboo

miniboo

    Lord of Original Thinking

  • Members
  • PipPipPipPipPipPipPipPipPipPip
  • 9,327 posts

Posted 17 December 2006 - 09:17 PM

jeesh that looks awesome

#48 Bungle

Bungle

    Original Spamster

  • Members
  • PipPipPipPipPipPipPipPipPipPipPip
  • 28,971 posts
  • Location: Cornwall
  • Local Club: cornish mini club

Posted 17 December 2006 - 09:22 PM
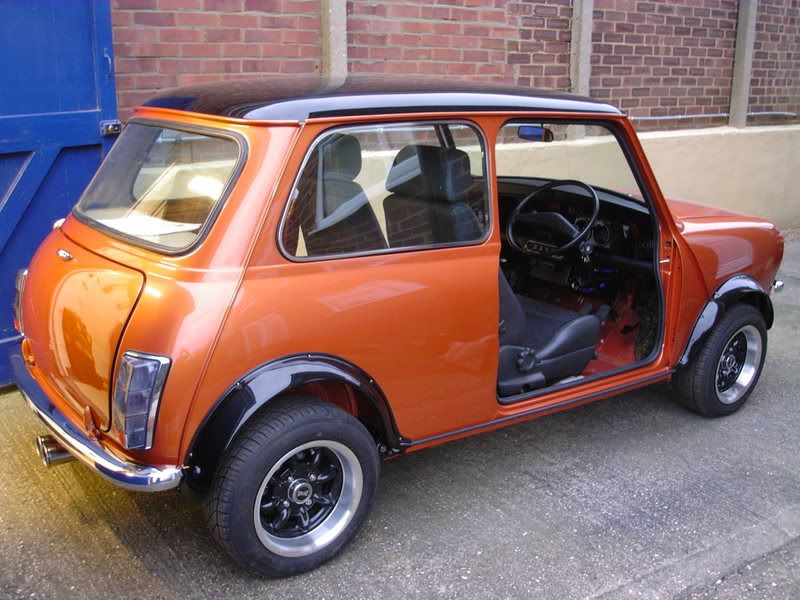
:D looking good

#49 jamieread

jamieread

    Mini Mad

  • Members
  • PipPipPipPip
  • 201 posts
  • Local Club: S.M.A.C

Posted 17 December 2006 - 09:42 PM

good job....that headlining looks brilliant :D

#50 steveobennet

steveobennet

    One Carb Or Two?

  • Members
  • PipPipPipPipPipPipPip
  • 944 posts
  • Local Club: stu's turbo club

Posted 17 December 2006 - 10:09 PM

lovin it! keep up the hard work!

#51 mini93

mini93

    He's just too casual!

  • Members
  • PipPipPipPipPipPipPipPipPipPip
  • 8,615 posts
  • Location: Warwick
  • Local Club: Medievil minis of Warwickshire

Posted 18 December 2006 - 12:01 AM

ah thats looking nice....its always nice when things are visualy coming together...strange about the lining down the pillers though i like it

#52 rsroadkilla

rsroadkilla

    Speeding Along Now

  • Members
  • PipPipPipPipPip
  • 365 posts
  • Local Club: Japshowcarz

Posted 18 December 2006 - 06:30 PM

the pics dont really dso it justice. Looks real smart in the flesh, and i really like the lining down the pillars!

#53 Maxmini

Maxmini

    Speeding Along Now

  • Members
  • PipPipPipPipPip
  • 308 posts

Posted 18 December 2006 - 10:41 PM

Now for the heart of the car... I bought a used MED 1380 engine which had covered less than 6,000 miles with all receipts. The engine spec is: Stage 2 Head, Kent 276 Cam, Omega 1380 Pistons, Reconditioned Gearbox complete with 4 Pin Diff. I wanted to check the engine out the best I could before fitting, so I removed the head and checked the bores - they were fine, the head had a bypass fitted, I needed to replace one of the valves as there was damage on the top of the stem. I also fitted a Swiftune Vernia Duplex Timing Chain and Sprockets, also a flat breather case. All nuts and bolts on the outside were replaced. I needed to find out the diff it was running and on removal found that the 3/4 diff bearings were worn i.e. the plastic cage on the 3/4 width bearing was cracked. New full width diff bearings were fitted also the speedo pinion and drive were changed to correct speedo reading for 12" wheels. With the help of RSRoadkilla we put the engine back in the car in approx one hour - we were taking our time not to damage the paint.

Posted Image
Posted Image
Posted Image
Posted Image
Posted Image
Posted Image

#54 Maxmini

Maxmini

    Speeding Along Now

  • Members
  • PipPipPipPipPip
  • 308 posts

Posted 04 January 2007 - 12:07 AM

Just to give you an update on how it's getting on at the moment, as you can see the engine is in, my 2 core rad with electric fan is fitted, my twin 1"1/4 carbs have been vapour blasted and fully rebuilt and fitted, also a SU fuel pump has been fitted to the rear subframe. Servo and all brake lines fitted with some tasty Goodridge hoses. Gear change and Maniflow exhaust system fitted with reverse cone centre section. Group 5 arches have been fitted on one side tonight. The boot is ready to be fitted. I need to bleed the clutch and brake system, then I will be getting close to starting up, just need to finish the wiring. As you can see the old steel wheels look lost in the arches at the moment and also the car is set high to aid work to be done underneath.

Posted Image
Posted Image
Posted Image
Posted Image
Posted Image

#55 rsroadkilla

rsroadkilla

    Speeding Along Now

  • Members
  • PipPipPipPipPip
  • 365 posts
  • Local Club: Japshowcarz

Posted 04 January 2007 - 06:30 PM

as always... looks sweet as a nut!!!

#56 Maxmini

Maxmini

    Speeding Along Now

  • Members
  • PipPipPipPipPip
  • 308 posts

Posted 17 January 2007 - 11:40 PM

Just got the car started properly tonight with some help from my friends, just needs timing to be adjusted and the carbs tweaked - sounded great with the new exhaust can't wait to get it on the road. Had to have a new coil and module after some false starts but got there in the end.

#57 Boab

Boab

    Camshaft & Stage Two Head

  • Members
  • PipPipPipPipPipPipPipPip
  • 1,610 posts
  • Local Club: E*S*M*O*C

Posted 18 January 2007 - 12:17 AM

F*** me, thats good. Well done fella, now we want pics with the wheels on and done in a scenic location for effect. Stunning

Edited by bigbadboab, 18 January 2007 - 12:17 AM.


#58 The mini

The mini

    Passed Test

  • Noobies
  • PipPip
  • 26 posts

Posted 21 January 2007 - 07:49 PM

One of the best projcts I have seen, Cracking effort mate. What sort of price did the paint job cost and how much have u spent in total on her, if u dont mind me askin

#59 Maxmini

Maxmini

    Speeding Along Now

  • Members
  • PipPipPipPipPip
  • 308 posts

Posted 21 January 2007 - 08:24 PM

The paint job was done for £1800 but I done 80% of the prepping i.e. blocking the hi-build primer etc. I got a special price as the people doing it were starting their own business so I got a special deal. I think the car is going to be in the region of £8,500-£9,000 as this is from the ground up rebuild. Just done the timing today with the strobe gun and sorting out a few fuel leaks and adjusted the clutch.

Edited by Maxmini, 22 January 2007 - 11:55 PM.


#60 Maxmini

Maxmini

    Speeding Along Now

  • Members
  • PipPipPipPipPip
  • 308 posts

Posted 28 January 2007 - 07:36 PM

Just to give you an update on progress so far, as you can see the group 5 arches and the smoothed out boot lid are fitted, I also fitted Rsroadkilla's alloys to see if I preferred the black centres and I do. The Recaros have been positioned ready for some tailor made brackets to be made and welded to subframes. Had to adjust clutch again as there was alot of drag. I did set up as the Haynes manual but this did not work for my competition clutch. The doors have been left off at the moment while the seats are being fitted. The grille has been painted and as you can see ready for fitment. Enjoying driving the car back and forth in the garage lol. The last picture shows the car ready for its bedtime.

Posted Image
Posted Image
Posted Image
Posted Image
Posted Image


1 user(s) are reading this topic

0 members, 1 guests, 0 anonymous users