Jump to content


Photo
- - - - -

1973 Australian Leyland Mini Clubman


  • Please log in to reply
16 replies to this topic

#1 Mk2Brett

Mk2Brett

    Passed Test

  • Noobies
  • PipPip
  • 31 posts
  • Location: Australia

Posted 19 May 2025 - 10:57 AM

Hi All,


Thought I would start one of these threads to track the progress on my recently acquired 1973 Leyland Clubman.


It has an over-bored 1275, twin HS4 carbs and a mild cam (of unknown origin)


It was in decent condition body wise after picking it up, with some minor spot rust here and there

IMG-4968.jpg

IMG-5055.jpg


I had to drive it about 3 hours home, so had it stored at a family members house for a few weeks. I booked it in for a service to make sure it was ok to make the journey home.


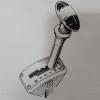
Ended up on a tow truck 50m down the road on the way to take it to the service... Fuel pump had died.


IMG-4993.jpg


It's now made it home and the upgrades/restoration begins!
 

IMG-5057.jpg


Edited by Mk2Brett, 19 May 2025 - 11:02 AM.


#2 Mk2Brett

Mk2Brett

    Passed Test

  • Noobies
  • PipPip
  • 31 posts
  • Location: Australia

Posted 19 May 2025 - 11:00 AM

Results from the service and inspection came back that the front end was pretty shot

IMG-5124.jpg


So I've started rebuilding the entire front end

New:


  • Gas-a-just shocks

  • Heavy duty lower control arms

  • new hi-lo and red dot cones

  • front disc conversion


So while waiting for the parts I've been cleaning up all the rust and re coating under the guards


IMG-5150.jpg


#3 Mk2Brett

Mk2Brett

    Passed Test

  • Noobies
  • PipPip
  • 31 posts
  • Location: Australia

Posted 19 May 2025 - 11:04 AM

And then, as you do while waiting for the front-end parts to finish that, I've decided to refresh the engine bay.


I have new radiator, alternator, dizzy, water pump, starter motor etc to fit so I've ripped it all out and taken the chance to redo the head gasket at the same time.


IMG-5211.jpg

IMG-5221.jpg

IMG-5244.jpg


This pretty much brings me up to date with the current work.

I'll keep cleaning out the engine bay, probably give it a pressure steam cleaning to get rid of all the oil and grime.
I'm not game enough to remove the engine, so im going to do my best to scrape off all the flaking paint and then brush it in place with some new engine enamel. 


#4 68+86auto

68+86auto

    One Carb Or Two?

  • TMF+ Member
  • PipPipPipPipPipPipPip
  • 961 posts
  • Location: Brisbane, Australia
  • Local Club: Queensland Mini Car Club

Posted 21 May 2025 - 11:21 AM

Something you may not be aware of yet is that new doesn't mean better especially when talking about distributors. Many of them will cause engine damage.


I'll also say that redoing a head gasket for no reason is more likely to introduce issues than leaving a working one alone.


Edited by 68+86auto, 21 May 2025 - 11:23 AM.


#5 Mk2Brett

Mk2Brett

    Passed Test

  • Noobies
  • PipPip
  • 31 posts
  • Location: Australia

Posted 22 May 2025 - 12:29 AM

Redoing the head gasket as it looked like there was some blow through between cylinders 2 and 3.


Regarding the distributor, you might be able to see in the photo, but its not in great condition. I've got a replacement with an electronic ignition kit to put in.


Thanks for the post!


#6 68+86auto

68+86auto

    One Carb Or Two?

  • TMF+ Member
  • PipPipPipPipPipPipPip
  • 961 posts
  • Location: Brisbane, Australia
  • Local Club: Queensland Mini Car Club

Posted 22 May 2025 - 12:59 AM

Redoing the head gasket as it looked like there was some blow through between cylinders 2 and 3.


Regarding the distributor, you might be able to see in the photo, but its not in great condition. I've got a replacement with an electronic ignition kit to put in.


Thanks for the post!


From what I can see, the original distributor looks ok. Most of the new ones have bad advance curves (engine damage) and also wear out very quickly (1000km). If you know the "brand" or part number I can probably tell which one will be the issue.


#7 Mk2Brett

Mk2Brett

    Passed Test

  • Noobies
  • PipPip
  • 31 posts
  • Location: Australia

Posted 22 May 2025 - 01:14 AM

I've got a 123 Ignition electric distributor to replace it with and getting local shop to do all the tuning. The issue with the current lucas is the ground wire is broken where it enters the distributor body, its been siliconed back in place. Im sure it can be repaired but I'd rather just replace it.


#8 68Deluxe

68Deluxe

    On The Road

  • Noobies
  • PipPip
  • 36 posts
  • Location: Avoca Victoria

Posted 22 May 2025 - 01:35 AM

I've got a 123 Ignition electric distributor to replace it with and getting local shop to do all the tuning. The issue with the current lucas is the ground wire is broken where it enters the distributor body, its been siliconed back in place. Im sure it can be repaired but I'd rather just replace it.

Nice little clubby!
 

It might take while, but you will come to discover that serviceable 50-60yo parts tend to be way more trustworthy than the newest shiniest chinesiest thing. 
Repair the old one and keep it in the boot, as its likely you'll need it.


#9 Steam

Steam

    One Carb Or Two?

  • Members
  • PipPipPipPipPipPipPip
  • 799 posts
  • Location: Vic
  • Local Club: Victorian Mini Club

Posted 22 May 2025 - 06:02 AM

N8ce project car. Old parts does not mean bad and new is most definately NOT better.

#10 68+86auto

68+86auto

    One Carb Or Two?

  • TMF+ Member
  • PipPipPipPipPipPipPip
  • 961 posts
  • Location: Brisbane, Australia
  • Local Club: Queensland Mini Car Club

Posted 22 May 2025 - 06:02 AM

I've got a 123 Ignition electric distributor to replace it with and getting local shop to do all the tuning. The issue with the current lucas is the ground wire is broken where it enters the distributor body, its been siliconed back in place. Im sure it can be repaired but I'd rather just replace it.


The 123 will be fine. The wire which enters the distributor body is part of the condenser so is a consumable part and cheap to replace. A Silicone tube probably cost more than a condenser.


#11 Mk2Brett

Mk2Brett

    Passed Test

  • Noobies
  • PipPip
  • 31 posts
  • Location: Australia

Posted 23 May 2025 - 07:40 AM

This week was rebuilding the front right 


IMG-5265.jpg


I refurbished the upper control arm, and then installed new lower control arm and tie bar. Added new steering rack end as well. You can see from the photos above this is looking much better now.


I regret painting it all in silver enamel now though, it was impossible to keep clean while installing ancd ended up with some scuffs. If I ever do this again will just go black!


Aiming to get the left side done this weekend so I can start rolling the car out of the garage.


Edited by Mk2Brett, 23 May 2025 - 07:41 AM.


#12 stuart bowes

stuart bowes

    Up Into Fourth

  • TMF+ Member
  • PipPipPipPipPipPipPipPipPip
  • 2,196 posts
  • Location: Dagenham

Posted 23 May 2025 - 08:53 AM

I went black with all my bits, that's an enamel as well, I'm sure there will be a few chips and dings during fitting but you can get a fine brush and touch up later :)  


looking good though


#13 Mk2Brett

Mk2Brett

    Passed Test

  • Noobies
  • PipPip
  • 31 posts
  • Location: Australia

Posted 24 May 2025 - 12:02 PM

Both sides done now


IMG-5271.jpg

IMG-5270.jpg


I've done a basic wheel alignment to the toe-in / toe-out to get the wheels so they atleast look straight, should be good enough to drive the 800m up the road when I get my wheel alignment done.

I have adjustable control arms/tie rods so they will need to sort out the camber adjustment for me.


Now its back on its wheels, I can continue with the engine rebuild and getting the interior stripped for the new carpet.


Edited by Mk2Brett, 24 May 2025 - 12:06 PM.


#14 Mk2Brett

Mk2Brett

    Passed Test

  • Noobies
  • PipPip
  • 31 posts
  • Location: Australia

Posted 25 May 2025 - 12:07 PM

Not much done today other than prepping the cylinder head for a rebuild.
I had some gold engine enamel so went with that, need to clean up where the gaskets go but other than that turned out pretty decent.


IMG-5275.jpg
IMG-5279.jpg


#15 Mk2Brett

Mk2Brett

    Passed Test

  • Noobies
  • PipPip
  • 31 posts
  • Location: Australia

Posted 30 May 2025 - 12:40 PM

Reassembly has somewhat started in the engine bay. I removed most of the surface rust in the engine bay and the chipped paint, and just went with a 2K gloss black and clear coat.

IMG-5304.jpg
 
I have also just fitted the retrosport timing cover
IMG-5308.jpg


1 user(s) are reading this topic

0 members, 1 guests, 0 anonymous users