Jump to content


Photo
- - - - -

1973 Australian Leyland Mini Clubman


  • Please log in to reply
50 replies to this topic

#31 Mk2Brett

Mk2Brett

    Stage One Kit Fitted

  • TMF+ Member
  • PipPipPip
  • 73 posts
  • Location: Australia

Posted 04 July 2025 - 01:07 PM

Waiting for the carpet underlay to arrive, so started work on the rear suspension/radius arms.


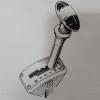
Somewhere down the line the car had an underbody protection paint applied, problem was it was applied directly on the radius arms as well so they are caked in a thick rubber layer.


I've removed them for now, as I have replacements to go in. I will get around one day to refurbing these ones to keep as a spare.

IMG-5565.jpg
Removing all the rust and underbody coating from the suspension areas
IMG-5566.jpg
Treating with rust converter + epoxy primer + CRC Black zinc. I'll then apply a gloss black and clear coat.
IMG-5567.jpg


Now waiting to do a few more coats before re-assembling the rear.


I also have new handbrake cables, so need to figure out how to run those next.


#32 Mk2Brett

Mk2Brett

    Stage One Kit Fitted

  • TMF+ Member
  • PipPipPip
  • 73 posts
  • Location: Australia

Posted 05 July 2025 - 07:30 AM

Lots of waiting for paint to dry today, so we tackled a few small jobs.


Addressed some rust under the bonnet, then hit it with 2K primer, 2K gloss black, then 2K clear.

IMG-5568.jpg

IMG-5573.jpg
Once this is dry we will add some under bonnet sound insulation.
 
Then applied the stripes, Not perfect for a first try.

IMG-5577.jpg


Next up was adding the chrome GB badge, previously we just had a vinyl sticker

IMG-5570.jpg
 
Then using vinyl dye, we dyed the rear seats red to match the front seats. This turned out really nice.
IMG-5571.jpg
IMG-5572.jpg
 
There was a small rust buble in the rear quarter, so I sanded that back, preped and primed it and then hit it with some paint matched spray I had made. Looks ok in the light, will hit this with with a 2K clear and see about blending it.
IMG-5578.jpg


#33 Mk2Brett

Mk2Brett

    Stage One Kit Fitted

  • TMF+ Member
  • PipPipPip
  • 73 posts
  • Location: Australia

Posted 09 July 2025 - 01:18 AM

Got a new pair of "Group 2" arches, they are a bit wider than usual group 2 arches however.
 
Primed them with epoxy primer
IMG-5587.jpg
First coat of the paint matched spray can
IMG-5588.jpg
2K Clear coat
IMG-5589.jpg
 
Turned out pretty well for a backyard spray can job I think.
IMG-5590.jpg
IMG-5591.jpg
 
Next up was re-wiring the new custom dash. The car was originally wired with quite a few gauges, so I've kept the 6 gauges
IMG-5592.jpg
IMG-5593.jpg
IMG-5594.jpg


#34 Mk2Brett

Mk2Brett

    Stage One Kit Fitted

  • TMF+ Member
  • PipPipPip
  • 73 posts
  • Location: Australia

Posted 11 July 2025 - 09:37 AM

Today we fit the guards to the car, they needed a bit of forming and after applying the rubber seal between the guard/car they fit pretty decent.

Pretty wide stance for 10" wheels, but we'll see how it goes 

IMG-5599.jpg


Next on to finishing up the rear suspension. Its all been rust treated and re-painted

New radius arms with new drum back plates fitted

IMG-5608.jpg

new hubs on

IMG-5611.jpg
then all re-assembled
IMG-5612.jpg
 
I also took the time while it was all apart to run new hand brake cables, so those are now brand new. This uncovered the issue of very rusty brake lines running front to back, and the rear brake pressure regulator looked to be leaking, so I have ripped all of that out.
Now need to wait for new brake lines for the rear to arrive.


#35 Mk2Brett

Mk2Brett

    Stage One Kit Fitted

  • TMF+ Member
  • PipPipPip
  • 73 posts
  • Location: Australia

Posted 12 July 2025 - 11:24 AM

Worked on a few other bits and pieces today


Installed the new handbrake

IMG-5620.jpg
 

Then started a basic restoration on the RHS door by sanding it back to remove most of the rust, then primed and painted it

IMG-5619.jpg
IMG-5621.jpg
IMG-5622.jpg
IMG-5623.jpg


#36 Mk2Brett

Mk2Brett

    Stage One Kit Fitted

  • TMF+ Member
  • PipPipPip
  • 73 posts
  • Location: Australia

Posted 13 July 2025 - 01:20 PM

Since I removed the hydraulic brake light switch, mainly because it failed, and its a pain to replace them, I created a custom bracket to mount an electric brake switch to the brake pedal.


Pretty simple upgrade and now have working brake lights again.

IMG-5626.jpg


#37 Mk2Brett

Mk2Brett

    Stage One Kit Fitted

  • TMF+ Member
  • PipPipPip
  • 73 posts
  • Location: Australia

Posted 16 July 2025 - 10:49 AM

We did a bit more work on the interior today.
 

I was lucky enough to pick up a good condition lower dash piece, so we gave it a touch up and it looks good.

IMG-5628.jpg
IMG-5629.jpg
 
Then some cleaning up on the door cards
IMG-5630.jpg
 
rear seatbelts installed
IMG-5632.jpg
rear seats back in.
IMG-5633.jpg


#38 Mk2Brett

Mk2Brett

    Stage One Kit Fitted

  • TMF+ Member
  • PipPipPip
  • 73 posts
  • Location: Australia

Posted 17 July 2025 - 12:39 PM

More interior work today, we added the rear carpet underlay and then the front seatbelts.

IMG-5636.jpg
We have a non-moulded carpet set so it does not fit perfect but once we get the front carpet in we will do some fine tuning.
IMG-5637.jpg
IMG-5638.jpg


#39 Mk2Brett

Mk2Brett

    Stage One Kit Fitted

  • TMF+ Member
  • PipPipPip
  • 73 posts
  • Location: Australia

Posted 20 July 2025 - 12:00 PM

Mounted the rear carpets properly today with the seatbelt mounts
IMG-5651.jpg
Then started to fit the dash, interior is finally starting to come together
IMG-5653.jpg
IMG-5654.jpg
 
Now test fitting the front carpets
IMG-5658.jpg


#40 timmy850

timmy850

    Up Into Fourth

  • Members
  • PipPipPipPipPipPipPipPipPip
  • 3,571 posts
  • Location: NSW, Australia
  • Local Club: MITG

Posted 22 July 2025 - 09:41 PM

I remember fitting the same carpet kit to my mini. It’s marginally better than bare metal but not very good. There’s some nice moulded ones available on eBay Australia from TST which I found fit a lot nicer

Eg
https://www.ebay.com...tm/112432822894

Edited by timmy850, 22 July 2025 - 09:50 PM.


#41 Mk2Brett

Mk2Brett

    Stage One Kit Fitted

  • TMF+ Member
  • PipPipPip
  • 73 posts
  • Location: Australia

Posted 23 July 2025 - 03:42 AM

I remember fitting the same carpet kit to my mini. It’s marginally better than bare metal but not very good. There’s some nice moulded ones available on eBay Australia from TST which I found fit a lot nicer

Eg
https://www.ebay.com...tm/112432822894


Thanks! That looks great, from Minisport this was the only option, otherwise it was nearly $1k for a set of moulded carpet. I think we might need to make the switch.


#42 Mk2Brett

Mk2Brett

    Stage One Kit Fitted

  • TMF+ Member
  • PipPipPip
  • 73 posts
  • Location: Australia

Posted 27 July 2025 - 07:24 AM

This weeks updates:


Added the new grille badge

IMG-5662.jpg
 
Started having some issues with the crank case pressure, but turns out since replacing the valve cover with a non-breather version, I kept having oil pump out the timing cover breather.
Even added a catch can but it just filled the catch can up.
 
So I cleaned up the old valve cover 
IMG-5700.jpg
And then wired up the breather hoses back to the carb and it seems to have resolved the excessive crank case pressure.
IMG-5702.jpg
IMG-5707.jpg


Is a shame since I have two nice rocker covers to choose from, so I might get a fitting and get it welded to the valve cover, or get a bolt in breather.
 
 
Next up we got the seats back in and added some small trim pieces as well as new door seals
IMG-5711.jpg
(sorry for the dirty floor mats!)
IMG-5708.jpg
 
Also have a boot lining kit, but we need to spend some time fitting it
IMG-5710.jpg
 
Lastly, I wired back in the driving/fog lamps
IMG-5709.jpg
IMG-5694.jpg
IMG-5695.jpg


Have it booked in for new tyres and a wheel alignment tomorrow, and then getting it tuned on Wednesday.


#43 sonscar

sonscar

    Up Into Fourth

  • Members
  • PipPipPipPipPipPipPipPipPip
  • 3,204 posts
  • Location: crowle
  • Local Club: none

Posted 27 July 2025 - 08:09 AM

Looking very nice.Steve..

#44 68+86auto

68+86auto

    One Carb Or Two?

  • TMF+ Member
  • PipPipPipPipPipPipPip
  • 1,373 posts
  • Location: Brisbane, Australia

Posted 27 July 2025 - 11:07 AM

If you intend to use the lights at all, you'll probably find them vibrating like crazy making them useless.


#45 Mk2Brett

Mk2Brett

    Stage One Kit Fitted

  • TMF+ Member
  • PipPipPip
  • 73 posts
  • Location: Australia

Posted 28 July 2025 - 02:40 AM

If you intend to use the lights at all, you'll probably find them vibrating like crazy making them useless.

Thanks for the tip, they probably wont be used often as I added LED headlights that should be sufficient.

I just like the aesthetic of the 2 up 2 down lights, I had them on my Ford Escort so I used the same mounting bracket from a Ford Escort so looks to be solid enough.


2 user(s) are reading this topic

0 members, 2 guests, 0 anonymous users