Jump to content


Photo
- - - - -

1984 Mayfair rebuild


  • Please log in to reply
135 replies to this topic

#121 gavfoz

gavfoz

    Speeding Along Now

  • Members
  • PipPipPipPipPip
  • 362 posts

Posted 16 December 2007 - 03:32 PM

0 degrees C and rising in the shed. . . just about right then :(
Posted Image
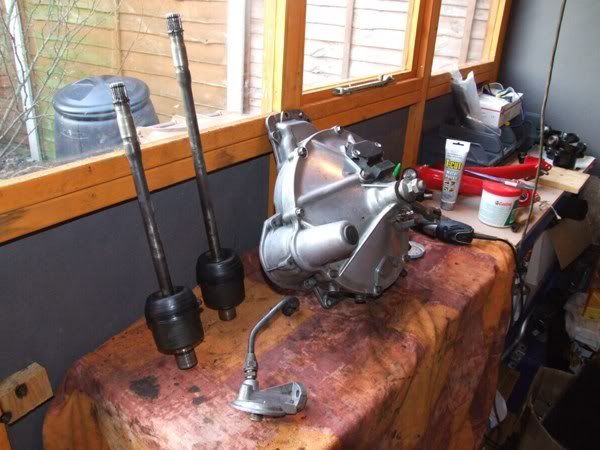
Driveshafts cleaned up, reunited with pot joint outers and fitted with new gators. The other bit of the clutch cover (or is it a flywheel housing?) cleaned up along with the oil filter housing and feed pipe.
Posted Image
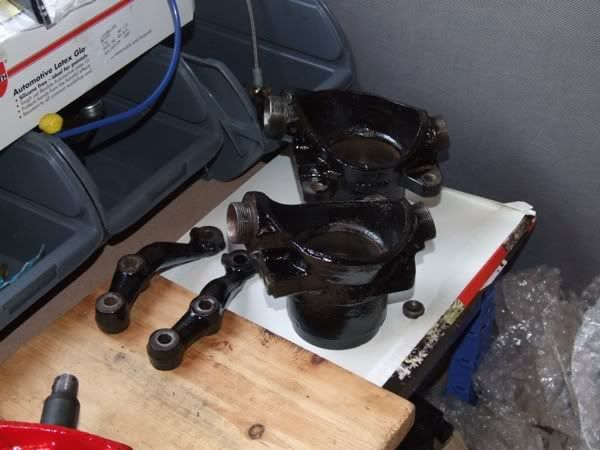
Disc hubs and top arms cleaned up and painted. New bearings due to land soon, ball joints are in a box somewhere along with the new CVs. . .

This will probably be it for 2007 me thinks. . .

#122 gavfoz

gavfoz

    Speeding Along Now

  • Members
  • PipPipPipPipPip
  • 362 posts

Posted 28 December 2007 - 03:05 PM

. . .oh no it isn't!

Christmas. A family time. A time to be with your family. Loads of time off work to work on Mini bits alone, at the bottom of the garden, in your shed. :(

Hubs rebuilt with new Timkin bearings and ball joints. The ball joints were a right fag to do. I used all the old shims and all the new shims that came in the kits. It just worked out alright shim wise.
Posted Image

Aslo:
Dismantled and cleaned the gear selector box as its going inboard so it needs to be shinny, found the rear subframe mounts so I can get them powder coated, bought a 12G940 head and quickly aligned my front hubs with the Fiesta calipers and it looks like my D1s ain't going to fit over them. . . 4.5x10 cooper s steel wheels and no arches may just look as fab though.

#123 miniboo

miniboo

    Lord of Original Thinking

  • Members
  • PipPipPipPipPipPipPipPipPipPip
  • 9,327 posts

Posted 28 December 2007 - 04:12 PM

you'll be very lucky to have no arches i think.

also i hate for getting your ball joints done. i am having real issues with getting mine right

#124 gavfoz

gavfoz

    Speeding Along Now

  • Members
  • PipPipPipPipPip
  • 362 posts

Posted 28 December 2007 - 09:40 PM

Yeah, I read about your problems. 3 of my ball joints are reasonably tight but move nice and smoothly, the fourth one is a little slacker perhaps than the rest. I used all my shims up which was a little unexpected as I only intended to use the new ones that came in the kit. I must of dismantled and faddled with the shims on each joint about half a dozen times.

As for arches I was just going by an old Mini Magazine feature on a Mk1 that was running 4.5 wide Cooper S rims over 7.5 Cooper S discs and spacer drums. It was arch less. I suppose the difference between my Fiesta set-up and the Cooper 'S' will be the difference in horizontal width of the drive flange as the hub and disc will be of the same dimension I would of thought. I have a standard 8.4 flange and a metro flange I can measure tomorrow. I wonder if those rims fit over the Fiesta set-up anyway? (Bum, I just read somewhere they don't. Back to the plan B then. Split rim Mini Specials and wide arches!)

#125 miniboo

miniboo

    Lord of Original Thinking

  • Members
  • PipPipPipPipPipPipPipPipPipPip
  • 9,327 posts

Posted 29 December 2007 - 05:27 AM

as long as you use genuine cooper rims then yeah that is ok. reverse rims will not be able to run archless. and proper cooper rims cost a small fortune!!!

#126 gavfoz

gavfoz

    Speeding Along Now

  • Members
  • PipPipPipPipPip
  • 362 posts

Posted 29 December 2007 - 05:22 PM

Cooper rims are the ones that go back inboard arnt't they? You can get alloy copies for £40 a corner. Anyway, I don't think they fit and until I actually have a car to put them on it's a waste of time day dreaming about them! lol

Right today:

I needed to make/find a little tube so I could mount a small round fog and a reverse lamp into the rear valance and look stock. I looked everywhere for a bit of tube and nothing was the right size and as desperation set in, I went to a DIY store to see if they had anything. Well they did. I must of measured everything circular in the shop whilst picking up some more wire wool and another wire brush. It turns out the small tins of Hammerite are the perfect diameter for what I wanted. So back home, found an old tin of Hammerite and bent a bit of sheet around it to form a cylinder. Drew around the tin on another scrap bit of steel and cut that circle out, then welded cylinder to circle and it looks like this:
Posted Image
Then with light lens in about the right places. THe tube is far to long but I will be able to cut it in half and use it for the other light on the other side hopefully. Beautiful!
Posted Image
Then I got my boot floor repair panel out, another rear valance and an old bumper to try and work out were to attach my cylindrical creation.
So, using the bumper mounting holes to align the panels together it became clear that the panels don't fit!
Look, drivers side is perfect match:
Posted Image
Passenger side is an inch out!
Posted Image
So that readers is reason number 2,900,647 why genuine heritage panels are worth the extra money over cheap copies that claim to be "bodyshop approved". What a load of scrap. . .

And this really is it for 2007. Happy new year people!
#127 gavfoz

gavfoz

    Speeding Along Now

  • Members
  • PipPipPipPipPip
  • 362 posts

Posted 22 March 2008 - 10:52 AM

Do you ever get the impression you bought the project that bares all the bad luck possible? And can you do an update if there is nothing to really update you all on?

Over New Year I got 3 Red Route parking fines, 4 Speeding tickets, 2 Red light camera tickets and 2 drive offs from fuel stations without paying all from London! Now for a Mini that’s sat dismantled outside for over two years with the engine scattered across three different counties I was suitably impressed as you could imagine. I cannot begin to explain how ecstatic I was with over £500 of unpaid fines and over 12 points to go on my already not so clean license landing on the door mat with my name on the envelope. The VW Golf that was bearing my Minis registration has now been removed from the streets of London thankfully. No one was prosecuted but that seems to be the way nowadays. Makes you wonder where they got my reg from? Photos on here? Pot luck? Who knows! I couldn't care.

So what can honestly go wrong now? No, actually, don't answer that . . . :D

#128 miniallsort

miniallsort

    Up Into Fourth

  • Members
  • PipPipPipPipPipPipPipPipPip
  • 4,723 posts

Posted 22 March 2008 - 11:25 AM

looking goood bud

#129 teezageeza

teezageeza

    Just On Tickover

  • Noobies
  • Pip
  • 6 posts

Posted 21 April 2008 - 03:24 PM

Just readt through this whole project... youve done a great job so far keep it up

Just out of interest does the finish look ok on your spray jobs out of cans?

#130 andys101

andys101

    Learner Driver

  • Noobies
  • PipPip
  • 11 posts

Posted 22 April 2008 - 07:15 PM

Realy good thread !!!

#131 gavfoz

gavfoz

    Speeding Along Now

  • Members
  • PipPipPipPipPip
  • 362 posts

Posted 22 April 2008 - 07:17 PM

Just readt through this whole project... youve done a great job so far keep it up

Just out of interest does the finish look ok on your spray jobs out of cans?


The spray can finish was quite good but I am well practiced at it and it was only temporary.

This project is currently on hold due to other stuff getting in the way. If I could just have a free wkend both subframes could be built up and ready to go.

#132 gavfoz

gavfoz

    Speeding Along Now

  • Members
  • PipPipPipPipPip
  • 362 posts

Posted 24 May 2008 - 07:13 PM

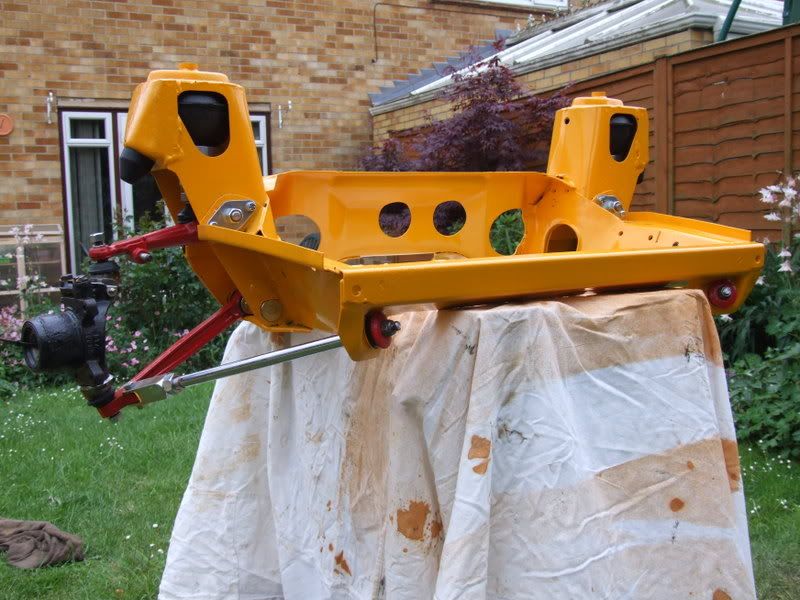
Update, update, update! Been a busy bee today . . . for a change:

Posted Image
Hubs are just for show. They need modifing to fit the Fiesta brake calipers.

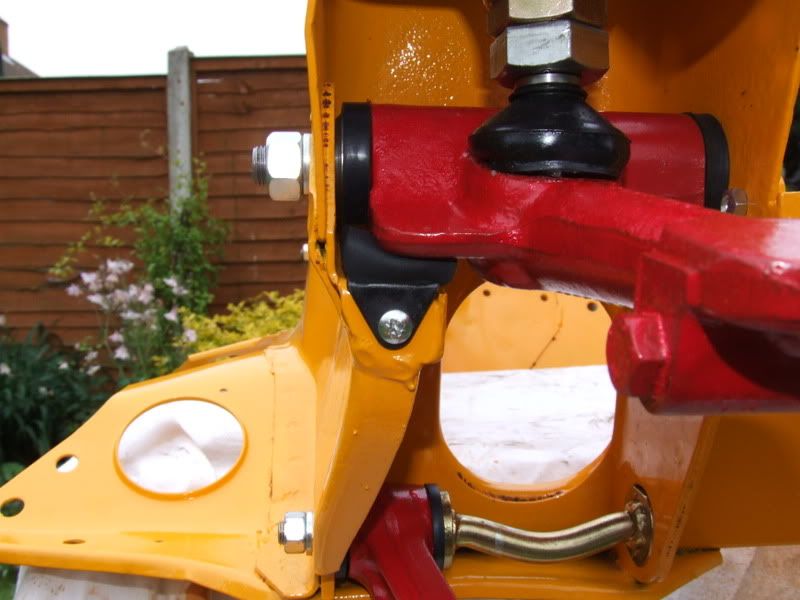
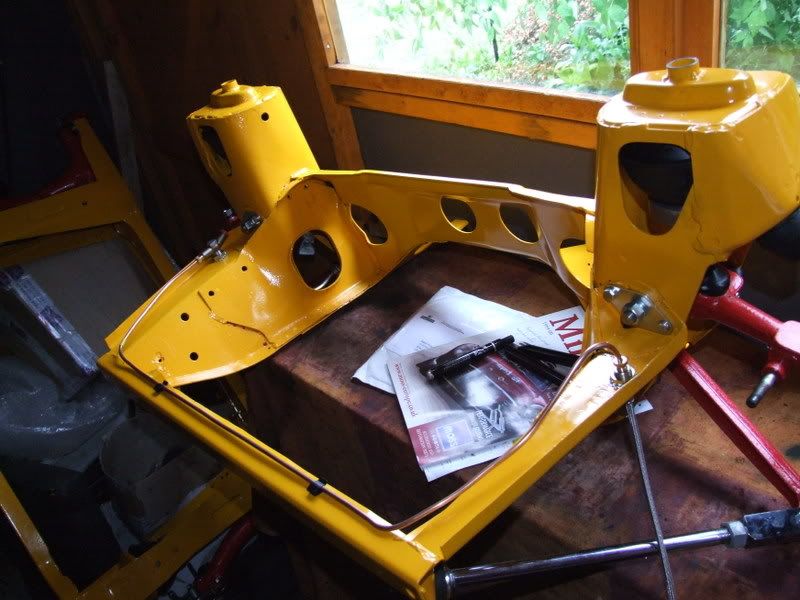
Posted Image
Hi-Los wound right in and no suspension travel available at all. At least I got an engine to weigh it down in the car.

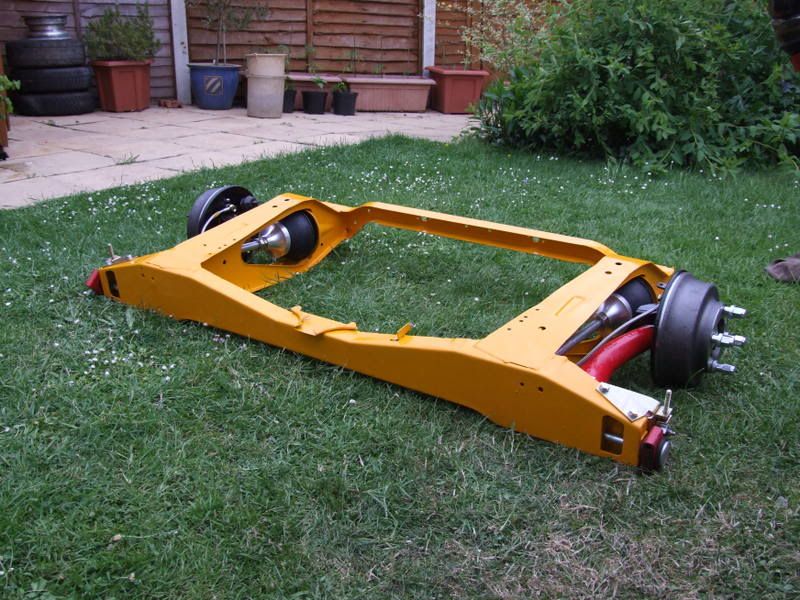
Posted Image
Rear sub in the same colour scheme.

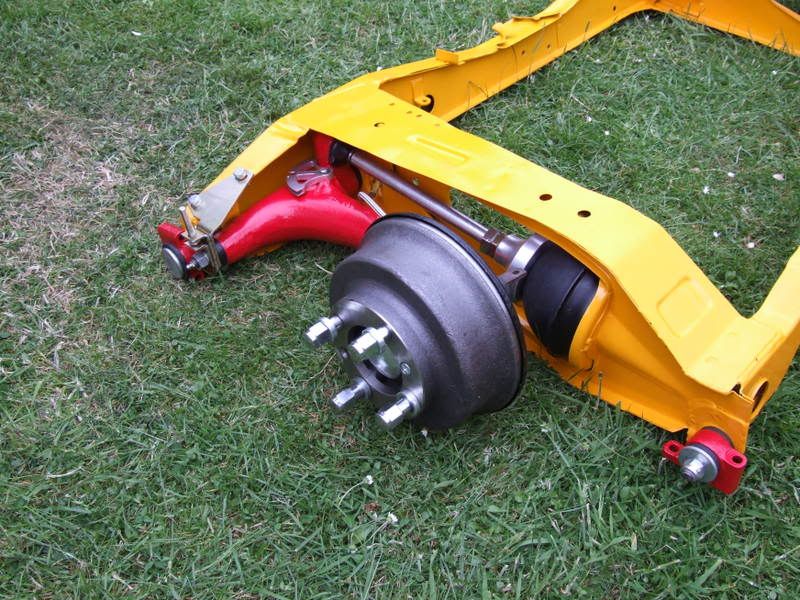
Posted Image
Adjustable camber brackets, Hi-Los, spacer drums and SC handbrake quadrants. There is a anti-roll bar to fit on there as well but when I offered it up it was about 50mm short in width.

The rear drums were a nightmare. New wheel cylinders, drums and shoes and it was a right struggle to get the drum to turn once all fitted.

TOP TIP: Fit the front rubber cones before the top arms on the front subframe. Guess how I found that out. . . twice :D

#133 dezshearer

dezshearer

    Speeding Along Now

  • Members
  • PipPipPipPipPip
  • 441 posts
  • Location: Belfast
  • Local Club: mini-chat.co.uk

Posted 25 May 2008 - 10:17 AM

Looking F**king gorgeous!

#134 T.Harper

T.Harper

    One Carb Or Two?

  • TMF+ Member
  • PipPipPipPipPipPipPip
  • 714 posts
  • Location: New Jersey

Posted 25 May 2008 - 05:23 PM

looks lovely mate

#135 gavfoz

gavfoz

    Speeding Along Now

  • Members
  • PipPipPipPipPip
  • 362 posts

Posted 26 May 2008 - 03:20 PM

Cheers chaps.

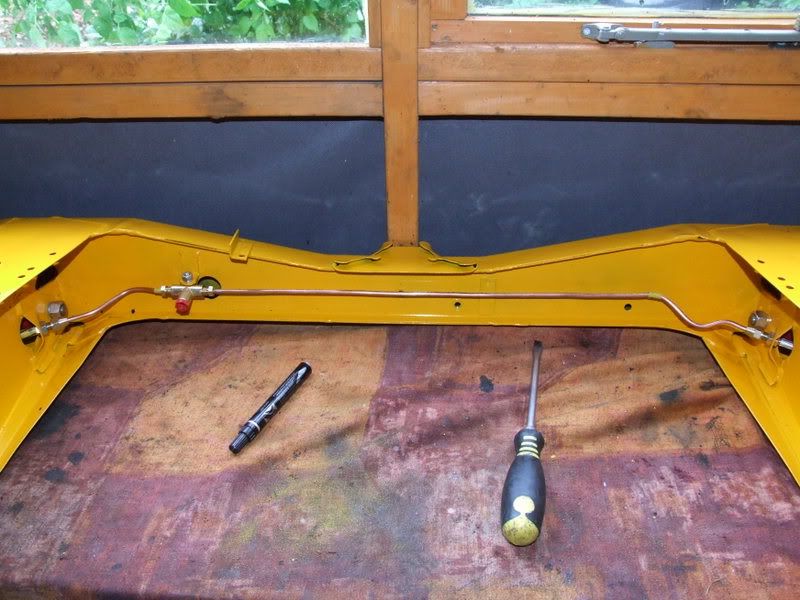
Today I did my least favourite job. . . brake lines. The longer ones always come curled up and it takes loads of faffing to straighten them out and in the past my sad attempts always looked messy. Anyway, four hours later I have nice looking shinny brake lines with ergonimic curves that match my thumbs/wrist/left knee/right elbow. . .

Posted Image
(the exploded diagrams in the back of that MOSS catalogue are so much better than the crappy pictures in the Haynes)
Posted Image

One of the rear drums was still locked solid so I took it apart, refitted some old shoes I had, and put it back together and it now spins freely. Wierd. Both set of shoes looked identical.

Edited by gavfoz, 26 May 2008 - 04:06 PM.


1 user(s) are reading this topic

0 members, 1 guests, 0 anonymous users