
By trim pads I meant the top and bottom dash rail trim.
JR

Custom Dash So Far
Started by
Gingerjoe
, Oct 20 2007 11:41 AM
33 replies to this topic
#17

Gingerjoe
-
- Members
-

- 1,908 posts
Camshaft & Stage Two Head
- Local Club: Tmf
Posted 21 October 2007 - 09:51 AM
By trim pads I meant the top and bottom dash rail trim.
JR
ahh, I havnt removed them atall :]
#18
Gingerjoe
-
- Members
-
- 1,908 posts
Camshaft & Stage Two Head
- Local Club: Tmf
Posted 22 October 2007 - 07:41 PM
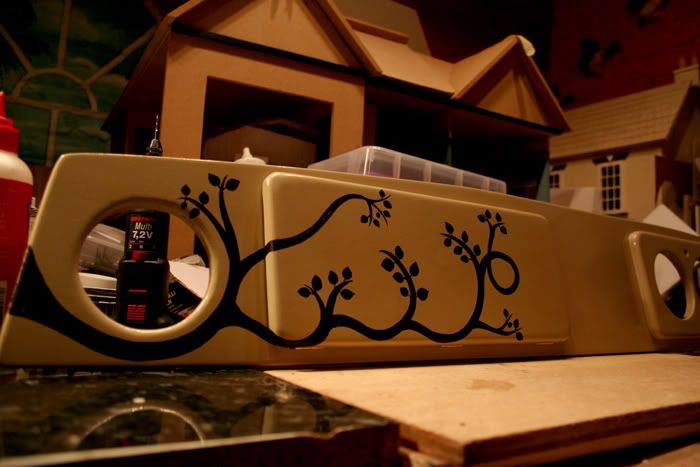
clocks so far! mehh, not to bad.


#19
stanley and naomi
-

- Members
-
- 504 posts
Super Mini Mad
- Local Club: Southwest Cornwall
Posted 22 October 2007 - 07:42 PM
looking good
#20
Gingerjoe
-
- Members
-
- 1,908 posts
Camshaft & Stage Two Head
- Local Club: Tmf
Posted 22 October 2007 - 07:46 PM
looking good
Just wish my hand was abit sharper with t'hee old Jigsaw! hopefully a bit of sanding'll do that.
#21
Steve@RetroDash
-

- Members
-
- 1,163 posts
One Carb Or Two?
Posted 22 October 2007 - 08:06 PM
Right, where to start.......
Firstly you've done a grand job with the fit so far.
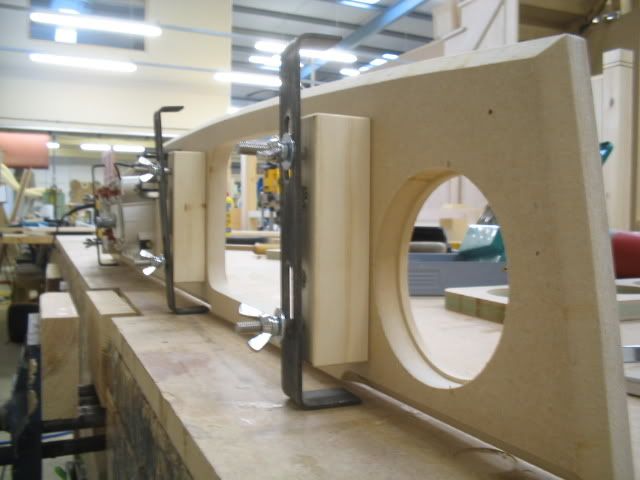
The air vents as previously mentioned will need to bee fixed to the dash using the screw collar around the vent. in order to do this you'll need to rebate around the rear of the hole so that there is a 4mm lip left on the front of the vent hole (see picture)
http://i14.photobuck...ek/IMG_2385.jpg
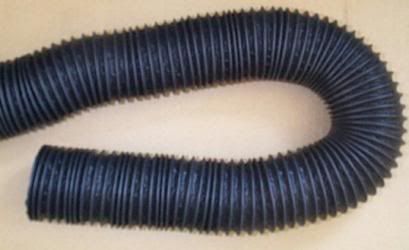
The air vents then need hosing to connect them back up
http://i14.photobuck...k/ducthose1.jpg
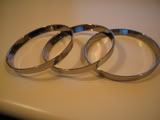
If you make your dial holes 94mm which is what I do as standard on all mini dashboards regardless of the make of dials (nippon/smiths) you can get these
http://i14.photobuck...ek/IMG_2469.jpg
The clips holding the glass to your dials can be removed as screwing the dials to the back of the raised surround will hold the glass in place. If you want to leave the clips in place you will need to chisel the mdf in order to accommodate the clips. (easily done).
The fitting kit is only accessable from the glove box apature and on later models from below the steering wheel.
To finish off the edges of the dashboard I use leather seat piping stapled around the edge.
I'm sure I'll think of some more hints in a mo
Firstly you've done a grand job with the fit so far.
The air vents as previously mentioned will need to bee fixed to the dash using the screw collar around the vent. in order to do this you'll need to rebate around the rear of the hole so that there is a 4mm lip left on the front of the vent hole (see picture)
http://i14.photobuck...ek/IMG_2385.jpg
The air vents then need hosing to connect them back up
http://i14.photobuck...k/ducthose1.jpg
If you make your dial holes 94mm which is what I do as standard on all mini dashboards regardless of the make of dials (nippon/smiths) you can get these
http://i14.photobuck...ek/IMG_2469.jpg
The clips holding the glass to your dials can be removed as screwing the dials to the back of the raised surround will hold the glass in place. If you want to leave the clips in place you will need to chisel the mdf in order to accommodate the clips. (easily done).
The fitting kit is only accessable from the glove box apature and on later models from below the steering wheel.
To finish off the edges of the dashboard I use leather seat piping stapled around the edge.
I'm sure I'll think of some more hints in a mo
#22
Steve@RetroDash
-
- Members
-
- 1,163 posts
One Carb Or Two?
Posted 22 October 2007 - 08:13 PM
An easy way of making the raised surround angled is to glue two wedge shaped pieces of mdf on either end and place a strip along the bottom edge between them.
This isn't the way I do it but is just as good if it's being covered.
I then drill two 6mm holes about 10mm deep at the two ends of the surround. I then use an epoxy glue to attach two M6 threads into the holes. These threads can then poke through some corresponding holes on your main dash body and two wingnuts can be used to secure the surround in place.
Doing things this way enables you to fit he dials after fitting the dash. The hole where the dials are greatly improves access to the fitting kit. The surround can then be fastened into place by reaching throught he air vent hole and stereo hole.
#23
Gingerjoe
-
- Members
-
- 1,908 posts
Camshaft & Stage Two Head
- Local Club: Tmf
Posted 22 October 2007 - 09:22 PM
An easy way of making the raised surround angled is to glue two wedge shaped pieces of mdf on either end and place a strip along the bottom edge between them.
This isn't the way I do it but is just as good if it's being covered.
I then drill two 6mm holes about 10mm deep at the two ends of the surround. I then use an epoxy glue to attach two M6 threads into the holes. These threads can then poke through some corresponding holes on your main dash body and two wingnuts can be used to secure the surround in place.
Doing things this way enables you to fit he dials after fitting the dash. The hole where the dials are greatly improves access to the fitting kit. The surround can then be fastened into place by reaching throught he air vent hole and stereo hole.
your a diamond! cheers buddie! the air vent thing will help alot, can I buy some of that piping of you? :]
And as for the dials! I never though of Just connecting them to the Dash! so what about the Clock mount? is that no longer in play? Will they be secure enuff connected to the wood? * gets excited * now I know ruffly what im doing, Im gonna need to buy a dash fitting kit from you? I'll email you in a bit, thnks ever so much for the help mate! Much appreciated!
#24
Steve@RetroDash
-
- Members
-
- 1,163 posts
One Carb Or Two?
Posted 23 October 2007 - 07:00 PM
Looking at your updated photos I'd suggest cutting 94mm holes for the main dials and space them 4mm apart. I doubt you'll get the visibility needed with them as far apart as you have them. What diametre are they currently?
Yup you can buy hose and fitting kits from myself. I will warn you that the hose is a very tight fit but does go on with patients. (It's a universal 2.5" diametre hose)
I think minispares sell the Genuine hose extentions and are pre cut to length. (just so you know the alternatives available to you)
Glad to be of help mate, keep up the good work
Regards
Steve
#25
imabitnaughtyxx
-

- Banned
-
- 4,619 posts
Up Into Fourth
Posted 24 October 2007 - 05:42 AM
im doing the same as you, i will post some pics at the weekend to show you if ive managed to get it all to fit, been a bit of an abortion until now, i almost gave up and got steve to sort a new one!
#26
*Raz*
-

- Members
-
- 4,039 posts
PC Hands
- Location: England
- Local Club: Brighton
Posted 24 October 2007 - 09:14 AM
good luck!! Looking good so far!! I bought my dash off [email protected] is the end result...
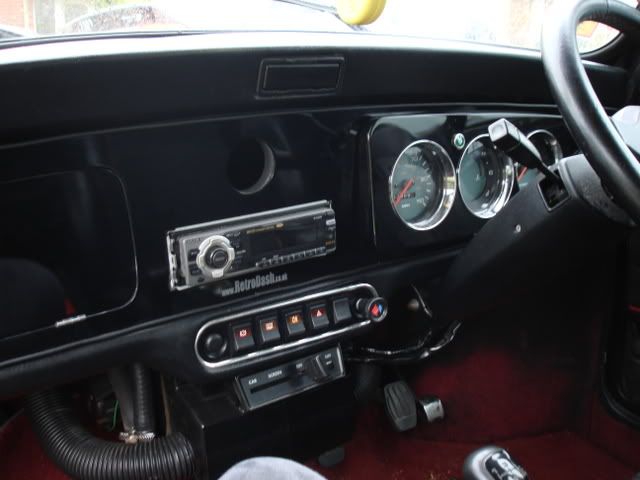
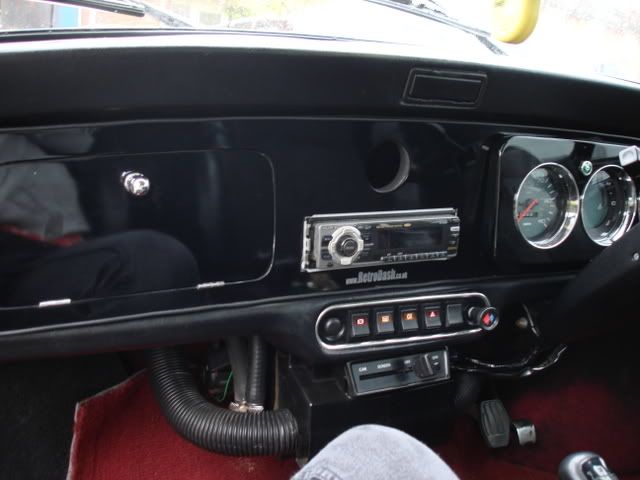
In this pic it still needs clock and the music surround....
Raz xXx
In this pic it still needs clock and the music surround....
Raz xXx
#27
Gingerjoe
-
- Members
-
- 1,908 posts
Camshaft & Stage Two Head
- Local Club: Tmf
Posted 24 October 2007 - 09:38 AM
Looks so smart! cant wait till mine is finished, Ive nearly given up, but I really dont want too!  Just be cool to think I did it myself :] we'll see eh! :] x
Just be cool to think I did it myself :] we'll see eh! :] x
#28
Bristolboy
-

- Members
-
- 291 posts
Mini Mad
Posted 24 October 2007 - 01:21 PM
No, don't give up as it looks really good so far, just make sure you give us a few piccies of the end result 
and Raz, that dash looks schweeeeeet...
BB
and Raz, that dash looks schweeeeeet...
BB
#29
*Raz*
-
- Members
-
- 4,039 posts
PC Hands
- Location: England
- Local Club: Brighton
Posted 24 October 2007 - 01:59 PM
I know
Thanks xXx
xXx
Thanks
xXx
#30
Steve@RetroDash
-
- Members
-
- 1,163 posts
One Carb Or Two?
Posted 24 October 2007 - 05:09 PM
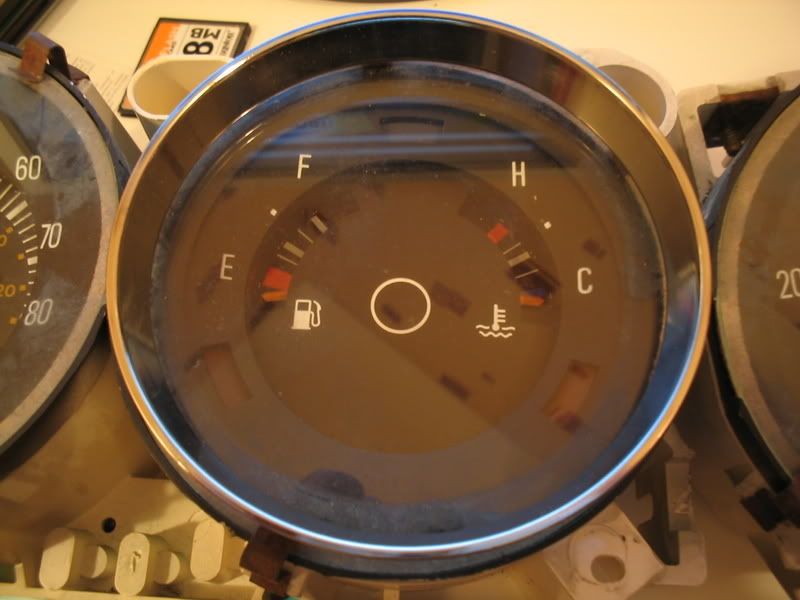
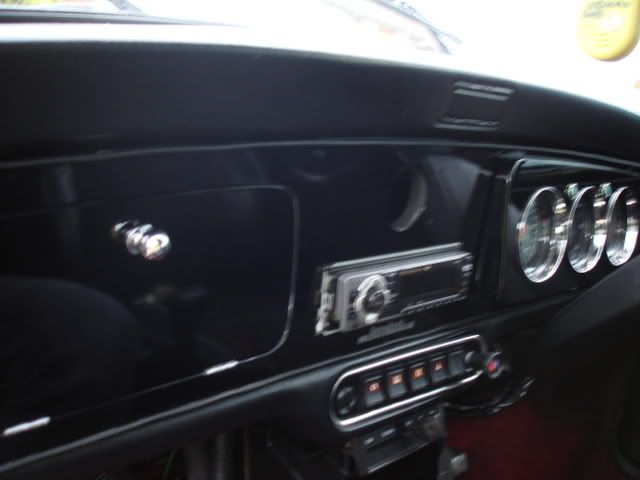
here's an example of your dials. just to show that you can get better visibility with a 94mm hole. They are the same diametre as the later clocks (I promise). By removing the clips and sandwiching the glass between the dial and the MDF you achieve a much better result
You have a pm regarding the hose and fitting kit.


1 user(s) are reading this topic
0 members, 1 guests, 0 anonymous users


