Jump to content


Photo

Front Bike Engine Rwd Beast..............hopefully !


  • Please log in to reply
71 replies to this topic

#31 lchris21

lchris21

    Mini Mad

  • TMF+ Member
  • PipPipPipPip
  • 106 posts

Posted 04 May 2008 - 05:37 PM

I must be on a roll. Managed to make a start on the mini as well.
Its started on its crash diet. Bits on the the Ebay of Dismay if anyone wants em ??
Took a couple of pics of the first steps.
Enjoy !

Attached Files


Edited by lchris21, 10 May 2008 - 03:04 PM.


#32 lchris21

lchris21

    Mini Mad

  • TMF+ Member
  • PipPipPipPip
  • 106 posts

Posted 10 May 2008 - 05:50 PM

Picked up some panels for the project yesterday from Dave Kimberley (TDK).
Top panels, top service and top bloke :thumbsup:
He made up my order at very short notice and delivered on time
Thanks Dave.

Attached Files


Edited by lchris21, 10 May 2008 - 05:52 PM.


#33 lchris21

lchris21

    Mini Mad

  • TMF+ Member
  • PipPipPipPip
  • 106 posts

Posted 05 July 2008 - 09:08 PM

Hi All,
I'm still alive. Sorry I have'nt posted for while, but you know what its like??
I've just had too many distractions lately and commiting time to the project has been hard, and is going to be hard. Everytime the new copy of Miniworld drops through the letterbox or everytime I find myself browsing on here is the motivation kick I need.
Anyway, back to the project. As its been constantly peeing down for the last week or so I decided what better time than to spend a few hours on the Min. So here's some pics of the latest progress..............................a little more deconstruction !!!!!!!
Cheers

Attached Files


#34 Ferrina1275

Ferrina1275

    Stage One Kit Fitted

  • Noobies
  • PipPipPip
  • 86 posts

Posted 14 July 2008 - 07:47 PM

Nice project fella. I'm looking to go down the same route with my Smart car and a ZX12R engine. If you have the early A1 engine it's 178bhp /99lb/ft, next B1 is one bhp more, same torque and the B6f is 190bhp and the same torque!!! Still, around 180bhp is awesome in a 600kg car. My Smart weighs about that as well, but not so streamlined!!!

Best of luck.

Edited by Ferrina1275, 14 July 2008 - 07:50 PM.


#35 lchris21

lchris21

    Mini Mad

  • TMF+ Member
  • PipPipPipPip
  • 106 posts

Posted 26 July 2008 - 07:25 PM

Been out playing a bit in the sun today......................

A little bit of spring cleaning in engine bay. Before...................
Attached File  before.jpg   180.23K   40 downloads

A bit of cosemtic surgery courtesy of me plasma cutter about to be unleashed. Plows through old B/L sheet-metal like, well................a knife through butter !!
Attached File  plasma.jpg   190.29K   46 downloads

A little tidy up later and its starting to clean up quite nice
Attached File  nosejob.jpg   156.25K   53 downloads

Edited by lchris21, 26 July 2008 - 07:33 PM.


#36 lchris21

lchris21

    Mini Mad

  • TMF+ Member
  • PipPipPipPip
  • 106 posts

Posted 17 January 2009 - 06:31 PM

Wow 6months since my last post. This is going to be one of the worlds slowest bike conversion projects I fear............................... Lets hope the finished product is faster than the build.
Still any progress, is progress.
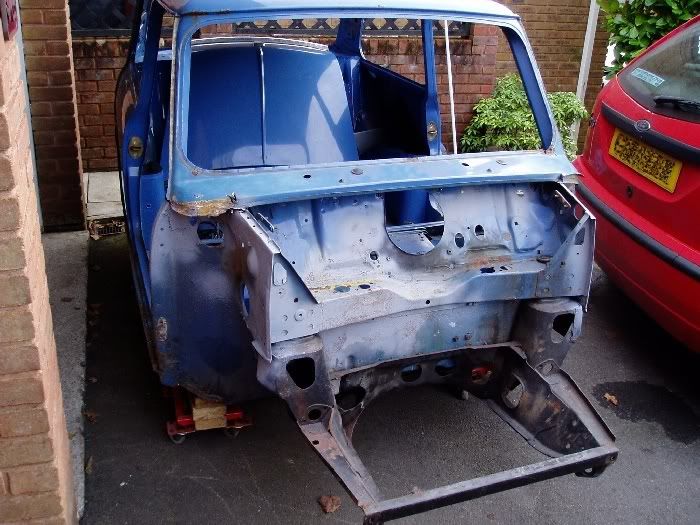
I've been mostly working on the shell trying to get it in as solid condition as possible before I start the engineering bit. As with all mini's theres a bit more rust than I first thought :D
Enjoy the pics:

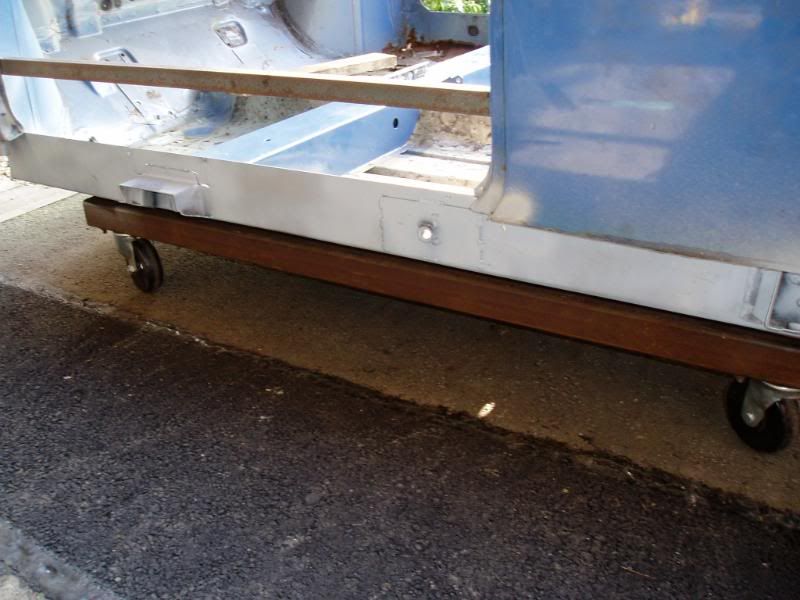
Roll over while I tickle your belly !
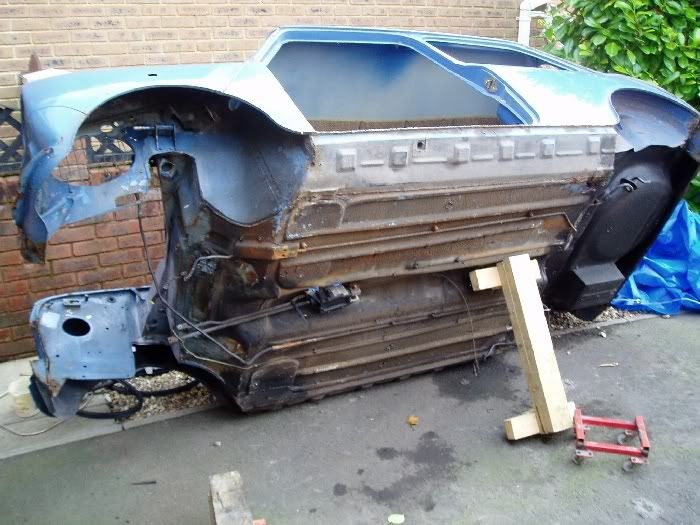
Posted Image

No more front end:
Posted Image

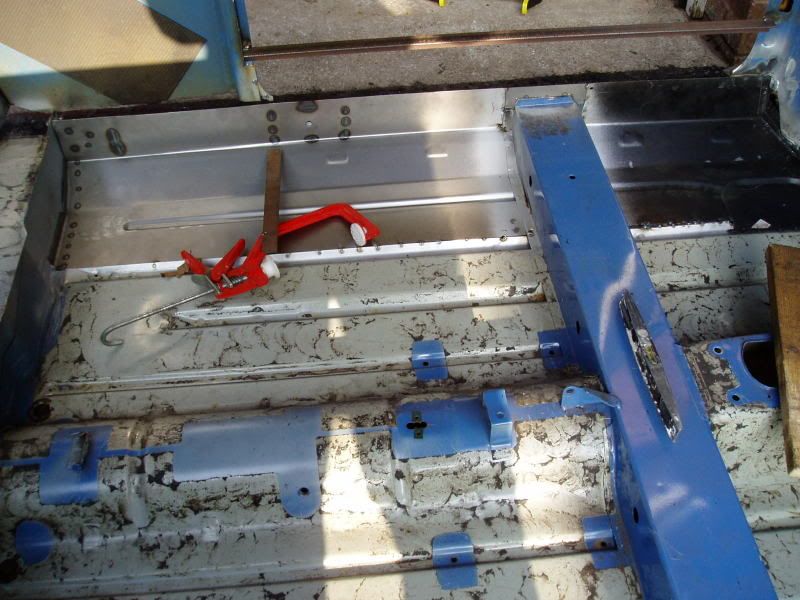
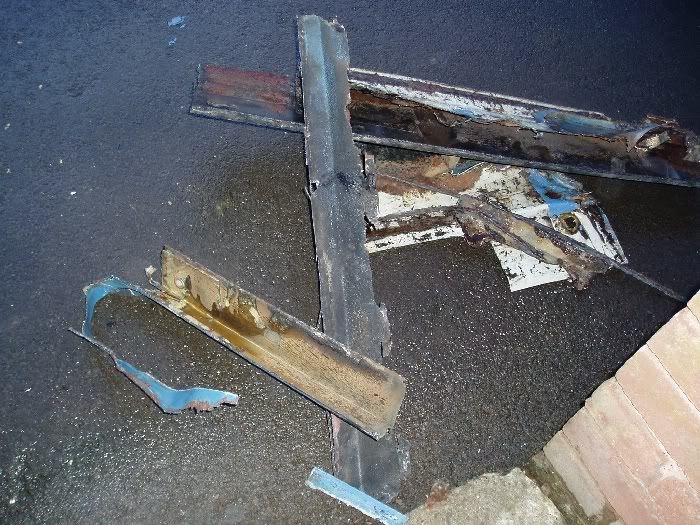
Spawn of the devil...................Sound deadining:
Posted Image

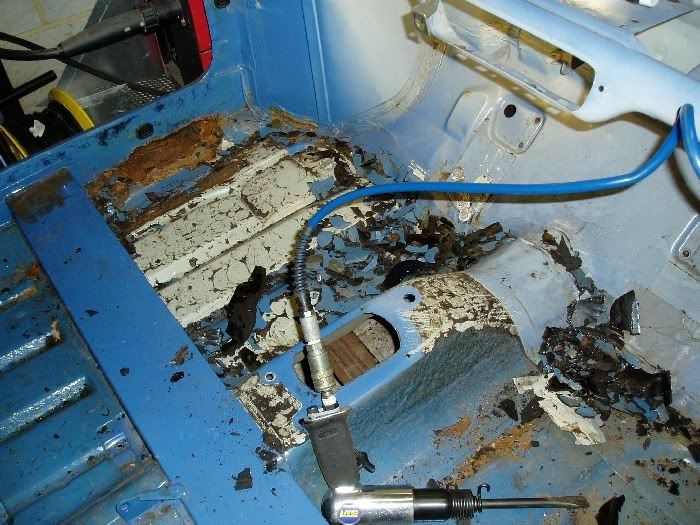
Nearly there, with the help of my Lidl mini jack hammer:
Posted Image

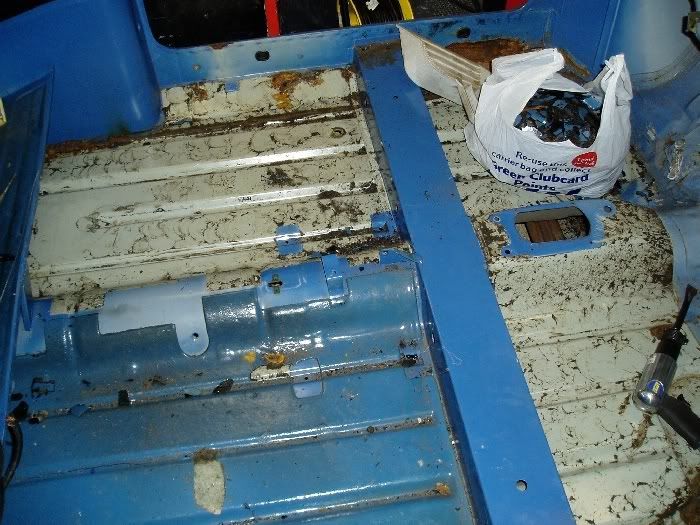
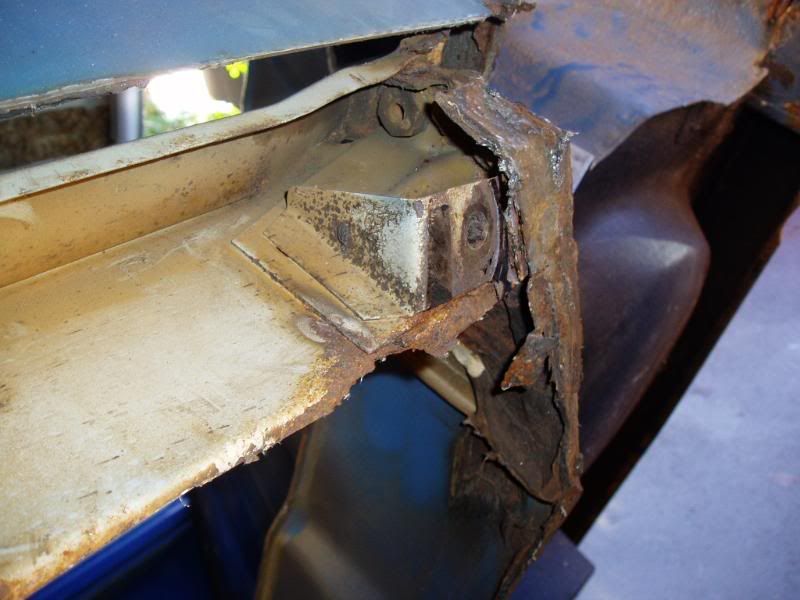
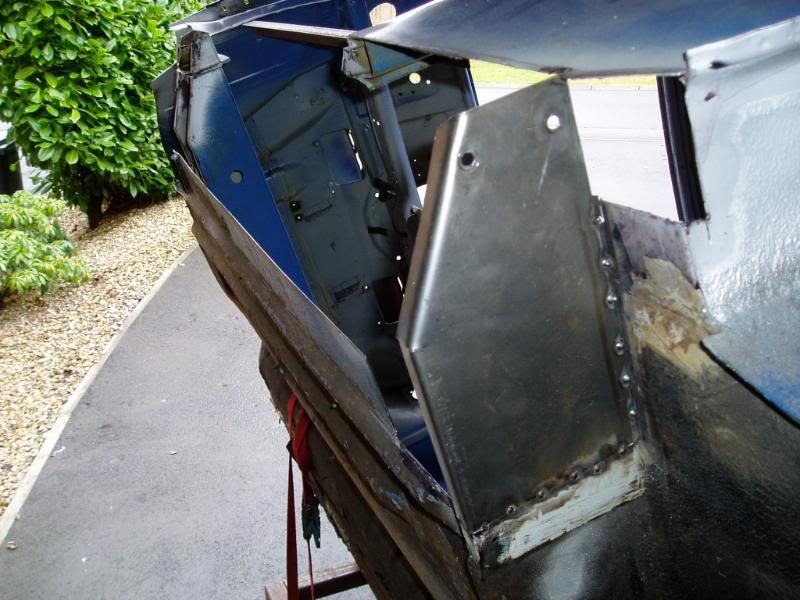
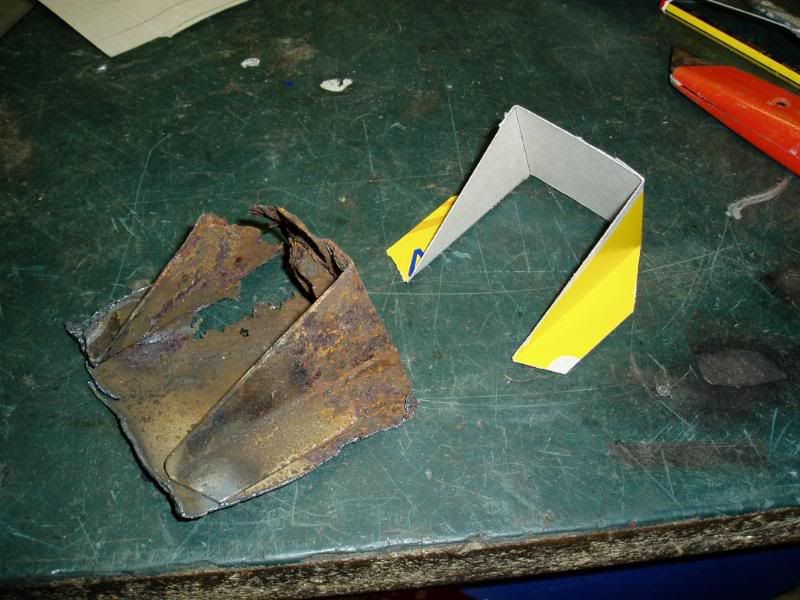
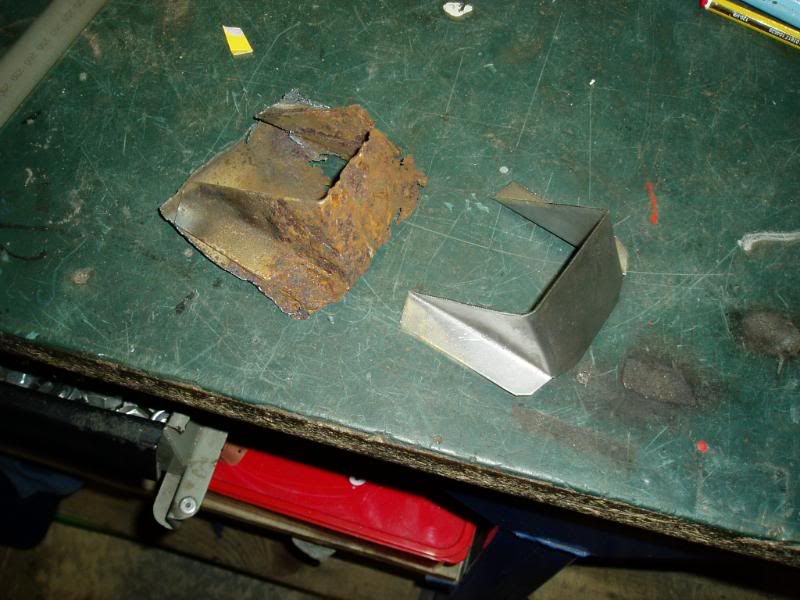
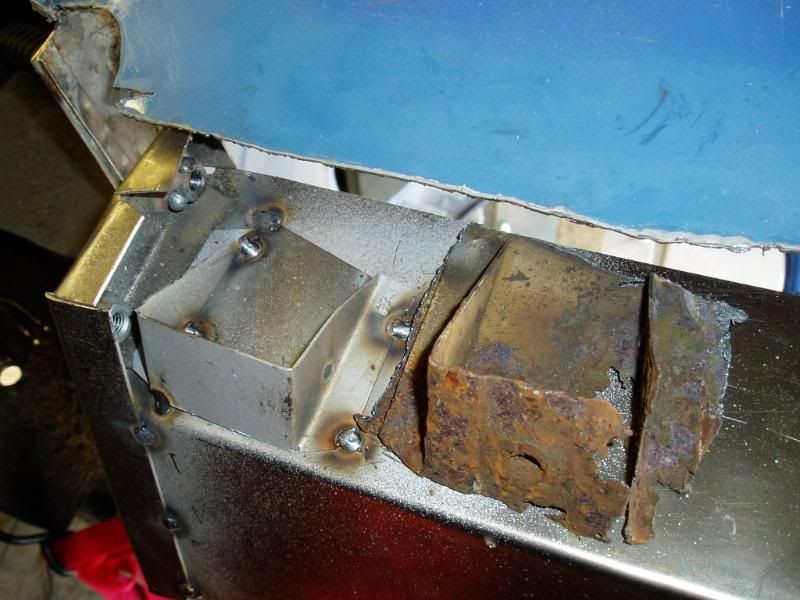
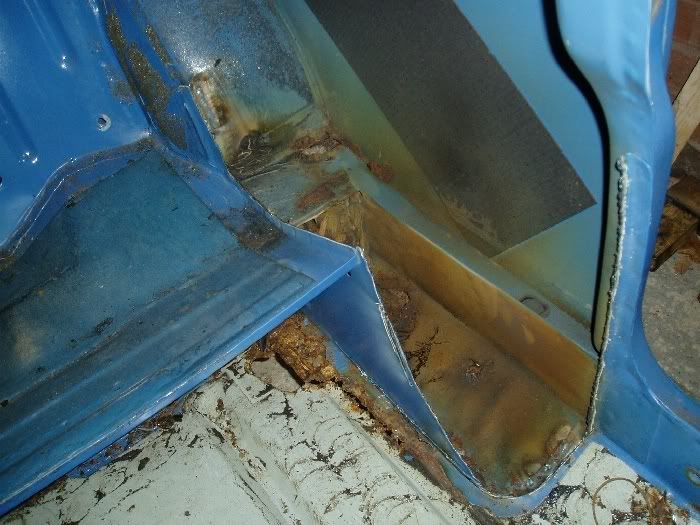
Need to remove rear side pockets to get at the rusty bits:
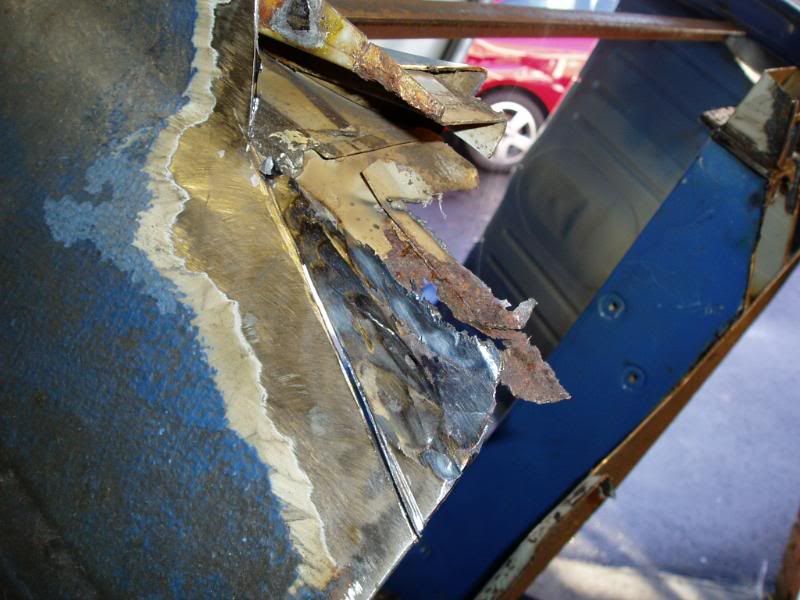
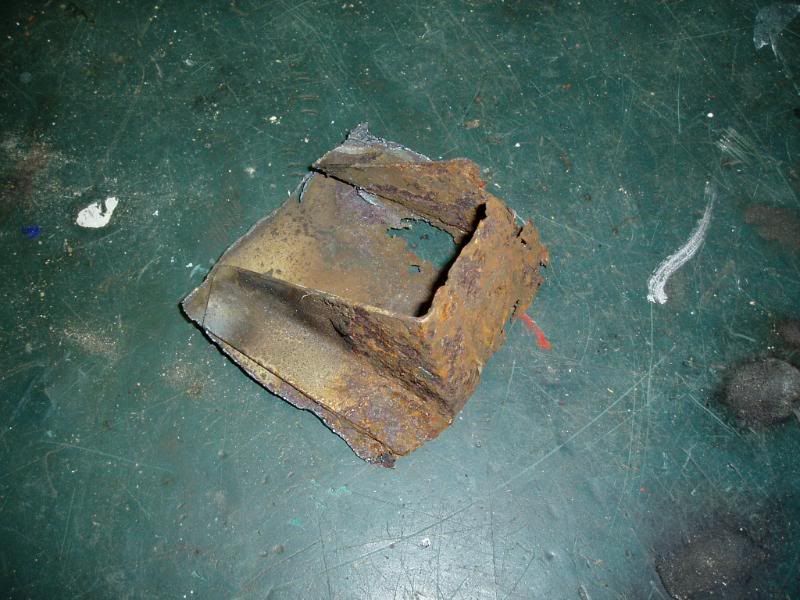
Posted Image

Even more rust:
Posted Image

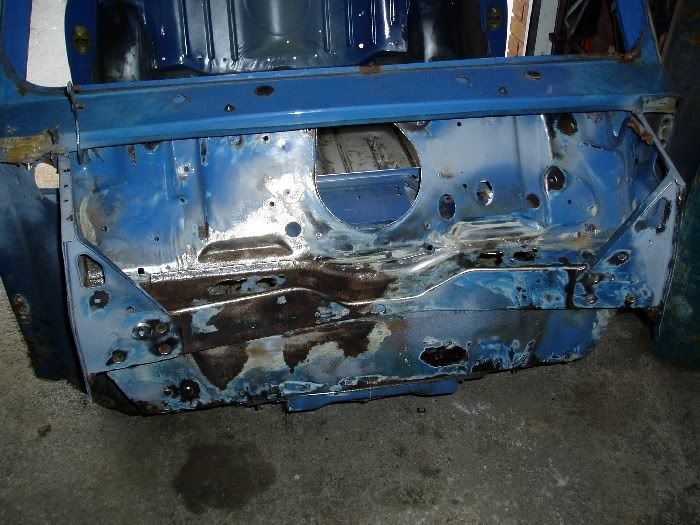
Atleast there'll be no back seat drivers in this Mini:
Posted Image

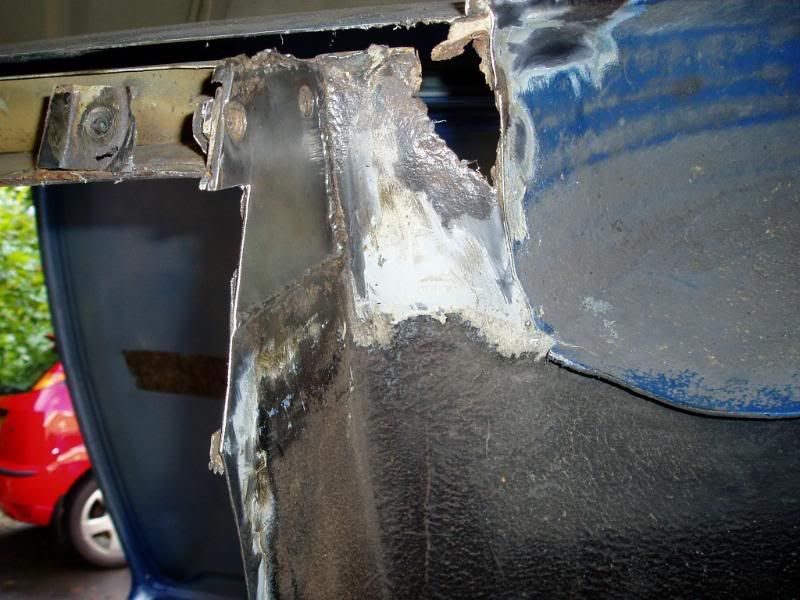
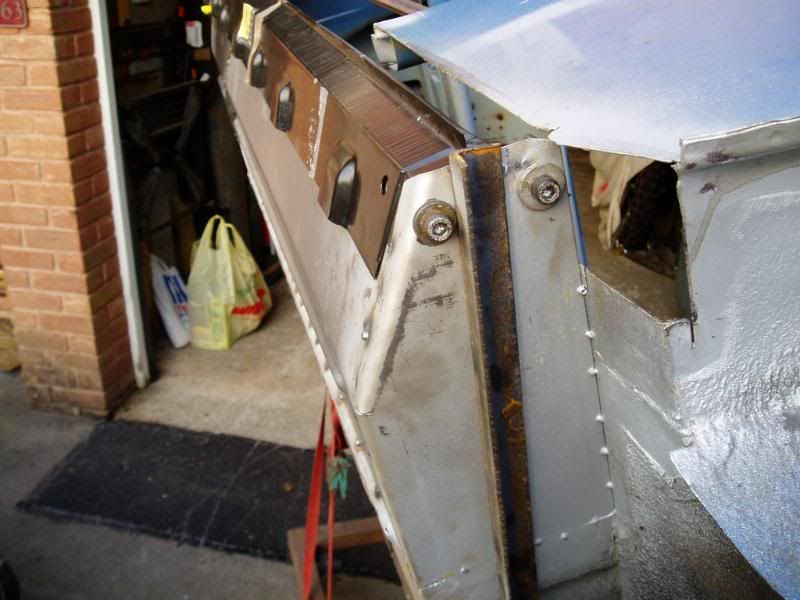
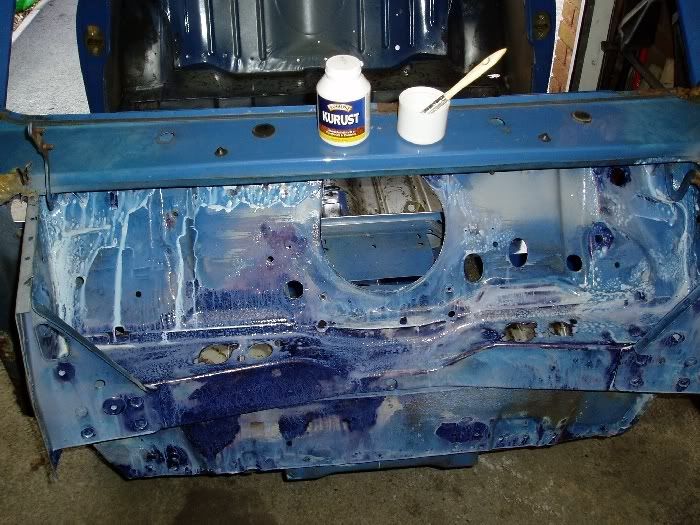
Decided to try & stabilise the surface rust on the bulkhead, using some stuff from Halfords called Krust. Dunno if it works but turns the rust/exposed metal blue/black:
Posted Image
Posted Image

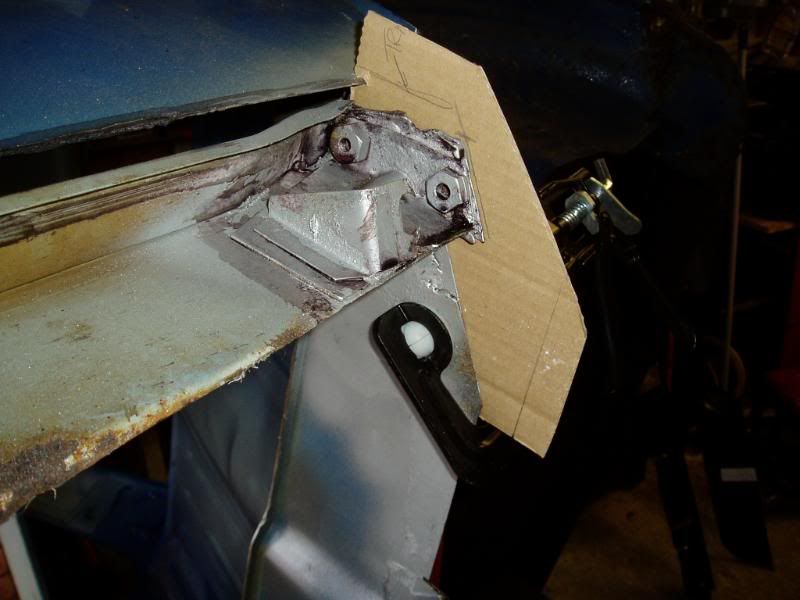
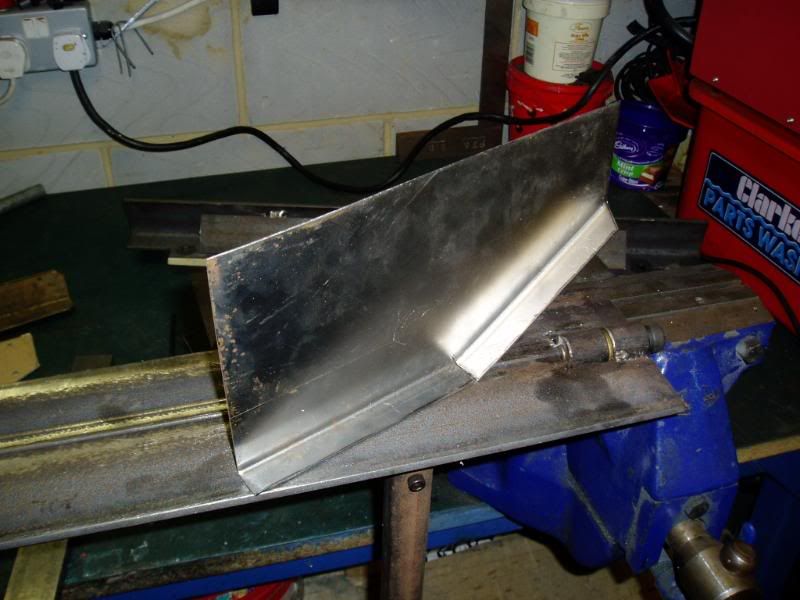
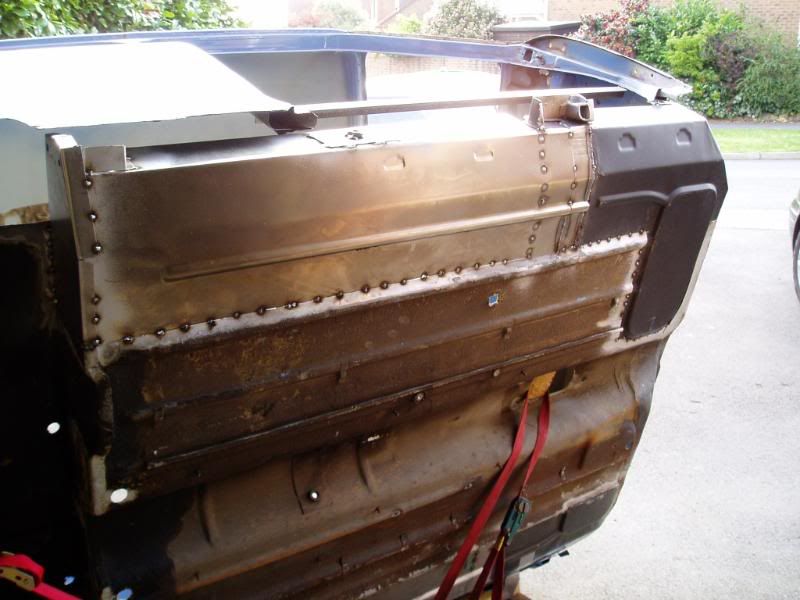
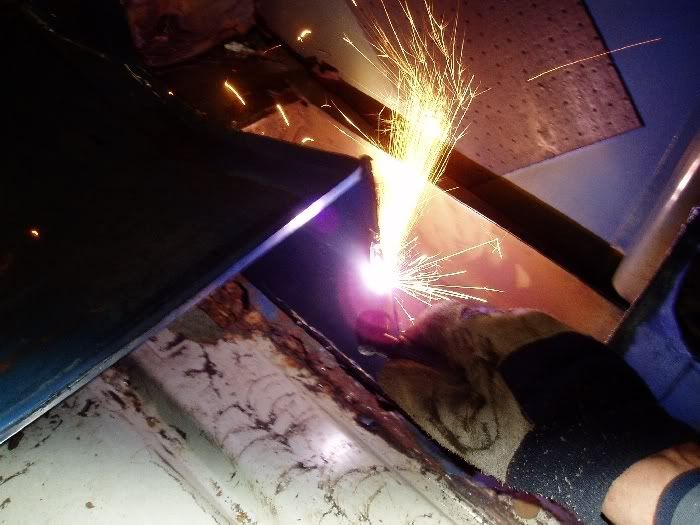
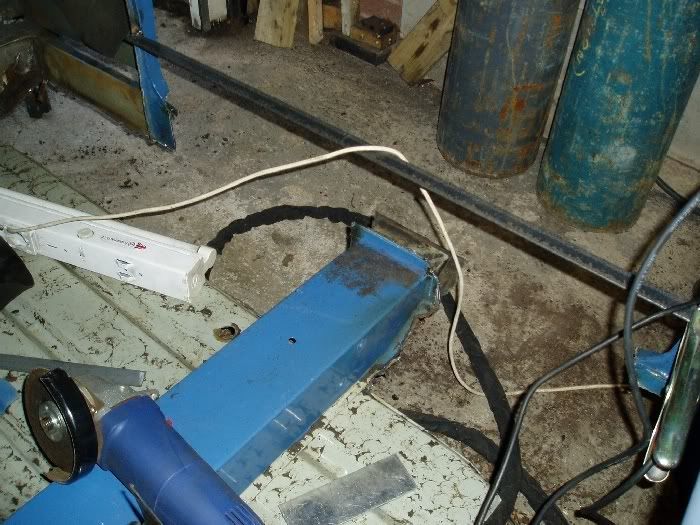
Welded in a brace before getting started on the rot down the sides. The joys of oversills eh ?
Posted Image

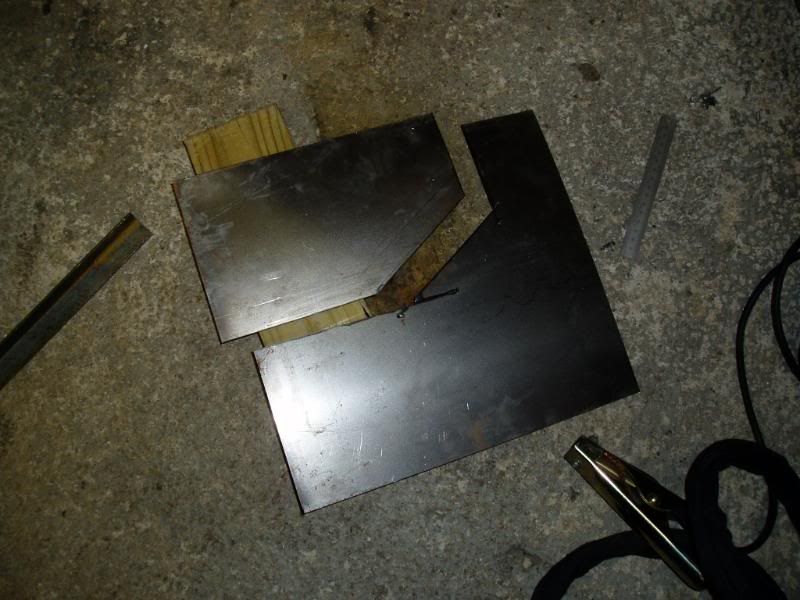
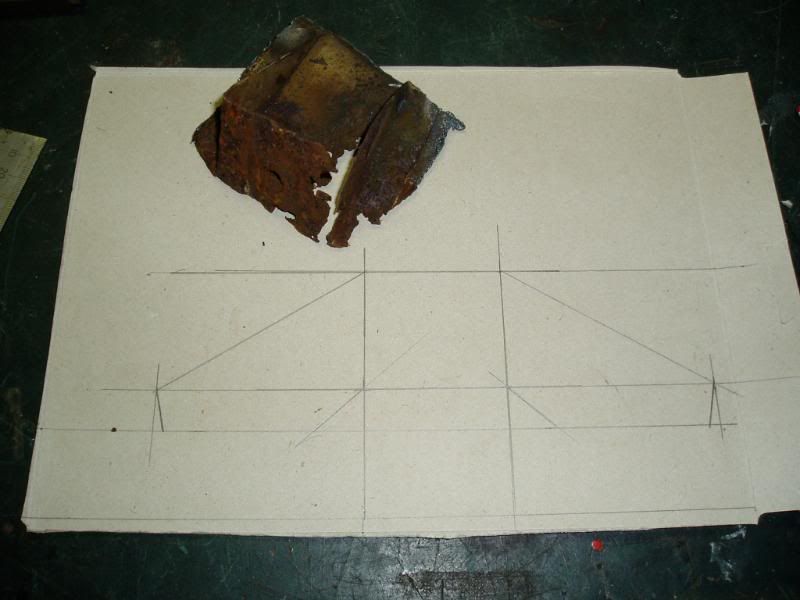
Most of its out on one side just a bit of clean up and I can start putting some fresh metal back in:
Posted Image

Edited by lchris21, 18 January 2009 - 06:41 PM.


#37 lchris21

lchris21

    Mini Mad

  • TMF+ Member
  • PipPipPipPip
  • 106 posts

Posted 29 March 2009 - 09:22 AM

The worlds slowest rebuild continues......but continues it does ;)

I'm continually getting side tracked on other stuff but try and get on the Mini when I can. More progress of the metalworking variety, not too much on the installation of the fast bits. That going to be a long way away at this rate.

Anyway, words aint nothing on rebuild threads with some some more pics, so here's some for you.

Enjoy !

A few more closeups of the stuff you get to find when you start peeling back the oversills:

Posted Image

Posted Image

Posted Image

Posted Image


Decided to have a go at making my own rear subframe mount repair panels. I'm not using a rear subby, but will use the mounts to attatch whatever rear suspension setup I end up with. Hope I don't end up cutting em out when the time comes :wacko:

Marked & measure a million times with cardboard
Posted Image

Cut out from template
Posted Image

Folded on my homemade folder
Posted Image

Tacked in place
Posted Image


The passenger floor is starting to look a little more healthier now

Posted Image

Posted Image

Posted Image

Posted Image

#38 Kam

Kam

    Straight to the Point

  • TMF+ Member
  • PipPipPipPipPipPipPipPipPip
  • 4,140 posts
  • Location: Hampshire
  • Local Club: 16vMini club

Posted 30 March 2009 - 10:56 PM

Another one to look forward to, nice project mate and very good updates aswell ;)

#39 lchris21

lchris21

    Mini Mad

  • TMF+ Member
  • PipPipPipPip
  • 106 posts

Posted 19 April 2009 - 07:56 AM

The updates are coming thick & fast now ! The second one inside a month >_<

I'm starting to get a bit faster on the bodywork jobs as I get more experienced. Never done any bodywork type stuff before this project so its all new to me. As an example the passenger floor, front & rear took about 3 weekends on and off, yesterday I managed it in a day >_<

Just a few pics of my "Blue Peter" effort in replicating what I think is the sill stiffner? Anyway, whatever it is/was, it was knackered.

Enjoy the pics:

The original stiifner, seen better days

Posted Image


Out with the pencil & ruler

Posted Image


Taking shape

Posted Image


Not too bad

Posted Image


And in its new home

Posted Image


Not bad for a days work. New floors, tacked in ready for seaming when the time comes

Posted Image

Edited by lchris21, 19 April 2009 - 06:34 PM.


#40 Kam

Kam

    Straight to the Point

  • TMF+ Member
  • PipPipPipPipPipPipPipPipPip
  • 4,140 posts
  • Location: Hampshire
  • Local Club: 16vMini club

Posted 19 April 2009 - 07:23 PM

Considering your bodywork experience I think thats some s**t hot stuff you got going on there, loving that pencil n paper stuff! top marks fella!

:P

#41 Furyan

Furyan

    Mini Mad

  • Members
  • PipPipPipPip
  • 166 posts

Posted 19 April 2009 - 07:32 PM

Some nice metalwork there! What do you cut the metal with, those edges on the repair panels are nice and clean! Got any more photos/plans for your homemade metal folder!!, could do with making one of those for myself!

#42 mighty mini jack

mighty mini jack

    Mighty Before a Pint

  • Members
  • PipPipPipPipPipPipPipPipPipPip
  • 5,095 posts

Posted 19 April 2009 - 10:48 PM

Nice Fab skills dude, should be done in no time!

#43 lchris21

lchris21

    Mini Mad

  • TMF+ Member
  • PipPipPipPip
  • 106 posts

Posted 20 April 2009 - 04:28 PM

Thanks for the encouragement lads :)

I want to get the shell as good as I can before I get into the nitty gritty of the engine & drivertrain install. Its gonna take a while but strangely enough I find it quite theraputic, the rust and all that. My missus thinks I'm nuts :P

Here's a few more pics of the folder. nothing fancy just a few bits of 50mm angle and some box section. They're quite simple to make. You can buy them for about 40odd quid.
If you want to make on have a look here, do a search on folders, theres' lots to chose from. There's also a few mini resto projects on the go in the projects section amongst other things.
http://www.mig-weldi...forum/index.php

Posted Image

Posted Image


My weapons of choice for panel trimming. If the steel is nice & clean I use my plasma, which eats through it. Just follow a straight edge or template and your away. Great item, saves alot of work.
Otherwise its one of these ( the 1mm thick cutting discs are great) or my faithful old Gilbow tinsnips.

Posted Image

#44 Furyan

Furyan

    Mini Mad

  • Members
  • PipPipPipPip
  • 166 posts

Posted 20 April 2009 - 06:37 PM

Thanks for the pics and link for folder mate, good site that.

#45 Saxo-Fiesta-Mini

Saxo-Fiesta-Mini

    Up Into Fourth

  • Members
  • PipPipPipPipPipPipPipPipPip
  • 2,889 posts
  • Local Club: LCMOC

Posted 20 April 2009 - 07:12 PM

so any more progress ???


0 user(s) are reading this topic

0 members, 0 guests, 0 anonymous users