"tidy Up" Project Evelyn... My Second Mini :)
#121

Posted 16 February 2008 - 11:18 PM
#122

Posted 16 February 2008 - 11:45 PM
#123

Posted 16 February 2008 - 11:46 PM
#124

Posted 17 February 2008 - 12:02 AM
what you gonna do about the rings?
#125

Posted 17 February 2008 - 12:03 AM
#126

Posted 17 February 2008 - 12:05 AM
NOTHING!! Were doing nothing about the rings, are we Chris? I said, ARE WE CHRIS!!?
I don't know.. are we?
#127

Posted 17 February 2008 - 12:17 AM
just thinking if you need to change the head you wouldnt have to worry about the snapped stud.It's not a 998, Mike
NOTHING!! Were doing nothing about the rings, are we Chris? I said, ARE WE CHRIS!!?
I don't know.. are we?I think there are other things to attend to first. Like water PÃ?SSING OUT onto the fan and being sprayed everywhere. And the boatload of shiny mini goodies sitting in my dining room need fitting!
#128

Posted 17 February 2008 - 12:19 AM
Don't fancy getting a new head really if I don't need one.
#129

Posted 17 February 2008 - 05:51 PM
Been wiring like mad today, but I don't mind it, in fact I'd rather do it myself so I know it's done properly.
Starting from the top, first of all I had to remove a furry animal from the car. You'd think she'd be scared of the car, usually the only trips she has in it are to the vets...

Then wired out for the boot light. I decided to use one of my own kits, to see if the length of wire is appropriate. I wired from the centre console (yet to be fitted) area, under the carpets, through a handy low-down hole in the rear seat bin, up the inside of the bin, out again at the top under the rear seats, through another handy hole and into the boot itself. To hold it roughly in place I've used what I call "sticky clips" - think they're made of aluminium, and have a sticky backing. Ideal for stuff like this. None of it will be visible when I fit the new carpets
Pictures of the wiring...
Front

Where it came up from the rear door bin and through into the boot, handy hole!

And the fuseholder in the boot. Note that I haven't fitted the bulb/bulbholder yet.


As I've got a Boot Liner Kit, there will be no visible wires when it's all in. I plan to screw the bulbholder to the right-hand side board of the Boot Liner when it's in - I may even punch holes through the board and feed the two wires through so there's no visible wires at all. I will mount it where you can't see it anyway unless you stick your head into the boot! I picked up the earth from the rear light units.
Something else I noticed was a random black wire, complete with ring connector, dangling down from the parcel shelf. I previously assumed that this was for the rear heated screen and for some reason had been undone. After replacing the switch (and plugging the multiplug into the switch - that helps!) the switch lit up but the screen didn't seem to work. Turns out not only was the switch unplugged but the screen wasn't earthed, hence it not working! So I have now re-attached the earth wire to the rear light units, with the earth for the boot light, and hey presto! The heated screen works, looks like every bar works too!
After realising I was "on a role" with the wiring I decided to try remove the fuel tank myself (first time I've even touched the fuel tank) and "look" at the rear light unit! So that I did... with a little bit of pushing and pulling managed to move the fuel tank over far enough to gain access to the rear lights. By this time it was 4pm, and I thought "I only have an hour or so till it gets dark" but I carried on anyway...
And managed to get the Mk2 rear lights fitted, wired in and working well before it got dark!!
Pictures below of the state of the bodywork after removing the old Mk3 lights and applying a bit of spit & rag to shine it up... perfect condition


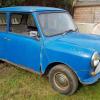
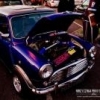
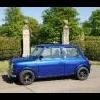
And pictures of how she looks now! First before... 2nd & 3rd after!


Edited by yorkshirechris, 17 February 2008 - 05:54 PM.
#130

Posted 17 February 2008 - 05:57 PM
Will deffo be having them on mine.
Looking great.
#131

Posted 17 February 2008 - 06:00 PM
That black wire with a ring connector hanging from your parcel shelf isnt for an old speaker is it? I have on too that came off my speaker.
#132

Posted 17 February 2008 - 06:01 PM
No sazal it is the earth wire, I traced it through the headlining to the feed for the rear heated screen, connected it to an earth and it now works perfectly
Edited by yorkshirechris, 17 February 2008 - 06:02 PM.
#133

Posted 17 February 2008 - 09:20 PM
Anyway good luck with all the work and look forward to meeting you and the mini at some shows in the future... Mine is a very similar colour as well
J
#134

Posted 18 February 2008 - 10:24 AM
For everyone who was wondering, mk 2 onwards, the rear lights are the same size, like chris says, its only when you go to mk1 that you have to weld the plate in.
#135

Posted 19 February 2008 - 02:36 AM
1 user(s) are reading this topic
0 members, 1 guests, 0 anonymous users


