Jump to content


Photo
- - - - -

Mini Van Rebuild - Slow N Steady.


  • Please log in to reply
141 replies to this topic

#16 dave21478

dave21478

    Super Mini Mad

  • Members
  • PipPipPipPipPipPip
  • 639 posts

Posted 01 September 2008 - 05:43 PM

Well, time for an update.
Progress has been non-existant for the last few weeks due to other commitments, but I now find myself with some free time, so The restoration can continue.

Having placed the new floor section on, I managed to get it lined up square and started to weld it in place. I have seam welded all round the rear, and had started on the front, but then gave up as I wasnt happy with the way it was going, so will have a re-think there regarding the join between the new floor section and the existing bulkhead.

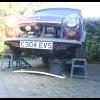
(apologies for the blurry pics, My hands are shaking like mad for some reason today. Ive probably caught Pakinsons or something cheery like that )


So today, I decided to crack on with the back end.
First up... the wheel arch was rotten in various places. Patchable, but would have looked shoddy, so I chopped the lot out.
Posted Image

I am keeping prices as low as possible for this car, so rather than buy a new panel, I attacked the donor shell and chopped its solid arch out roughly....
Posted Image

spent some time trimming it down, and ended up with an OE spec replacement part!
Posted Image

Drilled it and plug wlded into place....
Posted Image

I smoothed off the welds with a flap-wheel, then welded in a patch to finish the curve of the side panel (again, this was chopped from the donor shell)...
Posted Image

Towards the rear, I hacked he crusty old valence off and had a poke at the floor. Hmm, not ideal...
Posted Image

I also cut off the side skin lower section which was rotten...
Posted Image

Patched up the floor. Lots of card templates before committing to steel...
Posted Image
Posted Image
Posted Image

The finished off the skin...
Posted Image

The panel sections will need a wee skim of filler to smooth them off before paint.

Hopefully, I will get some time to continue tomorrow, The other side needs similar treatment, although I wont have to change the whole arch. I can then finish off the flange for the rear step.

Mojo is returning strongly. Having spent so long looking at it and making the holes bigger, to be actually putting it back together is wonderfull. The side I have done is now 100% solid and Im quite chuffed with the standards so far.yeah, its not the prettiest as is, but once the surface rust is removed and treated, the seams are covered in sealer and its painted, it will look fine.
:P

#17 dave21478

dave21478

    Super Mini Mad

  • Members
  • PipPipPipPipPipPip
  • 639 posts

Posted 15 September 2008 - 08:45 AM

no comments?
no interest?

done the other corner...
Posted Image

And repaired the rear step, and am about to start building a new valence.
Posted Image

#18 Tomf

Tomf

    Baby Tom

  • Traders
  • PipPipPipPipPipPipPipPipPipPip
  • 6,440 posts

Posted 15 September 2008 - 09:05 AM

Fair play! Really good looking project.

And wow how much is that donor car saving you, good use of what you have already got.

keep up the good work.

#19 Daveuk

Daveuk

    Speeding Along Now

  • Members
  • PipPipPipPipPip
  • 429 posts
  • Location: Lowestoft
  • Local Club: friendly with any mini people

Posted 15 September 2008 - 02:18 PM

jesus christ! you moved fast chopping that donor car down and the floor out! took me half a day to chop just my mini floor out! you've cut two floors and welded one together!

top job

however my only dislike about chopping and welding lots of patches is the end product (looks abit rough)

that's my opinion on things but what youve done there is alot of hard work and it's paying off :D

all the best, at this rate you'll soon have it back on the road!

Dave

#20 kirk

kirk

    Mini Mad

  • Noobies
  • PipPipPipPip
  • 143 posts

Posted 15 September 2008 - 02:45 PM

nice project mate
alot would never try and save that--- fair play

#21 james105

james105

    Speeding Along Now

  • Noobies
  • PipPipPipPipPip
  • 466 posts
  • Location: Bucks/ Coventry

Posted 15 September 2008 - 03:41 PM

Fantastic project, saves another van from the scrap man. Great use of the donor car as well!

#22 analogue_radio

analogue_radio

    Up Into Fourth

  • TMF+ Member
  • PipPipPipPipPipPipPipPipPip
  • 4,897 posts
  • Location: Melton Mowbray, UK.

Posted 15 September 2008 - 04:03 PM

Big effort Dave! nice work.

#23 dave21478

dave21478

    Super Mini Mad

  • Members
  • PipPipPipPipPipPip
  • 639 posts

Posted 15 September 2008 - 05:15 PM

woo, Thought I had committed some kind of serious faux-pas to offend folk and never get anyone comment!

Anyway, I got a few hours to work on it this afternoon, so started on the rear skirt today. I will let the pictures do the talking....
Posted Image
Posted Image
Posted Image
Posted Image
Posted Image
Posted Image


I am really rather chuffed with how it turned out. This is the first time I have really tried my hand at scratchbuilding more complicated shapes. Just need to see if I can replicate it on the other side now.

#24 freaker

freaker

    One Carb Or Two?

  • Members
  • PipPipPipPipPipPipPip
  • 1,378 posts
  • Location: zeebrugge
  • Local Club: mini fun club belguim

Posted 15 September 2008 - 05:20 PM

i must say, i have a lot of respect for your welding and building panel skills :thumbsup:

wreally top job

freaker

#25 edi57

edi57

    One Carb Or Two?

  • Members
  • PipPipPipPipPipPipPip
  • 821 posts

Posted 15 September 2008 - 06:30 PM

Woo! Some serious metal work going on here! Absolutely love it.

Keep up the progress and keep those pics coming!

#26 davos1983

davos1983

    On The Road

  • Noobies
  • PipPip
  • 45 posts

Posted 15 September 2008 - 07:47 PM

Very impressed with your metal working skills! Fancy building me a new valance too?

#27 dave21478

dave21478

    Super Mini Mad

  • Members
  • PipPipPipPipPipPip
  • 639 posts

Posted 17 September 2008 - 05:08 PM

Thanks for the encouragement!

Did the other end of the skirts today, made up some closing panels for where the skirt meets the wheelarch, then attacked this section of floor with the flapwheel, knotted wire brush wheel, then gave it a layer of anti-rust undercoat.

delicate forming...
Posted Image

weld up the holes...
Posted Image

Buff it down with a flap wheel...
Posted Image

Go back and re weld a few pinholes, then buff it again and its done...
Posted Image

Closing panel...
Posted Image

Stripping...
Posted Image

Painting...
Posted Image

Painted...
Posted Image

Thats the back end done. Next job is to sort out the join at the front of the floor, which is now annoying me. It seemed ok when I did it, but looking at it now, it looks a right bodge, so its all coming off and getting re-done - hopefully tomorrow.
Also, I have now ordered the replacement a-panels (inner and outer) and a step repair section. They should hopefully arrive in a few days, and I can crack on.


:dontgetit:

#28 Rosslin Racing

Rosslin Racing

    Up Into Fourth

  • Traders
  • PipPipPipPipPipPipPipPipPip
  • 2,408 posts
  • Location: Burgdorf.
  • Local Club: SMP beo BMC swiss

Posted 17 September 2008 - 05:51 PM

I think its more to do with amazement! your getting on with it. nice one.

#29 aaronyoung

aaronyoung

    Mini Mad

  • Members
  • PipPipPipPip
  • 211 posts
  • Location: wimborne

Posted 18 September 2008 - 10:46 AM

good job i've got a van needs restoring fancy doing 1 for me when youre done

#30 Nickh_16

Nickh_16

    One Carb Or Two?

  • Members
  • PipPipPipPipPipPipPip
  • 724 posts
  • Local Club: Pembs

Posted 18 September 2008 - 10:54 AM

jesus that's some crazy work you've done there, well impressed!


1 user(s) are reading this topic

0 members, 1 guests, 0 anonymous users