It's a good job that minis are so awesome (especially early Woodies!); there aren't that many cars that would be worth the effort going into this one. Progress is fantastic and I can't wait to see how it turns out! Although it may be a little while yet before it's finished...

Mk1 Austin Countryman
Started by
minimikej
, Jun 09 2018 11:40 PM
155 replies to this topic
#106

CharlieNZ
-

- Noobies
-

- 69 posts
Stage One Kit Fitted
- Location: Auckland
Posted 26 June 2019 - 09:17 AM
#107
minimikej
-
- Members
-
- 346 posts
Speeding Along Now
- Location: Derbyshire
Posted 08 September 2019 - 07:20 PM
Been very busy doing other things over the summer, buy I've had a couple of mammoth sessions on the rear underfloor the last 2 weeks.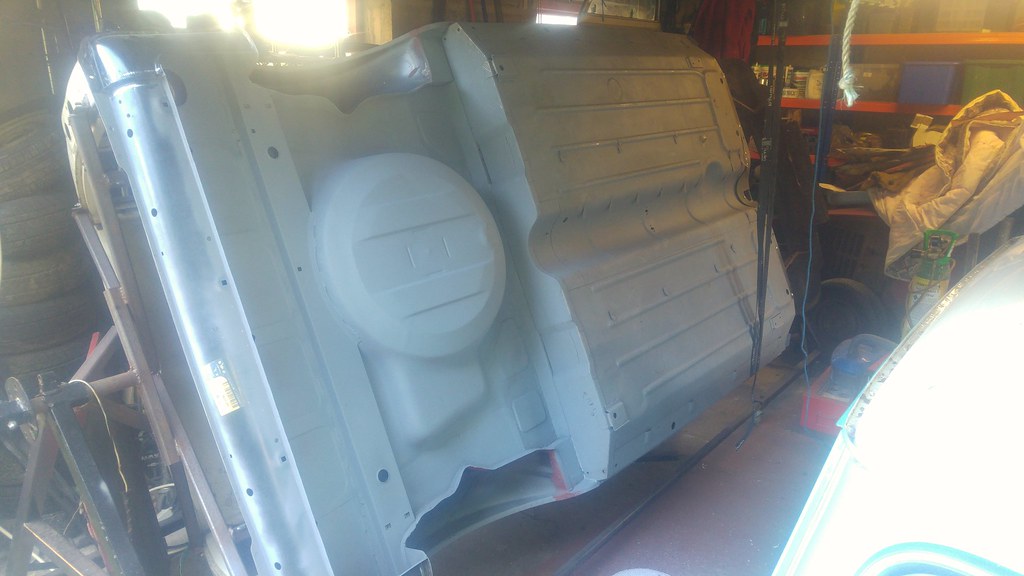 2019-09-08_07-16-21 by Mike Jackson, on Flickr
I'm trying to work out how to tackle the next massive job which is replacing the full front bulkhead, inner wings and scuttle without the whole lot collapsing.
#108
minimissions
-

- Members
-
- 3,427 posts
Up Into Fourth
- Location: North West
- Local Club: M.M.O.C
Posted 09 September 2019 - 03:31 PM
Wow this looks amazing! I need to catch up.
#109
16vmini
-

- Members
-
- 366 posts
Speeding Along Now
- Location: West Sussex
Posted 26 September 2019 - 11:03 AM
nice work .,..
#110
minimikej
-
- Members
-
- 346 posts
Speeding Along Now
- Location: Derbyshire
Posted 27 April 2020 - 06:42 PM
What a break that was!
I had to get the 1380 out of the blue mk1, it became dog rough to the point I couldn't move it.
I swapped it with a rebuilt but unknown 1098 from an MG110 I bought originally for this Countryman project.
It runs sweet and is so much gentler to drive than the 1380 but annoyingly it pops out of second on overrun. Dammit! It will have to come out again. But not just yet.
So on to the Countryman. A while back I decided to replace the whole bulkhead assembly because the panel above the toe board is paper thin and I was chasing holes with the welder.
I bought a Heritage assembly for a MK3/4 mini, so it has the roto-dip cutout behind the speedo (although it is crudely spot welded in place from the Heritage factory)
I want to keep the solid mount 2-bolt front subframe, which means that some work is required to get the single-bolt crossmember to fit.
I'm not going 100% original, I want strong and sturdy. And I'll not be selling this car so I decided to modify the Heritage assembly by working out the centre line of the 2-bolt setup and using a step drill to open up the holes such that I could weld in a 2mm wall thickness steel tube to act against the compression, in place of the spot-welded setup that you see on an orginal. I decided it wasn't worth opening up the crossmember box to fit an invisible original strengthener.
So here it is:
[/url]20200427_162417 by Mike Jackson, on Flickr">http://<a href='http....kr/p/2iV3BVs'>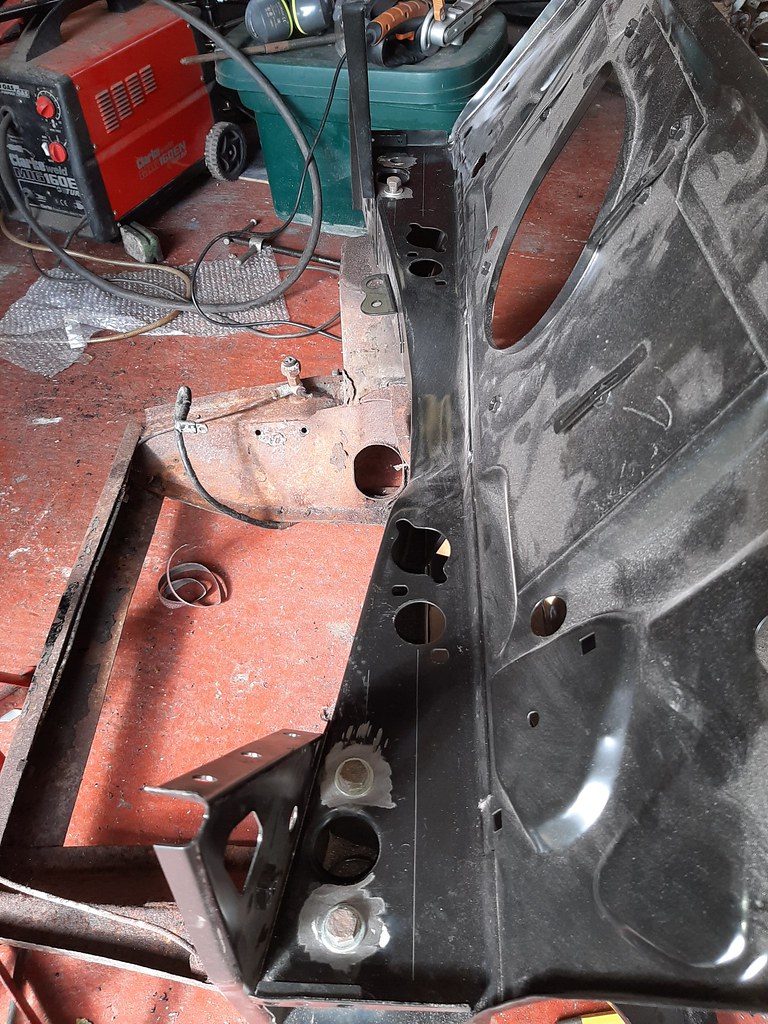 20200427_162417 by Mike Jackson, on Flickr
 20200427_162404 by Mike Jackson, on Flickr
Edited by minimikej, 27 April 2020 - 06:47 PM.
#111
minimikej
-
- Members
-
- 346 posts
Speeding Along Now
- Location: Derbyshire
Posted 27 April 2020 - 06:45 PM
Also, can anybody show me how the hell this is supposed to go back together? Fuel tank.
 20200427_170146 by Mike Jackson, on Flickr
#112
imack
-

- TMF+ Member
-
- 1,873 posts
Camshaft & Stage Two Head
- Location: Orpington, Kent
Posted 27 April 2020 - 06:57 PM
From memory when I did my clubman estate 35 years ago - these
Attached Files
-
 Screenshot_20200427-195408_Samsung Internet.jpg 20.33K
12 downloads
Screenshot_20200427-195408_Samsung Internet.jpg 20.33K
12 downloads
#113
Homersimpson
-

- Members
-
- 803 posts
One Carb Or Two?
- Location: Redditch
Posted 27 April 2020 - 09:23 PM
From memory when I did my clubman estate 35 years ago - these
When I rebuilt a pickup around 20 years ago I welded some nuts into the valance and cross member in front of the tank and used bolts and spacers.
If you can now get the proper fixings it would be better to use them.
My dad changed the tank in his mini clubman estate and he jacked the screwdriver up so it was lifting the car to get the screws out (lowering the jack a bit at a time).
#114
REVVIT
-

- Members
-
- 334 posts
Speeding Along Now
- Location: COVENTRY
Posted 28 April 2020 - 10:17 AM
Also, can anybody show me how the hell this is supposed to go back together? Fuel tank.
This was one of the most awkward jobs on my van..make sure you dry fit the tank and filler neck shroud many times to ensure the filler neck sits central in the shroud..i used the standard nylon fitting kit..or you could modify like KTS on here did with his pick up..
#115
Sleeping Park Lane
-

- Noobies
-
- 132 posts
Mini Mad
- Location: Reading
Posted 28 April 2020 - 02:59 PM
Great to see this pop back up.
That's a nice mod on the bulkhead to keep the 2 bolt subframe, I bet that took some measuring, remeasuring, oh heck, I'll measure it once more, just in case? :)
#116
minimikej
-
- Members
-
- 346 posts
Speeding Along Now
- Location: Derbyshire
Posted 28 April 2020 - 04:19 PM
Great to see this pop back up.
That's a nice mod on the bulkhead to keep the 2 bolt subframe, I bet that took some measuring, remeasuring, oh heck, I'll measure it once more, just in case? :)
It did, it really did.
I made up a former from a suitably sized dowel (probably a curtain rail!) of the nominal diameter of 35mm for the single bolt hole to pass through both upper and lower surfaces, attached to a 2-bolt subframe sandwich rubber plate thing to provide the bolt displacement.
I strung a length of box tubing alongside the dowel formers to obtain a line parallel to the axis of the mounting bolts.
And then extrapolated from that line to the centre of the single bolt mounting.
Then I centre-punched through the former and used a step drill to open out to 20mm (just larger than the diameter of the tubing).
Then I cut and dry fitted the spacer tubes, bolted and tack welded.
Then I repeated the operation from the underside.
And then I welded the lot up.
#117
minimikej
-
- Members
-
- 346 posts
Speeding Along Now
- Location: Derbyshire
Posted 29 April 2020 - 09:52 PM
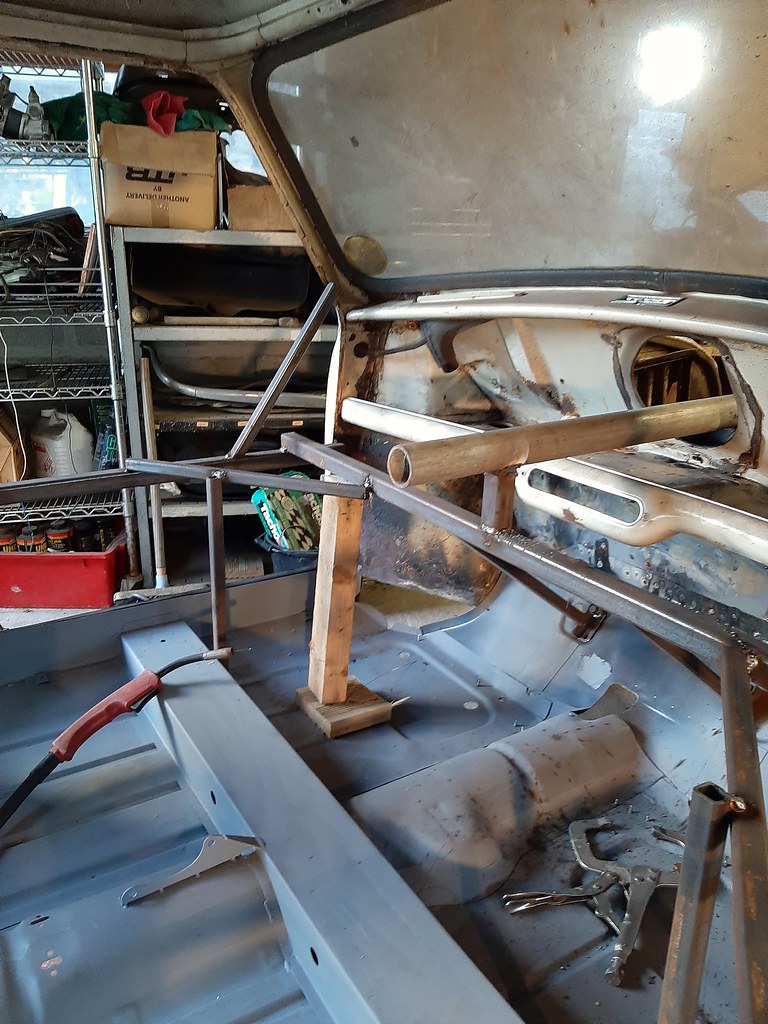
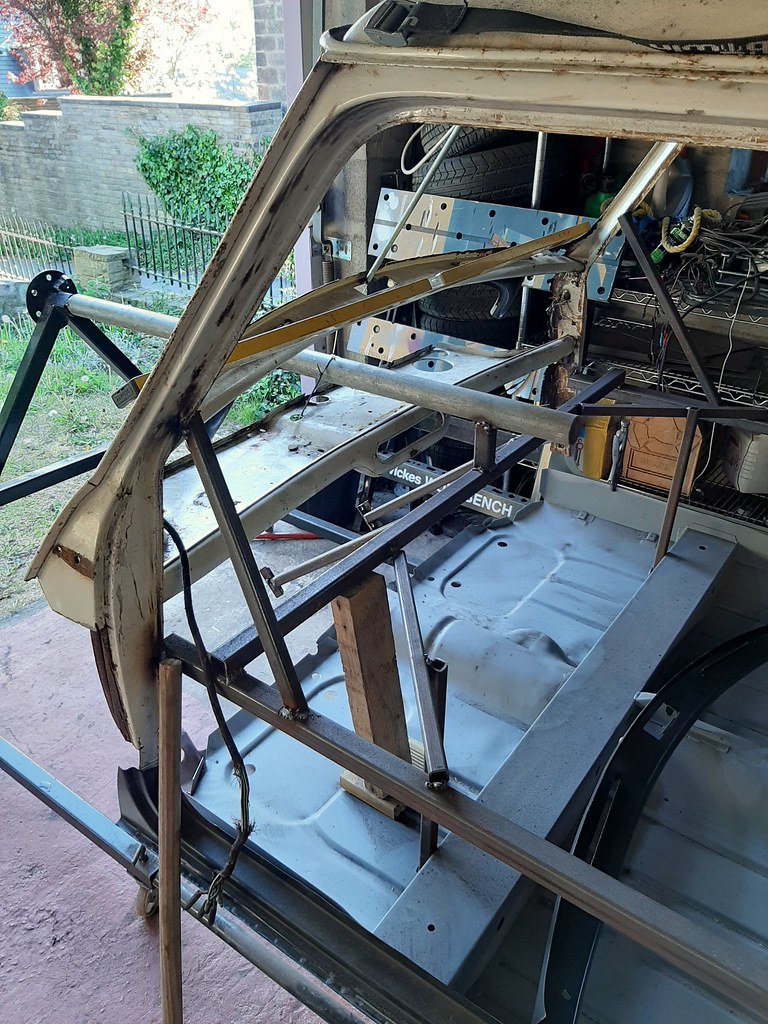
Had a bit of a tidyup in the garage and then tried to catch up on where I'd left things last summer.
I added some more bracing, to locate the steering rack mounts, and to anchor the floor pan in preparation for removing the whole bulkhead.
 2020-04-29_08-57-04 by Mike Jackson, on Flickr
Now then. I'm not decide yet how to tackle the bulkhead. Part of me thinks that the parcel shelf should be left in place to act as a reference, but the other part of me thinks it will be too hard to separate cleanly and I'd be better off ripping the lot out and sorting it out off the car. 2020-04-29_08-56-48 by Mike Jackson, on Flickr
Anyone with experience got any advice please?
Edited by minimikej, 29 April 2020 - 09:56 PM.
#118
minimikej
-
- Members
-
- 346 posts
Speeding Along Now
- Location: Derbyshire
Posted 30 April 2020 - 10:07 PM
4pm my contract ended and I'm now out of work for the first time in 26 years. So into the garage to take my mind off things.
Windscreen out, and I've kept the last tax disc safe, 1978.
Scuttle off:
 2020-04-30_08-06-40 by Mike Jackson, on Flickr
Old school repair, filler over newspaper... 2020-04-30_08-06-56 by Mike Jackson, on Flickr
...which then caught fire
 2020-04-30_08-07-11 by Mike Jackson, on Flickr
Remains of the front panels off, saving all the tags and good bits: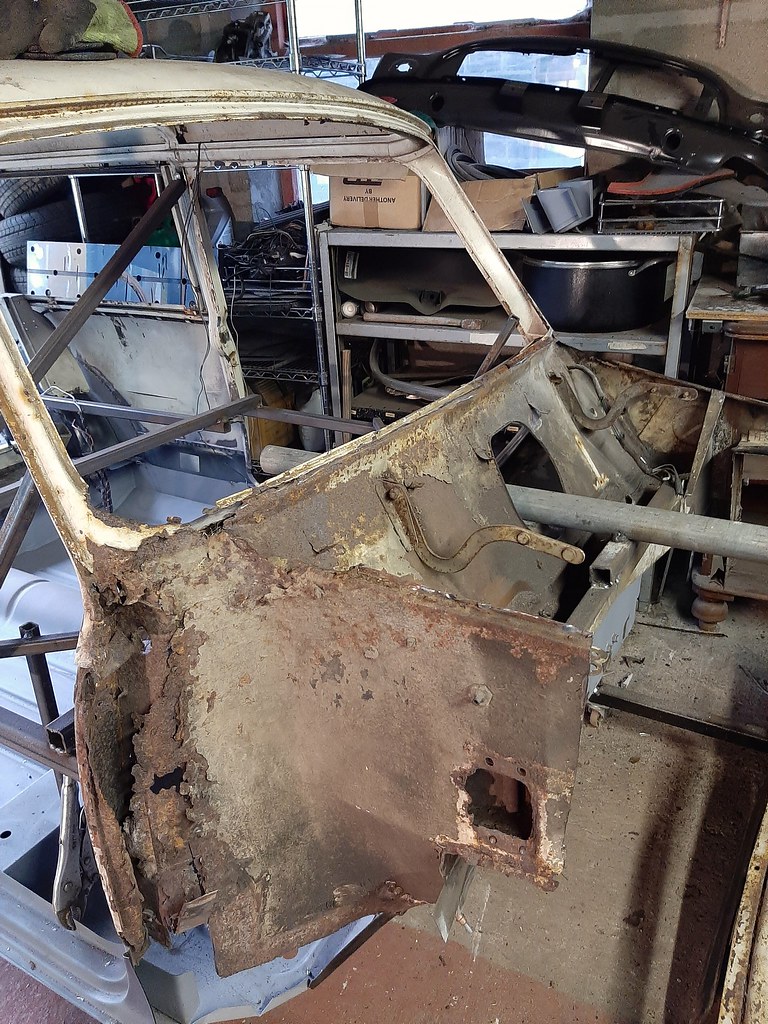 2020-04-30_08-07-30 by Mike Jackson, on Flickr
Ready to get cracking.
 2020-04-30_08-08-22 by Mike Jackson, on Flickr
#119
simpsonsclassics
-

- Noobies
-
- 106 posts
Mini Mad
- Location: UK
Posted 04 May 2020 - 03:16 PM
Hey Mike, I am sorry to hear about work thats a real shame I hope you find something soon. I agree being the garage does help though for sure. Time to get that woody done. I have always said it would look so nice next to your other mk1
#120
minimikej
-
- Members
-
- 346 posts
Speeding Along Now
- Location: Derbyshire
Posted 07 May 2020 - 11:02 AM
Well that was a horrible job. I decided to leave the parcel shelf in place and remove the bulkhead from around it. Horrid, dirty, noisy work.
Still some repairs to do on the parcel shelf though, both rust and self-inflicted.
 2020-05-07_11-58-58 by Mike Jackson, on Flickr
 2020-05-07_11-58-45 by Mike Jackson, on Flickr


0 user(s) are reading this topic
0 members, 0 guests, 0 anonymous users


