Lol yeah I was like that too. The things we do to save these cars lol ?


Getting The Rose Family Mini Back On The Road! (After 5 Years)
Started by
Ben Rose
, Jun 10 2019 03:11 PM
roundnose
297 replies to this topic
#16
: post #16")
blueovalcraig
-

- Members
-

- 193 posts
Mini Mad
- Location: Rothesay, Isle of Bute
Posted 13 June 2019 - 08:44 PM
#17
cooperd70
-

- TMF+ Member
-
- 784 posts
One Carb Or Two?
- Location: London
Posted 14 June 2019 - 08:50 AM
Ben,
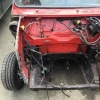
The rot on the scuttle looks to be caused by the windscreen rubber that was fitted by the factory from '93 onwards (fatter flatter style). Think you might find more (lets hope not) when you strip the car. When it rots it can lead to the rotting of the dashboard panel as well. The later style windscreen rubber was flawed as they didn't use sealant when fitting the screen and due to its design it actually allowed water ingress. Once the rot has been repaired I'd fit the older style rubber and sealant won't be required due to the way it fits the windscreen and the windscreen panel (correctly unlike the newer style rubber).
Good luck and looking forward to more pics as you progress.
#18
rich_959
-
- Just Joined
-
- 568 posts
Super Mini Mad
- Location: East Yorks
Posted 14 June 2019 - 09:14 AM
Solid advice - I have the older seals ready for my MPI project for the exact same reason. Seems the ingress at that point (and possibly lower quality steel than older cars?) has meant the premature death of many late cars.
#19
Eds.mini.lulu
-

- Just Joined
-
- 137 posts
Mini Mad
- Location: Kent
Posted 14 June 2019 - 09:27 AM
Good luck in your project.
#20
Ben Rose
-
- Members
-
- 210 posts
Mini Mad
- Location: Preston, Lancashire
Posted 14 June 2019 - 10:33 AM
Ben,
The rot on the scuttle looks to be caused by the windscreen rubber that was fitted by the factory from '93 onwards (fatter flatter style). Think you might find more (lets hope not) when you strip the car. When it rots it can lead to the rotting of the dashboard panel as well. The later style windscreen rubber was flawed as they didn't use sealant when fitting the screen and due to its design it actually allowed water ingress. Once the rot has been repaired I'd fit the older style rubber and sealant won't be required due to the way it fits the windscreen and the windscreen panel (correctly unlike the newer style rubber).
Good luck and looking forward to more pics as you progress.
Solid advice - I have the older seals ready for my MPI project for the exact same reason. Seems the ingress at that point (and possibly lower quality steel than older cars?) has meant the premature death of many late cars.
Brilliant advice guys, thank you! I have noticed that many of the late MPI's all seem to have this issue and what you have said about the windscreen rubbers makes perfect sense. I will certainly do this when I have replaced the rot.
As soon as I have stripped down the front end I will post some more pictures of what I find. I fear it may be pretty bad.
Thanks for the advice again. 
#21
Ben Rose
-
- Members
-
- 210 posts
Mini Mad
- Location: Preston, Lancashire
#22
Steve220
-

- Members
-
- 5,127 posts
Crazy About Mini's
- Location: Shropshire
- Local Club: BMC
Posted 14 June 2019 - 01:12 PM
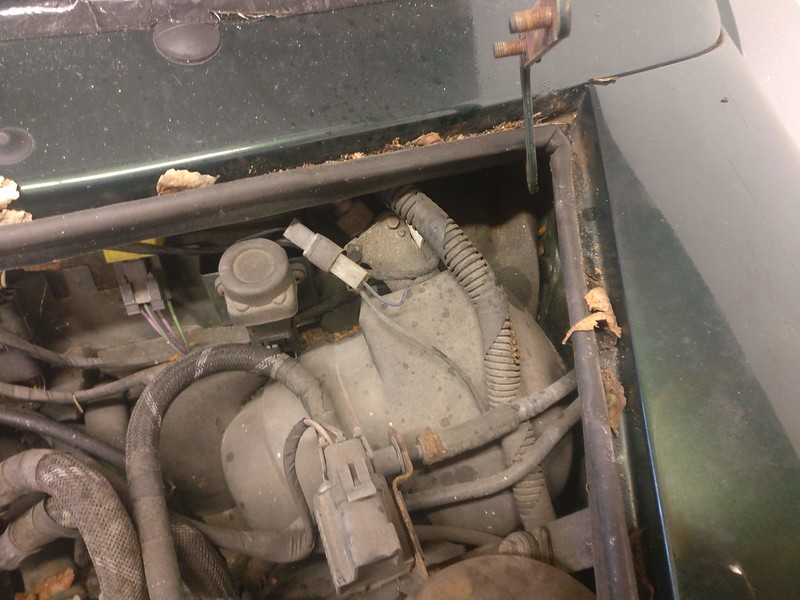
Be prepared to buy more panels than you first intended. Mine was in a slightly better condition than yours from the outside, after much cutting, i was left with this. However still replaced both rear quarters and the boot surround!

#23
Ben Rose
-
- Members
-
- 210 posts
Mini Mad
- Location: Preston, Lancashire
Posted 14 June 2019 - 02:18 PM
Be prepared to buy more panels than you first intended. Mine was in a slightly better condition than yours from the outside, after much cutting, i was left with this. However still replaced both rear quarters and the boot surround!
Hi Steve,
I've read most of your project thread now and it filled me with fear, dread and excitement. 

 Your build is incredible.
I fear with my MPI you are right though. My intentions are to buy heritage panels for all that need replacing and attempt most of it myself. My aim is to just get it back on the road and start enjoying her again. She's been all covered up for 5 years.
I would really appreciate any advice you can give as I progress and I'll be posting photo's as I go.
Many Thanks
Ben
#24
Steve220
-
- Members
-
- 5,127 posts
Crazy About Mini's
- Location: Shropshire
- Local Club: BMC
Posted 14 June 2019 - 02:40 PM
Hi Steve,
I've read most of your project thread now and it filled me with fear, dread and excitement.
I fear with my MPI you are right though. My intentions are to buy heritage panels for all that need replacing and attempt most of it myself. My aim is to just get it back on the road and start enjoying her again. She's been all covered up for 5 years.
I would really appreciate any advice you can give as I progress and I'll be posting photo's as I go.
Many Thanks
Ben
Thank you, you're too kind! As all the project on here, they're a labour of love. My best advice is if you're replacing the floor, get the entire thing from m-machine, everything else go heritage!
Also, get hold of a few cans Bilthamber Electrox and use it plentifully between seams and areas that are prone to rusting on the MPi!
#25
Ben Rose
-
- Members
-
- 210 posts
Mini Mad
- Location: Preston, Lancashire
Posted 14 June 2019 - 04:05 PM
Thanks for the tips. Appreciate your help.
#26
blacktulip
-

- TMF+ Member
-
- 6,231 posts
Crazy About Mini's
- Location: Braintree
Posted 14 June 2019 - 06:15 PM
Wow, some good thinking there. I think it's not that bad at first sight but I reckon there might be a few horrors left to uncover. The beauty is you have a good clean working area. That will definitely pay off. I'm looking forward to seeing the progress.
#27
Ben Rose
-
- Members
-
- 210 posts
Mini Mad
- Location: Preston, Lancashire
Posted 18 June 2019 - 10:14 AM
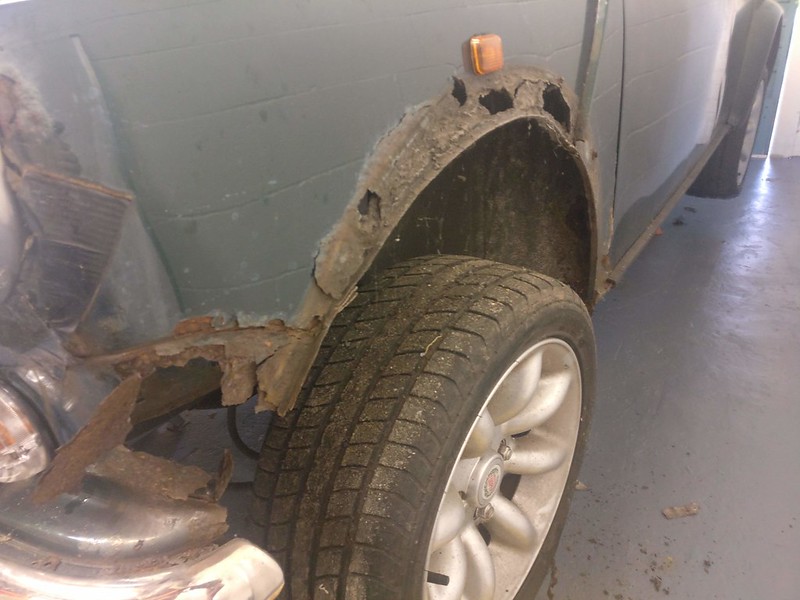
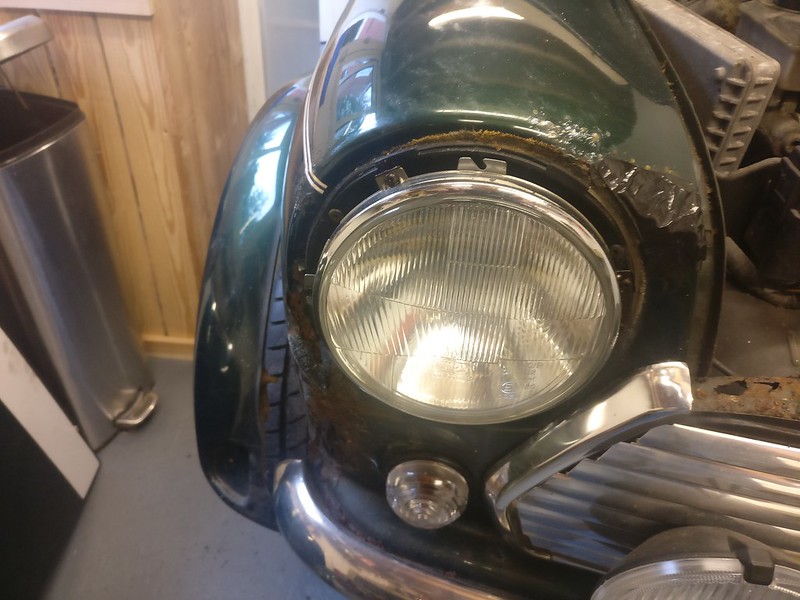
So I managed to grab an hour over the weekend to commence stripping the car down. I will post images as I go. I intend on spending a couple of hours on it in the evening this week although I'm well aware this will be a long slog if I cant find more time to spend on it. Young family and work commitments take a lot of my time.
First two small mistakes made! 
How did I forget to loosen the wheel nuts before jacking the car up?! Doh.
How on earth am I going to get the doors off? I think I'll have to drop it back on to the floor, wheel it out of the garage and take them off outside. I will strip off as much as I can and take the engine out to make manoeuvring more easy.
Storage of parts will also be tricky with my lack of space so I think I'll have to stick them in my loft which is thankfully clear.
 IMG_20190614_201252
 IMG_20190614_201306
 IMG_20190614_201322
 IMG_20190614_201328
 IMG_20190614_201332
 IMG_20190614_202249
 IMG_20190614_202254
 IMG_20190614_202255
 IMG_20190614_203037
 IMG_20190614_203041
 IMG_20190614_203044
 IMG_20190614_203244
 IMG_20190614_203248
Edited by Ben Rose, 18 June 2019 - 10:16 AM.
#28
cooperd70
-
- TMF+ Member
-
- 784 posts
One Carb Or Two?
- Location: London
Posted 18 June 2019 - 11:09 AM
Trying to get things in the correct order is a big part of it...I've done it and you just want to kick yourself for not thinking it through properly. It's the wasting of time (when it's so precious) that p*sses you off the most.
Great progress pics though Ben. I'll keep my ? for you that it doesn't get too scary once you're in deep.
Great progress pics though Ben. I'll keep my ? for you that it doesn't get too scary once you're in deep.
Edited by cooperd70, 18 June 2019 - 11:10 AM.
#29
rich_959
-
- Just Joined
-
- 568 posts
Super Mini Mad
- Location: East Yorks
Posted 18 June 2019 - 11:38 AM
Yeah, it's worth doing the low hanging fruit like outer trim, interior etc before you get the car in the air.
#30
Ben Rose
-
- Members
-
- 210 posts
Mini Mad
- Location: Preston, Lancashire
Posted 18 June 2019 - 12:56 PM
I'll get all the exterior trim off and interior out. Then work on engine, glass, suspension etc. Just wish I had thought about the wheels. Thanks for the input it's appreciated.
I'm determined to get to the point where I can see how bad things may or may not be as quickly as possible.
I'm determined to get to the point where I can see how bad things may or may not be as quickly as possible.


Also tagged with one or more of these keywords: roundnose
Projects →
Mini Saloons →
1976 Mini 1000 Le "stripey"Started by cafeclassic , 03 Sep 2025 |
|

|
||
Projects →
Mini Saloons →
Mini Cooper Project - Finally StartsStarted by piphatch , 08 Jan 2025 |
|

|
||
Projects →
Mini Saloons →
1965 Austin Mini Restoration - Canadian Mk1Started by DoubleEh , 14 Nov 2022 |
|

|
||
Projects →
Mini Saloons →
Project Joe - 1991 Mini Mayfair 998Started by Eggers , 02 Jun 2022 |
|

|
||
Projects →
Mini Saloons →
Mpi Dashboad ProblemStarted by mikeprez , 22 Dec 2021 |
|

|
0 user(s) are reading this topic
0 members, 0 guests, 0 anonymous users


