Jump to content


Photo
- - - - -

Supercharged K20a2 Vtec - Race Spec


  • Please log in to reply
1102 replies to this topic

#736 cptkirk

cptkirk

    Camshaft & Stage Two Head

  • Members
  • PipPipPipPipPipPipPipPip
  • 1,799 posts
  • Location: West Sussex
  • Local Club: B.M.C. + Chiminiclub

Posted 23 November 2011 - 07:46 PM

So it looks like I am going to have to put a little lump in my nice flat parcel shelf - bugger....on the plus side it means I can go from a 2.25" intercooler core to a 3". I think thats a fair trade off.

I had a measure up of proposed components and then went and got my ruler dirty checking it all out, Looks like the very top edge of the throttle body is going to be 20mm higher than the highest point of the valve cover/oil filler cap, which in turn is roughly 10-15mm higher than the parcel shelf.

For those that are intersted heres a couple of photos showing how might the charger will sit:


Posted Image


Posted Image

#737 rustandoil

rustandoil

    Speeding Along Now

  • Members
  • PipPipPipPipPip
  • 317 posts
  • Location: Gloucestershire

Posted 25 November 2011 - 06:51 AM

It all seems very close ;) is there any way you could lower the whole engine? different or modified mounts?

#738 cptkirk

cptkirk

    Camshaft & Stage Two Head

  • Members
  • PipPipPipPipPipPipPipPip
  • 1,799 posts
  • Location: West Sussex
  • Local Club: B.M.C. + Chiminiclub

Posted 25 November 2011 - 10:25 AM

It all seems very close ;) is there any way you could lower the whole engine? different or modified mounts?


It all jut got a whole lot closer as well as after Bell received numerous revisions from me they decided (on the last revision where I thought everything was good) that the opening on the intercooler need to match the core, where I had it stepping from the sizee of the output of the charger to the size of the core. So it now looks like I am going to have to add adaptor plates to the mix to cover the size difference between the core and the charger - well annoying....and makes it sit another 16mm higher..... parcel shelf lump getting bigger......

As you can see below it is a perfect match width ways but lengthways in needs to be stepped (adaptor plates in green), oh well, I guess if I dont want to pay for a bespoke sized core then this is the sacrifice I am going to have to make:


Posted Image


Posted Image

Edited by cptkirk, 25 November 2011 - 10:26 AM.


#739 cptkirk

cptkirk

    Camshaft & Stage Two Head

  • Members
  • PipPipPipPipPipPipPipPip
  • 1,799 posts
  • Location: West Sussex
  • Local Club: B.M.C. + Chiminiclub

Posted 28 November 2011 - 10:25 PM

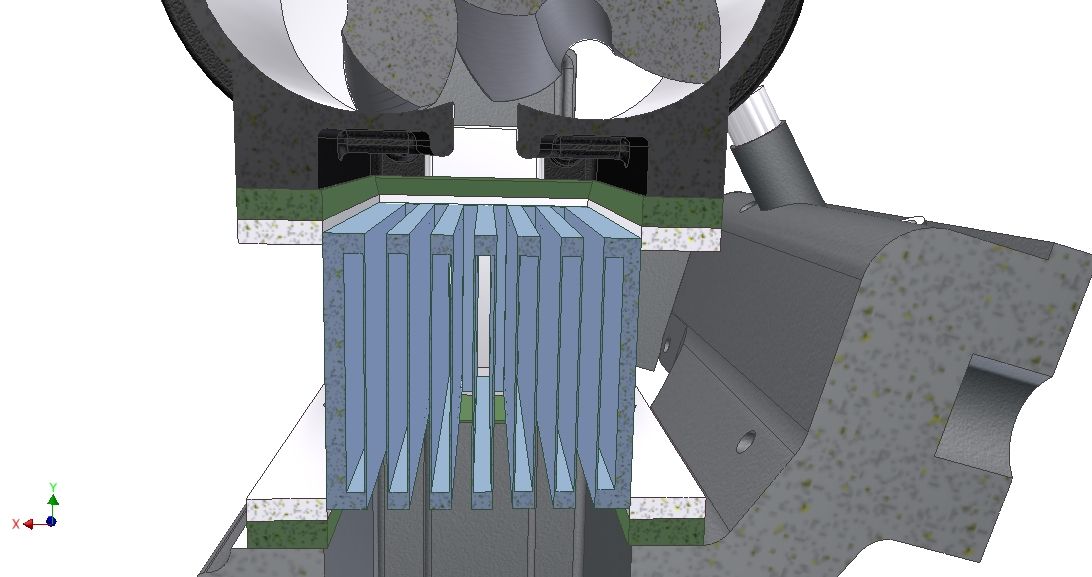
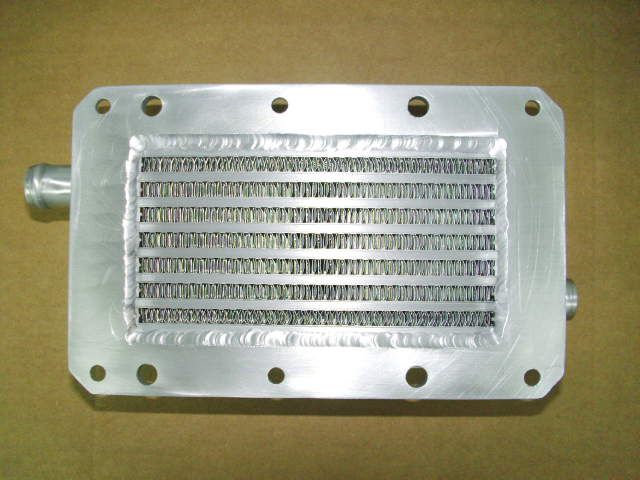
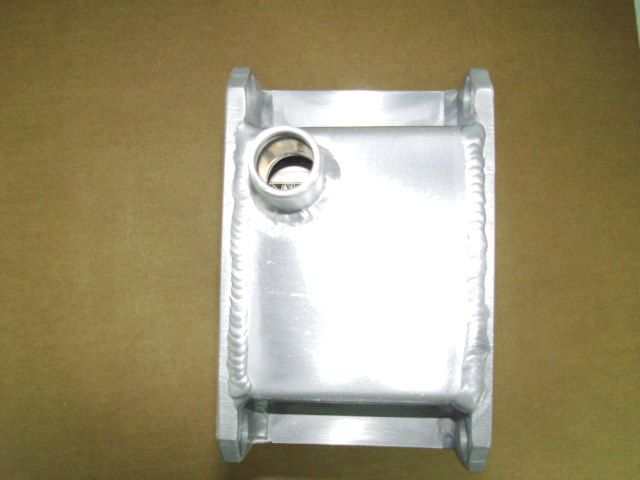
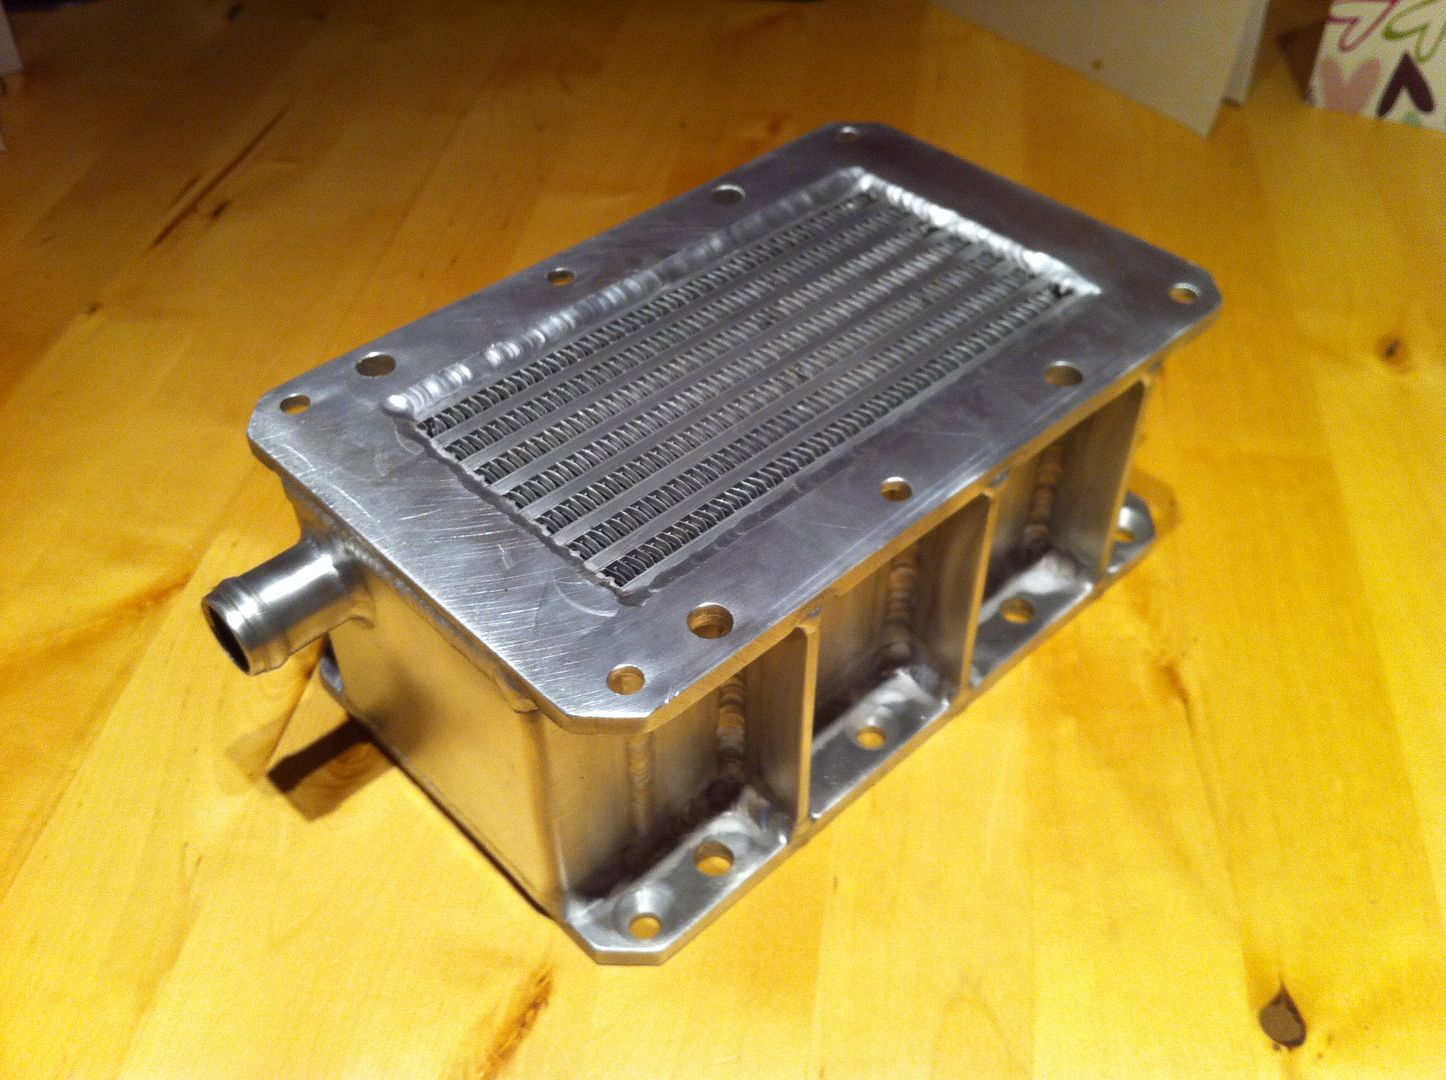
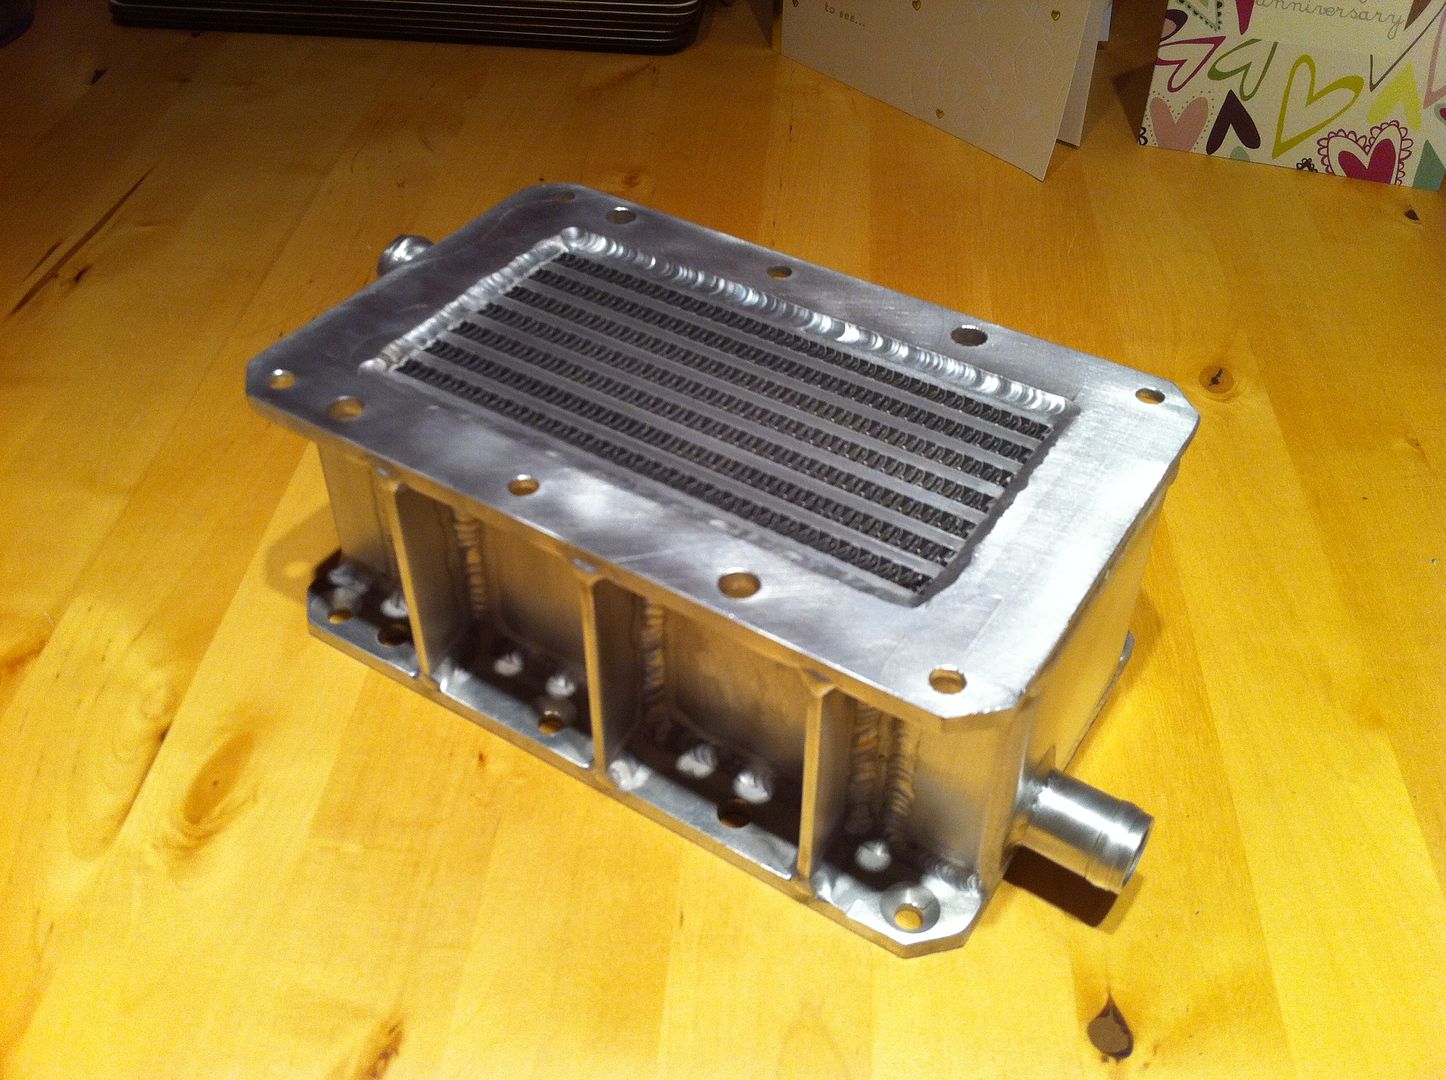
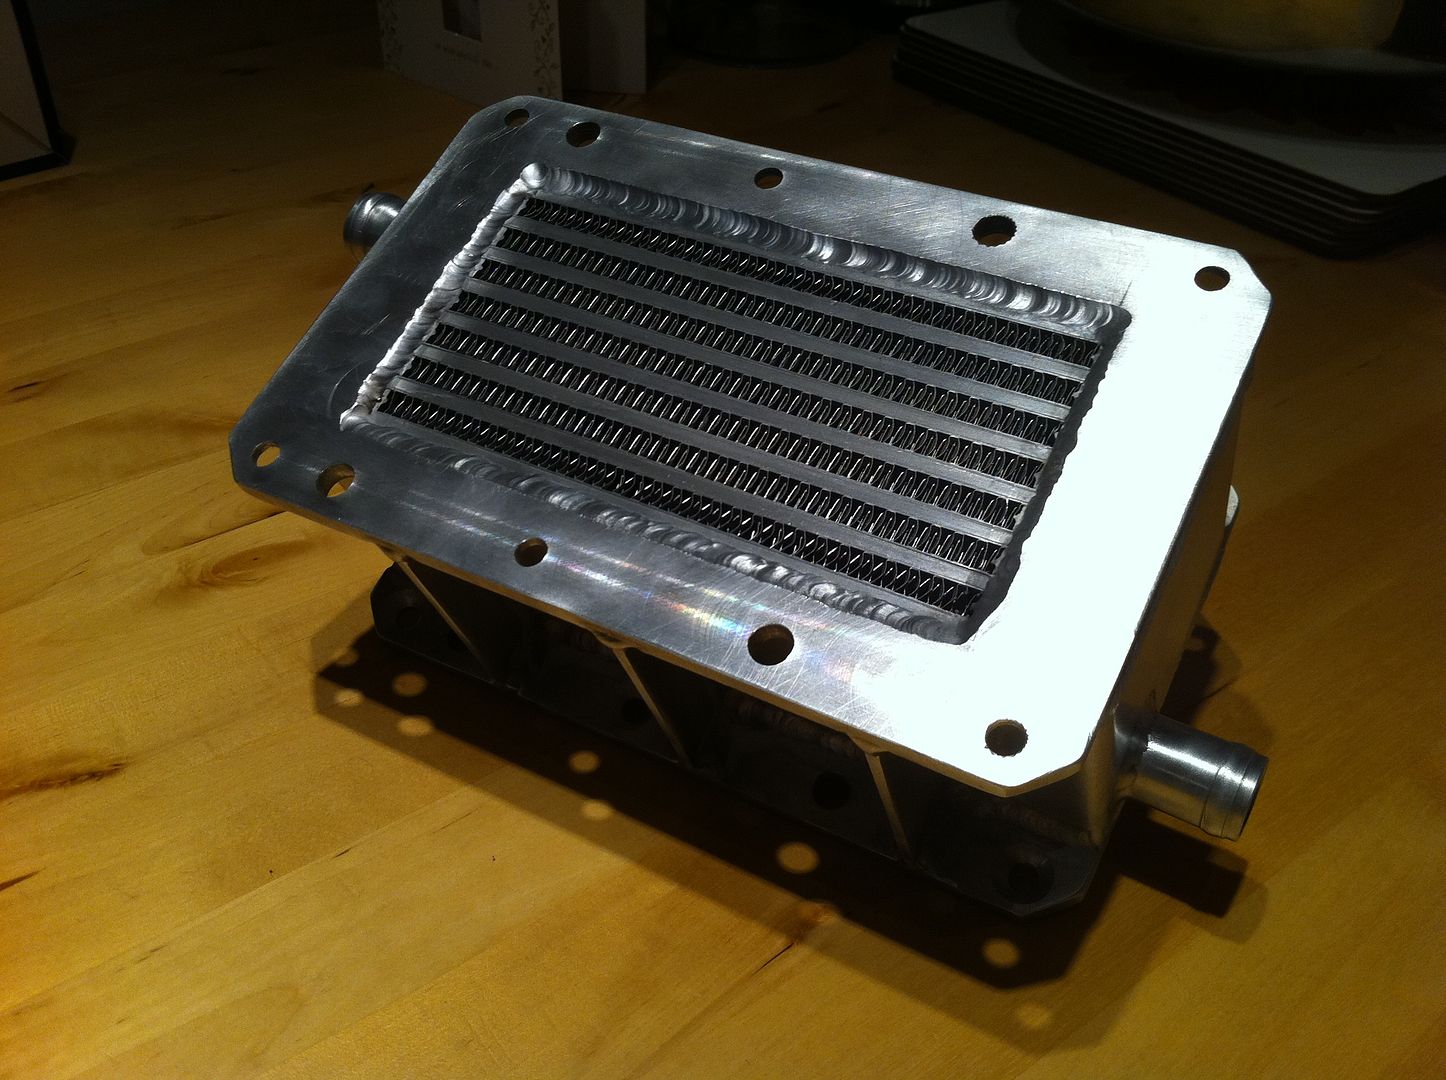
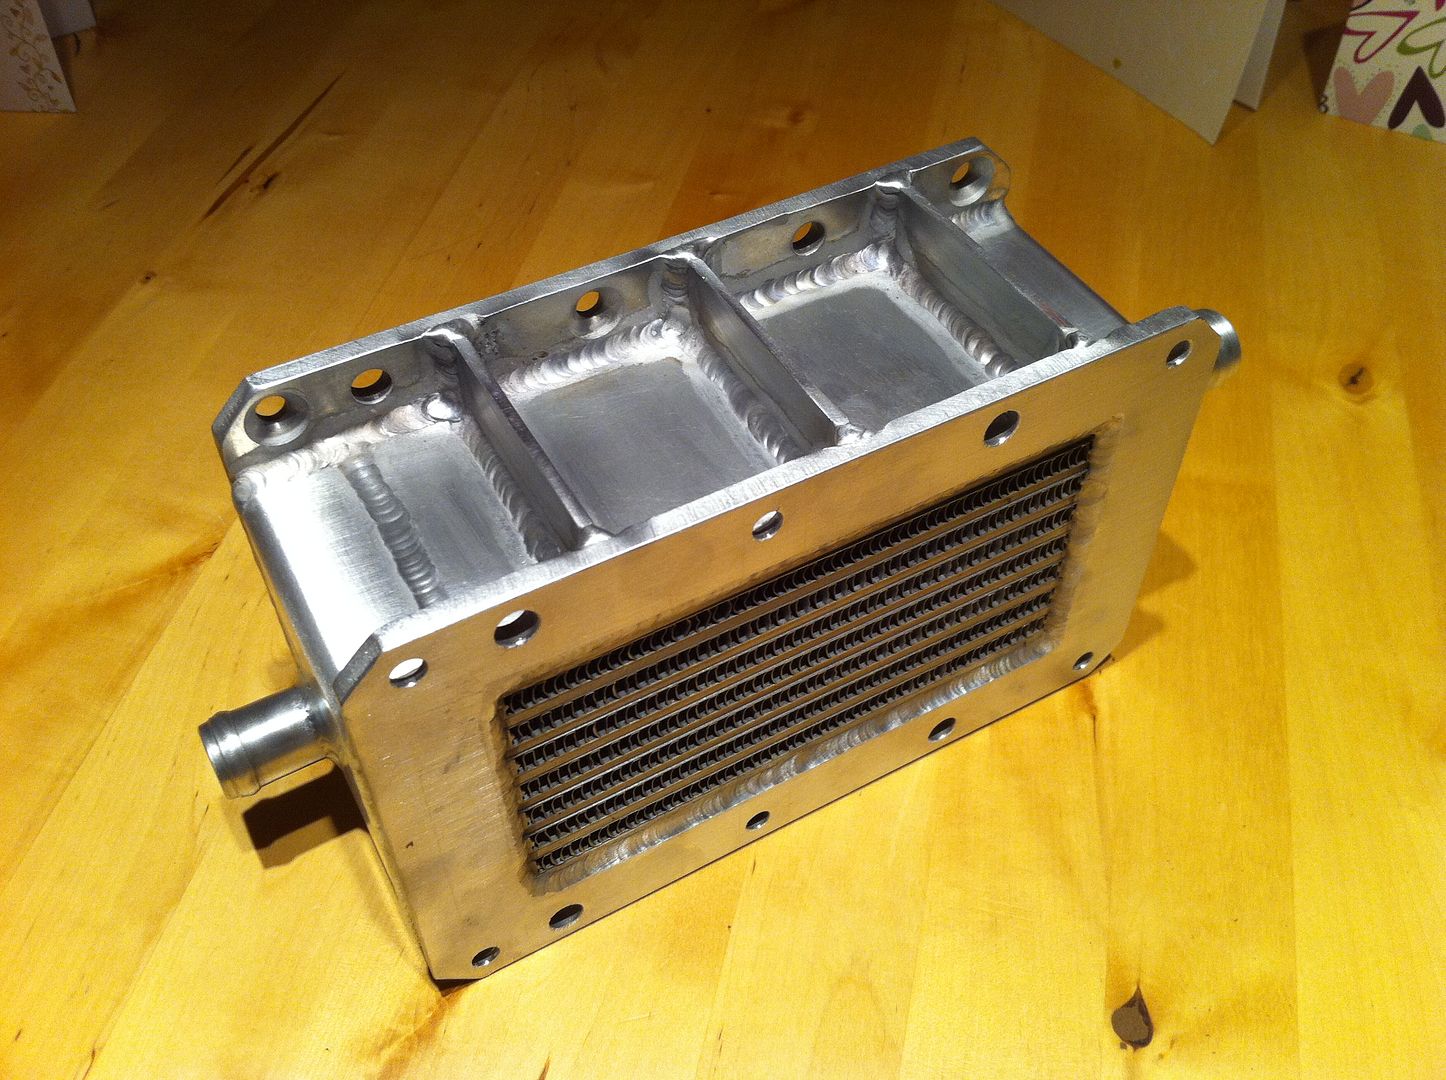
No news on the I/C yet, still doing revisions in response to comments from the guys at Bell.

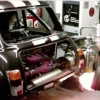
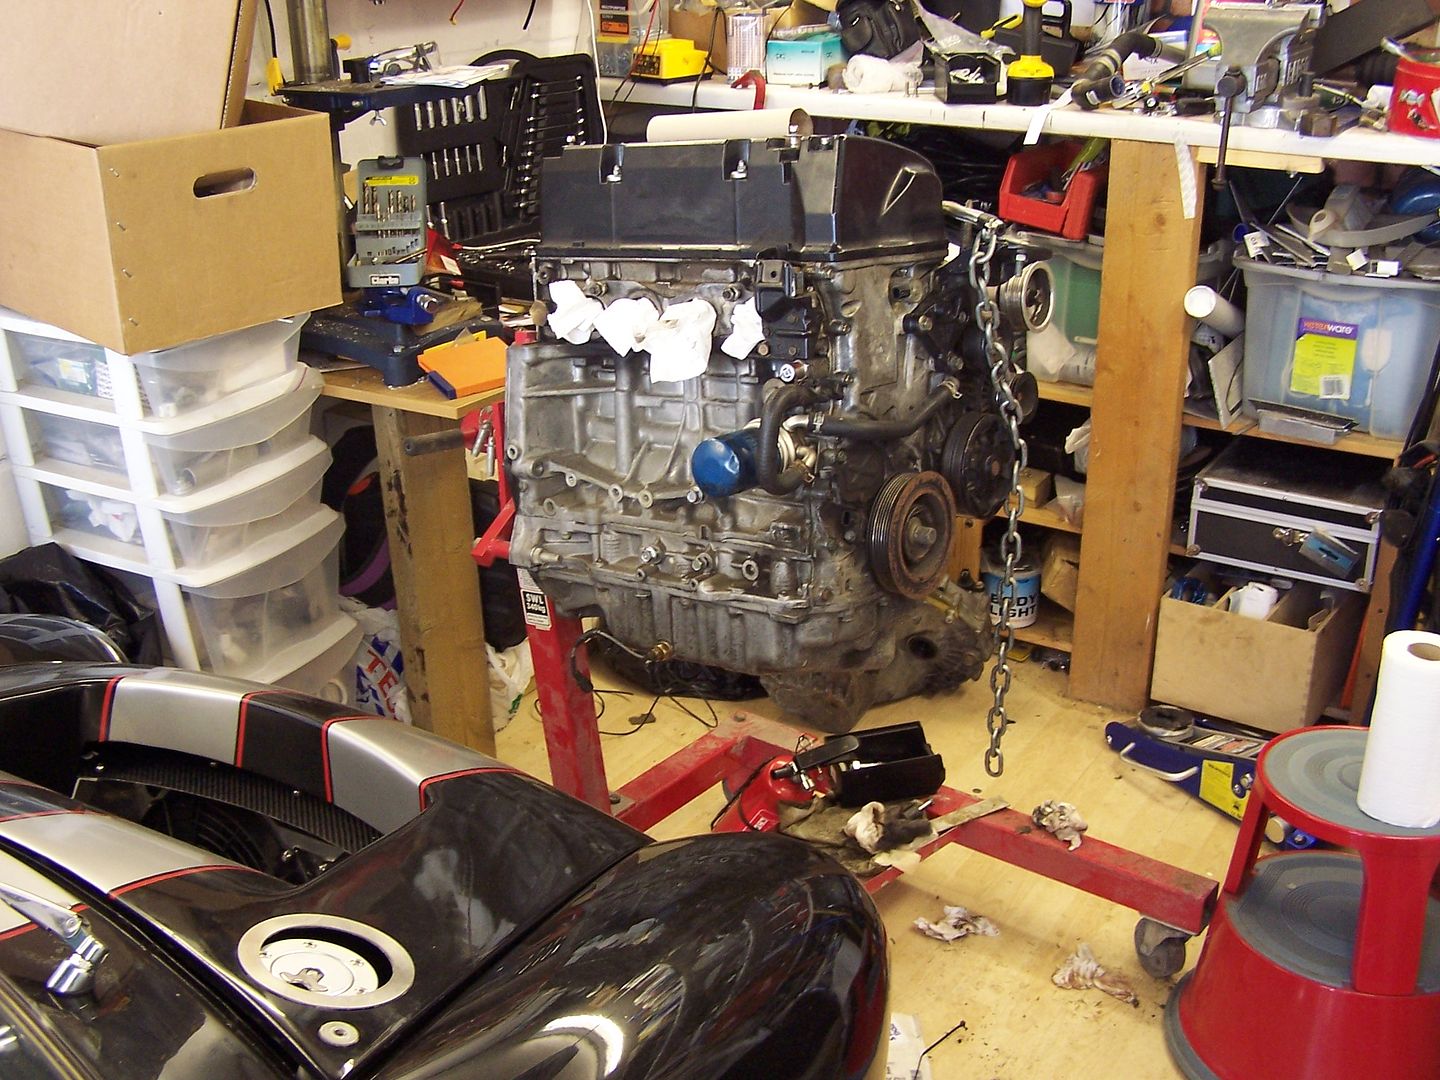
I downloaded some photos from the camera that I took last weekend, they are just to show what state the car is in at the minute and how tight it has become in the garage. I am having to clear stuff away as when its used to try and keep some free surface to work on.

Anyhooo, here's a few photos that might be of interest to anyone wanting to see what the engine bay of a VTEC Zcars mini looks like without an engine in it:


Posted Image


Posted Image


Posted Image


Posted Image


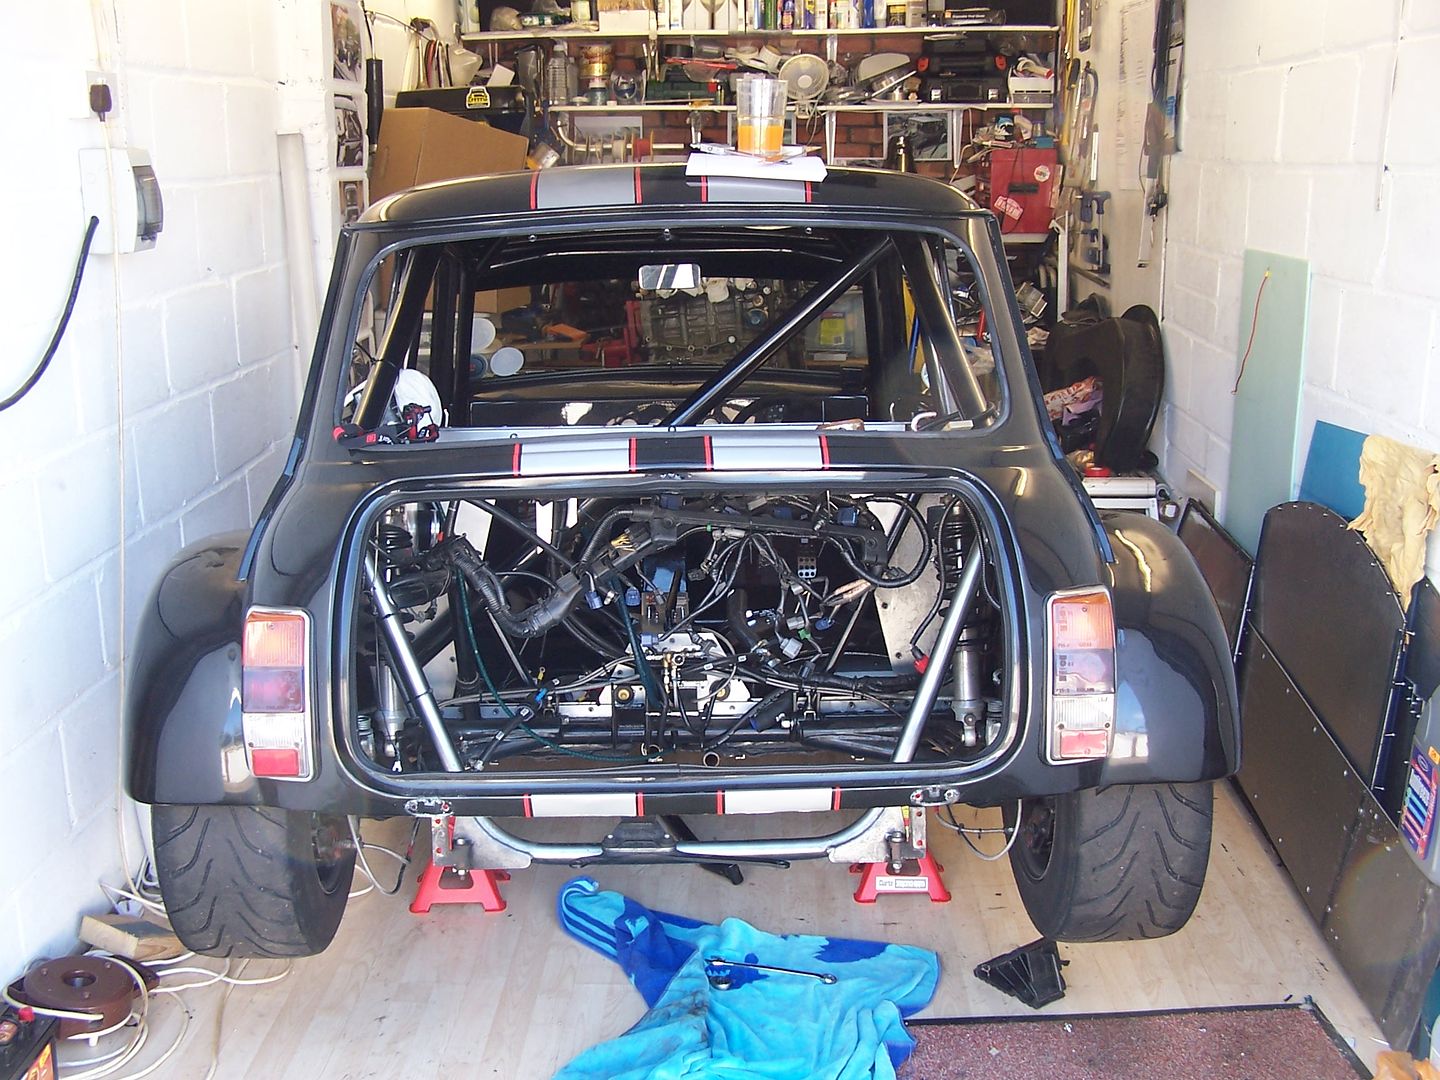
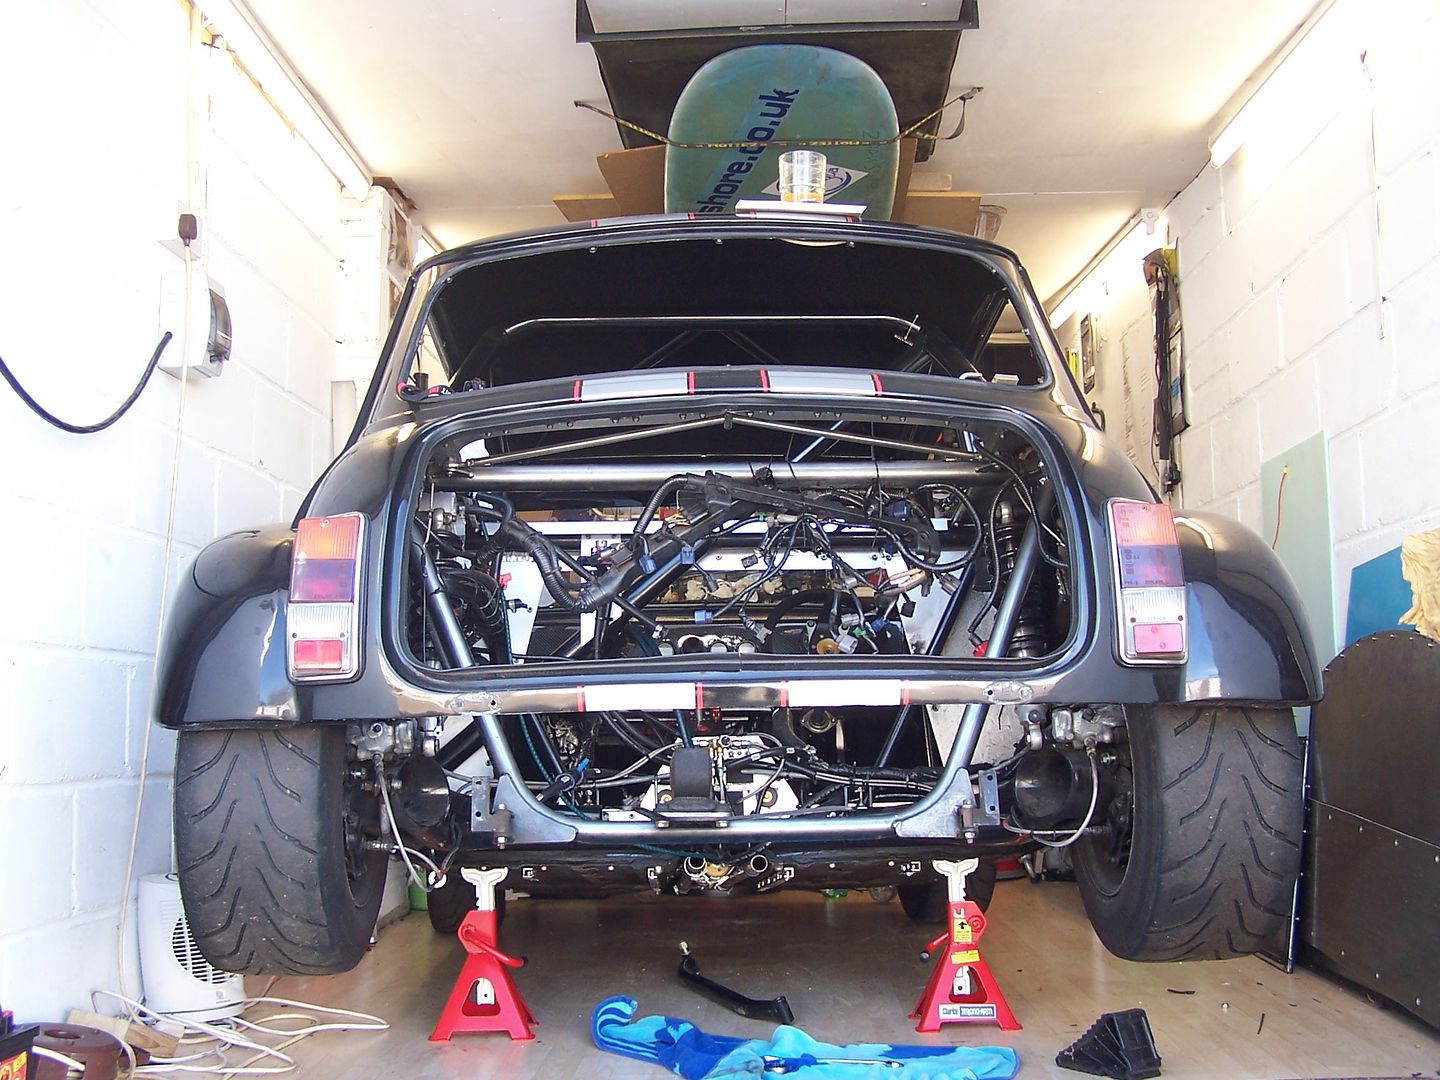
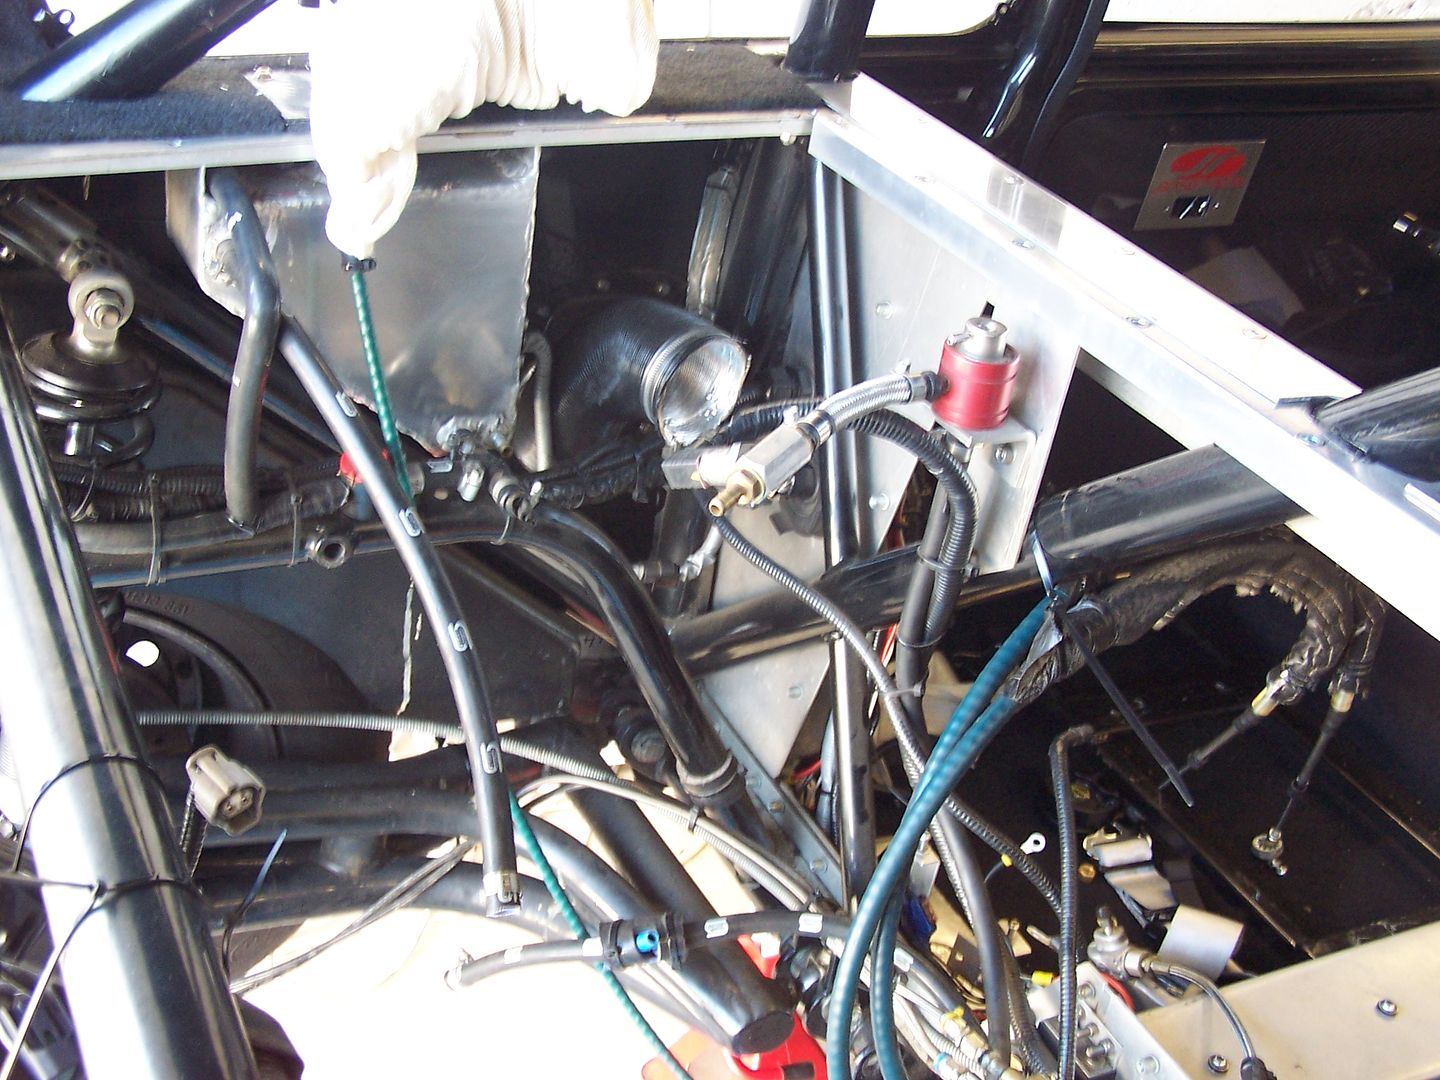
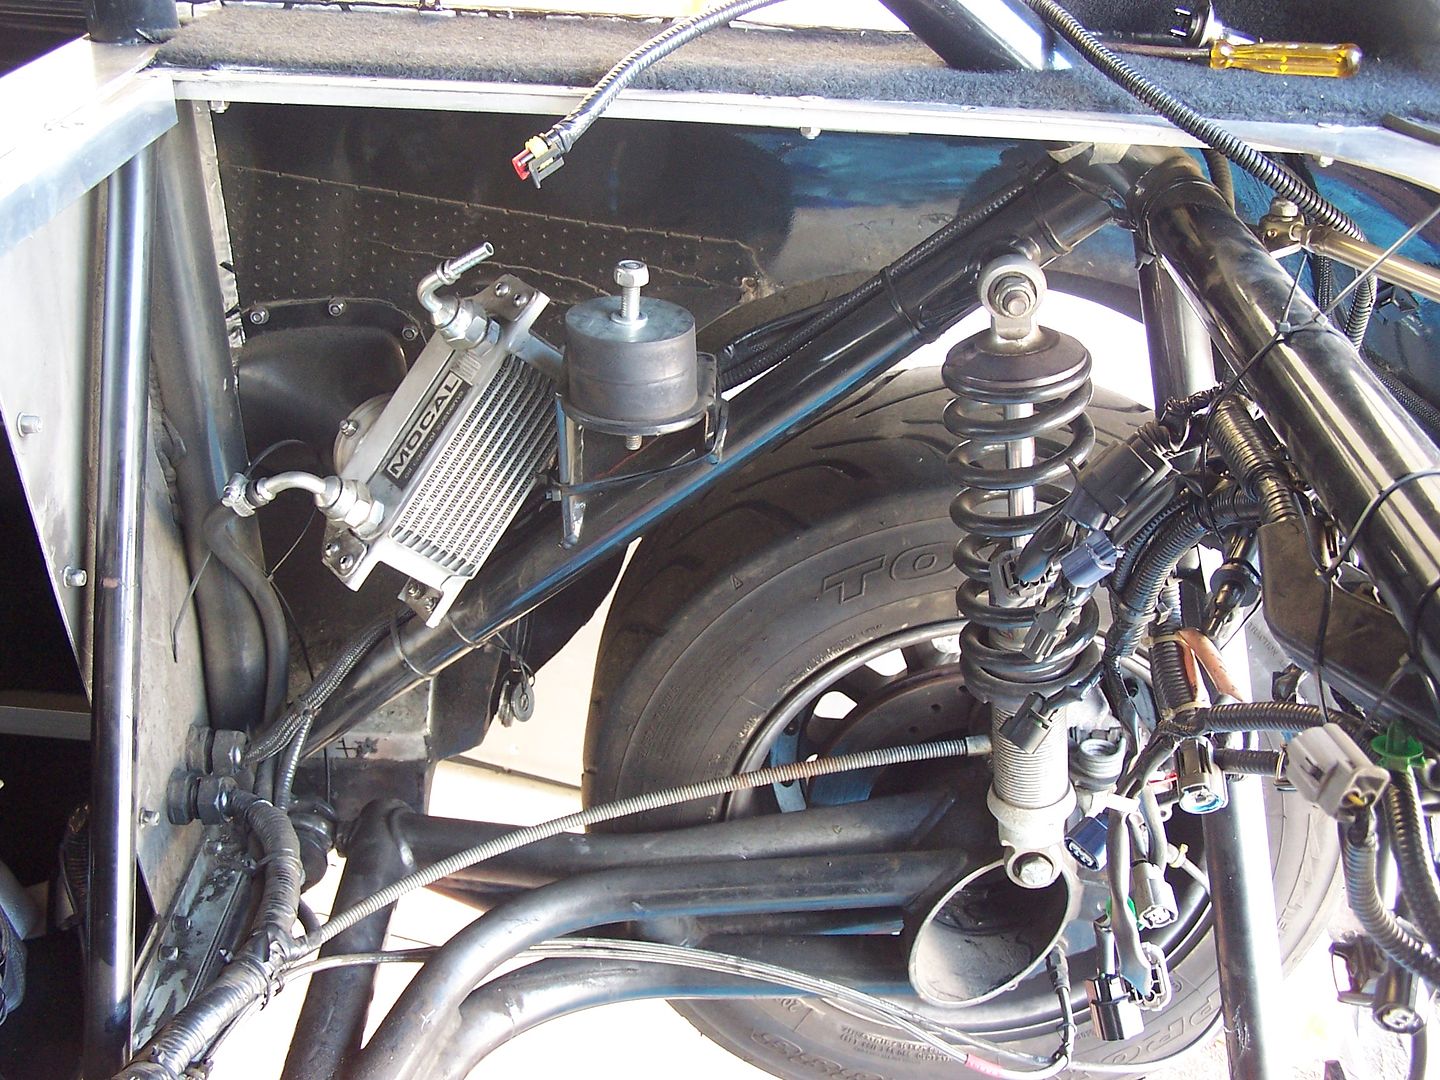
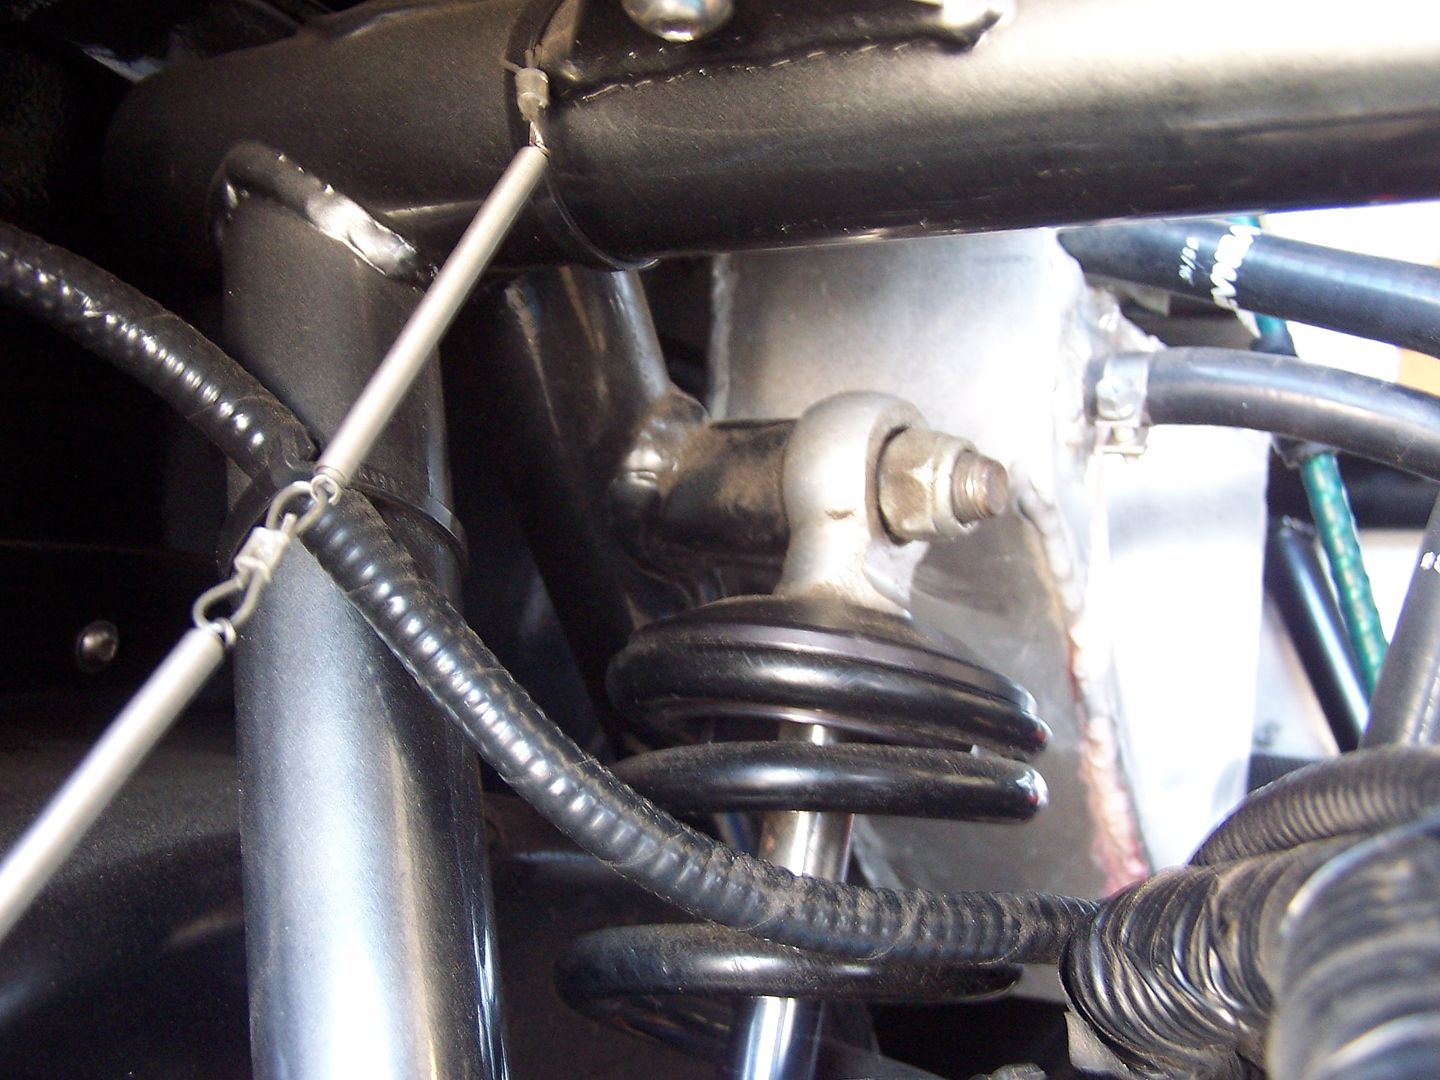
Below is a picture showing the main reason that I took the whole engine out, it wasnt just to change the clutch. The top rear suspension mounts have been bugging me ever since I got the car, as yet they havent failed but I know of some cars that have. So in an effort to eliminate the problem I am going to be making some additional supports to really beef up the mounts and greatly reduce the sheer forces on them. So you can see what I am going on about look at the photo below and you can see that all the force from the suspension unit is trying to make the bolt and its mount sheer from the frame. Since my frame has been made Zcars have beefed up this bit by adding a small rod in the mix to the top diagonal. As I am not intending to strip mine out and have it re-powder coated I am going to fabricate a brace bar that will hold the inner end of the bolt solid, more of that to come:


Posted Image


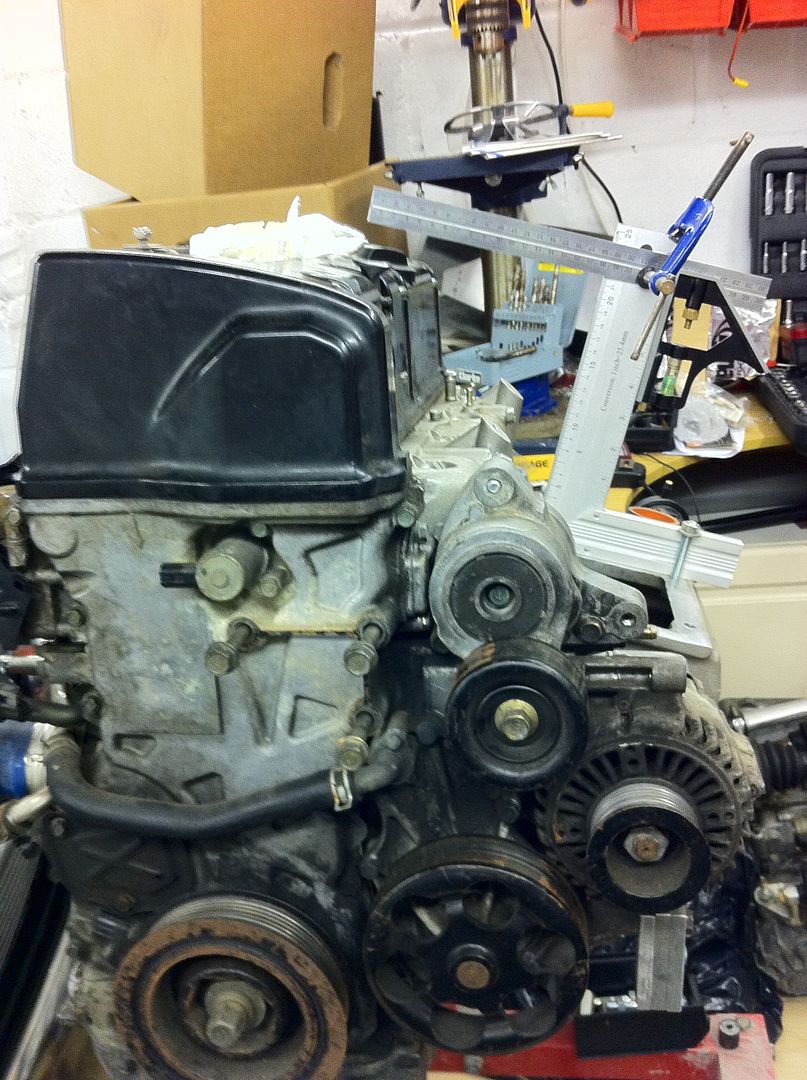
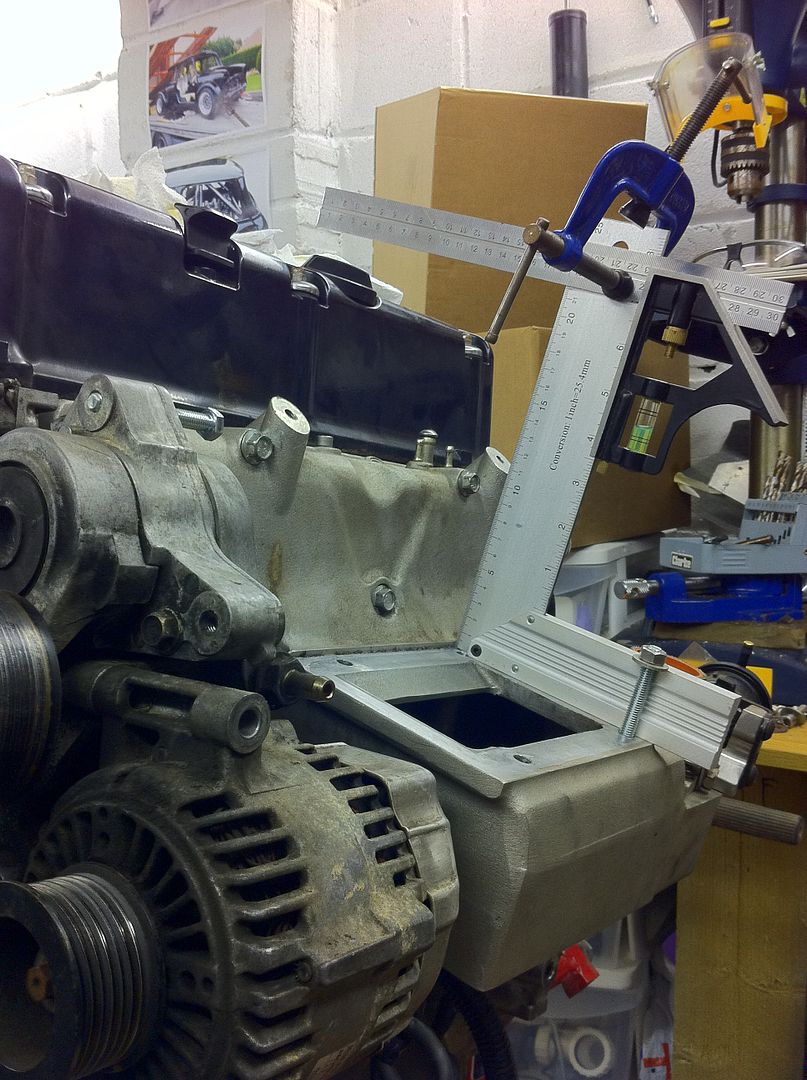
Good old facebook got me the loan of an engine stand to allow me to tinker to my hearts content.


Posted Image


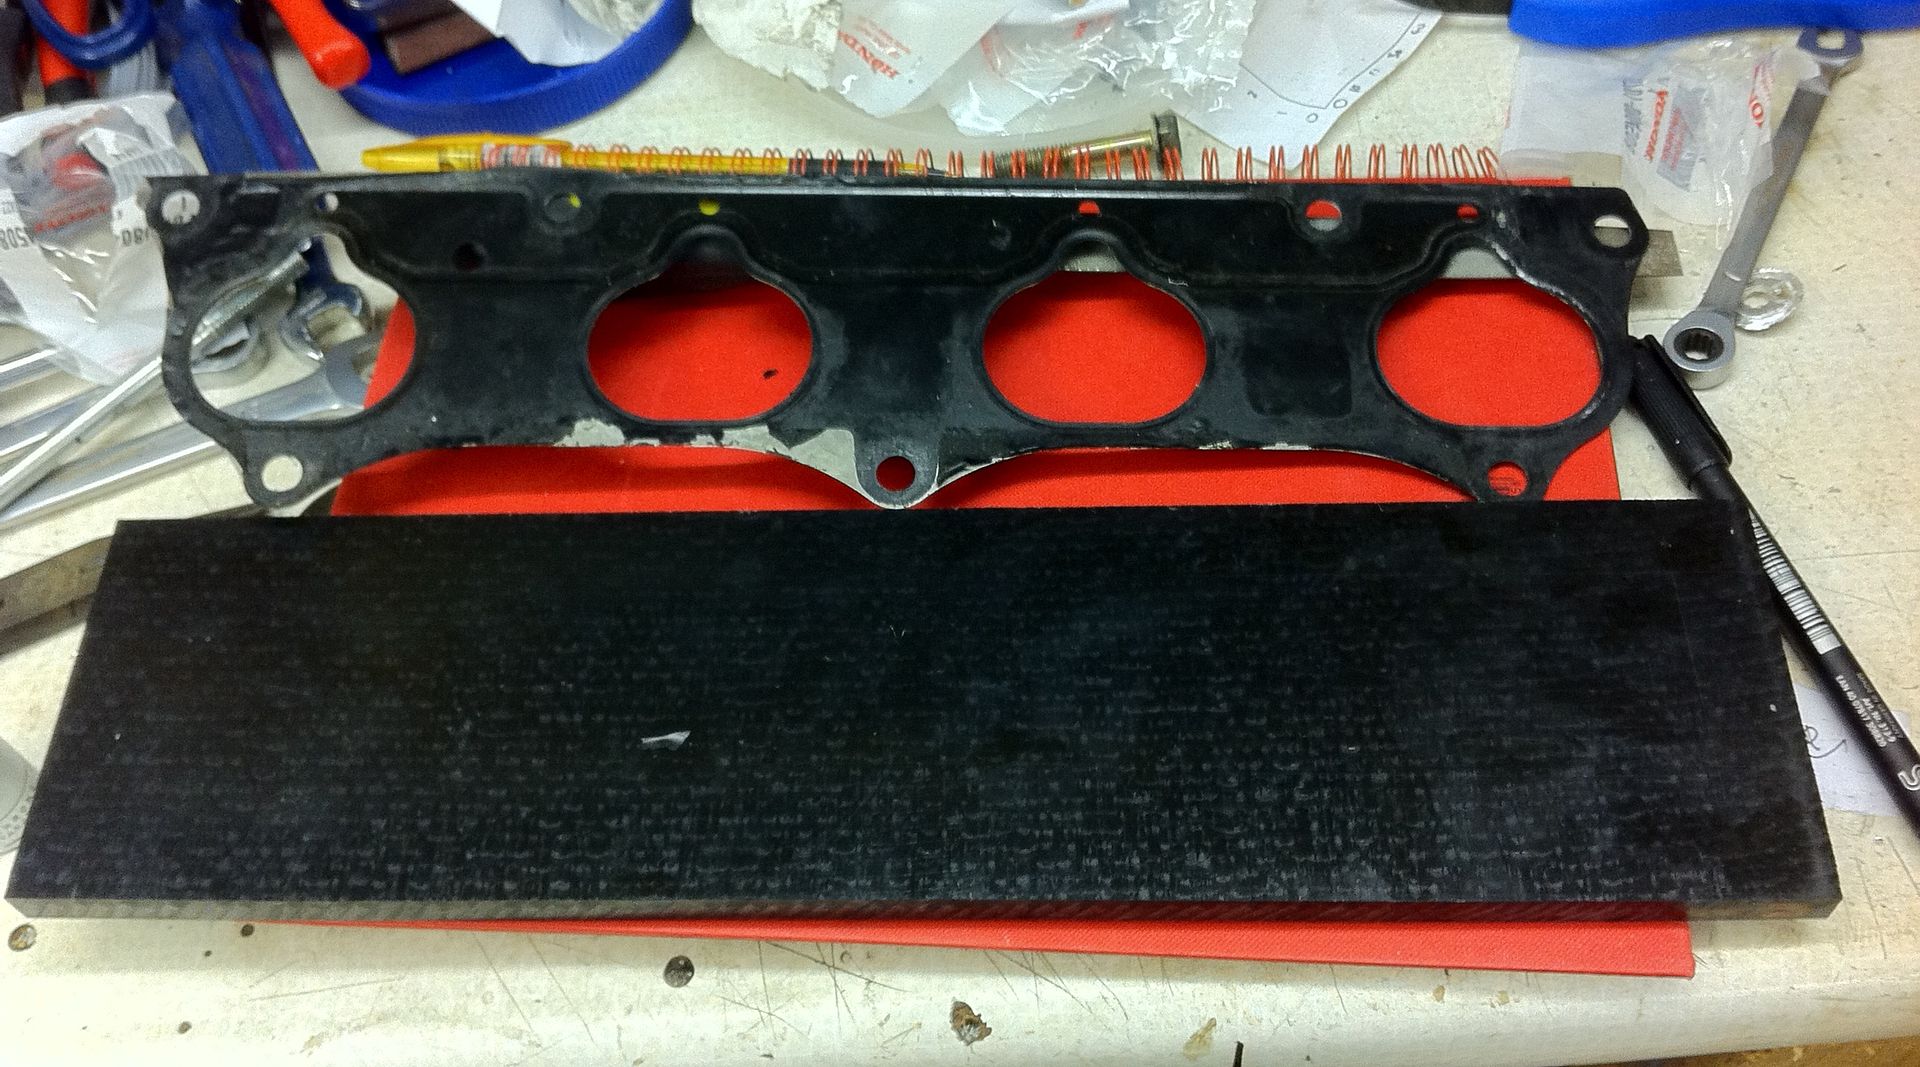
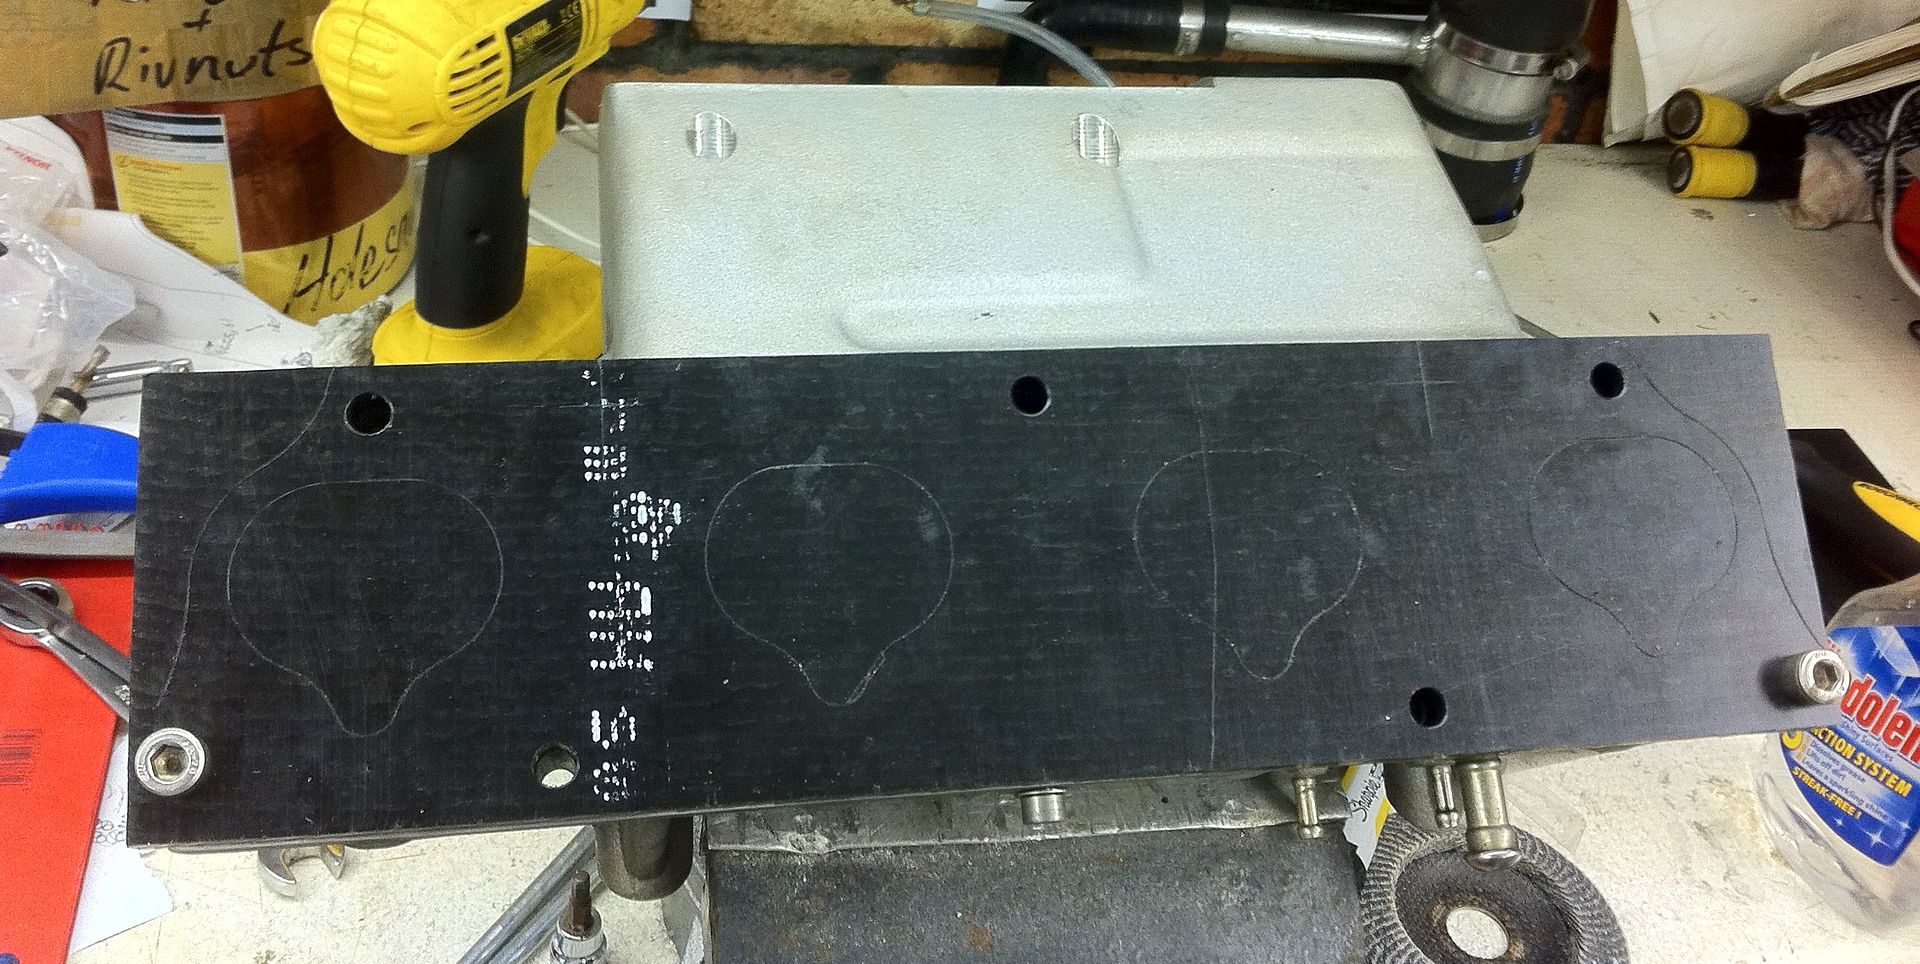
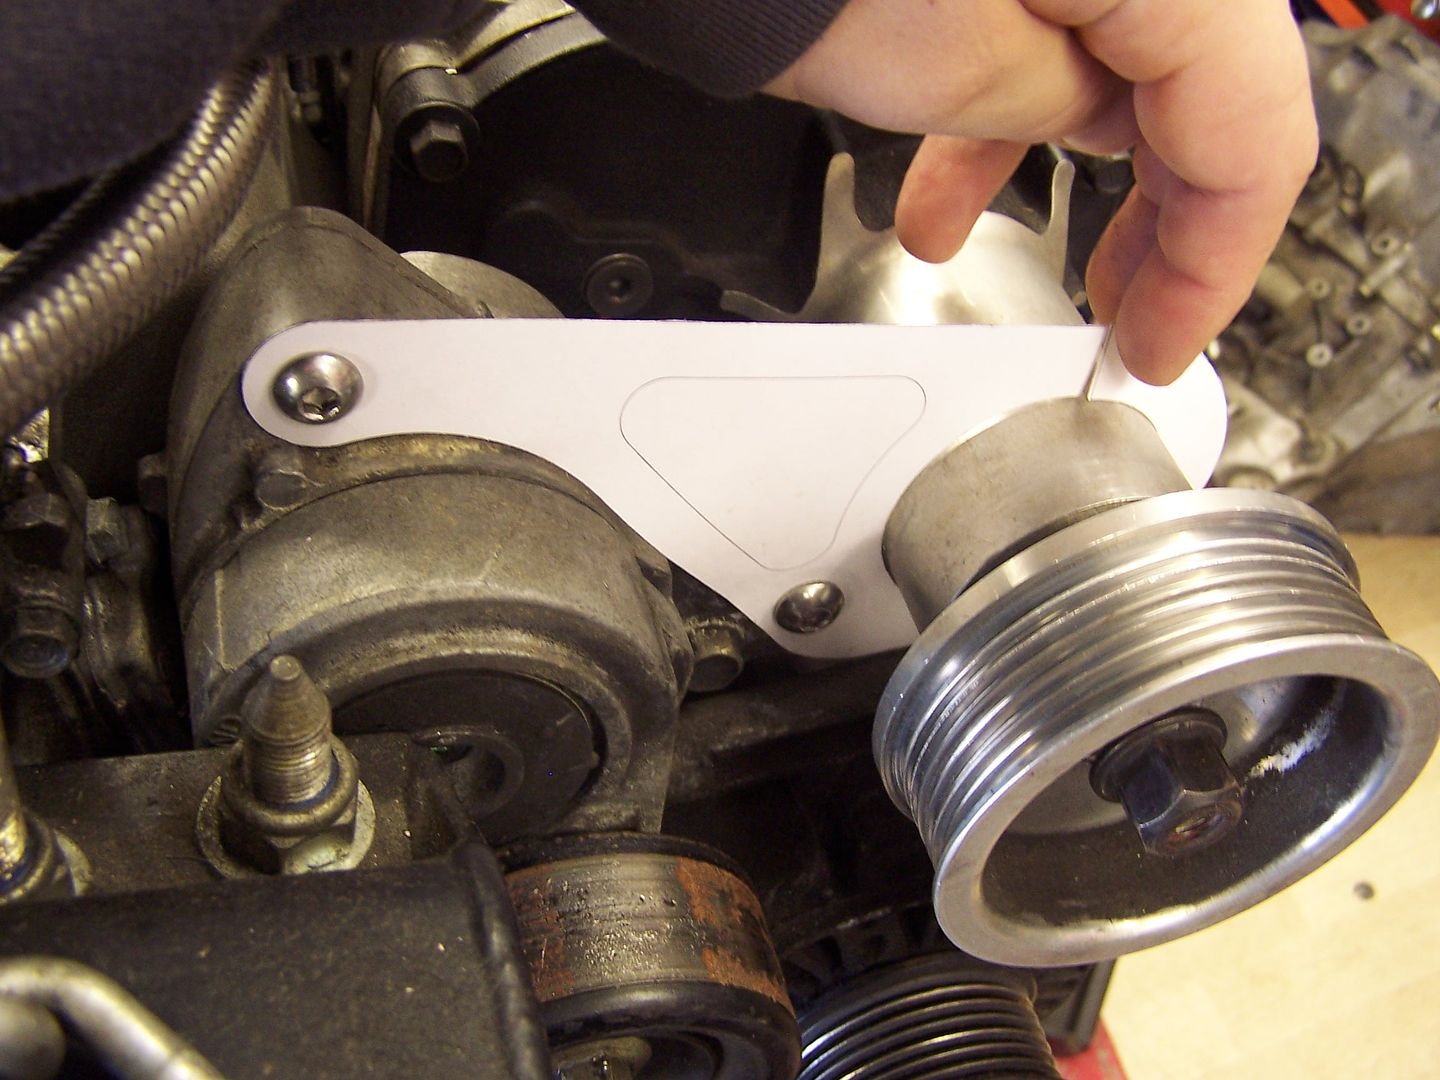
In the picture below is a card version of my first attempt at a snout clamp, before I decided to go chargecooled, the design has definitely come on a long way since this version.


Posted Image


Posted Image


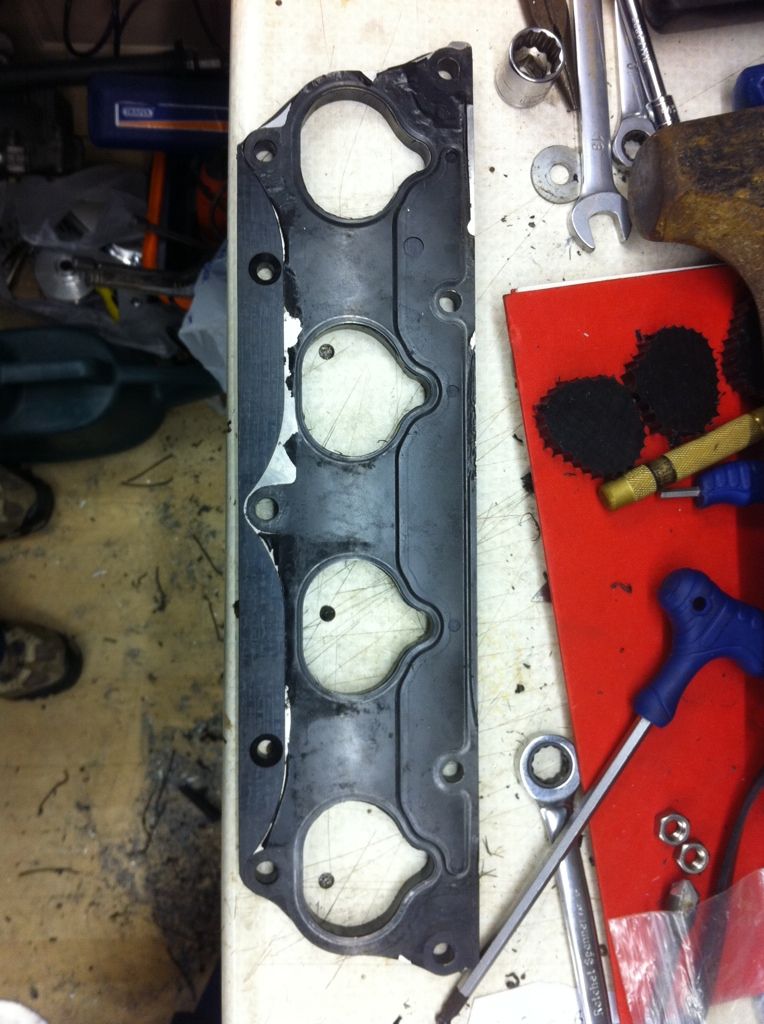
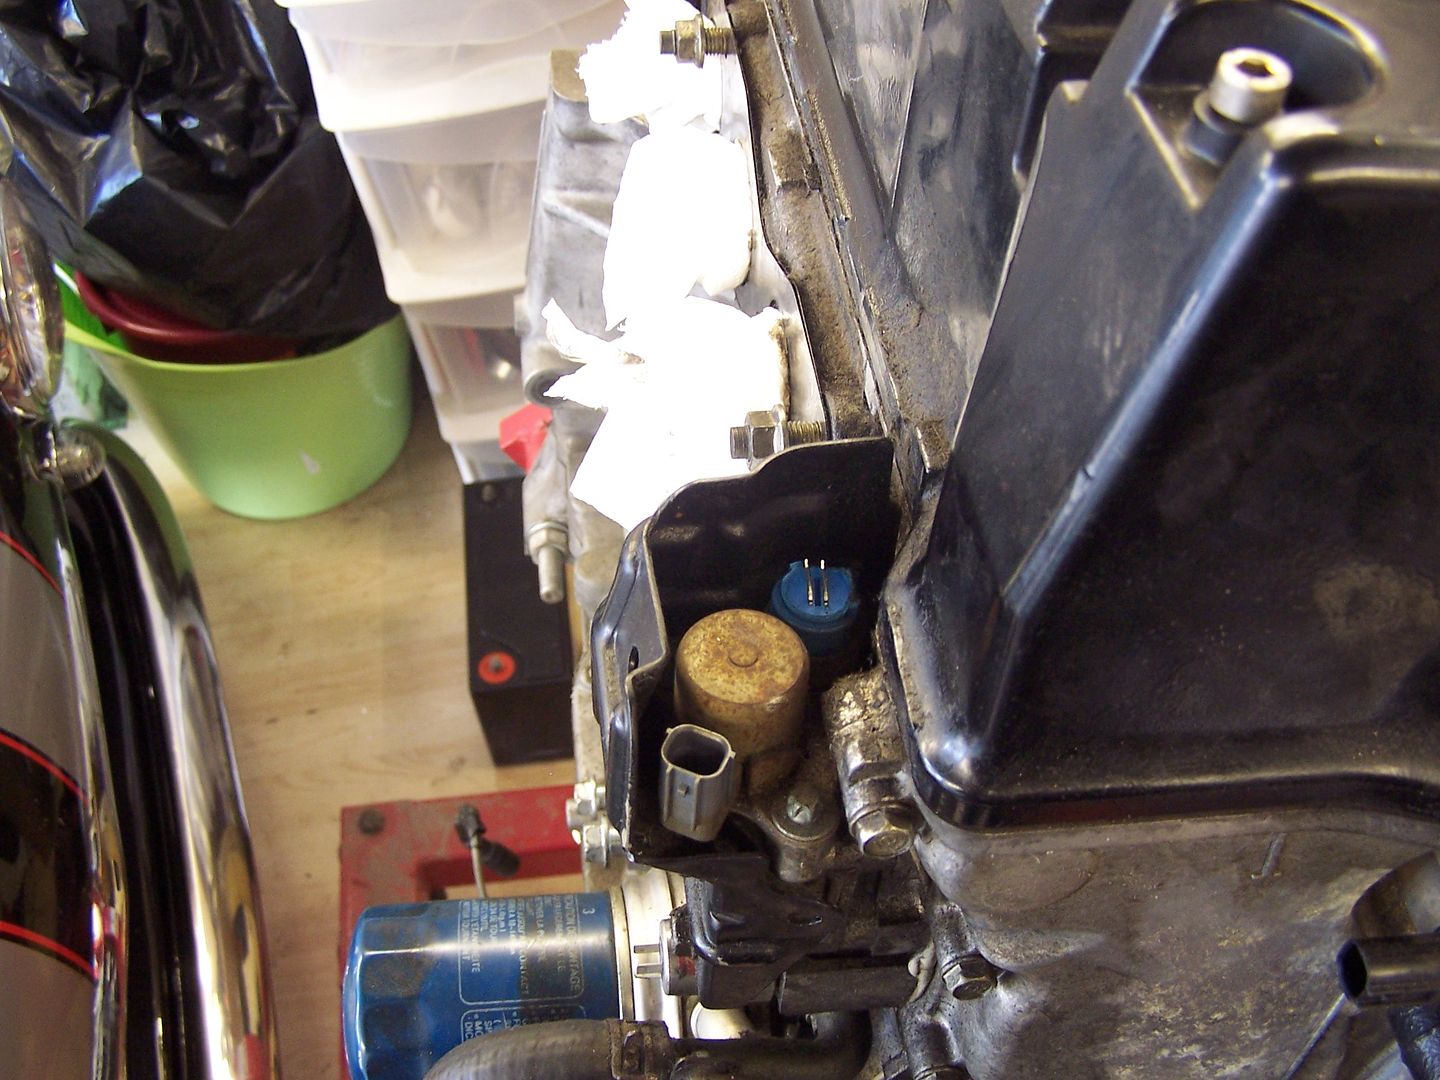
Below shows a broken sensor, its the VTEC oil pressure sensor of which Honda UK want approx £96 for one, I have managed to get one from the USA for £42 inc P&P, genuine Honda part..... Feck knows how long its been like that, the clip just came off in my hand with the top of the sensor still inside it - ooops...


Posted Image


That's all for now folks.........


.

#740 rustandoil

rustandoil

    Speeding Along Now

  • Members
  • PipPipPipPipPip
  • 317 posts
  • Location: Gloucestershire

Posted 29 November 2011 - 01:12 PM

Great pictures :mrcool:

Very interesting to see how it all fits together.

I might be being thick :huh: but how did you actually remove the engine? it all looks so very tight.........

#741 cptkirk

cptkirk

    Camshaft & Stage Two Head

  • Members
  • PipPipPipPipPipPipPipPip
  • 1,799 posts
  • Location: West Sussex
  • Local Club: B.M.C. + Chiminiclub

Posted 29 November 2011 - 06:01 PM

Great pictures :mrcool:

Very interesting to see how it all fits together.

I might be being thick :huh: but how did you actually remove the engine? it all looks so very tight.........


I took the car to a mates garage and used his two poster ramp, it sits pretty much flat on the bottom of the sump when dropped onto a flat surface, we used an old tool chest with castors so we could move it around. front and rear engine mounts have to be removed, the gearbox mount jsut needs the bold dropping out of it when theres some pressure from underneath on the engine and then finally the O/S mount needs weight taken up and then theres three bolts in the side of the block that need removing. Then its just a case of taking the car up on the ramp and pulling the engine from underneath, this is the second time I have taken the engine out, this is my second engine as the first one was well and truly water damaged.

#742 cptkirk

cptkirk

    Camshaft & Stage Two Head

  • Members
  • PipPipPipPipPipPipPipPip
  • 1,799 posts
  • Location: West Sussex
  • Local Club: B.M.C. + Chiminiclub

Posted 23 December 2011 - 01:30 PM

ONE STEP CLOSER TO MORE POWAHHHHH


I got an email yesterday from the guys at Bell in the USA, my new Intercooler cartridge (as they call them) is winging its way to me.........AWESOME.....

They were kind enough to send a couple of photos, unfortunately they arent the most interesting of angles, hey ho you get what you're given......

Turns out it looks alot like the drawing I sent them - which is nice, as if it didnt I'd be a bit peeved... So below we have the drawing I sent to them (not great quality but then I dont want to give all my secrets away followed by the photos from Bell, more to come as and when.....


Posted Image


Posted Image


Posted Image

#743 hustybusty

hustybusty

    Mini Mad

  • Members
  • PipPipPipPip
  • 236 posts

Posted 23 December 2011 - 11:29 PM

your car is immense, it makes mine look like micky mouse

#744 rustandoil

rustandoil

    Speeding Along Now

  • Members
  • PipPipPipPipPip
  • 317 posts
  • Location: Gloucestershire

Posted 24 December 2011 - 07:39 AM

That's a nice Christmas prezzie coming your way............... :D :D

#745 cptkirk

cptkirk

    Camshaft & Stage Two Head

  • Members
  • PipPipPipPipPipPipPipPip
  • 1,799 posts
  • Location: West Sussex
  • Local Club: B.M.C. + Chiminiclub

Posted 24 December 2011 - 10:57 AM

your car is immense, it makes mine look like micky mouse


Thanks, dont put yours down, we all have to start somewhere and I've had some sh!t cars in my time

That's a nice Christmas prezzie coming your way............... :D :D


Oh yes it is, loads to get done before the spring now, I'll have a few days on it over Xmas.


.

#746 cptkirk

cptkirk

    Camshaft & Stage Two Head

  • Members
  • PipPipPipPipPipPipPipPip
  • 1,799 posts
  • Location: West Sussex
  • Local Club: B.M.C. + Chiminiclub

Posted 24 December 2011 - 10:58 AM

Happy Christmas to everyone that reads the build diary, its the viewing numbers that keep me adding to it and to all the fellow Zcars owners.

#747 2lrminivan

2lrminivan

    Mini Mad

  • Members
  • PipPipPipPip
  • 276 posts

Posted 24 December 2011 - 03:34 PM

the Beast is evolving
what you doing to the car next winter lol
merry christmas m8

#748 scorge01

scorge01

    Just On Tickover

  • Noobies
  • Pip
  • 7 posts
  • Location: aberdeenshire

Posted 25 December 2011 - 02:20 PM

nice mate :) new to here but theres defo some nice projects on here and this is one of them

#749 cptkirk

cptkirk

    Camshaft & Stage Two Head

  • Members
  • PipPipPipPipPipPipPipPip
  • 1,799 posts
  • Location: West Sussex
  • Local Club: B.M.C. + Chiminiclub

Posted 28 December 2011 - 07:06 PM

The Intercooler is Here

It arrived today and looks really good, there will be more photos to come once I get the adaptor plates machined which will make more sense of the holes in the top and bottom plates.

I have also been doing some work on a heat barrier intake manifold gasket, you can buy these from Hondata and others but they are only 3-4mm thick, I went for 10mm Acetal for its high melting point. I am only half way through and hope to get more done to it tomorrow, photos of that at the end...


Intercooler Cartridge:


Posted Image


Posted Image


Posted Image


Posted Image


Posted Image


Heatshield:


the OEM gasket and the blank of Acetal - Gasket made for a good template.

Posted Image


Posted Image


Posted Image


Posted Image

#750 cptkirk

cptkirk

    Camshaft & Stage Two Head

  • Members
  • PipPipPipPipPipPipPipPip
  • 1,799 posts
  • Location: West Sussex
  • Local Club: B.M.C. + Chiminiclub

Posted 31 December 2011 - 12:13 PM

Heatshield

I managed a few more hours on the car and got the heatshield finished, considering all I used was a pillar drill, hand files and a stanley blade I thought I did alright.


Posted Image


Posted Image


Posted Image


This is one with the OEM gasket over the new Heatshield:

Posted Image


This is with the new Heatshield on the intake manifold, it shows how much the Jackson Racing manifold can be ported to improve the flow. I hope to borrow a die grinder and sort that soon enough.


Posted Image


1 user(s) are reading this topic

0 members, 0 guests, 0 anonymous users


    Google (1)