Oooh, and if you are thinking of buying a 12G940 head I think you will have to get your block pocketed to allow the valves to clear it.


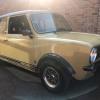
Newcomer to the Mini Scene and my project
Started by
stormduck
, Sep 22 2005 08:27 AM
141 replies to this topic
#31

The Matt
-

- Admin
-

- 17,232 posts
You don't escape that easily.....
- Name: Matt
- Location: Overton, North Wales
- Local Club: Welsh Border Minis
Posted 08 October 2005 - 01:39 PM
#32
Purple Tom
-
- TMF+ Member
-
- 4,921 posts
Up Into Fourth
- Location: Derbyshire
- Local Club: TMF
Posted 08 October 2005 - 01:46 PM
alternatively, use a jack to apply pressure to the ball joints, just enough to engage the taper, that should allow the nut to come undone.With the nut on the joint, I would get a crow bar or similar underneath it and lever the tapered joint back up into the hole (so it jams). THis is something that happens all the time and this is how I always undo them.
If you get a lever under it and lever it upwards the taper will jam in the hole and should hold enough for you to undo the nut.
I'd even be tempted to do that and wind the nut back down before trying to undo it. You can get to the threads then to clean them up where they have been tight (probably rust on the 'exposed' part of the thread). :wink:
Then use a ball joint splitter to split the joints.
As ed4ran says, you don't need a hub puller to remove the rear hubs, use a socket to undo the castle nuts (visible when you take the pressed steel caps off), bearing in mind the L/H one is a L/H thread. With the nuts undone the hub will literally slide off.
You're doing well though, I'm impressed!
#33
wobbit
-

- Members
-
- 1,579 posts
Camshaft & Stage Two Head
- Local Club: basingstoke mini club
Posted 08 October 2005 - 03:26 PM
lookin gud mate, i wish i had the guts to do that sorta work myself!!! :wink:
#34
CAU998
-
- Members
-
- 1,202 posts
One Carb Or Two?
- Local Club: TMF South Central...
Posted 08 October 2005 - 04:58 PM
The Rear subframe mount bolts are a pig exactly the same happened to me. Apparently you are meant to drill holes through the rear pockets into where the bolts come through, soak them in WD40 and leave them for along period of time. Before you release them. Least only 1 snapped off i have 2 snapped of in the car.
#35
stormduck
-
- Members
-
- 383 posts
Speeding Along Now
Posted 08 October 2005 - 07:54 PM
Cheers fellas! Right, i made a bit of a plumed attempt at explaining my balljoint situation!
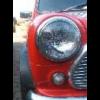
This balljoint, i have the nut able to come off, but i can't seem to dislodge the bugger. I've smacked it with a hammer, and even snapped one of the screw type ball joint seperaters (Brand NEW! but i think a cheapo C**p 8.99), so i'm not sure what's next...maybe one of the wedge type seperators...

and this pictures is of the passenger side where the nut is stuck.

ed4ran - funny you should say that because a pair of mole grips is one of things i haven't got! I may have to go and get some, i was trying to grip it with pliers but the grease was just causing them to slip, but yeah, if i could clean it up, i think this would work.
minimadme - i did think something along those lines and tried to do it, but i think the joint's knackered as it is just so loose and came free as i was undoing the nut!
minis84 - i did try this jack method of pressing the taper from underneath to try and hold it, but it just kept spinning, all be at a bit stiffer to turn the nut.
I think i'll try at the gripping and undoing method as i think that's got the most chance.
As for the rear hub that's excellent news! i'll do that tomorrow and get the radius arms off! Cheers!
minimadme - i wasn't sure if this was the case! I know the 1300 metro head does, but the book i've been reading doesn't say this about the 12g940, but as it comes from a 1275 it would make sense if that was the case. I'll keep my eye out for a 295 in that case!
wobbit - i don't know where it's all come from to be honest!
cau998 - it's great isn't it! My mechanic chum has instructed me to get a mounting repair panel, then we'll cut the section out and weld the new one in...making sure it's straight! I see a Tricky job coming on!
I've been stripping the twin SUs i've got off ebay tonight...i need to get a refurb kit off minispares and i can rebuild them all nice, they're quite grubby. But i'm wondering if anyone will know what this small tube i had running from the distributor horn looking thing to the inlet manifold of the 1.5" single su originally on there is!? It was actually snapped so wasn't working anyway, but i assume its some sort of vacuum and don't know if i need it or not!?
Cheers!!
Onwards and greasier!
This balljoint, i have the nut able to come off, but i can't seem to dislodge the bugger. I've smacked it with a hammer, and even snapped one of the screw type ball joint seperaters (Brand NEW! but i think a cheapo C**p 8.99), so i'm not sure what's next...maybe one of the wedge type seperators...
and this pictures is of the passenger side where the nut is stuck.
ed4ran - funny you should say that because a pair of mole grips is one of things i haven't got! I may have to go and get some, i was trying to grip it with pliers but the grease was just causing them to slip, but yeah, if i could clean it up, i think this would work.
minimadme - i did think something along those lines and tried to do it, but i think the joint's knackered as it is just so loose and came free as i was undoing the nut!
minis84 - i did try this jack method of pressing the taper from underneath to try and hold it, but it just kept spinning, all be at a bit stiffer to turn the nut.
I think i'll try at the gripping and undoing method as i think that's got the most chance.
As for the rear hub that's excellent news! i'll do that tomorrow and get the radius arms off! Cheers!
minimadme - i wasn't sure if this was the case! I know the 1300 metro head does, but the book i've been reading doesn't say this about the 12g940, but as it comes from a 1275 it would make sense if that was the case. I'll keep my eye out for a 295 in that case!
wobbit - i don't know where it's all come from to be honest!
cau998 - it's great isn't it! My mechanic chum has instructed me to get a mounting repair panel, then we'll cut the section out and weld the new one in...making sure it's straight! I see a Tricky job coming on!
I've been stripping the twin SUs i've got off ebay tonight...i need to get a refurb kit off minispares and i can rebuild them all nice, they're quite grubby. But i'm wondering if anyone will know what this small tube i had running from the distributor horn looking thing to the inlet manifold of the 1.5" single su originally on there is!? It was actually snapped so wasn't working anyway, but i assume its some sort of vacuum and don't know if i need it or not!?
Cheers!!
Onwards and greasier!
#36
ed4ran
-

- TMF+ Member
-
- 2,849 posts
Cadwell Event organiser
- Location: Stoke On Trent
Posted 09 October 2005 - 08:22 PM
Thats vaccum advance for the distributor, and i would say you need it for road use.
Im probably gonna get my free engine pocketed for a 940 head.
and ive just got some twin carbs off ebay, :fear: they will need rebuilding too, but ill only use one :cheese:
Im probably gonna get my free engine pocketed for a 940 head.
and ive just got some twin carbs off ebay, :fear: they will need rebuilding too, but ill only use one :cheese:
#37
CAU998
-
- Members
-
- 1,202 posts
One Carb Or Two?
- Local Club: TMF South Central...
Posted 11 October 2005 - 06:26 PM
yeah thats probly wats gonna happen to mine good thing is though is that me mates dads a proffesional welder and he'll be helping me.
#38
stormduck
-
- Members
-
- 383 posts
Speeding Along Now
Posted 11 October 2005 - 06:51 PM
Vacuum advance eh…hmm, I’ll have to see about that one.
Wahay! Finally solved the balljoint problems! Went to Halfords and got a pair of mole grips, and wedge type ball joint separator. Managed to get the mole grips on to the taper hard enough for it to grip and hold still, then I got the nut off, and a very tough nut it was! Then for the stuck joint, got the separator in there and started banging, then a nearby neighbour, who just happens to be a lorry mechanic J came over to see what was going on. Seeing I was having difficulty he helped out. And between the two of us, levering and banging, he managed to get it loose! But did say that in all his time he’d never known one to be as stubborn. Then it dawned on me that the min had had a small whack on that side, and I think it may have bent the bar very slightly to make it stubborn, and also bent the tie bar. I wonder what else could be wonky?
Also removed the shocks, and loosened the top and lower arm nuts. Any ideas on how I can undo the hub nut without any brakes?

Got the Tower bolts of easily, by the looks of things the subframe’s slipped offline a bit, the bushes are half pocking out into the engine bay!

Then got the rear hubs and back plates off, cheers fellas!

And then got stuck while removing the radius arms. How on earth do you undo this bolt!!!???

It’s ½” but I can’t get the socket on straight no matter what position the arms in!
And finally I got that nasty soundproofing off. What are people’s opinions on getting a replacement or leaving it off?

I’m also trying to find out, but not having much luck, in finding out what panels I need to sort this out? Ps. I added the black lines in photoshop to show where I believe the joins will be.

I believe that I need a doorstep that will fill the hole in the bottom right corner, then the upper post where the door switch fixes to, and then I get stuck working out the hinge panel, and the panel with the lip that the a-panel hooks on to…are they two separate panels? Cheers for any help!! Then I can order my last panels.
MIG welder turned up today, and I’ve ordered a load of Frost paint for the underneath, arches, suspension parts, subframes, engine and engine bay parts. I hate rust and love practical perfection, so I’m hoping that a lengthy painting process will give me both! I’ve also got a valve spring compressor to finish stripping the head to check its condition. With the panel order I also need a cone compressor, and possibly one of those driveshaft popper outer wedge thingys.
Excellent!
Wahay! Finally solved the balljoint problems! Went to Halfords and got a pair of mole grips, and wedge type ball joint separator. Managed to get the mole grips on to the taper hard enough for it to grip and hold still, then I got the nut off, and a very tough nut it was! Then for the stuck joint, got the separator in there and started banging, then a nearby neighbour, who just happens to be a lorry mechanic J came over to see what was going on. Seeing I was having difficulty he helped out. And between the two of us, levering and banging, he managed to get it loose! But did say that in all his time he’d never known one to be as stubborn. Then it dawned on me that the min had had a small whack on that side, and I think it may have bent the bar very slightly to make it stubborn, and also bent the tie bar. I wonder what else could be wonky?
Also removed the shocks, and loosened the top and lower arm nuts. Any ideas on how I can undo the hub nut without any brakes?
Got the Tower bolts of easily, by the looks of things the subframe’s slipped offline a bit, the bushes are half pocking out into the engine bay!
Then got the rear hubs and back plates off, cheers fellas!
And then got stuck while removing the radius arms. How on earth do you undo this bolt!!!???
It’s ½” but I can’t get the socket on straight no matter what position the arms in!
And finally I got that nasty soundproofing off. What are people’s opinions on getting a replacement or leaving it off?
I’m also trying to find out, but not having much luck, in finding out what panels I need to sort this out? Ps. I added the black lines in photoshop to show where I believe the joins will be.
I believe that I need a doorstep that will fill the hole in the bottom right corner, then the upper post where the door switch fixes to, and then I get stuck working out the hinge panel, and the panel with the lip that the a-panel hooks on to…are they two separate panels? Cheers for any help!! Then I can order my last panels.
MIG welder turned up today, and I’ve ordered a load of Frost paint for the underneath, arches, suspension parts, subframes, engine and engine bay parts. I hate rust and love practical perfection, so I’m hoping that a lengthy painting process will give me both! I’ve also got a valve spring compressor to finish stripping the head to check its condition. With the panel order I also need a cone compressor, and possibly one of those driveshaft popper outer wedge thingys.
Excellent!
#39
ed4ran
-
- TMF+ Member
-
- 2,849 posts
Cadwell Event organiser
- Location: Stoke On Trent
Posted 11 October 2005 - 09:05 PM
With the hub nut, ive seen many people have problems removing these, and i would think that brakes alone wouldnt work (depending on how stuck they are), I would get a bar and wedge it between the wheel studs so it hits the floor, and then you need a breaker bar with a long bit of scaffold pole (depending on how stuch they are). Soak them in WD40 before hand (and leave soaked) it may be a pain in the @rse or it may be easy. :sad:
I have heard of someone putting the breaker bar on (through the wheel) and positioning the car so it holds it in place then driving (in the appropriate direction) to undo the nut!!! With my brothers they were sooo tight that we ended up just cutting them off and buying some new ones.
The front subframe bushes poke into the engine bay a little anyway so it may not be as bad as it seems, but new bushes should help, and just making sure they line up when putting the subframe back on.
I managed to get a socket in there, and i think the arm was parallel with the subframe.
I took the complete subframe off the car then stripped it, and i removed the suspension cones by moving the arms as far down as they would go (the knuckle comes out of the socket and allows the cone to move), with the cone removed the arm can go further up without fighting against the suspension.
Ive removed the sound deadening and wont be replacing it.
It just seems to hold water, leaf matter and make the bulk head rust, along with it looking rather manky.
They do a genuine door step and A post as one big panel, but i cant find that one by its self.
Mini Spares
Ed :grin:
#40
stormduck
-
- Members
-
- 383 posts
Speeding Along Now
Posted 12 October 2005 - 05:10 PM
cheers ed,
I had something along those lines in my head about the hub nut but you've just given me a light bulb moment!
I didn't think of removing the cone first, dimwit! I did have a small go but it wouldn't budge, i got angry and gave up! It appears to have got very stuck in place, how did you get yours out? Hammer to wallop and screwdriver to prise?
I did see that panel on minispares, but it doesn't include the door hinge part, or the lip that the a-panel hooks on to, i think i'll have to give them a ring.
Cheers!!
#41
nomininolife
-

- Members
-
- 982 posts
One Carb Or Two?
- Location: Sheffield
- Local Club: Mini Mates
Posted 12 October 2005 - 05:22 PM
#42
nomininolife
-
- Members
-
- 982 posts
One Carb Or Two?
- Location: Sheffield
- Local Club: Mini Mates
Posted 12 October 2005 - 05:24 PM
or maybe not its the wrong end of the door DOH!!
#43
nomininolife
-
- Members
-
- 982 posts
One Carb Or Two?
- Location: Sheffield
- Local Club: Mini Mates
#44
stormduck
-
- Members
-
- 383 posts
Speeding Along Now
Posted 12 October 2005 - 05:48 PM
Cheers for the link fella, their diagrams make things a little easier, but i'm still baffled by what i actually need! 
I've ruled out the door step, that's pointless, now i'm left with these!
An Inner Hinge Cover:

Inner Hing Panel:

Inner Front Wing Rear Edge:

Ooo, looking at ti now it's beigning to make sense, i don't think i'll need the last one, but i'll need to find the vertical door post.
I've ruled out the door step, that's pointless, now i'm left with these!
An Inner Hinge Cover:
Inner Hing Panel:
Inner Front Wing Rear Edge:
Ooo, looking at ti now it's beigning to make sense, i don't think i'll need the last one, but i'll need to find the vertical door post.
#45
stormduck
-
- Members
-
- 383 posts
Speeding Along Now
Posted 14 October 2005 - 04:07 PM
I ended up going for just the hinge cover as i'm sure that will be all i'll need, and just repair the a post. Got them from Minisport plus scuttle inner repair panels and a subframe repair panel. I was hoping that would be all the panels but i'm not so sure now as i've found another hole that i thought was just surface in front of the rear wheel arch passenger side, ho hum i'll just wait and see.
Right, made the most of the good weather today and got a nice chunk done
Removed the rear screen, rear seam seals, light lense and boot no. plate light.

Took all the wiring loom out of the engine bay...

And into the car...eek! It looks worse than it actually is!

Removed the headlining

And starting removing the gear linkage, but need to get about a 5mm straight punch to finish the job

I also bent back the clips that hold the fuel/brake lines on underneath, ready to be removed once front and rear subframes are off. Removed steering wheel, plus some other bits and bobs throughout the car.
While i wait for the panels and paint, i really need to make room in the garage and then sort a hoist and stand for the engine to come out. The only thing left for me to do on the car at the moment is to get grinding and cutting on the front end.
Right, made the most of the good weather today and got a nice chunk done
Removed the rear screen, rear seam seals, light lense and boot no. plate light.
Took all the wiring loom out of the engine bay...
And into the car...eek! It looks worse than it actually is!
Removed the headlining
And starting removing the gear linkage, but need to get about a 5mm straight punch to finish the job
I also bent back the clips that hold the fuel/brake lines on underneath, ready to be removed once front and rear subframes are off. Removed steering wheel, plus some other bits and bobs throughout the car.
While i wait for the panels and paint, i really need to make room in the garage and then sort a hoist and stand for the engine to come out. The only thing left for me to do on the car at the moment is to get grinding and cutting on the front end.


1 user(s) are reading this topic
0 members, 1 guests, 0 anonymous users


