What filler is that you used to make the rear shelf speakerboard?


Fern...
Started by
Brams96
, Aug 09 2009 09:49 AM
217 replies to this topic
#92

Brams96
-
- Members
-

- 2,308 posts
Up Into Fourth
- Local Club: Kentish Mini Club
Posted 27 April 2010 - 08:12 PM
It's either the UPOL Quicksand stuff or the UPOL Easy Lite I cant remember which as I have both. I built a MDF ring then built up the shape with the filler and lots of sanding.
#93
Jet_black
-
- Members
-
- 325 posts
Speeding Along Now
Posted 27 April 2010 - 08:25 PM
Thanks, same as what I have got. Might use it for the speakers on my dash.
#94
Brams96
-
- Members
-
- 2,308 posts
Up Into Fourth
- Local Club: Kentish Mini Club
Posted 29 April 2010 - 06:57 PM
Well I've been a bit busy lately. I have had the interior gutted to do all the work.
So far i have run in all the speaker cables for the front doors from the amp to the doors, made and mounted the amp back board and wired in the amp, run all the power and earth cables, run all the RCA's, installed a new carpet underlay, installed a smiths water temp gauge, installed my hand made switch panel (see the picture), made up and covered a partial dash cut off and remounted the bonnet brackets, painted the inside of the bonnet and fixed the problem with the carb.
Here are a couple of pictures so far:
The bonnet minus the old brackets:

The new brackets fiberglassed in place. I used tread plate because the 5mm aluminium plate I used first wouldn't bend without breaking:

The 3mm Blue Perspex switch panel. I have LEDs behind it so it should light up qite well at night:

I didn't want to muck around with a full dash install with everything else I have to do so I thought I would just make a partial dash big enough for the radio and 2 gauges (Water Temp and Oil Pressure). I've covered it all now and have it in place, anyway here's the result:

Over the next few night shifts I will be finishing off the wheels and sub box. No pressure but only 15 days to get it all done!
So far i have run in all the speaker cables for the front doors from the amp to the doors, made and mounted the amp back board and wired in the amp, run all the power and earth cables, run all the RCA's, installed a new carpet underlay, installed a smiths water temp gauge, installed my hand made switch panel (see the picture), made up and covered a partial dash cut off and remounted the bonnet brackets, painted the inside of the bonnet and fixed the problem with the carb.
Here are a couple of pictures so far:
The bonnet minus the old brackets:
The new brackets fiberglassed in place. I used tread plate because the 5mm aluminium plate I used first wouldn't bend without breaking:
The 3mm Blue Perspex switch panel. I have LEDs behind it so it should light up qite well at night:
I didn't want to muck around with a full dash install with everything else I have to do so I thought I would just make a partial dash big enough for the radio and 2 gauges (Water Temp and Oil Pressure). I've covered it all now and have it in place, anyway here's the result:
Over the next few night shifts I will be finishing off the wheels and sub box. No pressure but only 15 days to get it all done!
#95
Brams96
-
- Members
-
- 2,308 posts
Up Into Fourth
- Local Club: Kentish Mini Club
Posted 30 April 2010 - 05:43 PM
How annoying is this. I found the rubber gromet for the main wiring loom in the fire wall completely deteriorated so basically it isn't doing anything. I dont want to have to unplug everything just to get a new gromet over the loom, but looks like I might have to. Grrr. I'll wait before tackling this one I think as I still have the SPi loom I bought a few months ago to put in so I can use the bigger fuse box.
Painted one wheel last night with high build primer and will be doing the last one tonight then I can colour coat all 4 wheels before 3-4 layers of laquer.
Painted one wheel last night with high build primer and will be doing the last one tonight then I can colour coat all 4 wheels before 3-4 layers of laquer.
#96
Brams96
-
- Members
-
- 2,308 posts
Up Into Fourth
- Local Club: Kentish Mini Club
Posted 02 May 2010 - 05:39 PM
More pictures of the amp and dash. I'm going to make up a cover for the amp and to hide the wiring which will have a perspex part to it.


Edited by Brams96, 02 May 2010 - 05:44 PM.
#97
Brams96
-
- Members
-
- 2,308 posts
Up Into Fourth
- Local Club: Kentish Mini Club
Posted 09 May 2010 - 08:26 AM
Here are are a few more update pictures of the sub box being made and the dash with the lights on behind the perspex switch panel.
One layer of t-shirt material to get the shape and first layer of fiberglass matting

First smoothed layer of filler for shaping

Second layer of filler being smoothed off by the wife with the 'help' of our dogs

Finished off in Acoustic carpet spray glued into shape.

In place. It is slightly tighter than I would like and doesn't sit as low as before the fiberglass went on but I can fix that with a grinder Just have to drop the sub in and fit a cover.

Dash at the moment as I'm still fitting all the wiring for the new radio and dials.

Switch Panel lighting. It s a bit hard to see but looks pretty cool.

Wheels all painted and with rubber on (small scratch where the clamp was will be retouched)

Thats it for now.
One layer of t-shirt material to get the shape and first layer of fiberglass matting
First smoothed layer of filler for shaping
Second layer of filler being smoothed off by the wife with the 'help' of our dogs
Finished off in Acoustic carpet spray glued into shape.
In place. It is slightly tighter than I would like and doesn't sit as low as before the fiberglass went on but I can fix that with a grinder
Just have to drop the sub in and fit a cover.Dash at the moment as I'm still fitting all the wiring for the new radio and dials.
Switch Panel lighting. It s a bit hard to see but looks pretty cool.
Wheels all painted and with rubber on (small scratch where the clamp was will be retouched)
Thats it for now.
Edited by Brams96, 09 May 2010 - 08:31 AM.
#98
Jet_black
-
- Members
-
- 325 posts
Speeding Along Now
Posted 10 May 2010 - 08:26 PM
Is that sub ten inch or twelve inch?
#99
ajperry
-
- Members
-
- 316 posts
Speeding Along Now
- Location: Wokingham
- Local Club: Thames Valley Mini Club
Posted 10 May 2010 - 09:48 PM
your parcel shelf and door cards look great! and its good to see the sub bins taking shape! keep it up!
#100
Brams96
-
- Members
-
- 2,308 posts
Up Into Fourth
- Local Club: Kentish Mini Club
Posted 11 May 2010 - 07:58 AM
It's for a 10" Alpine SWS-1043D. The 12" would be too deep to fit in that position and the box would stick out into the seat to get the right volume for the sub. As it is the box is about 18-20 litres.
#101
Brams96
-
- Members
-
- 2,308 posts
Up Into Fourth
- Local Club: Kentish Mini Club
Posted 12 May 2010 - 11:09 AM
Man has it been busy! I've been out in the garage til midnight for the las 3 nights trying to get things done for the weekend, getting up for work at 0430 doesn't help either!
So far I have got the 1/2 dash in, radio installed and working, sub box sitting in the bin properly now and wired up, all the interior back in, bonnet fitted (as best it can) and 2 wheels laquered. Just recieved my delivery from Minispares this morning of wheel nuts, centre caps and all bonnet rubbers so that will all be getting put on tonight. Hopefully tomorrow I can get the passenger door off and the gromets and wiring done to the doors then all I have to do is install the front speakers and set the sounds up. Yay, it's finally coming together.
I'll post more pictures when I get them.
#102
Brams96
-
- Members
-
- 2,308 posts
Up Into Fourth
- Local Club: Kentish Mini Club
Posted 13 May 2010 - 07:07 AM
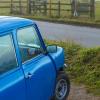
Right, Last night I put on 2 of the wheels (still need 1 coat of laquer on the other 2) & fitted the bonet strap, bonnet catch and buffers. Didn't get as much done as I would have liked but it is still progress. Anyway here are some pictures:
The Sub box in place and fitted properly. I had to grind about 5 - 10mm from the top lip of the bin.

The wheels finally on. The rear is sitting a bit high so I guess a set of Hi Lo's is next on the purchase list


The bonnet now with buffers and a strap. It still needs a coat of polish which will be happening Saturday morning .

I still need to fit the rubber seal at the back of the bonnet but I'm not quite sure about where I am supposed to cut ti to get the right angle

The Sub box in place and fitted properly. I had to grind about 5 - 10mm from the top lip of the bin.
The wheels finally on. The rear is sitting a bit high so I guess a set of Hi Lo's is next on the purchase list
The bonnet now with buffers and a strap. It still needs a coat of polish which will be happening Saturday morning .
I still need to fit the rubber seal at the back of the bonnet but I'm not quite sure about where I am supposed to cut ti to get the right angle
#103
GW
-
- Members
-
- 458 posts
Previously Small Bore Racer
Posted 13 May 2010 - 07:43 PM
on mine I cut the outside of the bend - as that side needs to move round furthest if you see what i mean.
#104
Brams96
-
- Members
-
- 2,308 posts
Up Into Fourth
- Local Club: Kentish Mini Club
Posted 17 May 2010 - 10:04 PM
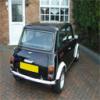
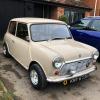
Whew, all done now. After only finishing the boot liner floor in the morning and getting the car all packed up we made it to the run with everything I wanted done finished. Had a great weekend and made it home with no major incidents. Roll on next year!
Kentish Mini Owners Club contingent

Parked at Crystal Palace

Back Home after the run.

Kentish Mini Owners Club contingent
Parked at Crystal Palace
Back Home after the run.
Edited by Brams96, 17 May 2010 - 10:23 PM.
#105
MiniJosh92
-
- Traders
-
- 1,711 posts
Camshaft & Stage Two Head
- Location: Nr Ashford, Kent
Posted 17 May 2010 - 10:27 PM
Looks good Scott. Shame I never had chance to have a proper look at the weekend though.
Edited by MiniJosh92, 17 May 2010 - 10:28 PM.


1 user(s) are reading this topic
0 members, 1 guests, 0 anonymous users


