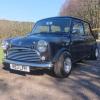
And panelbeaterpeter what can i say your work is excellent, wish i had your skills to get a perfect job.

'68 Mk1 Morris Mini 850 Sdl Complete Resto
#16

Posted 22 September 2009 - 11:19 PM
And panelbeaterpeter what can i say your work is excellent, wish i had your skills to get a perfect job.
#17

Posted 23 September 2009 - 10:55 AM
Nice memorial to your granny to restore it to original too - good one.
Will watch this with interest.
LOL at "I just happen to have a spare car for bits"! Wish we were all as lucky - but you've had some time to gather up the bits you need.
#18

Posted 23 September 2009 - 03:37 PM
#19

Posted 23 September 2009 - 08:43 PM
The mini is a '68 -I imagine made in 67 while they were still manufacturing the mk1, but not registered ubntil '68, and I have the original bill of sale, will have to scan it and put it up on here!
I've got about 98% of the parts i need to put it all back together, most of the work involved is the cleaning of all the parts, plus I want to replace all the perishable parts (particularly all the rubber parts in the suspension) and bearings, brakes etc
The panels being used are from Mini Machine: http://www.m-machine.co.uk/ as recommended by Pete
#20

Posted 25 September 2009 - 10:57 PM
The rear drivers side ashtray mounting is missing, another product of an 'good idea' I had as a teenager to mount a piece of wood accross the top of the storage space to sink a speaker into it. Well rather than buying the replacement ashtray holder, Pete made one, and it looks bloody brilliant, a testament to the eye for detail Pete has, here are the pics, enjoy
 057.jpg 32K
23 downloads
 058.jpg 30.56K
20 downloads
 059.jpg 22.42K
19 downloads
#21

Posted 25 September 2009 - 11:15 PM
The boot floor as it was:
 069.jpg 35.73K
22 downloads
069.jpg 35.73K
22 downloadsAll gone:
 070.jpg 34.54K
25 downloads
070.jpg 34.54K
25 downloadsThe new one:
 071.jpg 46.54K
18 downloads
071.jpg 46.54K
18 downloadsrobbing the spare wheel mount & the petrol tank mounts off of the old floor to go on to the new one:
 073.jpg 31.58K
8 downloads
 074.jpg 28.87K
7 downloads
 075.jpg 44.22K
8 downloads
 076.jpg 28.96K
8 downloads
 077.jpg 34.37K
9 downloads
077.jpg 34.37K
9 downloadsThen the new floor in place:
 078.jpg 29.93K
19 downloads
078.jpg 29.93K
19 downloadsThe strengtheners and closing panels in place:
 079.jpg 24.9K
17 downloads
 080.jpg 20.19K
14 downloads
 081.jpg 28.8K
12 downloads
#24

Posted 25 September 2009 - 11:38 PM
Andy
#25

Posted 27 September 2009 - 09:30 PM
It's a while since I've read through this project and it's coming along really well, I love the Idea you came up with to repair the holes in the rear parcel shelf, I have the same problem with my car and I'm going to look for an old style ribbed boot and use your idea if that's ok, you learn so many tips by looking at other peoples projects and work, it really does help, anyway excellent work, I'll be watching this one with intrest
Andy
Thanks Andy, the double skinned bootlids can be hard to get hold of, although you wouldn't really need it to be in top condition- most of them go along the bottom of the lid and that would not make much difference for what you need it for.
Best of luck with it
Nick
#26

Posted 28 September 2009 - 08:48 PM
 089.jpg 45.11K
25 downloads
 090.jpg 29.03K
24 downloads
 091.jpg 28.72K
11 downloads
 092.jpg 22.8K
20 downloads
 101.jpg 20.91K
27 downloads
 102.jpg 20.25K
16 downloads
 103.jpg 35.6K
17 downloads
 104.jpg 40.57K
19 downloads
104.jpg 40.57K
19 downloadsGood as new
#27

Posted 28 September 2009 - 09:05 PM
#28

Posted 28 September 2009 - 09:10 PM
#29

Posted 28 September 2009 - 09:21 PM
The first few bits:
before
 094.jpg 34.86K
8 downloads
094.jpg 34.86K
8 downloadsafter
 095.jpg 37.42K
8 downloads
095.jpg 37.42K
8 downloadsother bits cleaned:
 096.jpg 32.05K
7 downloads
 097.jpg 20.46K
7 downloads
097.jpg 20.46K
7 downloadsthe first few parts being painted, they look shiney in the pics as the paint is wet, but it is actually a satin finish paint (Hammerite):
 098.jpg 33.15K
6 downloads
 099.jpg 32.68K
9 downloads
099.jpg 32.68K
9 downloadsPlenty more to do yet!
#30

Posted 09 October 2009 - 09:50 PM
lots of patches hidden under all the underseal
 110.jpg 47.27K
13 downloads
 111.jpg 32.85K
24 downloads
 112.jpg 62.41K
18 downloads
112.jpg 62.41K
18 downloadsAll cut away:
 113.jpg 33.56K
37 downloads
113.jpg 33.56K
37 downloadsNew support panel in place:
 114.jpg 18.62K
15 downloads
114.jpg 18.62K
15 downloadsThe new inner wing:
 115.jpg 35.67K
9 downloads
115.jpg 35.67K
9 downloadsAnd in place:
 116.jpg 35.23K
24 downloads
116.jpg 35.23K
24 downloadsOuter A panel in place and all welded up:
 117.jpg 21.42K
26 downloads
 118.jpg 27.25K
21 downloads
118.jpg 27.25K
21 downloadsCouldn't believe how many patches there were, that at first you could not even see, because of the amount of underseal this car was covered in, although thats probably why its lasted as long as it has!
1 user(s) are reading this topic
0 members, 1 guests, 0 anonymous users


