Jump to content


Photo
- - - - -

Mini Virgin Rebuild Of 83 Mayfair.


  • Please log in to reply
1006 replies to this topic

#46 grahama

grahama

    Up Into Fourth

  • Members
  • PipPipPipPipPipPipPipPipPip
  • 2,442 posts
  • Location: Warrington
  • Local Club: None in my area !!

Posted 15 July 2010 - 10:02 PM

Hi all,

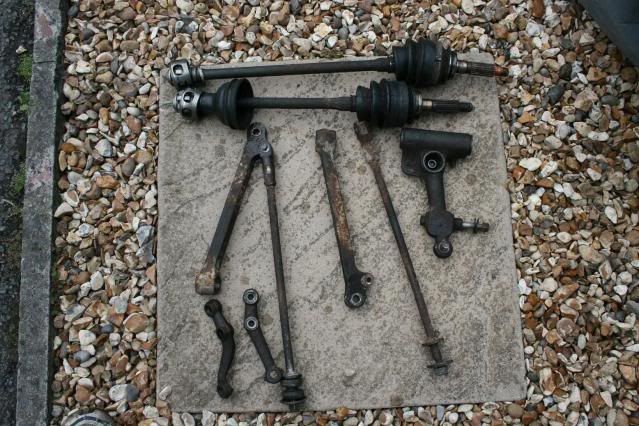
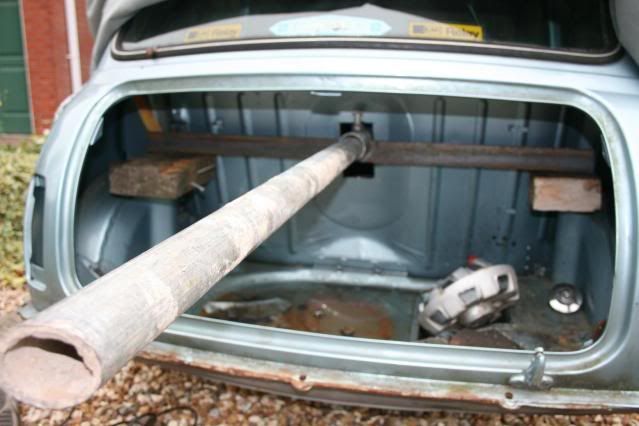
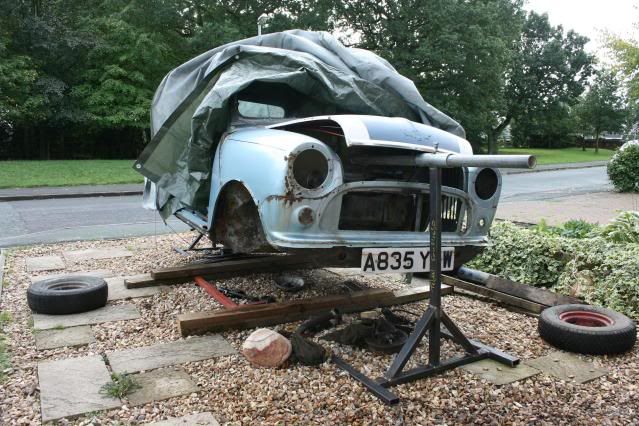
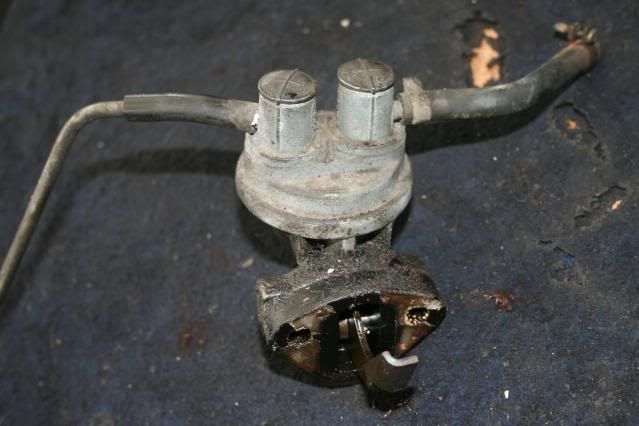
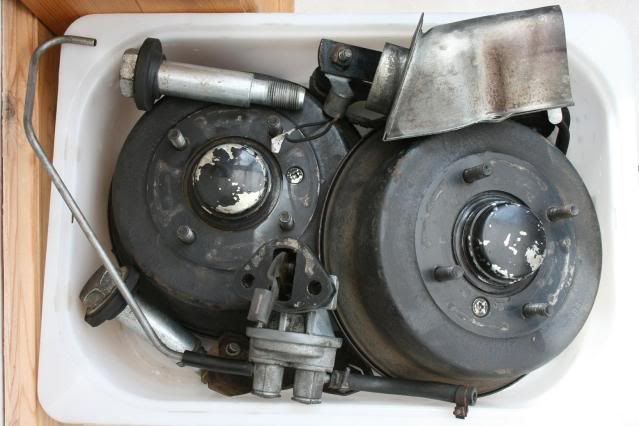
still waiting for my mate to make the spit for me and so the bodywork can begin, well so I can look at it anyway. I have been busying myself cleaning and bringing stuff inside so no rust sets in and the rear drums got a clean along with the fuel pump and a few other bits and pieces.

Posted Image

Posted Image

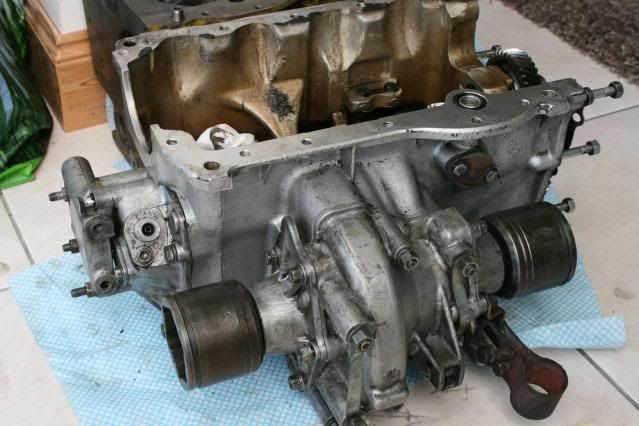
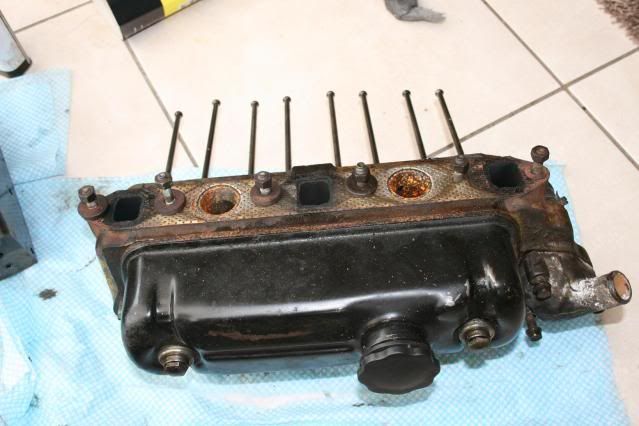
The clutch and flywheel housing was very manky when I took it off, assured it was normal by your good selves and so the white spirit and brake cleaner came out once again.

Posted Image

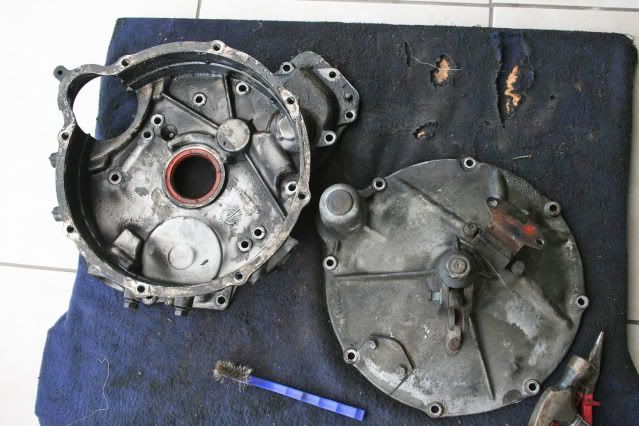
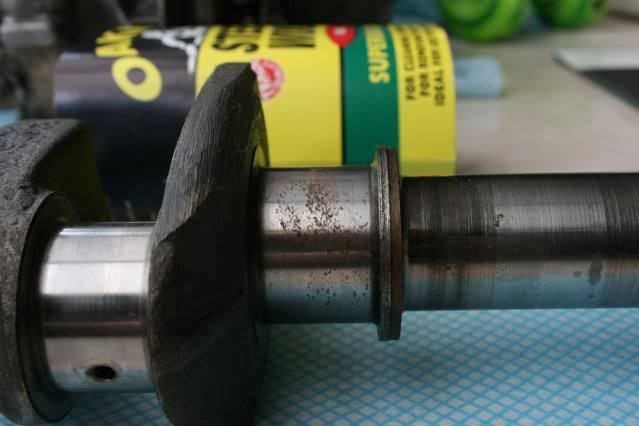
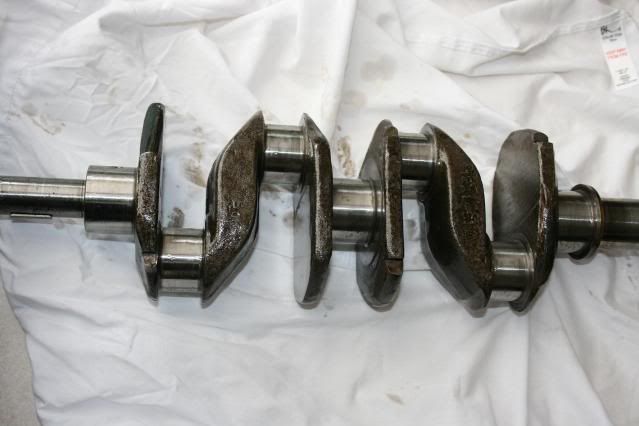
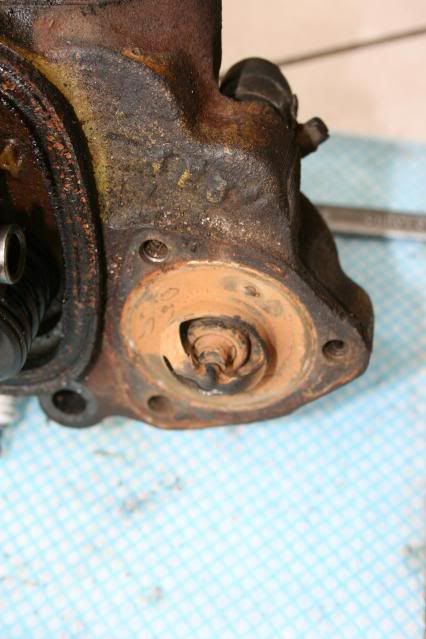
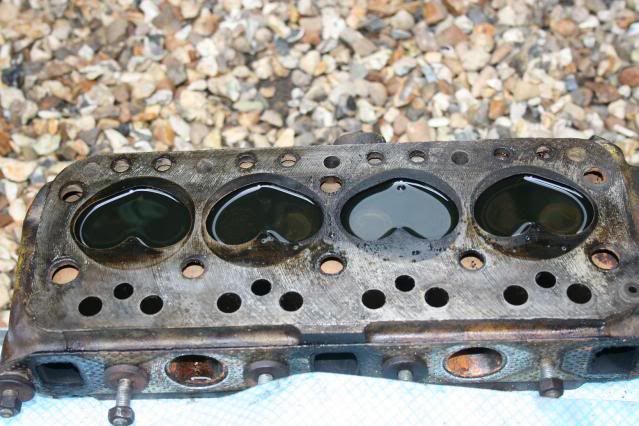
much cleaning later, including the bolts, sad I know and this..

Posted Image

Posted Image

Posted Image

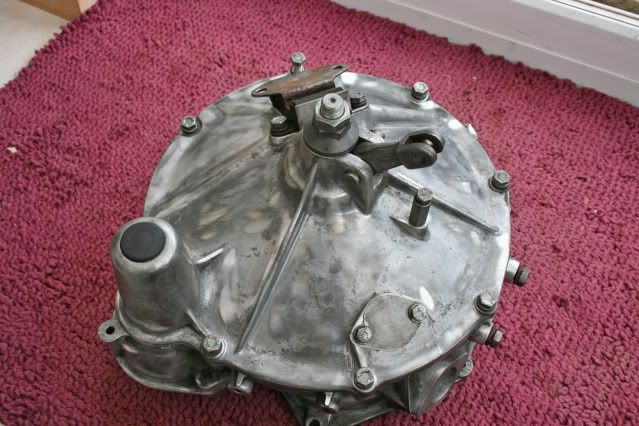
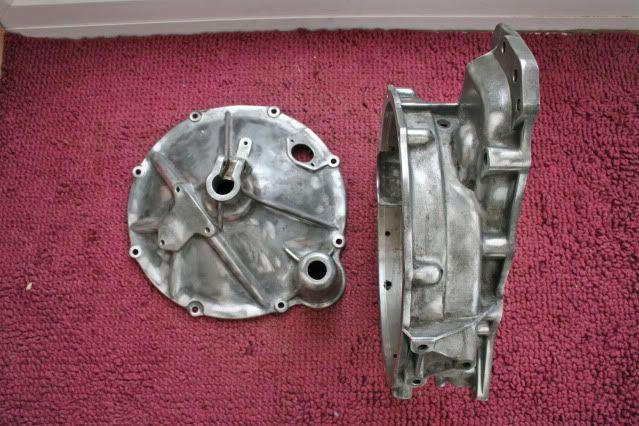
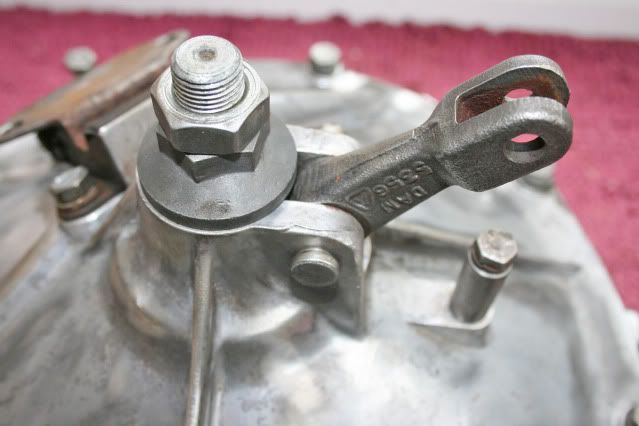
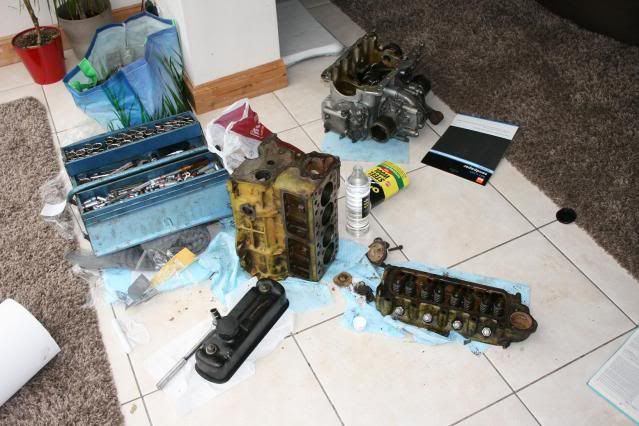
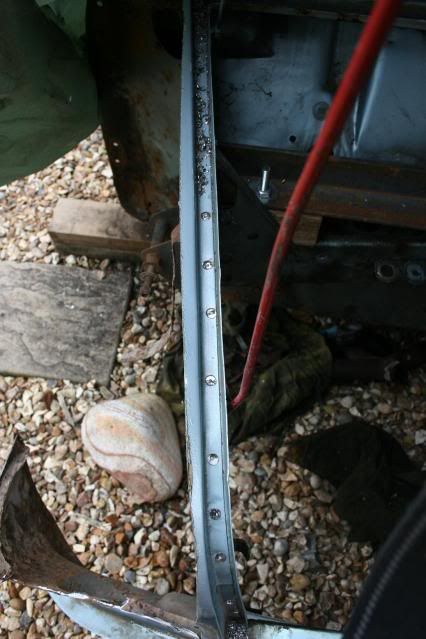
I know it's only pictures of cleaning stuff, but there is a pleasure in getting stuff sorted out and ready for painting and refitting which will be a clean and enjoyable process.
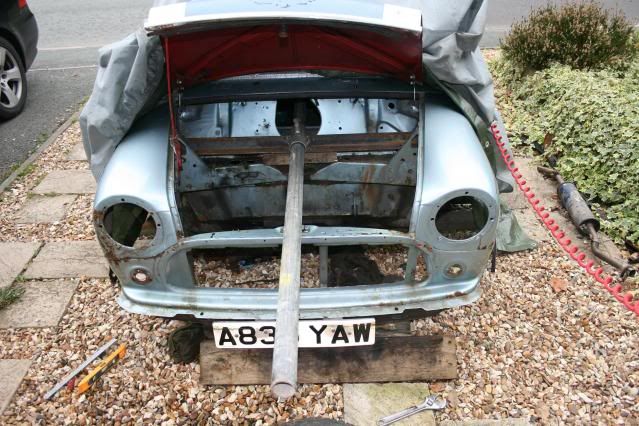

Oh bugger !!

Posted Image

Posted Image

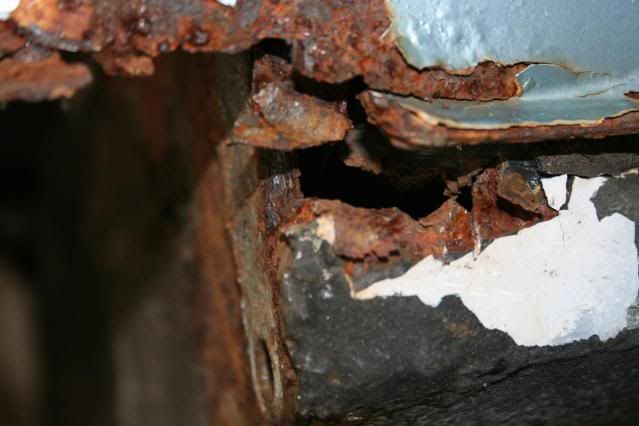
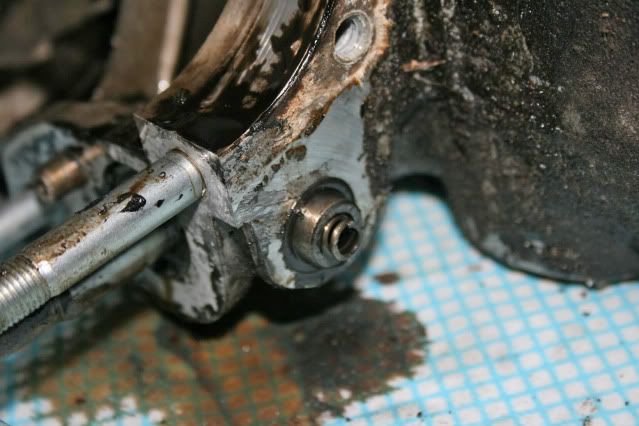
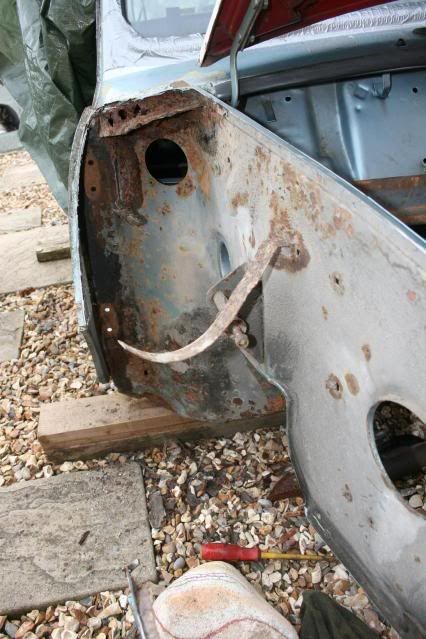
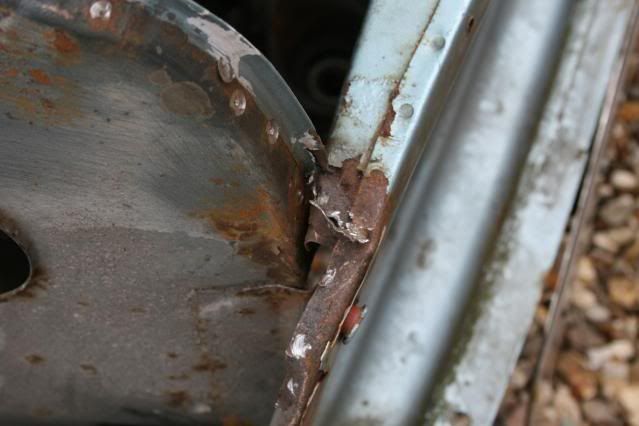
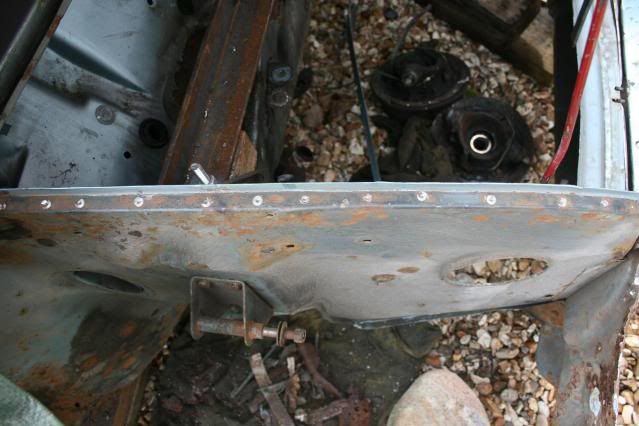
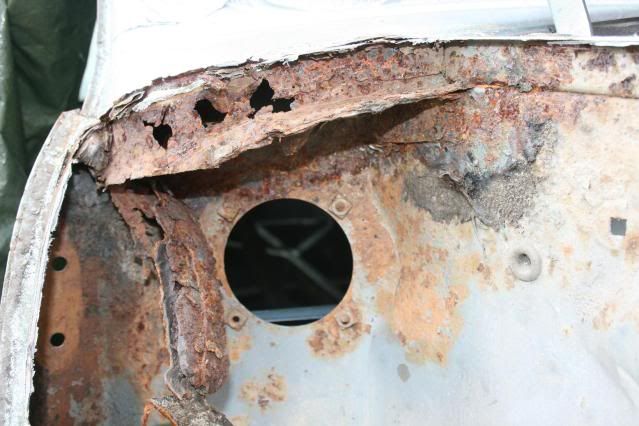
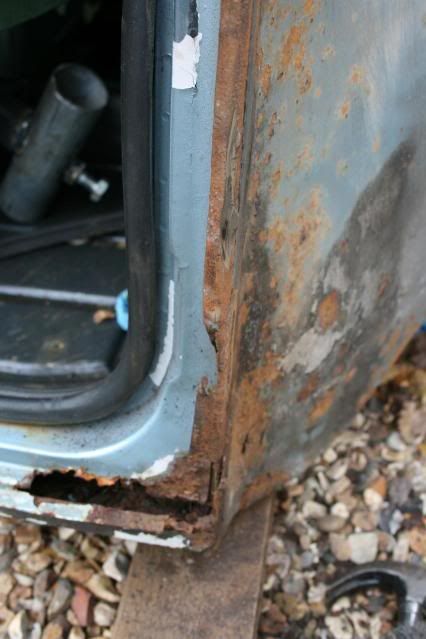
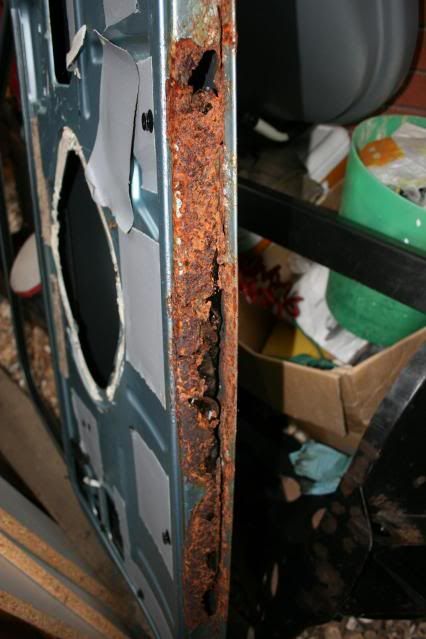
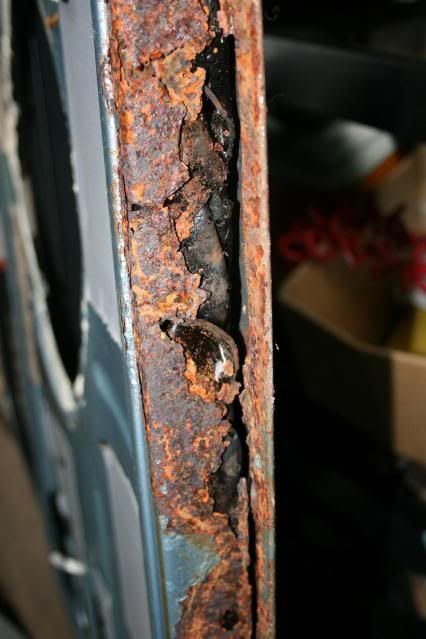
the rust near the rear subframe mounts was worse than I expected on the OS, and there will have to be a heel board repair to sort this out, not what I was expecting to be honest. I thought the welding was all non structural so this is all a bit scary for a virgin welder.

Posted Image

Posted Image

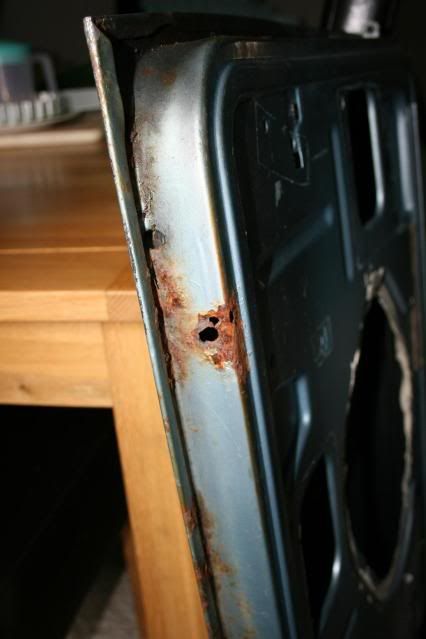
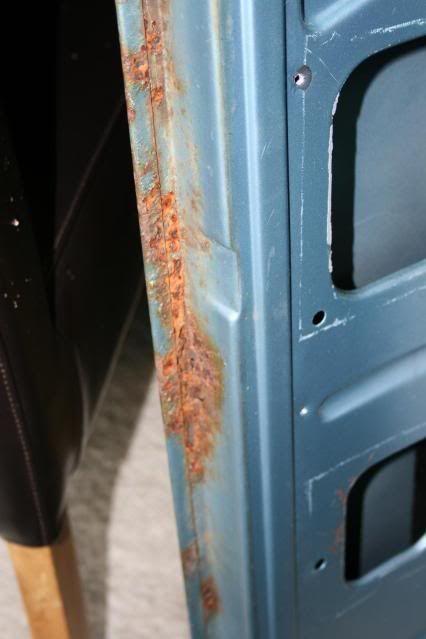
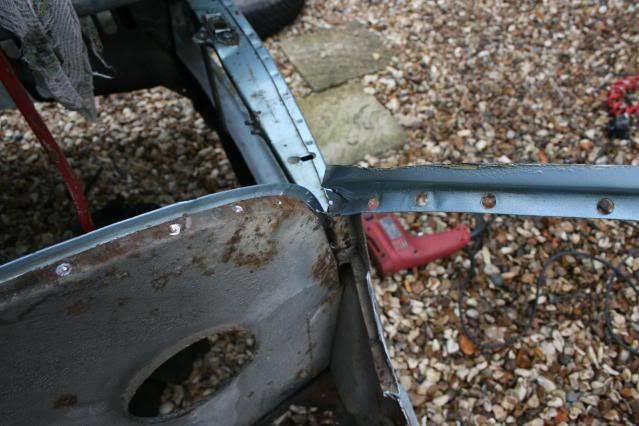
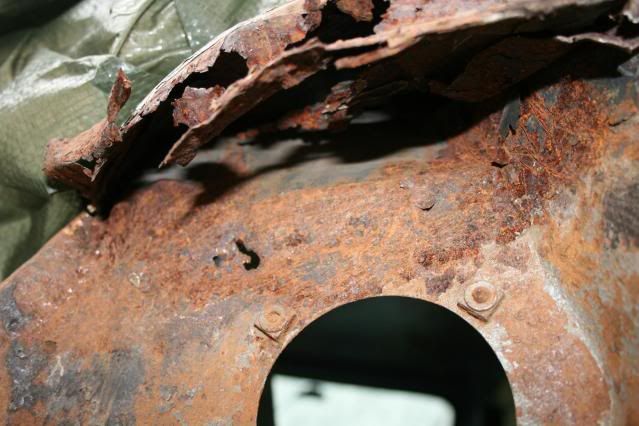
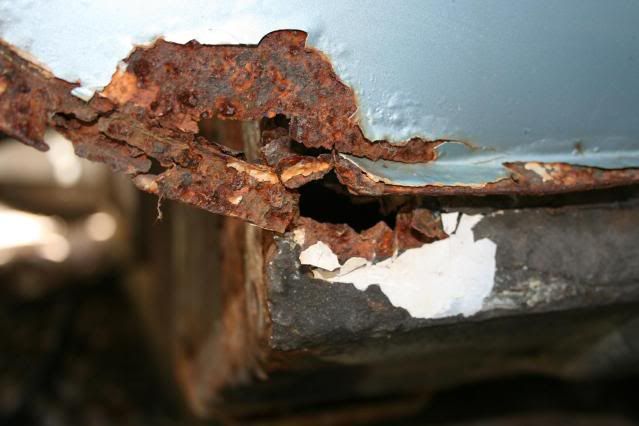
Os door pretty good considering the 27 years it has been used but the NS not so good

Posted Image

Posted Image

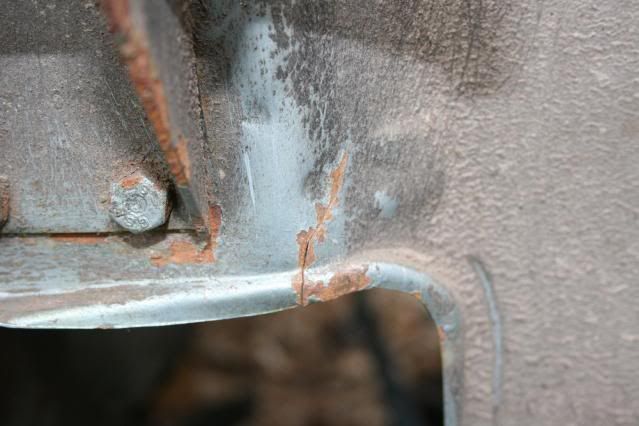
The inside of the pass door is filled with a bitumen sheet stuff, I suppose to hold it together, but fortunately I have found a good door to replace it with for £16, result. The original door I will restore when I know what I am doing and sell on to help pay for goodies in the future.

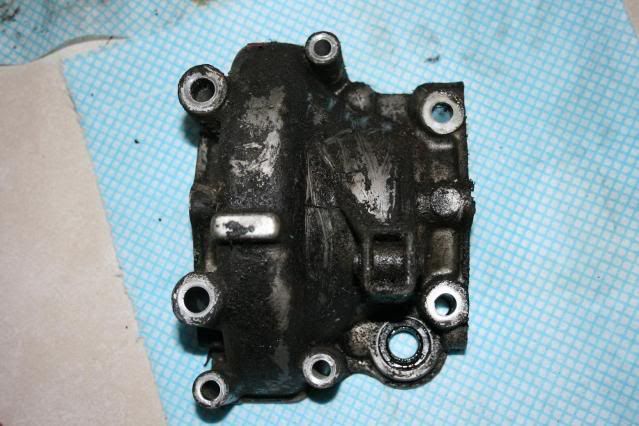
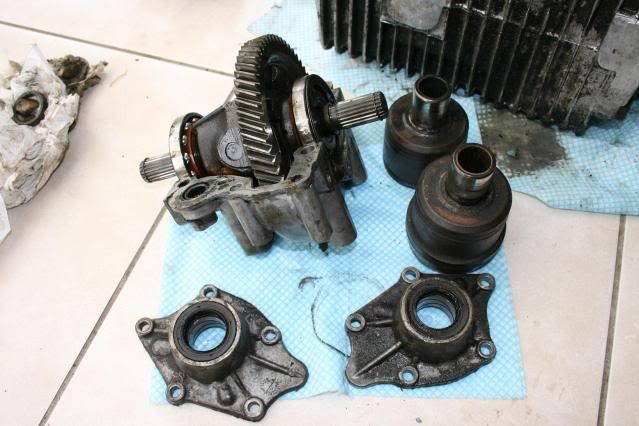
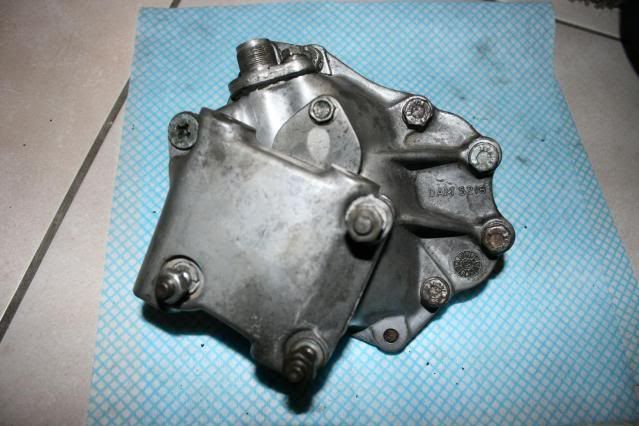
Tonight, much to the dismay of the wife, the gearbox came in from the under car storage place into the warm dry workshop infront of the telly and tonight's job was to strip and clean the speedo housing.

Posted Image

Posted Image

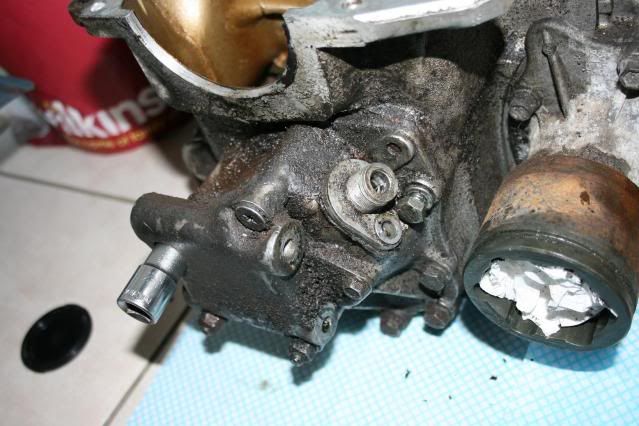
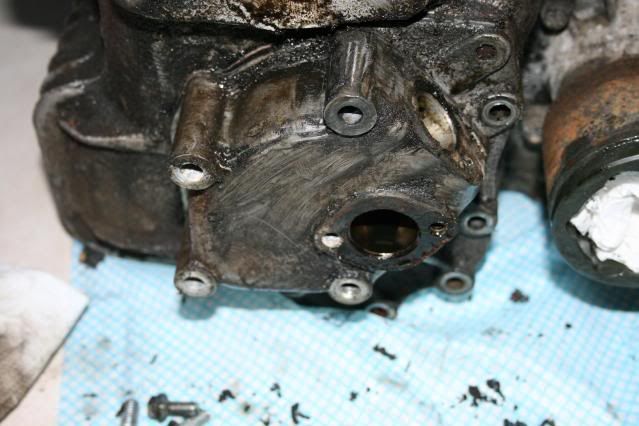
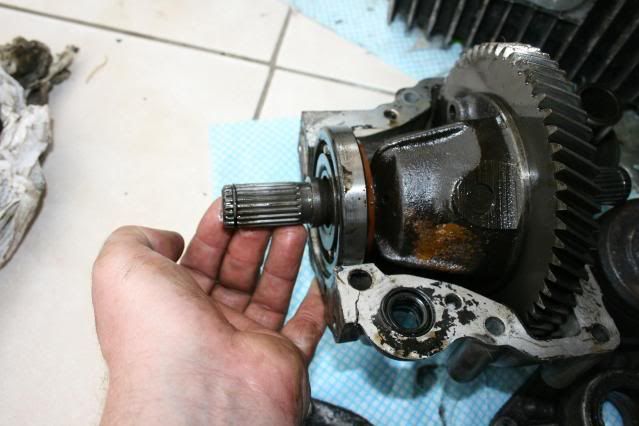
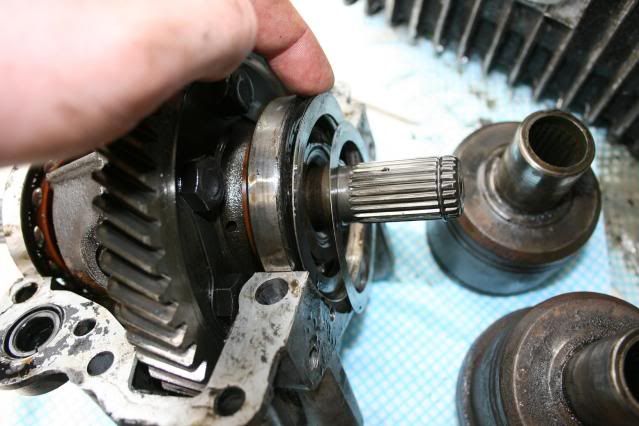
The bolts came out pretty easy but the actual housing was stuck fast to the gearbox casing via a paper gasket and two locating lugs. Only banging a stanly blade into the gasket worked to ease the two apart then some gentle banging from inside with an metal drift wraped in a cloth and out it popped.

Posted Image

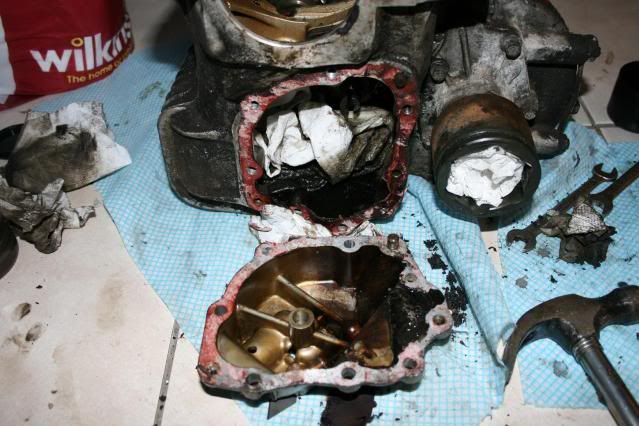
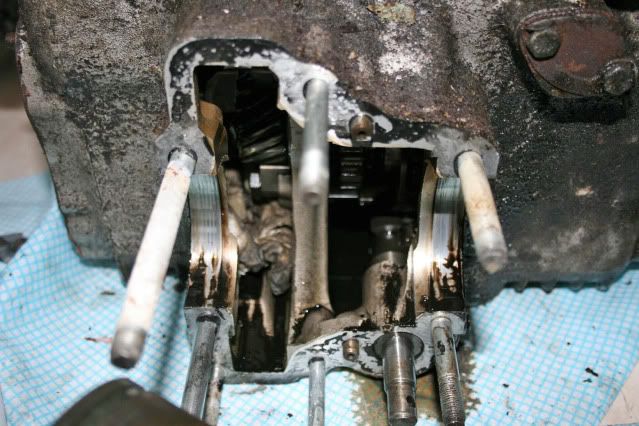
Note the oily kitchen paper inside the casing to stop the oil going on the tiles, boy my wife must love me to let me get away with this !!

Posted Image

Posted Image

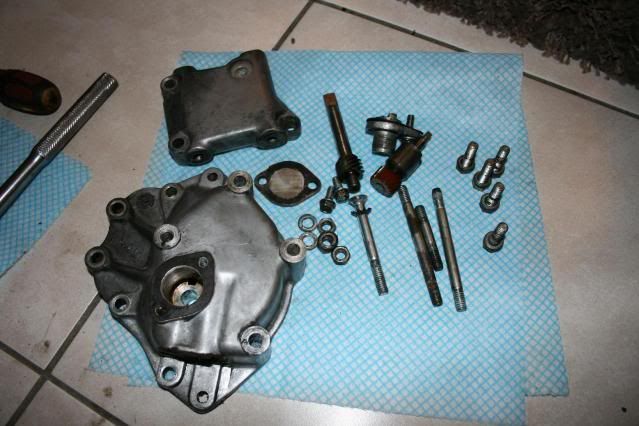
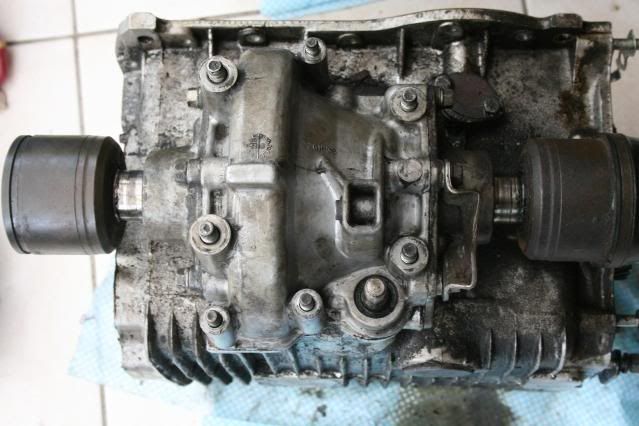
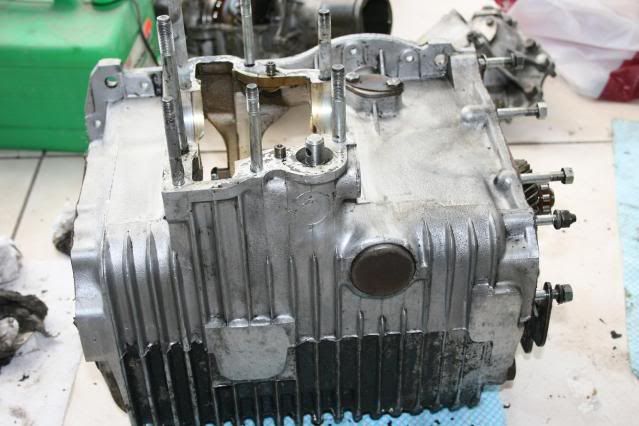
All cleaned up and reassembled ready for storage. Will give a quick spray with WD40 to protect it before though, diff housing tomorrow, more oil, more dirty looks then she can have a rest when I am at work !!

Hope you enjoyed,

Graham

Edited by grahama, 15 July 2010 - 10:06 PM.


#47 malebassplayer

malebassplayer

    Stage One Kit Fitted

  • Noobies
  • PipPipPip
  • 75 posts

Posted 16 July 2010 - 02:29 PM

Just read through your thread and am looking forward to seeing how it progresses. Good luck! :D

#48 grahama

grahama

    Up Into Fourth

  • Members
  • PipPipPipPipPipPipPipPipPip
  • 2,442 posts
  • Location: Warrington
  • Local Club: None in my area !!

Posted 25 July 2010 - 09:07 PM

Hi all,

Posted Image

Posted Image

Posted Image

More cleaning, but it does get you used to how things come apart, and hopefully go back together again !! The diff was as mucky as the rest of the gearbox housing and the casing itself was the same. The pot joints were refusing to come apart but after asking more questions they just needed a little persuasion with a screwdriver and they slipped over the retaining clip and slid off the splines.

Posted Image

Posted Image

Posted Image

Posted Image

All separated and cleaning was underway. The LH pot joint had no shims but there were 3 on the RH, why this was I will have to do some investigating so it goes back together correctly. All cleaned up I put the diff back together for storage.

Posted Image

As I said the box casing was full of a combination of dirt, oil and sealant so it had to go.

Posted Image

Posted Image

Posted Image

It came up fine for the initial clean and degrease, so I put it all back together so it can be stored till after the bodywork is done. One problem I had was with the detent pin which uses a ball bearing and spring to locate the gear selections in the box. It first flew over the living room after I initially took the diff off,

Posted Image

but after cleaning everything it wouldn’t locate properly back into it’s slot because the selector rod had moved, ahhhhhhhhhhhhhhhh !! Another job to do to try and fit it back in properly. I am going to strip the box down eventually so not too much to worry about for now.

#49 grahama

grahama

    Up Into Fourth

  • Members
  • PipPipPipPipPipPipPipPipPip
  • 2,442 posts
  • Location: Warrington
  • Local Club: None in my area !!

Posted 25 July 2010 - 09:08 PM

Hi all,

split post as too many pics for one !!


The old drum brakes I took off needed to be stripped of their suspension parts for the new discs but once again the nuts were welded in place and I had to grind some off as penetrating oil just didn’t help.

Posted Image

Posted Image

The pile of scrap grinded off metal, nuts bolts and a bit of the drum back plates. I did however get the suspension parts I required and driveshafts to sell on eventually.

Posted Image

I thought I’d have a quick look at the crank before putting it away for a while and I’m glad I did. A little surface rust had started to grow on the journals, and this was inside not in the shed.

Posted Image

Posted Image

A rub down with some fine wire wool and plenty of oil and wrapped up for the rebuild.

The workshop was open for business again today and I brought the old head in from the shed to do some tinkering.

Posted Image

The ports on the head had already started t get rust on, not a big problem but it’s inside now so should stop. Started to strip down and looked at the valves, very coked up and was thinking of cleaning up and using an additive instead of converting which costs £250 ish.

Posted Image

Posted Image

The thermostat I think has had it but will test it at a later date before the rebuild and I also did a petrol test on the valves to see how sealed the seats were.

Posted Image

They seemed not to leak so a plus point but I have seen unleaded heads going for £85 and a friend said just scrap mine and buy a modded one. Like it to be original though but that’s probably a tad anaraky of me. We’ll see how we go, plenty of time yet.

Hope you enjoyed,

Graham

#50 adam_mini

adam_mini

    Speeding Along Now

  • TMF+ Member
  • PipPipPipPipPip
  • 394 posts
  • Location: Lincolnshire

Posted 29 July 2010 - 09:20 PM

Looking good mate :)

Keep going :D

Edited by adam_mini, 29 July 2010 - 09:20 PM.


#51 grahama

grahama

    Up Into Fourth

  • Members
  • PipPipPipPipPipPipPipPipPip
  • 2,442 posts
  • Location: Warrington
  • Local Club: None in my area !!

Posted 30 July 2010 - 10:12 AM

Off on hols tonight so a mini rest for 2 weeks, then it's the body !

Graham

#52 Meland4

Meland4

    Previously Known as Eve

  • Noobies
  • PipPipPip
  • 94 posts

Posted 18 August 2010 - 01:06 PM

Wow! I have just read this and am really so impressed!!

I have just stripped my mini Harvey ready for a full restoration, and the cleaning has just begun. I am totally new to this having never worked on any car before but am thoroughly enjoying every minute and learning so much.
The engine and gear box are sat there talking to me but still seem a hugely overwhelming thing to start. Reading your thread gives me the confidence to give it a go. Such a huge help to be on this forum with so many people willing to offer someone like me lots of much needed and appreciated advice.

Much luck with this project. I will be watching with interest. Would have LOVED to have done something like this with my Dad years ago!

Mel

P.s Hope you had a good holiday :)

#53 grahama

grahama

    Up Into Fourth

  • Members
  • PipPipPipPipPipPipPipPipPip
  • 2,442 posts
  • Location: Warrington
  • Local Club: None in my area !!

Posted 18 August 2010 - 03:16 PM

Thanks for the comments.

I am in the same boat as you, new to all this although I used to service my own cas before the dreaded ' musn't touch ' cars ! Matt is however a fleeting visitor to the oily bits and is much more interested in putting it all back together and painting it. Will be getting on with the bodywork next as the spit should be ready next week.

Lots of pics to come soon !!

Graham

ps, do a project thread, it's good fun to share progress :)

#54 Meland4

Meland4

    Previously Known as Eve

  • Noobies
  • PipPipPip
  • 94 posts

Posted 18 August 2010 - 09:56 PM

I actually have a project thread and have now added it below :wub:

I am a little bit behind you guys, waiting for my hubby to finish harvest (Grrr rain :)) before the bodywork can begin. So it gives me plenty of time to learn the oily, clanky bits.

Sounds like a good team. Going to be a great little first car!

Mel

#55 grahama

grahama

    Up Into Fourth

  • Members
  • PipPipPipPipPipPipPipPipPip
  • 2,442 posts
  • Location: Warrington
  • Local Club: None in my area !!

Posted 28 September 2010 - 12:46 PM

Hi all,

back from hols mid Aug and still no spit to play round with so cleaned a few bits up, not very interesting so no pics. Then I went over on my ankle at work and was off my feet for 3 weeks so did some more cleaning !! During this time I thought I'd " just get that last bit done " and as it was only a bit no eye protection and you guessed it, a bit of wire brush in my eye and to the hospital with a punctured eye, what a muppet !!! I have been a very lucky lad as no lasting damage or infection so am now back on form with new goggles.

Please let this be a lesson for everyone who like me thought you could get away with it this time, you never know when you will be caught out !!!

Health and safety lecture over, my spit has arrived !!! :D

Posted Image

Posted Image

I have just got to get some threaded bar tomorrow and it will be ready for me to atack the body.

Posted Image

In my excitement to be able to do something on the car after so long I cut out the hole in the back seat too low so have a bit more than planned to weld back in, pieces kept so a good fit will be easy !!

Posted Image

Posted Image

It's a little high really but shouldn't be a big problem for me and I will just chock the body when it's rotated to do stuff but maybe the height will be a bonus and prevent too much stooping down to do stuff, we'll see !!

Anyway bits coming off later in the week but I thought I'd bring you all up to speed.

Regards,

Graham

Edited by grahama, 28 September 2010 - 12:46 PM.


#56 Wilqaeda

Wilqaeda

    Learner Driver

  • Noobies
  • PipPip
  • 17 posts

Posted 28 September 2010 - 01:11 PM

Ace project chap, looks like it's coming along a treat! Will watch this one with intrest!

#57 grahama

grahama

    Up Into Fourth

  • Members
  • PipPipPipPipPipPipPipPipPip
  • 2,442 posts
  • Location: Warrington
  • Local Club: None in my area !!

Posted 02 October 2010 - 01:40 PM

Hi all,

Moved onto the bodywork side of things today, :( my first time doing anything of this sort so started with the front wing. Got the spit finished too, not sure if it is too high though, your thoughts please...

Posted Image

Then I took it off again and got the grinder out !!

Posted Image

Posted Image

I got a spot weld bit off fleabay and tried that out too, worked a treat as you can see.

Posted Image

Posted Image

Chiselled off the last bits of wing and got to the join between the wing and front panel and it was welded on there, is this normal as need a grinder for that bit and the front panel was not atached to the inner wing there either, mmmmm !!! Cleaned up the drilled sections next.

Posted Image

The scuttle area was well past it

Posted Image

Posted Image

as was the top of the flitch area although it was solid in most parts, might replace it all though.

Posted Image

Posted Image

The a panel lip was fine at the top but needs a repair at the bottom and I have a split in the inner wing which should be fine with a quick mig.

Posted Image

On a brighter note the suspension mounting bracket area is mint so just a wire brushing needed here at the moment.


Well seem to have got away with it thus far, only a cut thumb and top of hand for the wife to tut at, just need to wire brush it all down now and order some panels before taking off the scuttle and front panel end. I have decided to tackle one section at a time or it will just get too messed up for me.

Hope you enjoyed,

Graham

Edited by grahama, 03 October 2010 - 05:24 PM.


#58 nrwilliams

nrwilliams

    Mini Mad

  • Noobies
  • PipPipPipPip
  • 133 posts
  • Location: Uckfield, East Sussex

Posted 02 October 2010 - 03:03 PM

Really enjoying this thread! Keep the updates coming!

#59 grahama

grahama

    Up Into Fourth

  • Members
  • PipPipPipPipPipPipPipPipPip
  • 2,442 posts
  • Location: Warrington
  • Local Club: None in my area !!

Posted 12 October 2010 - 11:10 AM

Hi all,

have been practicing my welding ready for the start...

1st attempt

Posted Image

Posted Image

2nd attempt

Posted Image

Posted Image

latest attempt

Posted Image

Posted Image

Posted Image

Think I am ready as I can't bend the welds and penetration seems fine mostly. Getting panels next !

Regards,

Graham

#60 sonikk4

sonikk4

    Twisted Paint Polisher!!!

  • Admin
  • PipPipPipPipPipPipPipPipPipPipPip
  • 16,033 posts
  • Name: Neil
  • Location: Oxfordshire

Posted 12 October 2010 - 04:21 PM

Those last set of welds look much better but it does look as if the gas flow is not quite right as the welds look a tad scabby. If you are using a gas Mig then try turning the flow up slightly, you should be aiming for clean welds like this
Posted Image


1 user(s) are reading this topic

0 members, 1 guests, 0 anonymous users