Ohhhh for welds like that !! Am changing to argon mix and some more practice now I have seen your efforts, good job I am not in a rush to finish !!
Can't turn up the hobby bottle any more so am getting a big bottle with lots of gas in and a proper regulator on it, more delays !! Will all be worth it tho I'm sure.
Graham


Mini Virgin Rebuild Of 83 Mayfair.
Started by
grahama
, May 22 2010 05:09 PM
1006 replies to this topic
#61

grahama
-
- Members
-

- 2,442 posts
Up Into Fourth
- Location: Warrington
- Local Club: None in my area !!
Posted 12 October 2010 - 05:30 PM
#62
Mini Mad Drakeley
-

- Members
-
- 1,172 posts
One Carb Or Two?
- Location: bangor
- Local Club: south down mini owners club
Posted 12 October 2010 - 06:38 PM
i wish my dad showed as much enthusiasm as you do cus then my mini would act be nearly finished lol but good luck with the project =D
#63
WoodlandsMini
-

- Members
-
- 208 posts
Mini Mad
- Location: North Petherton
- Local Club: AutoJungle
Posted 21 October 2010 - 07:46 PM
Absolutely loving this, your pretty much at the same stage as me at the moment 
I am practising the welding, from the pictures it looks as though you are doing a series of spot welds, which is great for panel work, as it is less likely to burn through... I had been trying it in a constant stitch weld, but found it burnt through even on the lowest of settings.
I will try .6mm wire tomorrow and that should help lower the amps going through and hopefully less burning, I will try and post some pictures tomorrow, but thanks for the project thread
#64
grahama
-
- Members
-
- 2,442 posts
Up Into Fourth
- Location: Warrington
- Local Club: None in my area !!
Posted 31 October 2010 - 02:33 PM
Hi all,
got some of these off fleabay a few weeks back, £28, bargain !!
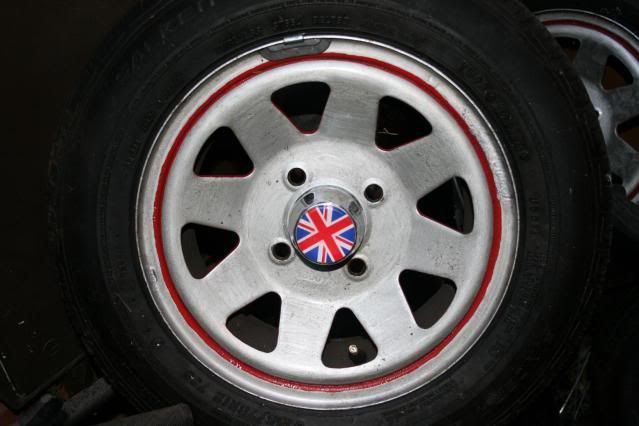
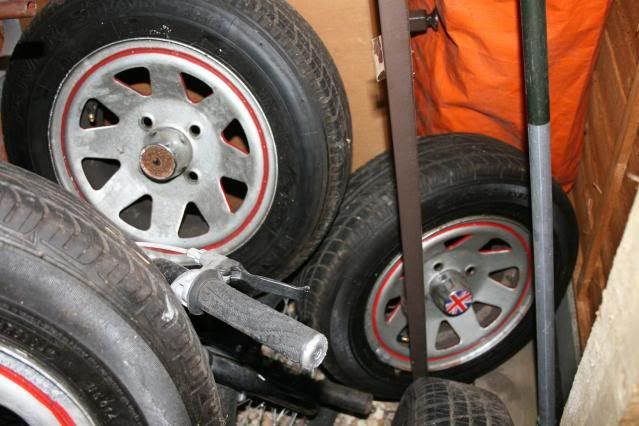
Original 12" Wellers, just what I have been after so well pleased.
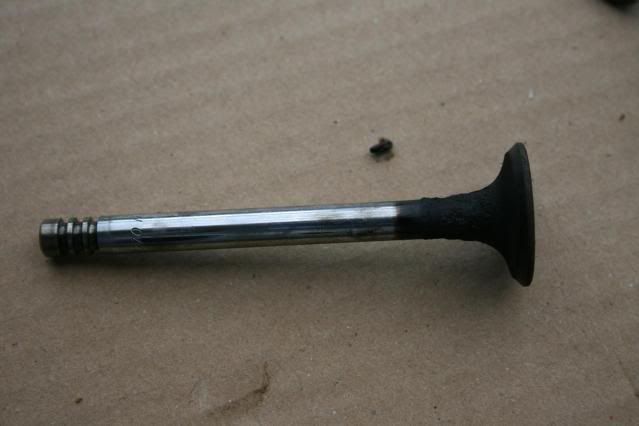
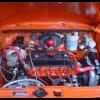
Also from the great fleabay I bought, I hope, an unleaded 998 head for £56, another bargain. Bought it off a mini nut and he was a genuine bloke so think it is ok.
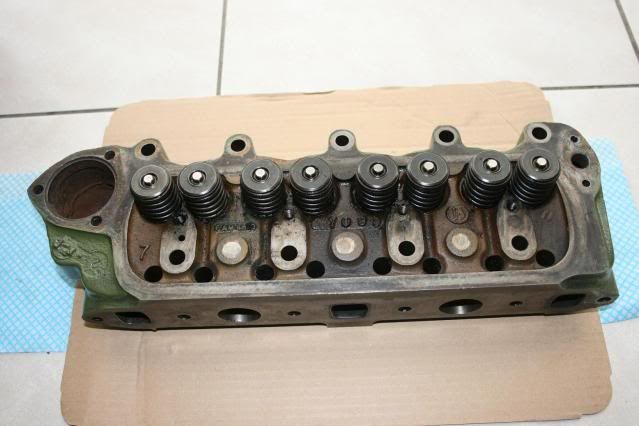
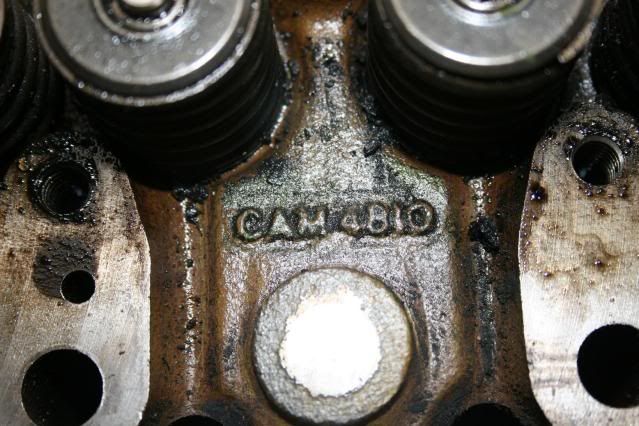
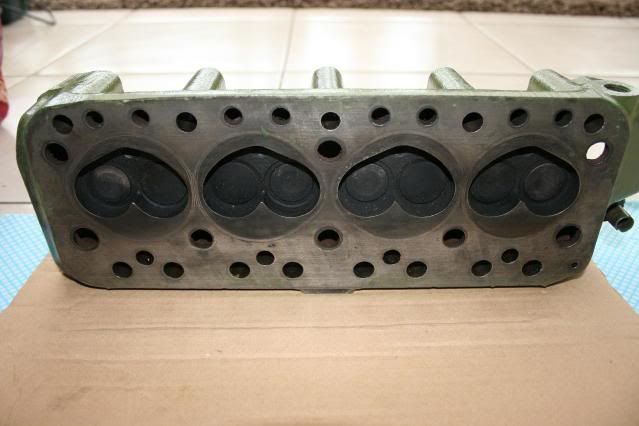
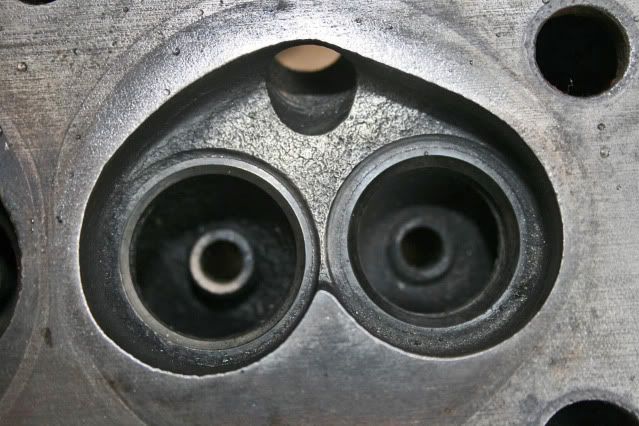
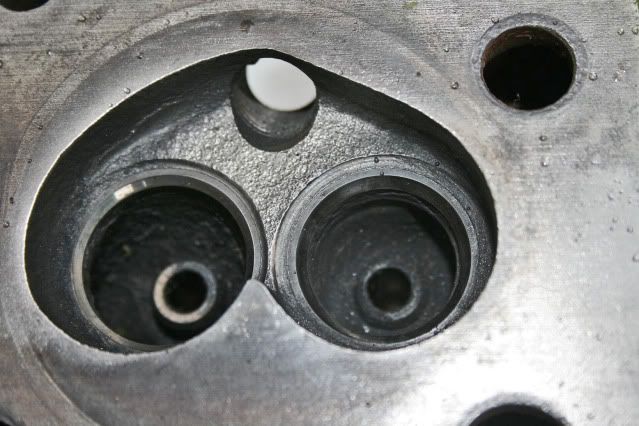
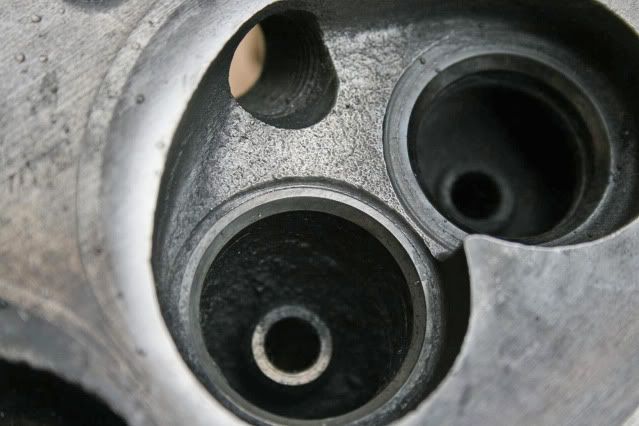
A standard casting CAM 4810, but from a 1992 car so unleaded I hope. I took the valves out and they were a little coked up as you can see but fine and I cleaned round the valve seats to look at the hardened seats if it has them.
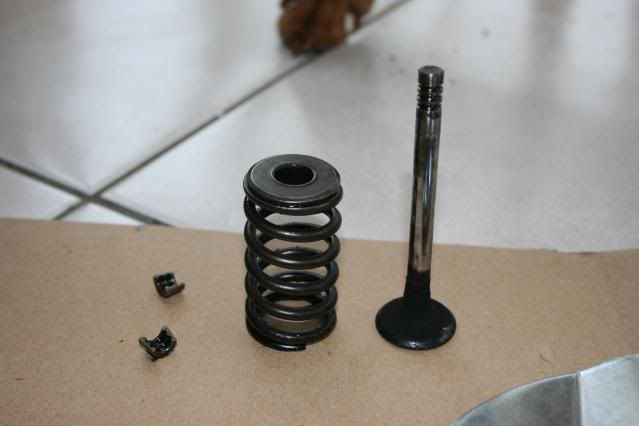
Stripped of valves the bare head looked fine but not sure what the caps are on top of the valve guides??
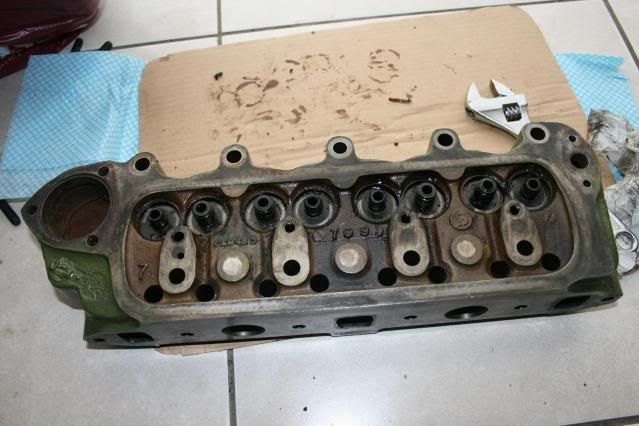
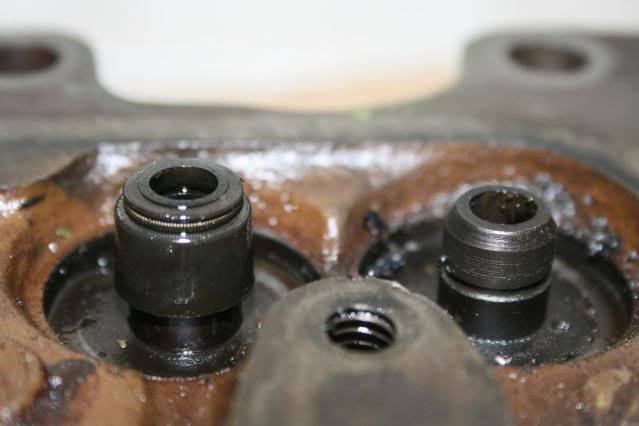
Now for the valve seats, are they hardened??
Any thoughts, will post in quetions too.
Onwards to welding now, can't put it off any longer !!
Graham
got some of these off fleabay a few weeks back, £28, bargain !!
Original 12" Wellers, just what I have been after so well pleased.
Also from the great fleabay I bought, I hope, an unleaded 998 head for £56, another bargain. Bought it off a mini nut and he was a genuine bloke so think it is ok.
A standard casting CAM 4810, but from a 1992 car so unleaded I hope. I took the valves out and they were a little coked up as you can see but fine and I cleaned round the valve seats to look at the hardened seats if it has them.
Stripped of valves the bare head looked fine but not sure what the caps are on top of the valve guides??
Now for the valve seats, are they hardened??
Any thoughts, will post in quetions too.
Onwards to welding now, can't put it off any longer !!
Graham
#65
Sir Cheat
-
- TMF+ Member
-
- 1,171 posts
One Carb Or Two?
- Local Club: Manchester Minis
Posted 31 October 2010 - 04:43 PM
They look like they are..
#66
valve bounce
-

- Members
-
- 694 posts
Super Mini Mad
Posted 31 October 2010 - 08:58 PM
for the gas flow if using proper gas bottles and a proper regulator, then idealy you need 1 psi of gas pressure for every mm in size of nozzle size, so if the nozzel on your welder is 15mm then you need about 15psi of gas pressure
#67
Sam Walters
-

- Members
-
- 2,765 posts
Up Into Fourth
Posted 31 October 2010 - 09:14 PM
I agree, the wheels a bargain.
But the head, well, for the price of postage, i would have probably given you one. 56 pound, i best get my wares up on ebay!
I think before you go buying again on ebay it would be best to ask around for the average price of an item.
But the head, well, for the price of postage, i would have probably given you one. 56 pound, i best get my wares up on ebay!
I think before you go buying again on ebay it would be best to ask around for the average price of an item.
#68
grahama
-
- Members
-
- 2,442 posts
Up Into Fourth
- Location: Warrington
- Local Club: None in my area !!
Posted 01 November 2010 - 06:19 AM
Never mind Sam, will ask in future but I have been following quite a few on ebay now and the one I got was £20 to £40 cheaper than any I have seen before over a 5 month period, may have missed some though !! The cost of converting mine near me was upwards of £100, so not too dissapointed although a free one for postage would have been good, lol.
Graham
Graham
Edited by grahama, 16 November 2010 - 08:21 AM.
#69
grahama
-
- Members
-
- 2,442 posts
Up Into Fourth
- Location: Warrington
- Local Club: None in my area !!
Posted 15 November 2010 - 08:17 PM
Hi all,
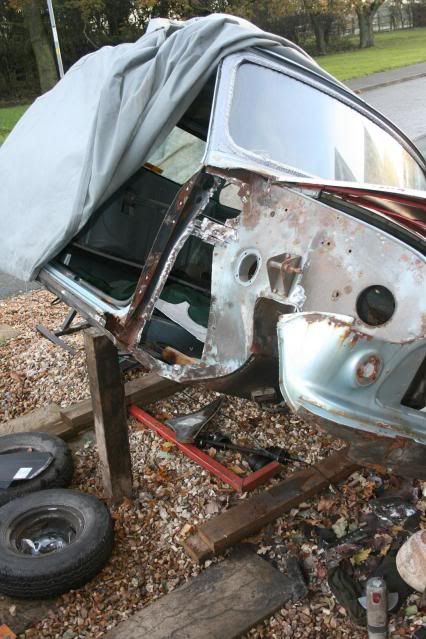
I actually became a mini restorer today !! The grinder came out to play in the sunshine as I had put the bodywork off for too long hiding away practicing welding incase I hurt the mini, so I have come to the conclusion that nothing ventured, nothing gained !! So here goes, my first bodywork ever....
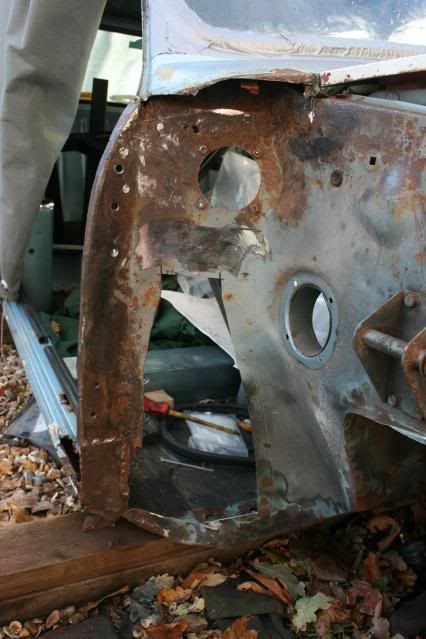
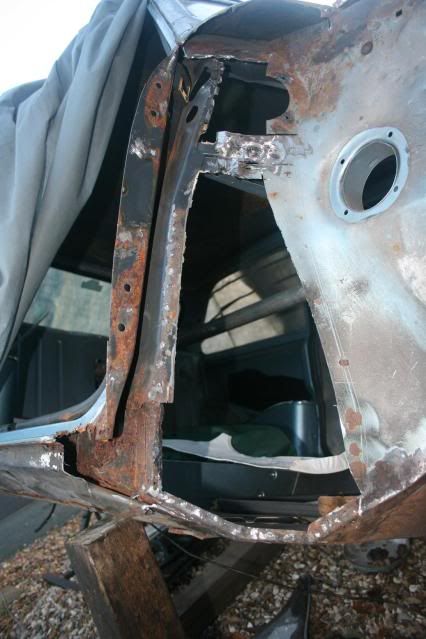
First cuts were very nervous afairs, trying not to cut into anything important as I only wanted a flitch repair not a full inner wing !!
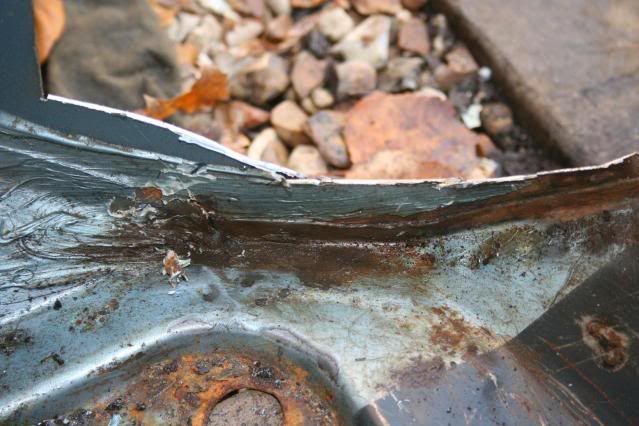
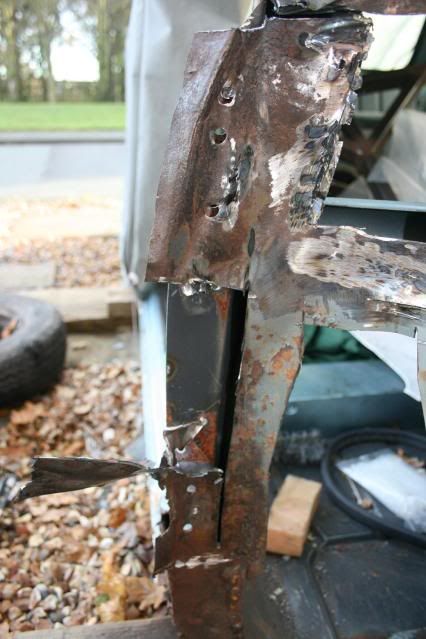
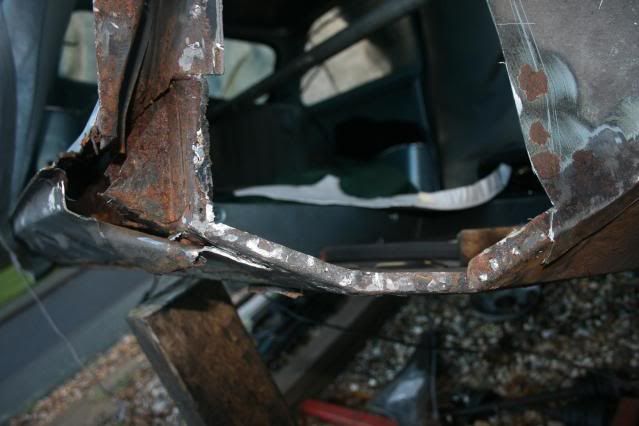
Took the main part out but was still unsure of how it was all joined up so took it easy, then found the rust behind the sills
Aparantly this is a strengthening bracket from inner floor to sill, but doesn't do much so may just cut out. My sills although new ish seem to have been welded on and then finnished with a bead of black silicone to hide the fit, so can't be too important !!
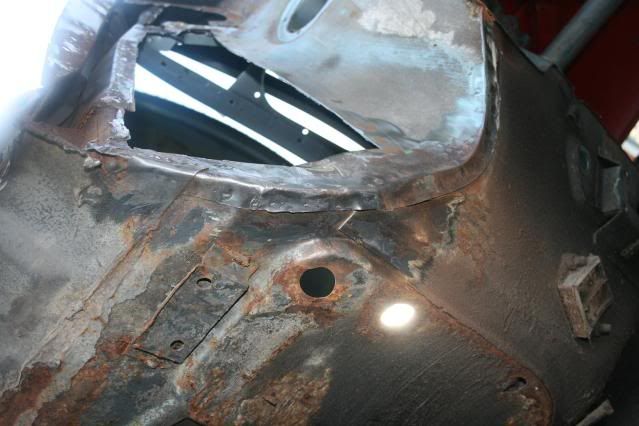
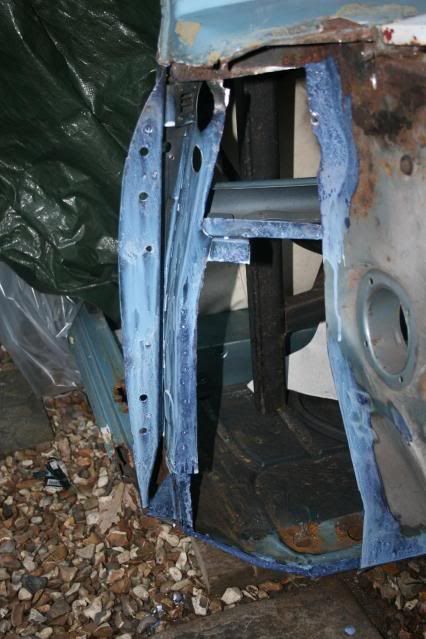
Put it on the spit to see underneath and am so glad I had one knocked up for me, made life so much easier for this bit. Wire brushed the joins and drilled out yet more spot welds befre peeling off the old flitch panel.
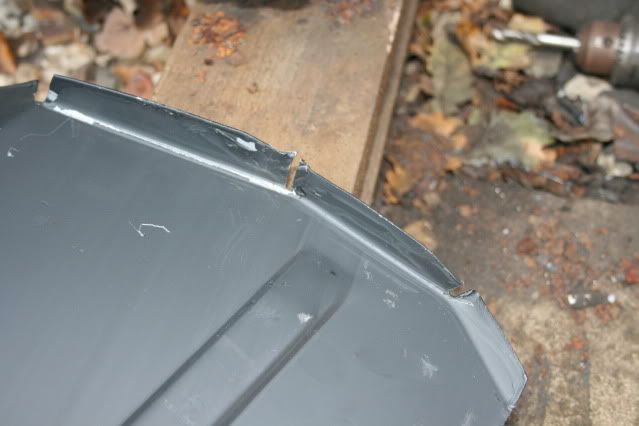
The pattern panel didn't fit exactly so I did some alterations and took out the underside bends, straightened them out for shaping when welding.

As close as the top gets, but am filling the holes in so I can put speakers there.
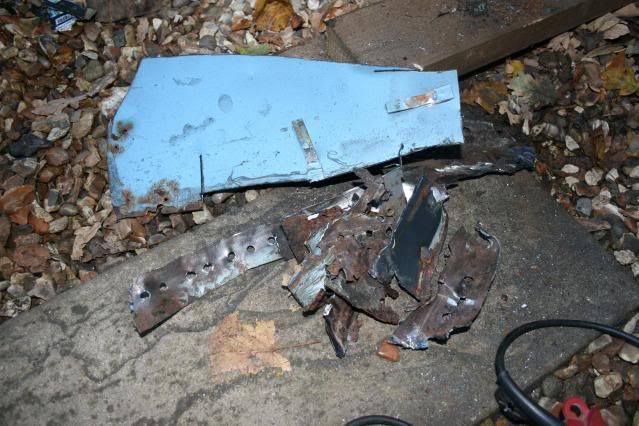
First pile of scrap car done and the area was cleaned up ready for a final fit before welding.
Don't know what all the fuss and worry was about !!! It did take me 3 hours to do this small bit though, guess Iwill get faster as I gain experience, and was pleased with the underneath too, oily but good nick !!
If it's dry tomorrow it's tack welding and scuttle end !!
Regards,
Graham
I actually became a mini restorer today !! The grinder came out to play in the sunshine as I had put the bodywork off for too long hiding away practicing welding incase I hurt the mini, so I have come to the conclusion that nothing ventured, nothing gained !! So here goes, my first bodywork ever....
First cuts were very nervous afairs, trying not to cut into anything important as I only wanted a flitch repair not a full inner wing !!
Took the main part out but was still unsure of how it was all joined up so took it easy, then found the rust behind the sills
Aparantly this is a strengthening bracket from inner floor to sill, but doesn't do much so may just cut out. My sills although new ish seem to have been welded on and then finnished with a bead of black silicone to hide the fit, so can't be too important !!
Put it on the spit to see underneath and am so glad I had one knocked up for me, made life so much easier for this bit. Wire brushed the joins and drilled out yet more spot welds befre peeling off the old flitch panel.
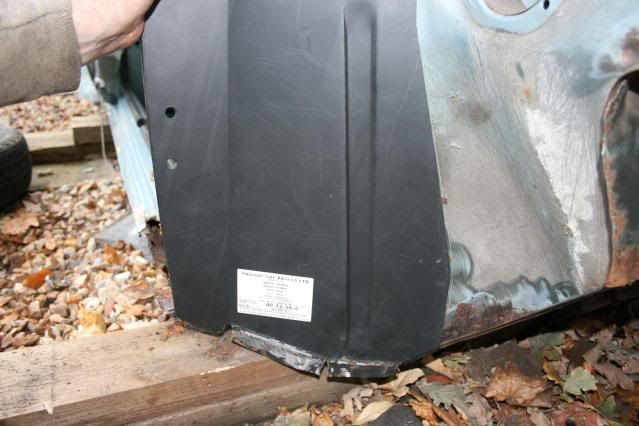
The pattern panel didn't fit exactly so I did some alterations and took out the underside bends, straightened them out for shaping when welding.
As close as the top gets, but am filling the holes in so I can put speakers there.
First pile of scrap car done and the area was cleaned up ready for a final fit before welding.
Don't know what all the fuss and worry was about !!! It did take me 3 hours to do this small bit though, guess Iwill get faster as I gain experience, and was pleased with the underneath too, oily but good nick !!
If it's dry tomorrow it's tack welding and scuttle end !!
Regards,
Graham
#70
xBR4DLEY
-

- Members
-
- 1,618 posts
>>mine's still gay<<
Posted 15 November 2010 - 08:23 PM
Do you work on cars for a living or just a hobby?
You seem very enthusiastic to take everything apart and most people who are new to cars dont have the balls to do that
Good on ya mate
Good luck with the repairs
You seem very enthusiastic to take everything apart and most people who are new to cars dont have the balls to do that
Good on ya mate
Good luck with the repairs
#71
grahama
-
- Members
-
- 2,442 posts
Up Into Fourth
- Location: Warrington
- Local Club: None in my area !!
Posted 15 November 2010 - 08:30 PM
Hi,
very much a hobby, have always wanted to do a full restore since my mate got a beetle 20 years ago and I got a shiny new car. So I am ' living the dream ' with my lad's mini, lol. I do like the work though, although confidence in what I am doing is only growing slowly, like the work rate !!
My next one will be another mini for my daughter then one for me, maybe an mg or campervan, but space is my problem.
Graham
#72
nrwilliams
-

- Noobies
-
- 133 posts
Mini Mad
- Location: Uckfield, East Sussex
Posted 15 November 2010 - 09:14 PM
Hello,
Excellent progress!! It does get easier, I am about to start the the flitch panel on the other side of my Sprite feeling much more confident having done one side already!
Keep the updates coming! )
)
Neil
Excellent progress!! It does get easier, I am about to start the the flitch panel on the other side of my Sprite feeling much more confident having done one side already!
Keep the updates coming!
)Neil
#73
grahama
-
- Members
-
- 2,442 posts
Up Into Fourth
- Location: Warrington
- Local Club: None in my area !!
Posted 23 November 2010 - 04:18 PM
Hi all,
just a little update, been sorting out my order of things before cracking on. I had some advice from members as to my order and then changed it !! Seeing that the hinge panel had only a little surface rust on it gave it a coating or Kurust and a spray with some zinc rich primer, the Upol one.
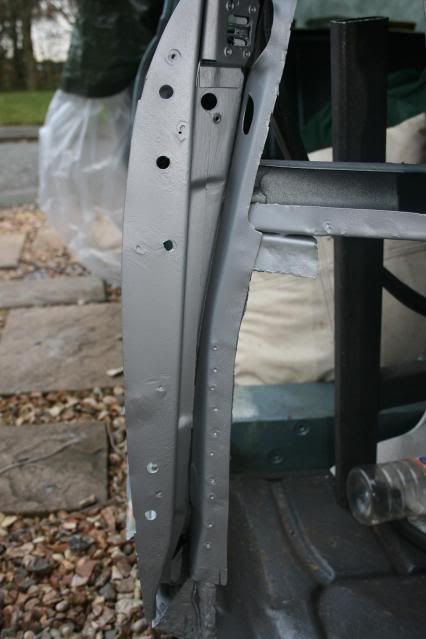
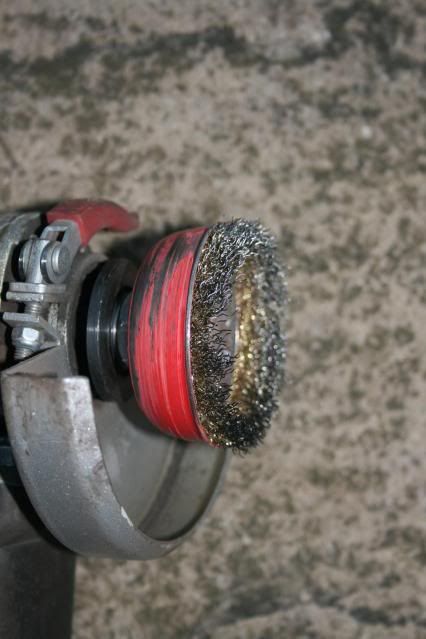
All cleaned up with the wire wheel thing before primer, but think I need a new one !!
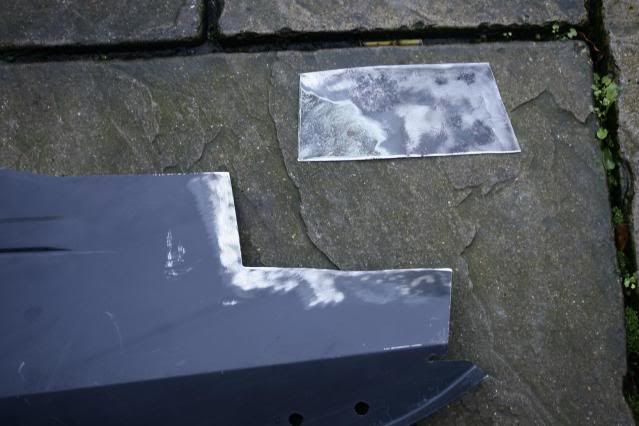
I have been doing a mod to the flitch replacement panel as the vent holes are to be replaced with speakers. So here's my very first bodywork welding can you spot the problem with the mod ??
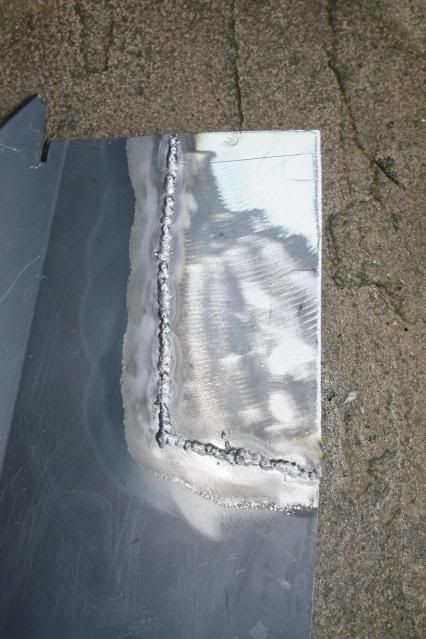
Very nervous affair, but the pulse technique stopped any bad distorsion to the panel, so quite happy. Gave it a grind down and coating of the zinc primer.
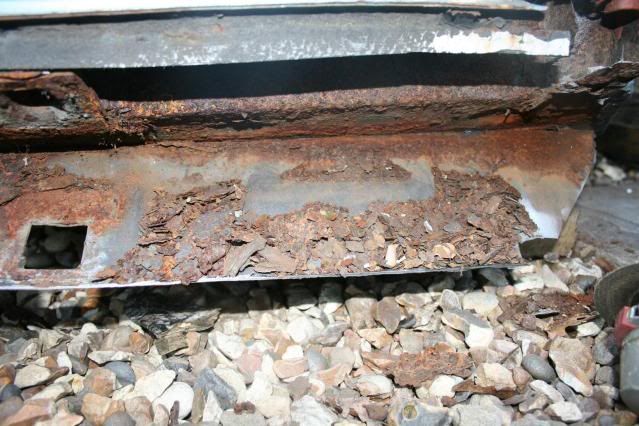
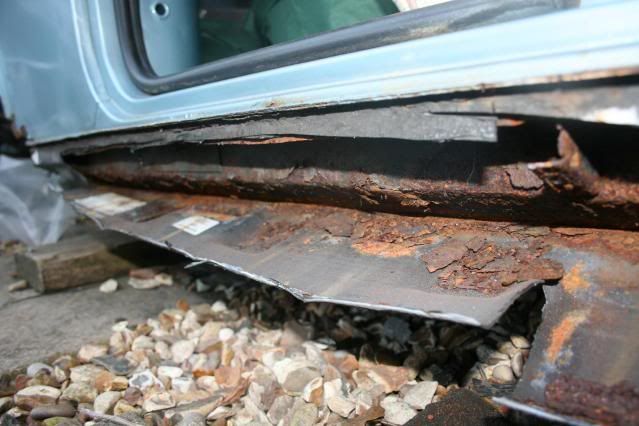
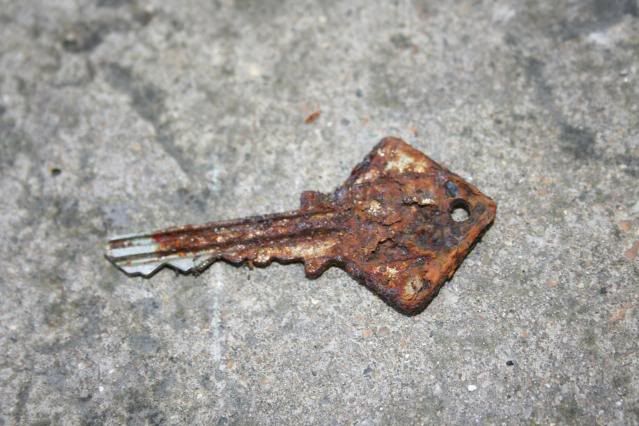
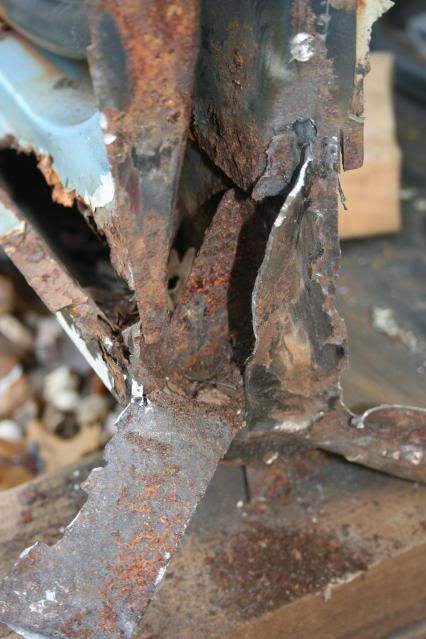
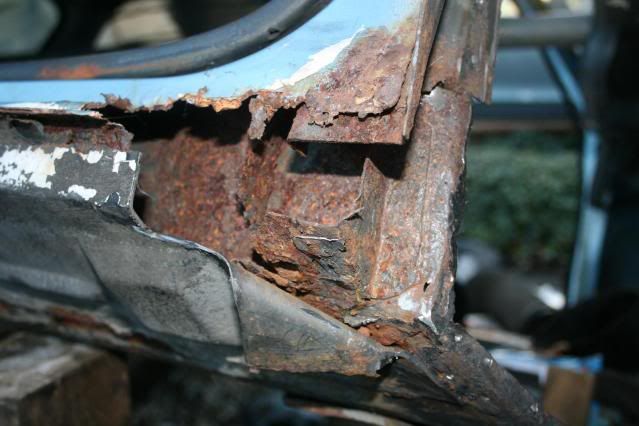
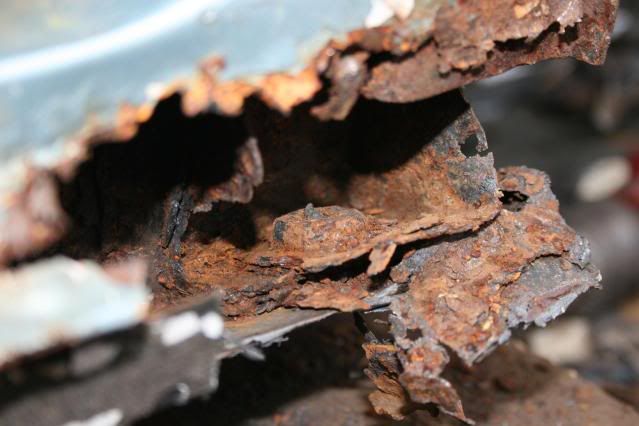
Took the grinder, rapidly becoming my favourite tool ever, to the os sill which was solid. Unfortunately as with most minis the inner sill was left untreated when the repair was done, and the rust has got to it !! Found an AA key inside the sill but don't think they can help out really !!
My main thoughts for the mini at the moment is the jacking point and how t attaches to the cross member / floor panels and what I need to replace, hmmmm !! Will get the flitch on and then take the sill off completely, attack the inner sill and go from there next. Hope this thread is going ok and not too much in the way of pointless stuff !!
Regards,
Graham
just a little update, been sorting out my order of things before cracking on. I had some advice from members as to my order and then changed it !! Seeing that the hinge panel had only a little surface rust on it gave it a coating or Kurust and a spray with some zinc rich primer, the Upol one.
All cleaned up with the wire wheel thing before primer, but think I need a new one !!
I have been doing a mod to the flitch replacement panel as the vent holes are to be replaced with speakers. So here's my very first bodywork welding can you spot the problem with the mod ??
Very nervous affair, but the pulse technique stopped any bad distorsion to the panel, so quite happy. Gave it a grind down and coating of the zinc primer.
Took the grinder, rapidly becoming my favourite tool ever, to the os sill which was solid. Unfortunately as with most minis the inner sill was left untreated when the repair was done, and the rust has got to it !! Found an AA key inside the sill but don't think they can help out really !!
My main thoughts for the mini at the moment is the jacking point and how t attaches to the cross member / floor panels and what I need to replace, hmmmm !! Will get the flitch on and then take the sill off completely, attack the inner sill and go from there next. Hope this thread is going ok and not too much in the way of pointless stuff !!
Regards,
Graham
#74
darky32
-

- TMF+ Member
-
- 272 posts
Mini Mad
- Location: Bournemouth
- Local Club: Not yet !!
Posted 23 November 2010 - 04:34 PM
Your thread is going great Graham...give yourself a pat on the back 
Mark
Mark
#75
sonikk4
-

- Admin
-
- 16,168 posts
Twisted Paint Polisher!!!
- Name: Neil
- Location: Cotwolds.
Posted 23 November 2010 - 04:40 PM
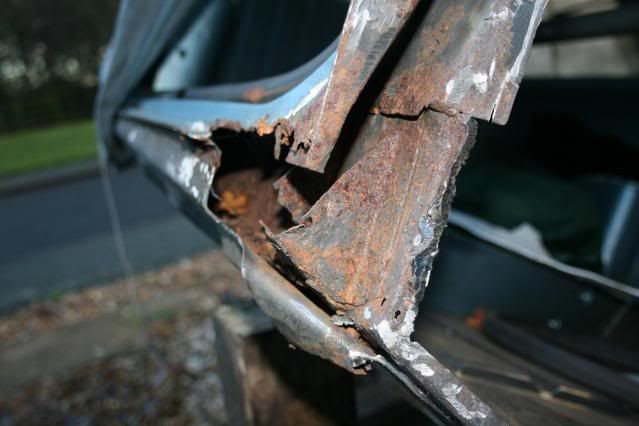
Glad to see you are getting on, before you weld in the flitch panel i would recommend taking off that corner of the scuttle to see if the rust has got under the lip. If it has it will be easy then to repair this at the same time as welding in the flitch.
The wire cup you are using is not really the best, you need to get a twisted wire cup like this one from Machinemart
CHT555 - 100mm Wire Cup Brush (M14) much stronger and it comes in various sizes.
Neil
The wire cup you are using is not really the best, you need to get a twisted wire cup like this one from Machinemart
CHT555 - 100mm Wire Cup Brush (M14) much stronger and it comes in various sizes.
Neil


0 user(s) are reading this topic
0 members, 0 guests, 0 anonymous users


