
As Neil said above glad to see your welding.
I plated the air vent holes and welded around them to keep the shape.
I think with hind sight i should have bolted and seam sealed a
panel on in case I wanted to return it.
I have subscribed and look forward to more pictures, posts.
Cheers
John


Mini Virgin Rebuild Of 83 Mayfair.
Started by
grahama
, May 22 2010 05:09 PM
1006 replies to this topic
#77

grahama
-
- Members
-

- 2,442 posts
Up Into Fourth
- Location: Warrington
- Local Club: None in my area !!
Posted 23 November 2010 - 07:39 PM
Hi,
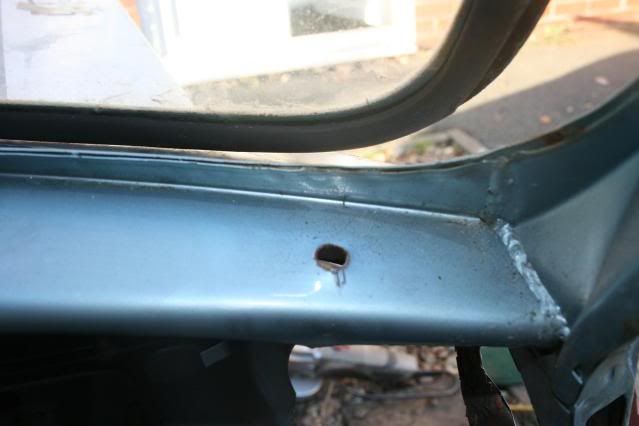
Neil, I have had a look under the scuttle and it looks in pretty good condition, may just do a front section repair and give the surface rust a coating of Kurust and some primer.
John, the vents have gone but if I really need them then a hole saw will do the trick but the lad wants speakers, as many as possible by the sound of it !!
Hopefully get to do some more tomorrow if it is dry.
Graham
#78
grahama
-
- Members
-
- 2,442 posts
Up Into Fourth
- Location: Warrington
- Local Club: None in my area !!
Posted 24 November 2010 - 06:06 PM
Hi,
bit more today on the back of advice from Neil, (project Erm), and took the corner off the scuttle to have a good look underneath...
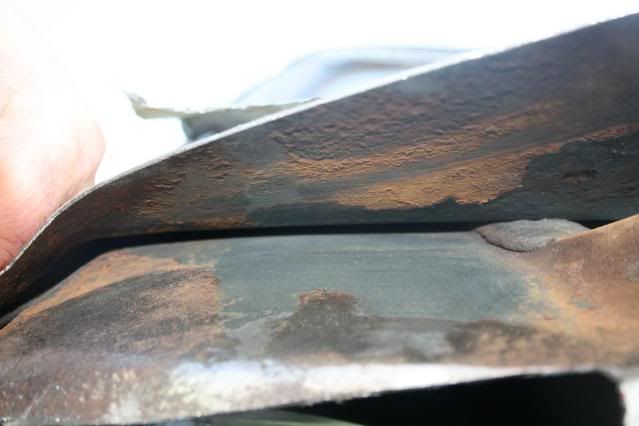
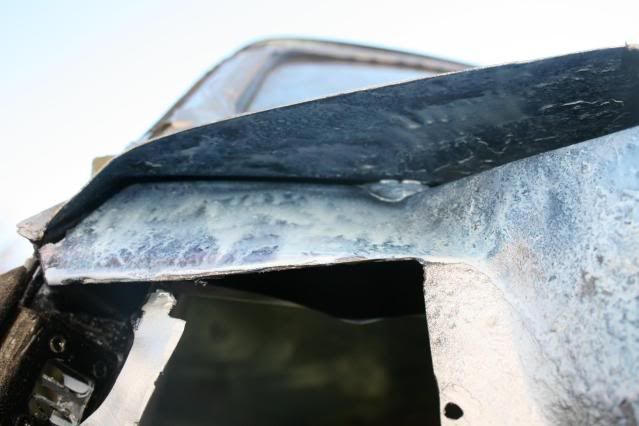
Just some surface rust by the look of it, gave it a good prodding with a sharp implenent and solid so am sticking with the original scuttle with a repair section. Gave the paint, and filler, a wire brushing with my new knotted grinder atachment and couldn't find a previous repair. Also the inner scuttle looks solid, just a little surface rust so gave the under scuttle metal a good Kurusting and will prime and paint tomorrow.

The window surround has the, I think, factory spot welds so am quite pleased with the condition, and the passenger side even has the scuttle closure plate intact so might get away with things there too. With that in mind I cut out a section from the scuttle...
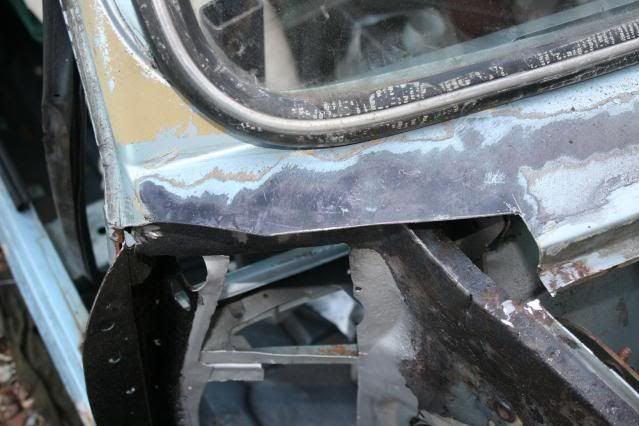
Getting the hang of the fabrication side of things, and really enjoying the bodywork now. I WILL do some welding next as I need to get the flitch repair in before I can move on to the sills, and the under scuttle area which will need a little patch. I also gave the hinge panel a coat of hamerite because Rustoleum is on a few days order but it will be fine I'm sure where it is.
Hope you enjoyed,
Graham
bit more today on the back of advice from Neil, (project Erm), and took the corner off the scuttle to have a good look underneath...
Just some surface rust by the look of it, gave it a good prodding with a sharp implenent and solid so am sticking with the original scuttle with a repair section. Gave the paint, and filler, a wire brushing with my new knotted grinder atachment and couldn't find a previous repair. Also the inner scuttle looks solid, just a little surface rust so gave the under scuttle metal a good Kurusting and will prime and paint tomorrow.
The window surround has the, I think, factory spot welds so am quite pleased with the condition, and the passenger side even has the scuttle closure plate intact so might get away with things there too. With that in mind I cut out a section from the scuttle...
Getting the hang of the fabrication side of things, and really enjoying the bodywork now. I WILL do some welding next as I need to get the flitch repair in before I can move on to the sills, and the under scuttle area which will need a little patch. I also gave the hinge panel a coat of hamerite because Rustoleum is on a few days order but it will be fine I'm sure where it is.
Hope you enjoyed,
Graham
Edited by grahama, 25 November 2010 - 10:43 AM.
#79
nrwilliams
-

- Noobies
-
- 133 posts
Mini Mad
- Location: Uckfield, East Sussex
Posted 25 November 2010 - 03:44 PM
Looking good! Excellent progress.
Hoping to do some more welding on mine at the weekend.
Hoping to do some more welding on mine at the weekend.
#80
grahama
-
- Members
-
- 2,442 posts
Up Into Fourth
- Location: Warrington
- Local Club: None in my area !!
Posted 28 November 2010 - 04:47 PM
Hi all,
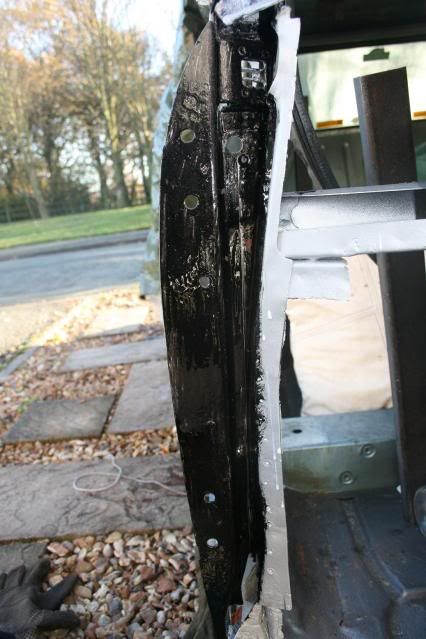
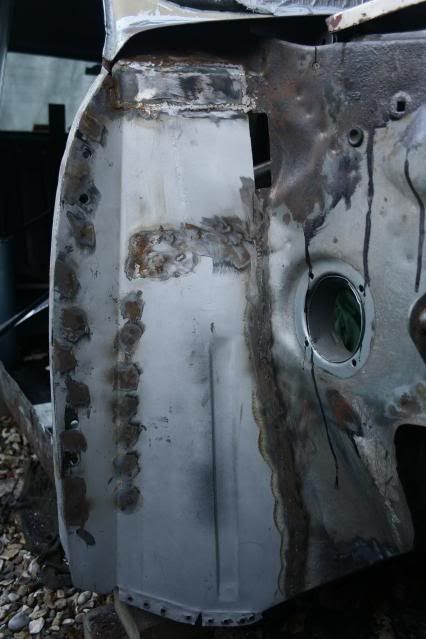
ok, finally took the welder out to play with the mini, they got on together fairly well for a first time together but I had to seperate them at one stage for playing too agressively !!!
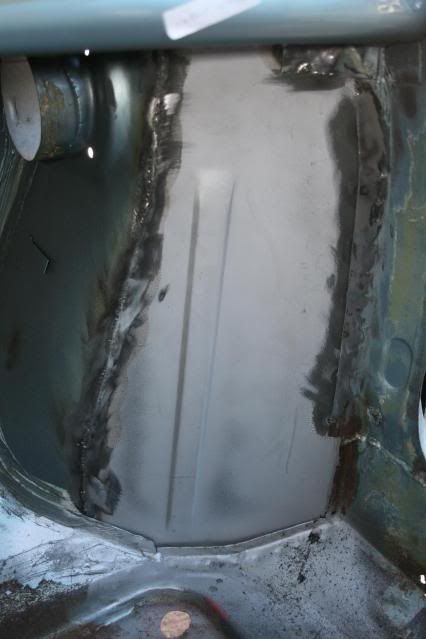
Set the flitch panel in and did my first plug welds
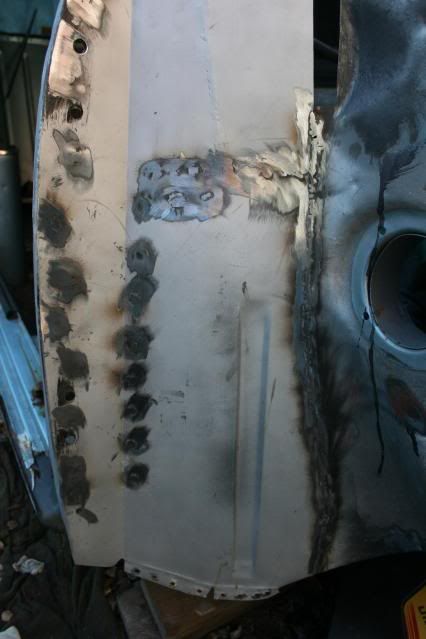
I ground them down but not too closely as I don't trust my skill in this area yes and don't want to grind all the way through the new panel. I also butt welded the RHS join.
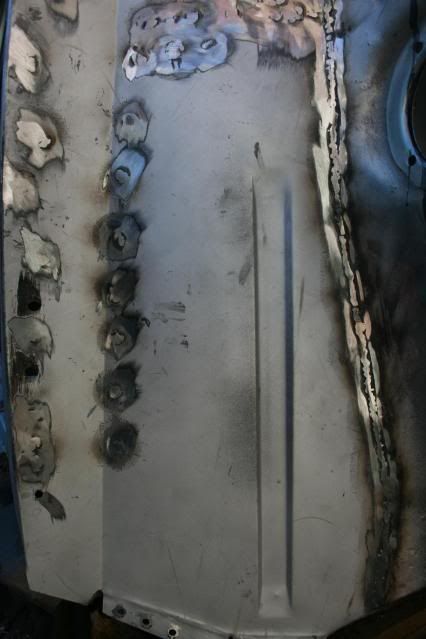
Put a few tacks inside too just in case !!
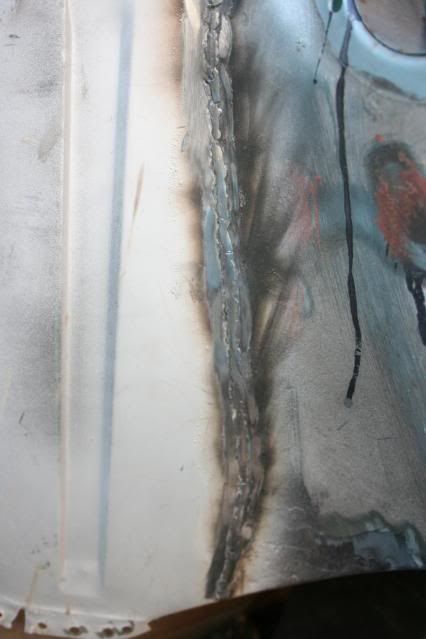
Again they were ground down and inside I had pretty good penetration so tidied up inside aswell. What I did fing is that I was leaving tiny pin holes along the butt weld which I could see from the inside. Just applied more weld and more grinding to the area till no pin holes visible. Not too bad for my first time, but the plug welds were not as successful. The plug welds were not penetrating on the hinge panel so had to grind them off and re drill and re weld. Hope to get better at these but they are holding now.
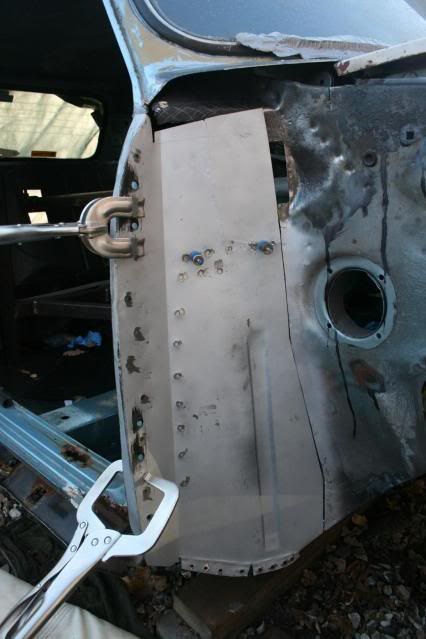
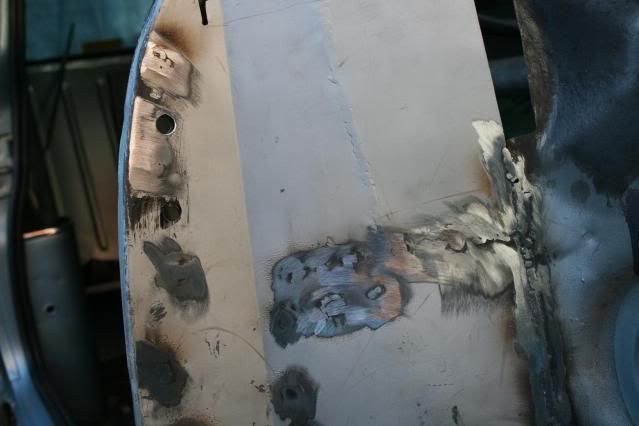
I had movement in the top of the old flitch panel after I cut the old one out which was concerning me a little. After a question in the bodywork area I was reasured that the area would firm up when the new panel was put in, and it proved to be the case, thanks Neil !!
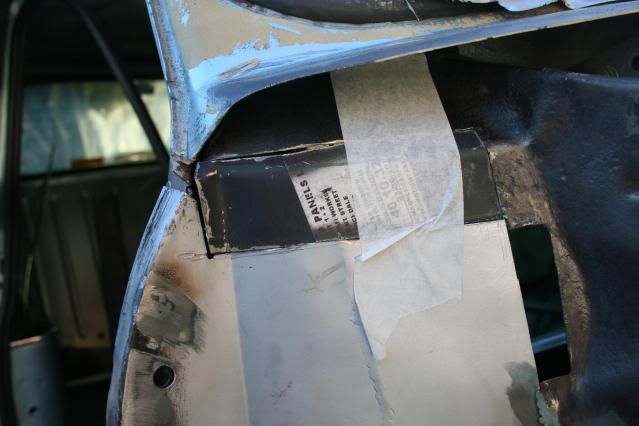
This was the area flexing and I needed to make a patch to join this section to the flitch repair.
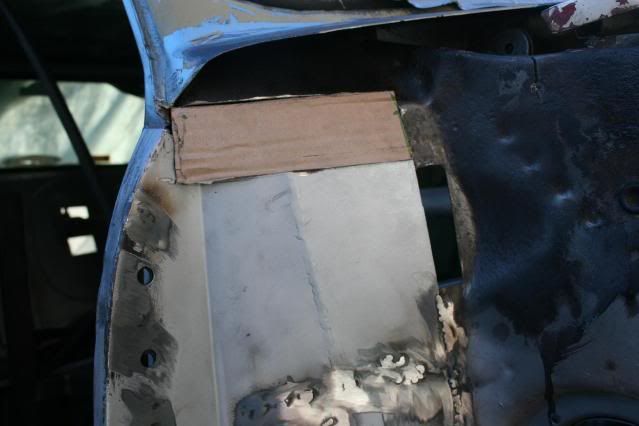
Blue Peter mode waent into full swing and a template was made and transfered onto steel from a cut off. It was bent and cut to fit and tacked in.
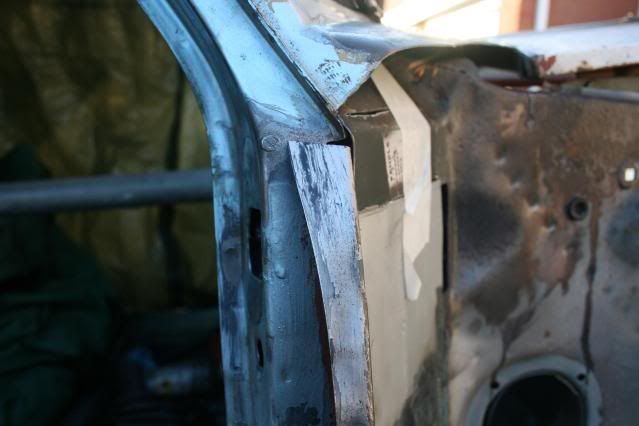
I then welded it in fully, correcting a couple of pin holes along the way and ground it down.
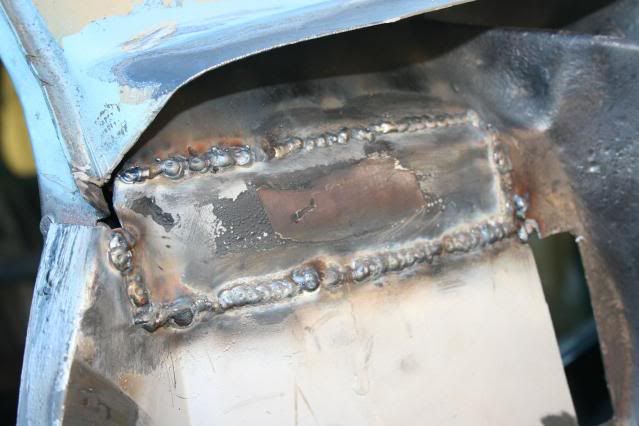
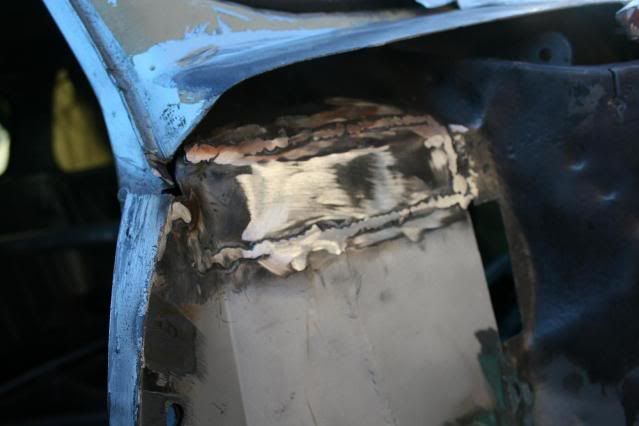
All ground down and inspected and looks ok, certainly strong enough, but I don't think it will win any awards for looks. I was pleased with the bend from top of the flitch panel into the new section and it just needs protecting now.
All in all not too bad for my first atack on the mini, no major disastors and it all fits, sort of, lol, just need to keep going and improve the plug welds and stop the pin holes !! Small patch required to finish but that was my deliberate mistake from earlier !!
Hope you enjoyed,
Graham
ok, finally took the welder out to play with the mini, they got on together fairly well for a first time together but I had to seperate them at one stage for playing too agressively !!!
Set the flitch panel in and did my first plug welds
I ground them down but not too closely as I don't trust my skill in this area yes and don't want to grind all the way through the new panel. I also butt welded the RHS join.
Put a few tacks inside too just in case !!
Again they were ground down and inside I had pretty good penetration so tidied up inside aswell. What I did fing is that I was leaving tiny pin holes along the butt weld which I could see from the inside. Just applied more weld and more grinding to the area till no pin holes visible. Not too bad for my first time, but the plug welds were not as successful. The plug welds were not penetrating on the hinge panel so had to grind them off and re drill and re weld. Hope to get better at these but they are holding now.
I had movement in the top of the old flitch panel after I cut the old one out which was concerning me a little. After a question in the bodywork area I was reasured that the area would firm up when the new panel was put in, and it proved to be the case, thanks Neil !!
This was the area flexing and I needed to make a patch to join this section to the flitch repair.
Blue Peter mode waent into full swing and a template was made and transfered onto steel from a cut off. It was bent and cut to fit and tacked in.
I then welded it in fully, correcting a couple of pin holes along the way and ground it down.
All ground down and inspected and looks ok, certainly strong enough, but I don't think it will win any awards for looks. I was pleased with the bend from top of the flitch panel into the new section and it just needs protecting now.
All in all not too bad for my first atack on the mini, no major disastors and it all fits, sort of, lol, just need to keep going and improve the plug welds and stop the pin holes !! Small patch required to finish but that was my deliberate mistake from earlier !!
Hope you enjoyed,
Graham
Edited by grahama, 28 November 2010 - 04:51 PM.
#81
sonikk4
-

- Admin
-
- 16,168 posts
Twisted Paint Polisher!!!
- Name: Neil
- Location: Cotwolds.
Posted 28 November 2010 - 04:53 PM
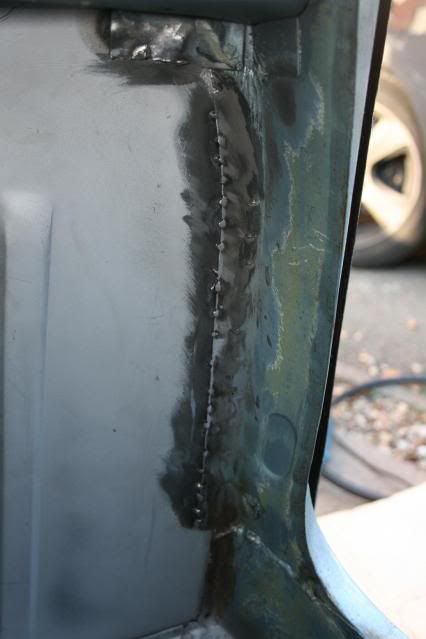
Thats not too shabby at all.  What size holes are you drilling for the plug welds??
What size holes are you drilling for the plug welds??
#82
grahama
-
- Members
-
- 2,442 posts
Up Into Fourth
- Location: Warrington
- Local Club: None in my area !!
Posted 28 November 2010 - 05:02 PM
They were about 6 mm, not exactly sure, and I didn't bevel the edges either. Do they need to be bigger and bevelled to hold the weld pool in. I had troublt with the penetration too on the metal while trying not to blow the hole to pieces in the top panel !! Ahhhhhhhh plug welds were meant to be easier than butt welds and I am doing them ok now, nearly !
Graham
Graham
Edited by grahama, 28 November 2010 - 05:04 PM.
#83
GreaseMonkey
-

- Members
-
- 3,663 posts
Has Ratchet, Will Make Noises
Posted 28 November 2010 - 05:04 PM
Great stuff
#84
sonikk4
-
- Admin
-
- 16,168 posts
Twisted Paint Polisher!!!
- Name: Neil
- Location: Cotwolds.
Posted 28 November 2010 - 05:15 PM
They were about 6 mm, not exactly sure, and I didn't bevel the edges either. Do they need to be bigger and bevelled to hold the weld pool in. I had troublt with the penetration too on the metal while trying not to blow the hole to pieces in the top panel !! Ahhhhhhhh plug welds were meant to be easier than butt welds and I am doing them ok now, nearly !
Graham
Providing you are using plenty of power that should be fine. I use 1/4" which is fractionally bigger and then high power. No need to bevel the edges (countersink) as the metal is so thin all you would do is make the hole larger. With plug welding unlike spot welding the weld pool will build up but providing the hole is filled then grinding back will sort that out.
There is a knack to plug welding, i tend to start at the top of the hole especially on a vertical surface then the weld will flow into the hole. When doing it on the level or horizontal then i start in the middle and the weld pool will fill the hole.
The butt welds look good so no worries there. Providing the plug welds are good then there is no need to put any tack welds on the back. If you want to do that then i would use 1 inch seam welds instead. Weld an inch miss an inch and so on but that would be ott. Its up to you though how much weld you put in, as long as its strong and there is plenty of it then happy days.
#85
grahama
-
- Members
-
- 2,442 posts
Up Into Fourth
- Location: Warrington
- Local Club: None in my area !!
Posted 28 November 2010 - 05:20 PM
Cheers Neil, will have a practice before doing anymore, but can move onto the inner sill now it's in and strong.
Graham
Graham
#86
nrwilliams
-
- Noobies
-
- 133 posts
Mini Mad
- Location: Uckfield, East Sussex
Posted 28 November 2010 - 08:06 PM
Excellent progress, looks really neat! Much neater than my first attempt. Must try harder on the other side LOL
#87
grahama
-
- Members
-
- 2,442 posts
Up Into Fourth
- Location: Warrington
- Local Club: None in my area !!
Posted 28 November 2010 - 10:34 PM
Ta Neil,
Am quite pleased really all in all, have learnt a lot just doing this small bit. Onto the inner sill next and then door step, was a nervy afair but enjoyed it. How are you going with yours, managed to do any ?? And you need a link in your signature so can find it for reference !!
Am quite pleased really all in all, have learnt a lot just doing this small bit. Onto the inner sill next and then door step, was a nervy afair but enjoyed it. How are you going with yours, managed to do any ?? And you need a link in your signature so can find it for reference !!
#88
Shifty
-

- Admin
-
- 13,154 posts
Sponsored by Fosters (tm)
- Name: Sean
- Location: Shropshire(sunny)
- Local Club: TMF
Posted 28 November 2010 - 10:38 PM
Looks good, nice job there.
I don't like to grind back flush as I think it weakens the weld too much, yes it looks pretty but not worth it.
I don't like to grind back flush as I think it weakens the weld too much, yes it looks pretty but not worth it.
#89
grahama
-
- Members
-
- 2,442 posts
Up Into Fourth
- Location: Warrington
- Local Club: None in my area !!
Posted 17 January 2011 - 07:36 PM
Hi all,
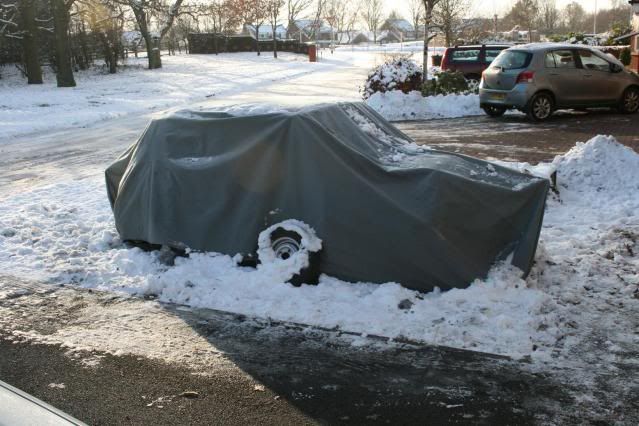
well a combination of work, xmas, lots of snow has not seen much progress recently but the snow is gone, having been replaced by rain mostly, neither good for 'on drive' workshops, but have had a good couple of days so here goes, but not too much...
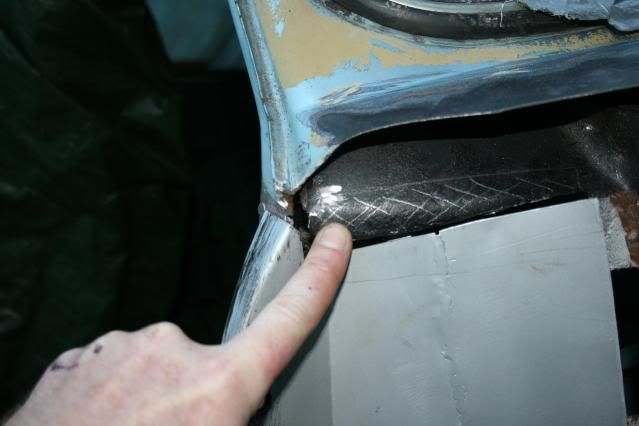
Next section is the sill and doorstep area, not too bad but they do need replacing in parts. I took the newish outer sill off to look inside and this is what greeted me
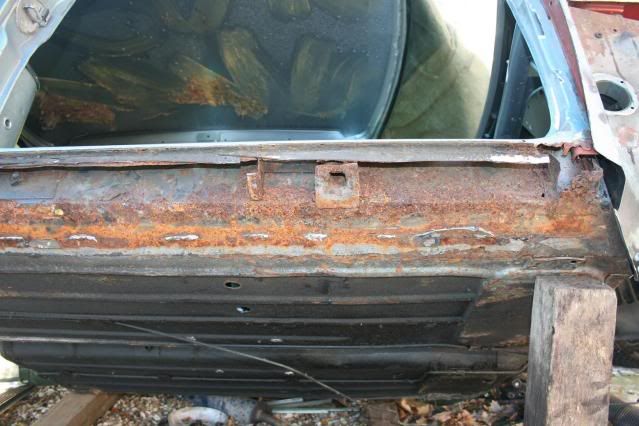
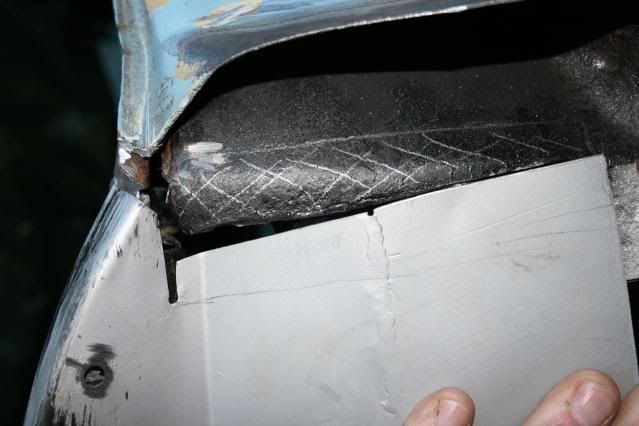
not too bad up top but round where the replacement outer sill has been, not too good. The jacking point was too far gone too so off it came, never to go back and I thought the inner sill was ok behind it but holes showed up with a little prodding.
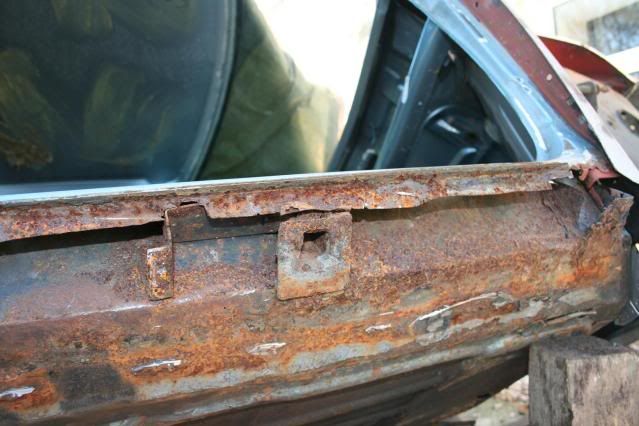
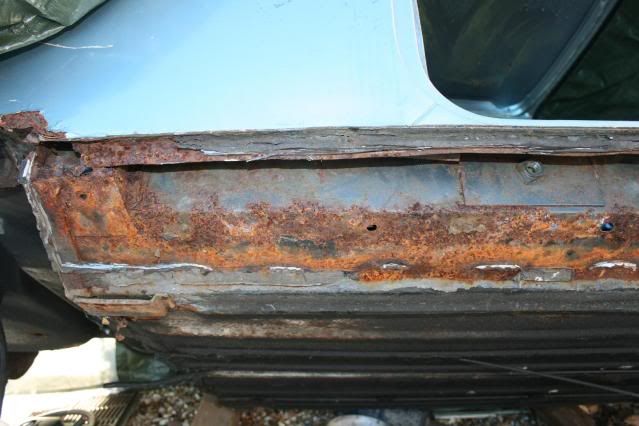
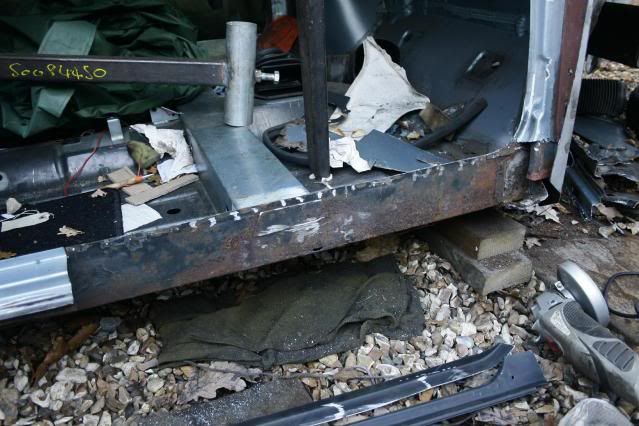
I took the doorstep off as far back as it required and offered up the replacement part. Not a good fit as many of you have found so I took the grinder to it to shrink it down to size. Cut sort of down the middle all the way along.
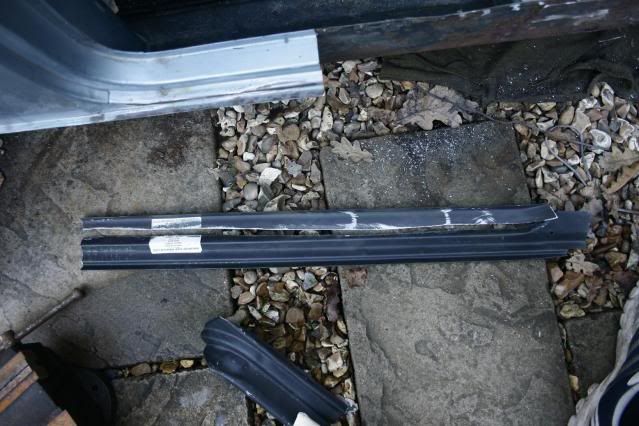
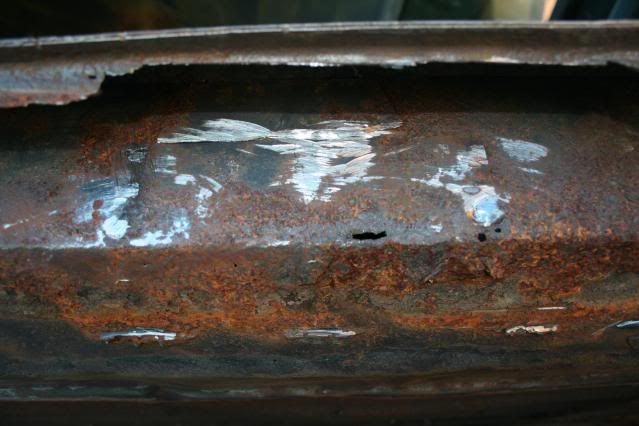
This is getting welded tomorrow and hopefully tacked in. Also on the cards for tomorrow is the rust on my shiny new panel > The Winter has not been kind so far .
A good scrub down, kurust and red oxide going on tomorrow !!
Small progress but hope you enjoyed
well a combination of work, xmas, lots of snow has not seen much progress recently but the snow is gone, having been replaced by rain mostly, neither good for 'on drive' workshops, but have had a good couple of days so here goes, but not too much...
Next section is the sill and doorstep area, not too bad but they do need replacing in parts. I took the newish outer sill off to look inside and this is what greeted me
not too bad up top but round where the replacement outer sill has been, not too good. The jacking point was too far gone too so off it came, never to go back and I thought the inner sill was ok behind it but holes showed up with a little prodding.
I took the doorstep off as far back as it required and offered up the replacement part. Not a good fit as many of you have found so I took the grinder to it to shrink it down to size. Cut sort of down the middle all the way along.
This is getting welded tomorrow and hopefully tacked in. Also on the cards for tomorrow is the rust on my shiny new panel >
The Winter has not been kind so far .A good scrub down, kurust and red oxide going on tomorrow !!
Small progress but hope you enjoyed
Edited by grahama, 17 January 2011 - 07:38 PM.
#90
myredmini
-

- TMF+ Member
-
- 3,211 posts
My Mummy Says It's OK
- Name: Dan
- Location: Teesside
- Local Club: BOG MOG
Posted 17 January 2011 - 11:23 PM
Looking good bud, loving the thread, keep it up


1 user(s) are reading this topic
0 members, 1 guests, 0 anonymous users


