To be honest mate, i'm not a boro fan *waits for the onslaught from other boro fans*. I'm actually a leeds fan. Leeds rhinos that is though not the football team, ha.
90-100 ponies doesn't sound unreasonable from your engine (depending on the head work you've had done).


Wide Ratio Gearbox And 1380 Engine Build
Started by
AndyMiniMad.
, Jun 12 2010 10:58 PM
419 replies to this topic
#46

AndrewJ530
-

- Members
-

- 1,628 posts
Camshaft & Stage Two Head
- Location: Middlesbrough
Posted 17 August 2010 - 09:30 PM
#47
AndyMiniMad.
-
- Members
-
- 3,295 posts
Up Into Fourth
- Location: Under The Bonnet.
Posted 18 August 2010 - 02:59 AM
The head is also getting some work done at the same workshop. Its an MG metro engine so the valves are pretty big already. Having the ports widened to get the gasses flowing better and the face skimmed to increase the comp ratio a bit. Got a good inlet manifold and lcb exhaust so all good there. Pipercross cone filter on a HIf 44 with a reprofiled needle. You have probably already seen the pics of the cam im useing.To be honest mate, i'm not a boro fan *waits for the onslaught from other boro fans*. I'm actually a leeds fan. Leeds rhinos that is though not the football team, ha.
90-100 ponies doesn't sound unreasonable from your engine (depending on the head work you've had done).
It mentions in the blurb that this cam works well with the 1.5 - 1 rockers, but I think i will wait to see how it runs with the standard ratio first.
Ive pretty much got all the bits needed to start the build now. Can any one suggest anything I may have forgotten?
#48
AndrewJ530
-
- Members
-
- 1,628 posts
Camshaft & Stage Two Head
- Location: Middlesbrough
Posted 18 August 2010 - 06:35 PM
I'm going to hazard a guess at 92 bhp and similar torque. Could do some vizard mods to the carb spindle, piston and butterfly to increase airflow through it?
#49
AndyMiniMad.
-
- Members
-
- 3,295 posts
Up Into Fourth
- Location: Under The Bonnet.
Posted 26 August 2010 - 09:43 PM
Ok so a major change of heart. I have removed the engine from the workshop and taken the block to a more specialised machineist. More expensive but at least it will get done quickly. Its at Precision Engine Services in Inverness now. Well pleased with them. The head?? Mmmm well err i have taken the plunge an gone for a MED rally spec head. Not cheep but MED heads are the muts nuts.
Edited by AndyMiniMad., 26 August 2010 - 09:43 PM.
#50
AndyMiniMad.
-
- Members
-
- 3,295 posts
Up Into Fourth
- Location: Under The Bonnet.
Posted 02 September 2010 - 09:02 PM
A quick update, Ive been working away for a couple of weeks so no major changes on the engine build. I went down to see the block today and its all bored out and the pistons have been fitted to the rods. they said its a good block and the bores will stand a further 0.5mm oversize if required. So just the cam bearings to change and hone to match the calver cam. Should be all done by wednesday. Anyway ive been busy today fitting these.
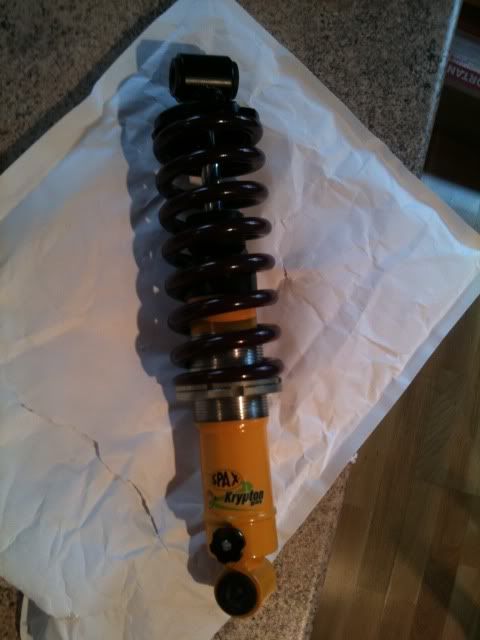
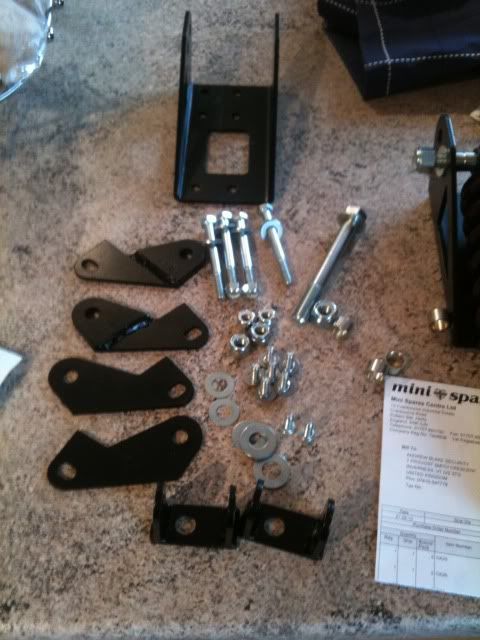
It was a pig to fit because the top arm damper bolts were jammed in solid. Had to drill them out. But eventually they went on.
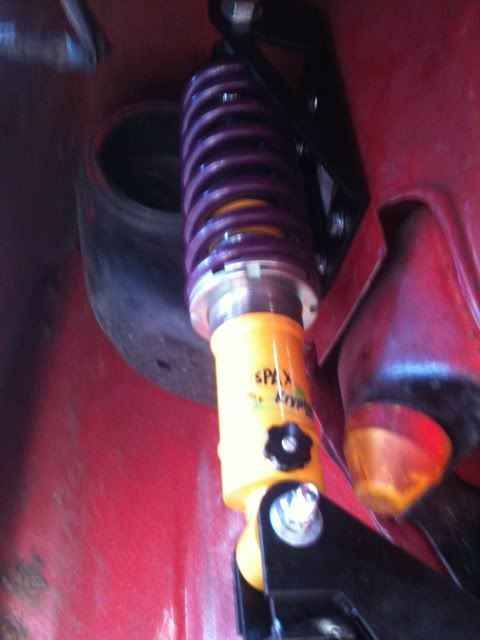
Went for a test drive and played with the ride height and damper settings. Ive set the knobs to possition 12 of the 32 available and it seems to be fine. Corners flat and is not to harsh over the bumpy stuff. So much better than the rubber donuts. I would highly recommend this upgrade to anyone thinking of a suspension change.
It was a pig to fit because the top arm damper bolts were jammed in solid. Had to drill them out. But eventually they went on.
Went for a test drive and played with the ride height and damper settings. Ive set the knobs to possition 12 of the 32 available and it seems to be fine. Corners flat and is not to harsh over the bumpy stuff. So much better than the rubber donuts. I would highly recommend this upgrade to anyone thinking of a suspension change.
Edited by AndyMiniMad., 02 September 2010 - 09:04 PM.
#51
AndyMiniMad.
-
- Members
-
- 3,295 posts
Up Into Fourth
- Location: Under The Bonnet.
Posted 07 September 2010 - 08:01 AM
Hello again!! Good news. The block is back, WooHoo! But first here is a couple of pics of Haggis at Motormania this weekend. A great day out with lots of very nice cars to drool over. Also a great run home over the Dava Moore. Had a bit of a thrash with a lovely Mk 1 XR2. We couldnt keep up with the big stuff but a great run anyway. Only bad thing was some ignorant ******* let there dog pee on my wheels Note the wet mark in the picture. A puddle of pee in my deep dish alloy. Not Nice. 


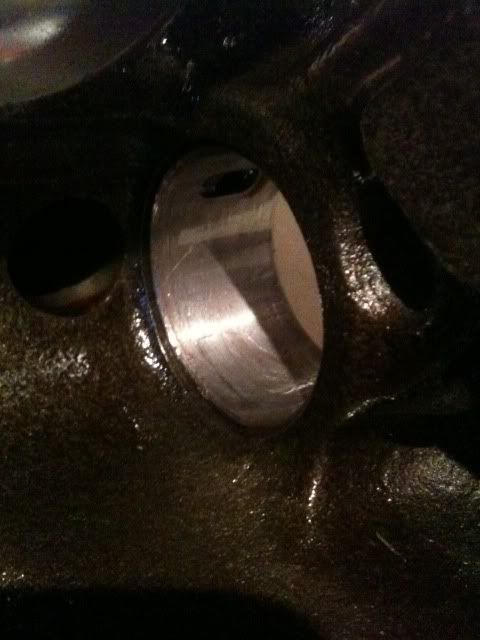
And so to the 1380 block. All bored, Honed and skimmed by Precision engine services, Thanks guys for a great job.
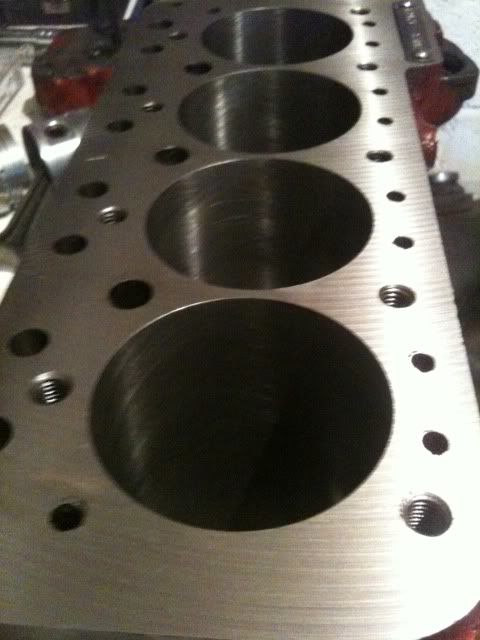
You can just about make out the hone marks.

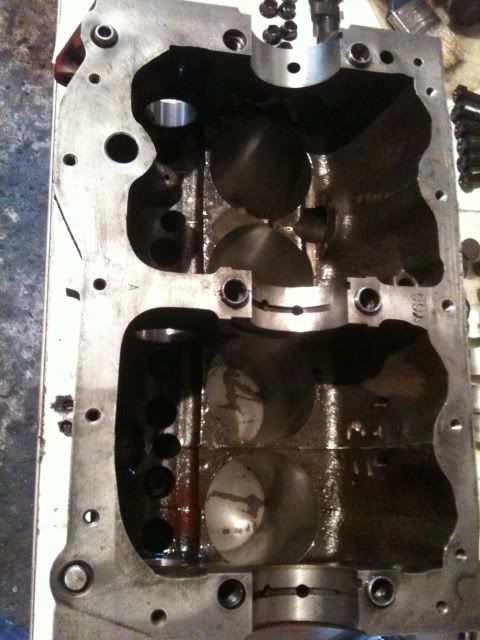
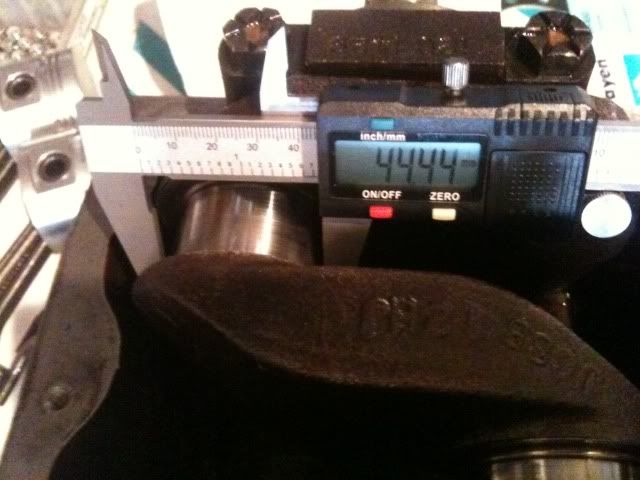
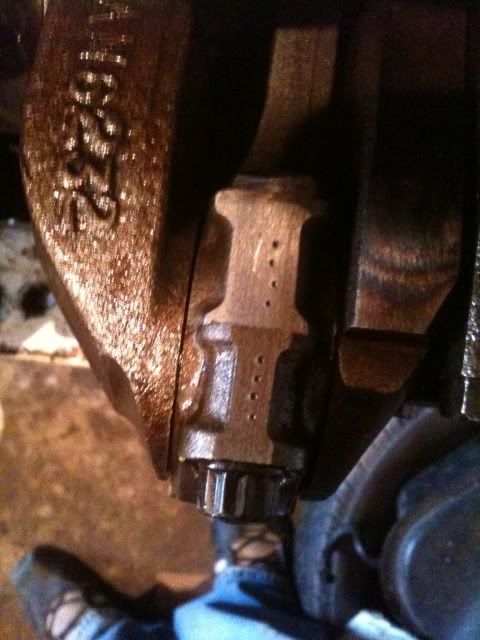
The engine number if anyones interested.

They also pressed in the new cam bearings and honed them to match the new camshaft.
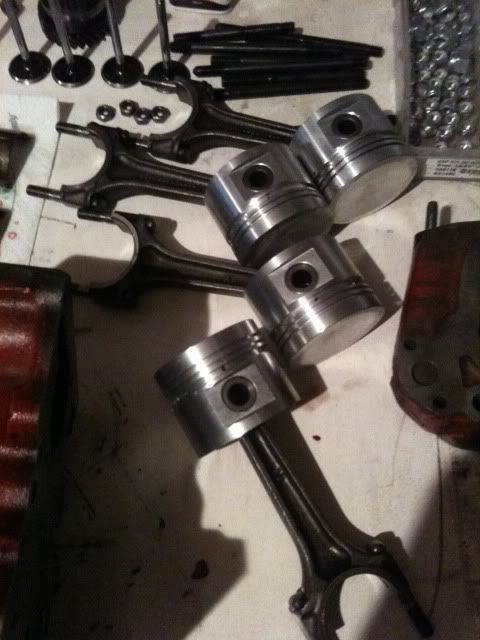
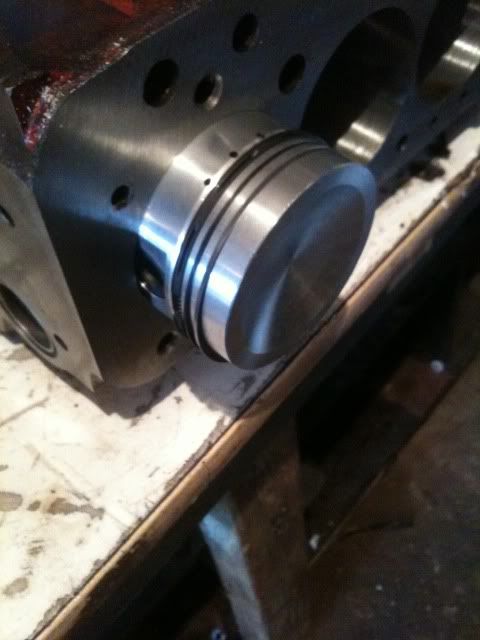
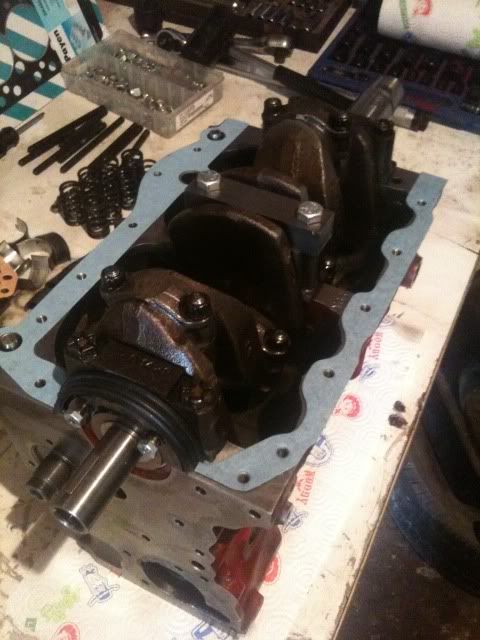
The pistons were fitted to the conrods.
And the last picture is of all the bits laid out on the work bench ready for the build to start.
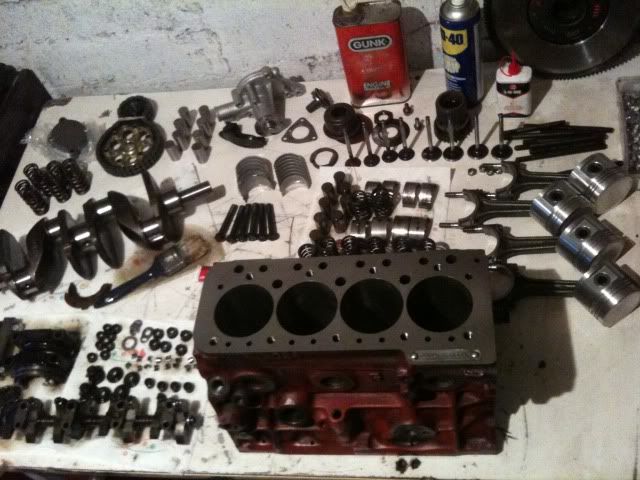
Cant wait to get the build started but have to go to work
And so to the 1380 block. All bored, Honed and skimmed by Precision engine services, Thanks guys for a great job.
You can just about make out the hone marks.
The engine number if anyones interested.
They also pressed in the new cam bearings and honed them to match the new camshaft.
The pistons were fitted to the conrods.
And the last picture is of all the bits laid out on the work bench ready for the build to start.
Cant wait to get the build started but have to go to work
#52
AndyMiniMad.
-
- Members
-
- 3,295 posts
Up Into Fourth
- Location: Under The Bonnet.
Posted 09 September 2010 - 09:05 PM
Right then ive started the engine build today. I dont know if anybody s interested in this but what the hell im going to keep posting the pictures and info anyway.
The block ready to start.
I started by oiling the new cam followers before placing them in.
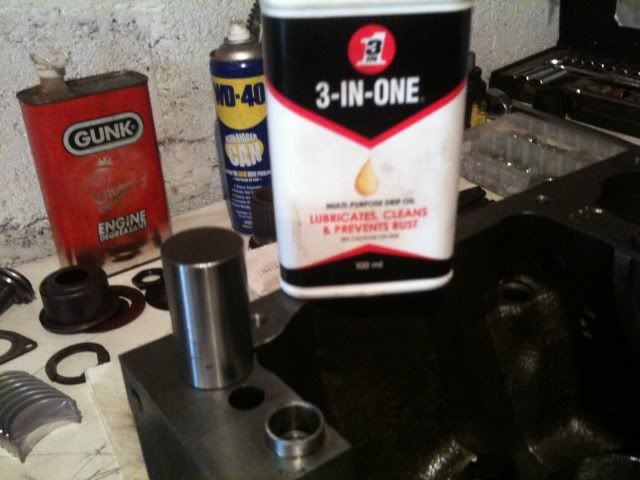
Once they were all fitted I coated the faces with cam lube.
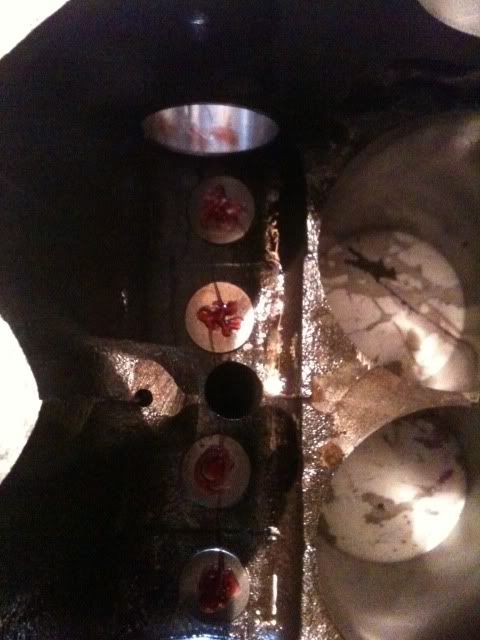
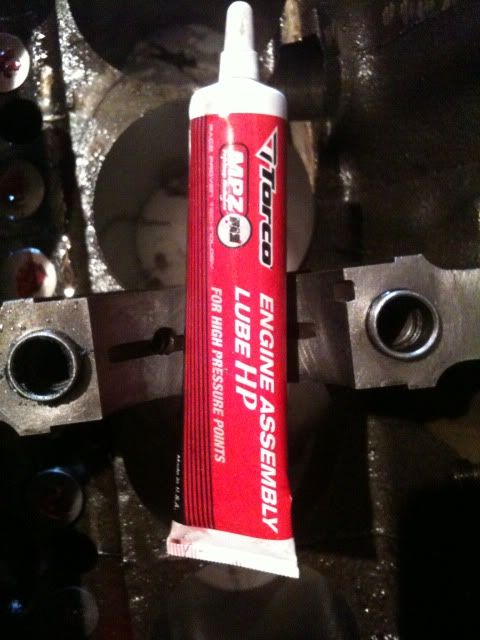
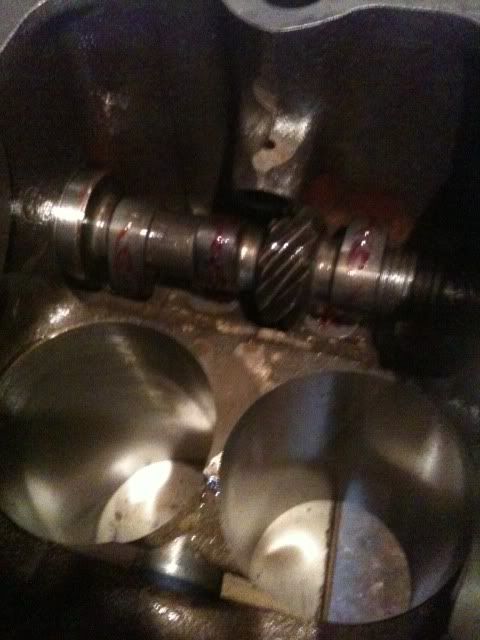
Then I slid in the cam being very carefull not to dammage the new cam bearings. Then I coated the lobes with the cam lube.
Next was the main bearing shells all oiled and ready to accept the crank.
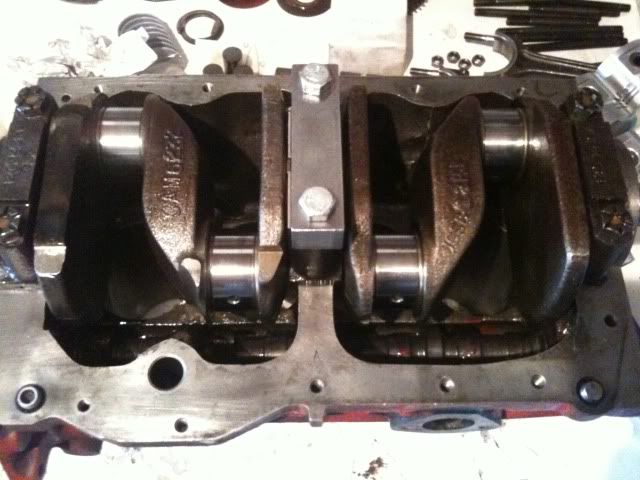
Then the crank and the mains caps all torqued down to 85nm. The centre strap was machined to the centre cap by johnspeed. The thrusts are installed and the end float checked. (0.054) with the crank pushed over to the flywheel end.
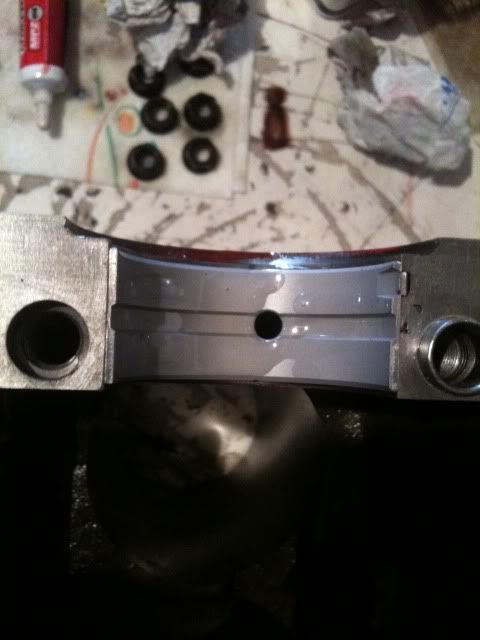
Before fitting the rods and pistons I did a last check of the big ends.
Perfect!!!
Rings fitted and pistons ready to go in. The middle ring has a slight shoulder which goes towards the top.
Ring compression tool makes this an easy job.
Then the big end caps are fitted with new shells and torqued to 45nm. You can see the marks on the rods and caps. This was done when I dissmantled the engine and means I wont get thing mixed up when rebuilding.
Next was to turn the block upside down and place the gaskets and rubber seal ready to accept the gearbox.

A new rubber "o" ring on the box with a bit of oil to keep it in place while I turned the box over for fitting to the block.
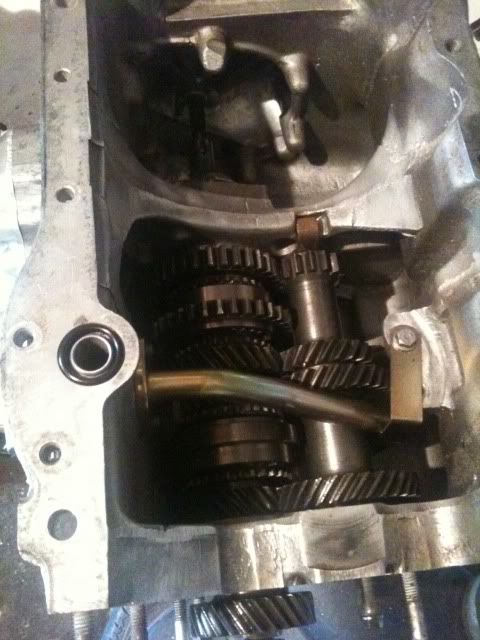
Gearbox fitted.

The block ready to start.
I started by oiling the new cam followers before placing them in.
Once they were all fitted I coated the faces with cam lube.
Then I slid in the cam being very carefull not to dammage the new cam bearings. Then I coated the lobes with the cam lube.
Next was the main bearing shells all oiled and ready to accept the crank.
Then the crank and the mains caps all torqued down to 85nm. The centre strap was machined to the centre cap by johnspeed. The thrusts are installed and the end float checked. (0.054) with the crank pushed over to the flywheel end.
Before fitting the rods and pistons I did a last check of the big ends.
Perfect!!!
Rings fitted and pistons ready to go in. The middle ring has a slight shoulder which goes towards the top.
Ring compression tool makes this an easy job.
Then the big end caps are fitted with new shells and torqued to 45nm. You can see the marks on the rods and caps. This was done when I dissmantled the engine and means I wont get thing mixed up when rebuilding.
Next was to turn the block upside down and place the gaskets and rubber seal ready to accept the gearbox.
A new rubber "o" ring on the box with a bit of oil to keep it in place while I turned the box over for fitting to the block.
Gearbox fitted.
#53
AndyMiniMad.
-
- Members
-
- 3,295 posts
Up Into Fourth
- Location: Under The Bonnet.
Posted 09 September 2010 - 09:22 PM
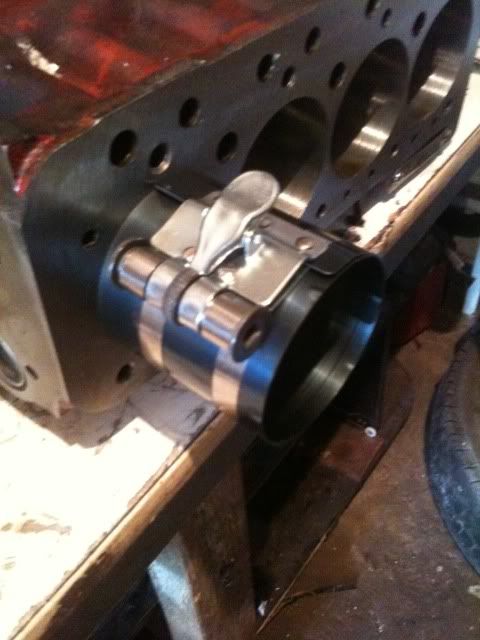
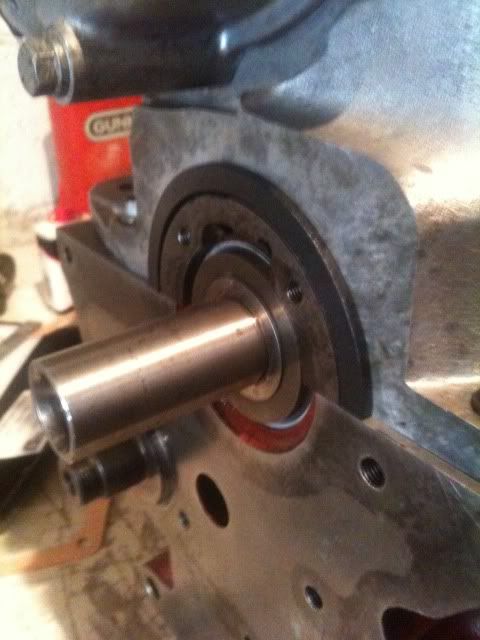
Next was the new oil pump and primary gear thrust washer.
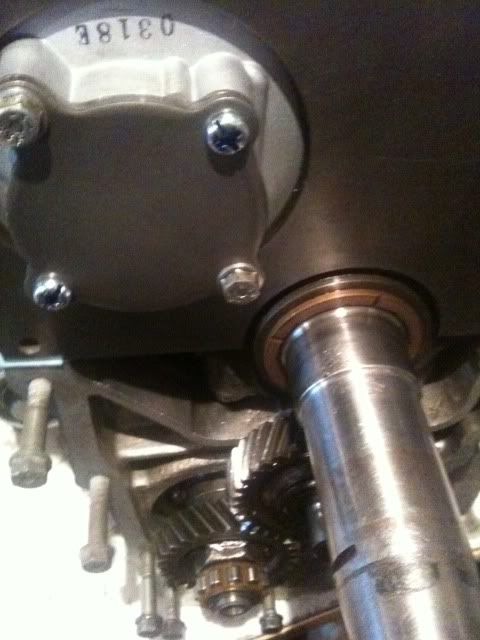
Then the primary gear slides on.
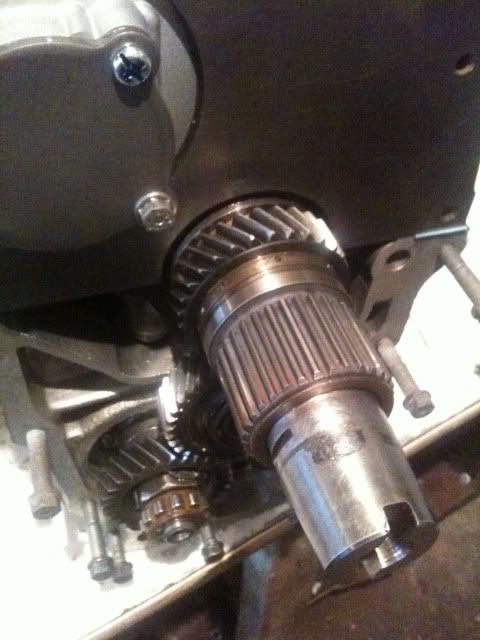
And lastly for tonight the washer and lock ring.
Dont know if anyones watching this but at least im having fun doing it.
Then the primary gear slides on.
And lastly for tonight the washer and lock ring.
Dont know if anyones watching this but at least im having fun doing it.
#54
GraemeC
-

- TMF+ Member
-
- 7,469 posts
Crazy About Mini's
- Location: Carnforth
Posted 10 September 2010 - 07:10 AM
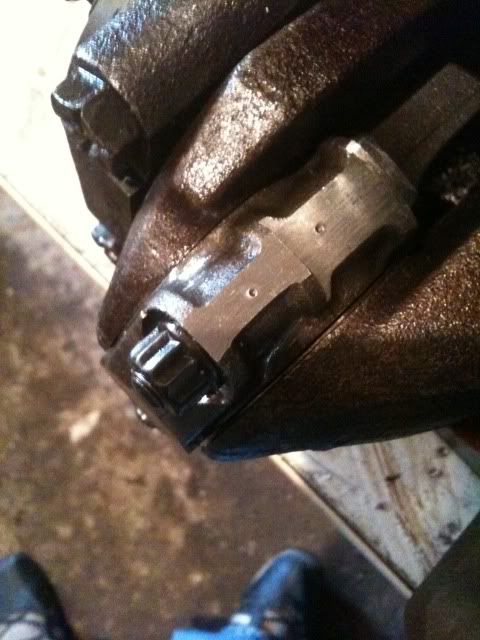
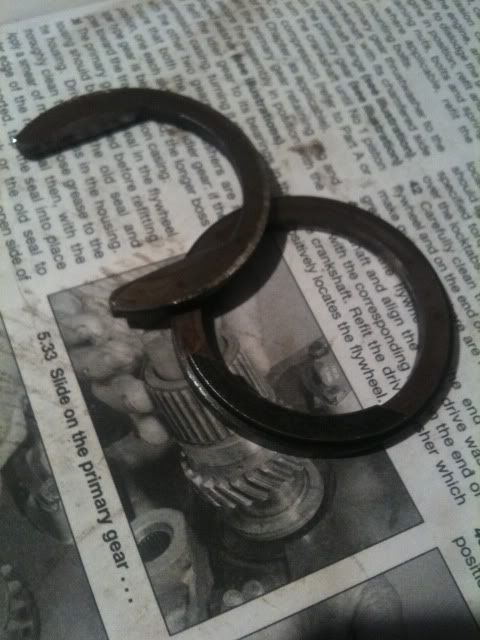
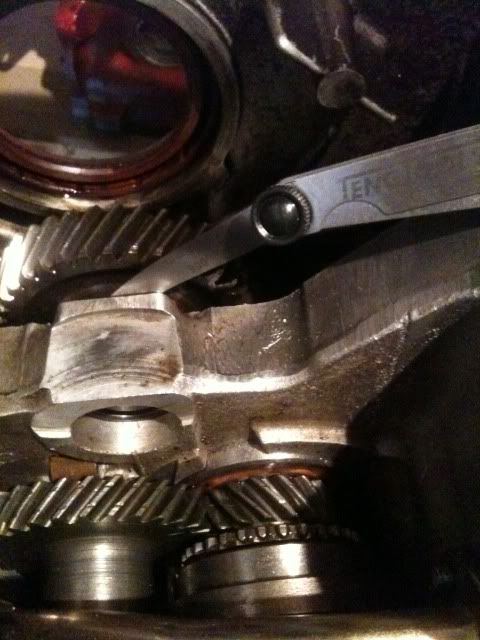
Erm, you're not going to like this.....
You have the half moon seal on backwards, the raised shoulder sould be to the outside.
You have the half moon seal on backwards, the raised shoulder sould be to the outside.
#55
AndyMiniMad.
-
- Members
-
- 3,295 posts
Up Into Fourth
- Location: Under The Bonnet.
Posted 10 September 2010 - 08:16 AM
Thank you for pointing it out. I was about to start with the timing plate and stuff today. I really should have checked the book before guessing. Just goes to show, I rushed that bit and made a mistake. Thanks again GraemeC. The forum comes to the rescue. Oh well back to the garage, one step forward two steps back.
#56
AndrewJ530
-
- Members
-
- 1,628 posts
Camshaft & Stage Two Head
- Location: Middlesbrough
Posted 10 September 2010 - 05:36 PM
Looking good Andy.
#57
summs116
-

- Members
-
- 372 posts
Speeding Along Now
- Local Club: Mini 7 racing
Posted 11 September 2010 - 10:15 PM
have u counter sunk the two lower holes on the timing plate which bolts onto the end cap so you can use new allen key bolts which are tapered so they fit flush to clear year new timing gear and chain,the standered bolts foul
only from experince
but great build and good luck with rest
sam
only from experince
but great build and good luck with rest
sam
#58
summs116
-
- Members
-
- 372 posts
Speeding Along Now
- Local Club: Mini 7 racing
Posted 11 September 2010 - 10:17 PM
sorry double post
Edited by summs116, 11 September 2010 - 10:18 PM.
#59
Mini-Mad-Craig
-

- Members
-
- 9,298 posts
Crazy About Metro's
- Location: Travelling in a fried out Kombi
Posted 11 September 2010 - 11:03 PM
Excellent build! well done! 
#60
AndyMiniMad.
-
- Members
-
- 3,295 posts
Up Into Fourth
- Location: Under The Bonnet.
Posted 12 September 2010 - 10:05 AM
Thanks Guys.
So ive fixed the half moon seal and moved on to the timing bits.
Checked the idler gear clearance again while it was all apart. (4 thou) so thats ok.
Once it was all back together I fitted the timing back plate not forgetting the gasket, and also fitted the cam retaining plate.
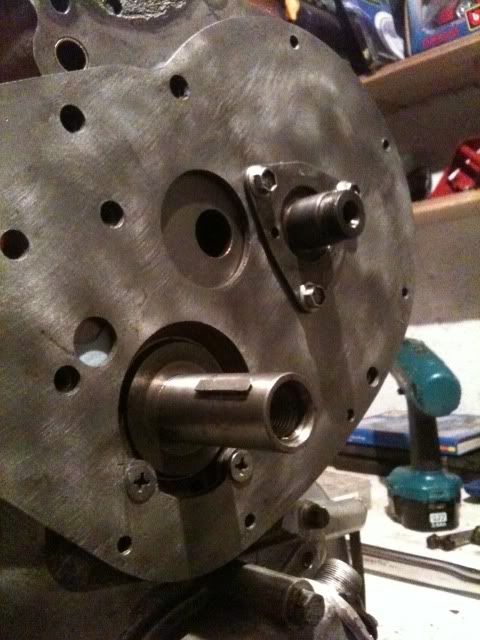
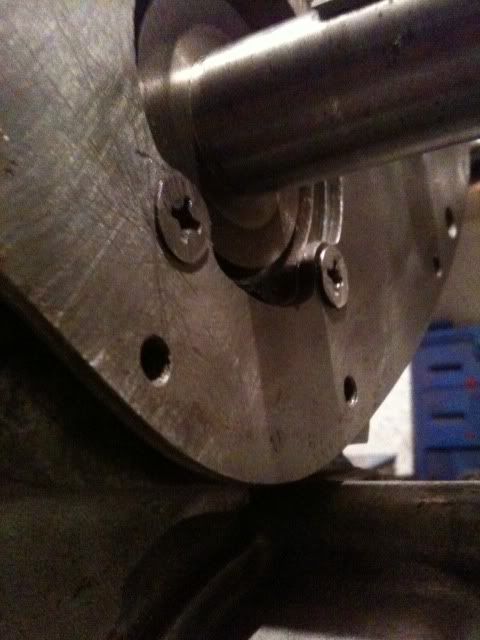
The cross head countersunk bols came from an old door hinge. They are the same size as the normal bolts so I guess they will be fine.
I have ordered the correct bolts from mini spares so I think ill change them over on monday when they arrive.
I slid on the duplex kit for a nice photo. Looks fab!!!

Next bit, modifications to the timing cover. I ground out the lip on the inside of the cover by the breather hole and bashed the lump by the oil seal flat.
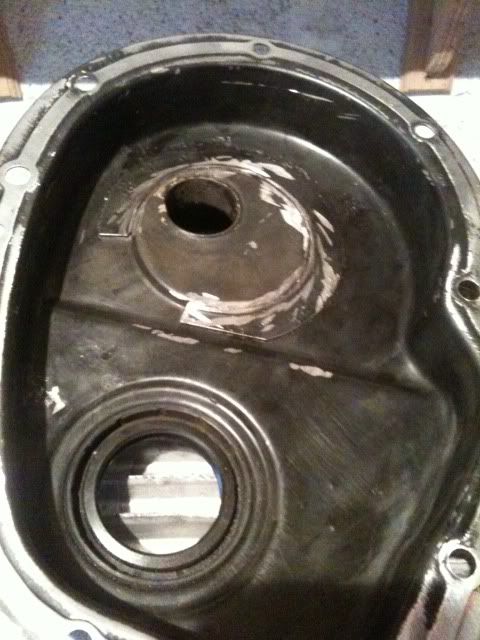
Gave it a general tidy up before the main mod to the breather tube.
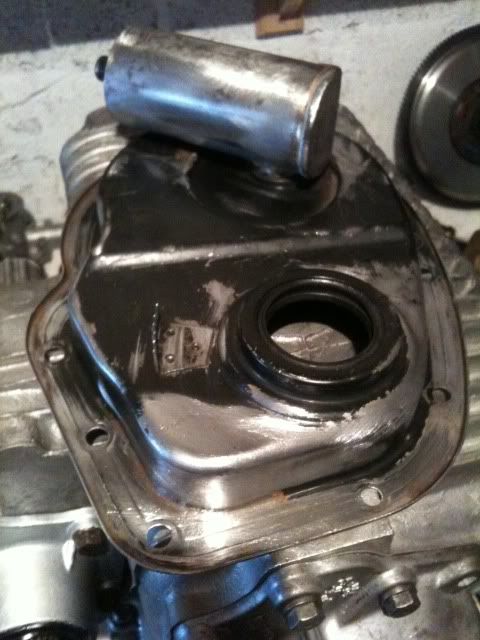
Im going to cut the tube in half lenghtways and weld on a new flat peice of metal. I know most folk just squash it with a big hammer, and to be honest thats what i did with the last one, but this time i thought it might look prettyer cut and welded. Im off to the garage now to start so ill put the pics up later.
So ive fixed the half moon seal and moved on to the timing bits.
Checked the idler gear clearance again while it was all apart. (4 thou) so thats ok.
Once it was all back together I fitted the timing back plate not forgetting the gasket, and also fitted the cam retaining plate.
The cross head countersunk bols came from an old door hinge. They are the same size as the normal bolts so I guess they will be fine.
I have ordered the correct bolts from mini spares so I think ill change them over on monday when they arrive.
I slid on the duplex kit for a nice photo. Looks fab!!!
Next bit, modifications to the timing cover. I ground out the lip on the inside of the cover by the breather hole and bashed the lump by the oil seal flat.
Gave it a general tidy up before the main mod to the breather tube.
Im going to cut the tube in half lenghtways and weld on a new flat peice of metal. I know most folk just squash it with a big hammer, and to be honest thats what i did with the last one, but this time i thought it might look prettyer cut and welded. Im off to the garage now to start so ill put the pics up later.
Edited by AndyMiniMad., 12 September 2010 - 10:07 AM.


0 user(s) are reading this topic
0 members, 0 guests, 0 anonymous users


