Jump to content


Photo
- - - - -

Siw 2221 The Rebuild


  • Please log in to reply
75 replies to this topic

#46 charie t

charie t

    Up Into Fourth

  • Members
  • PipPipPipPipPipPipPipPipPip
  • 3,153 posts
  • Location: South Leicestershire sticks
  • Local Club: wreake mini wanderers

Posted 22 November 2010 - 05:58 PM

Posted Image

Looking a top job
What are the seats from?
#47 blue min 1

blue min 1

    Mini Mad

  • Members
  • PipPipPipPip
  • 272 posts
  • Local Club: BMC

Posted 22 November 2010 - 07:29 PM

Posted Image

Looking a top job
What are the seats from?

there from an audi A3

mike

#48 olds_kool_lews

olds_kool_lews

    Up Into Fourth

  • Traders
  • PipPipPipPipPipPipPipPipPip
  • 3,602 posts

Posted 22 November 2010 - 09:51 PM

footwells welded in
Posted Image


just wondering why you chose to weld the new floor panels in over the top of the old ones (more so the passenger side), but with the foot wells cut out, wouldnt this cause a sandwich effect and if water got in between the panels, rust would start from the inside out? not knocking your work or nothing, just thought it was bit of a strange thing to do!

keep up the good work though! looking great!

#49 blue min 1

blue min 1

    Mini Mad

  • Members
  • PipPipPipPip
  • 272 posts
  • Local Club: BMC

Posted 22 November 2010 - 10:47 PM

footwells welded in
Posted Image


just wondering why you chose to weld the new floor panels in over the top of the old ones (more so the passenger side), but with the foot wells cut out, wouldnt this cause a sandwich effect and if water got in between the panels, rust would start from the inside out? not knocking your work or nothing, just thought it was bit of a strange thing to do!

keep up the good work though! looking great!

thanks all the rust and crud was cleened off the inside weld through high zink primer was sprayed inside and on the back of the floor panel then welded inside and underside i had not welded the underside in this pic


mike

#50 blue min 1

blue min 1

    Mini Mad

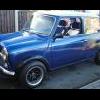
  • Members
  • PipPipPipPip
  • 272 posts
  • Local Club: BMC

Posted 11 December 2010 - 05:48 PM

ok not much done on it went to work on it thursday and had to put the gazebo up UNDER the carport as the carport was defrosting all over the car but got a bit of work done today
fitted the flipfront and cut out holes for the lights
Posted Image


mike

#51 blue min 1

blue min 1

    Mini Mad

  • Members
  • PipPipPipPip
  • 272 posts
  • Local Club: BMC

Posted 02 January 2011 - 05:01 PM

just an update not much work done on the mini cold a snow and ive been ill but got my 455 in to gear and its ready for filler primer so going to spray it tomorrow so some pic's when its sprayed


mike

#52 blue min 1

blue min 1

    Mini Mad

  • Members
  • PipPipPipPip
  • 272 posts
  • Local Club: BMC

Posted 09 January 2011 - 06:42 PM

ok so ive filler primerd the shell acid etched the front and will primer that tomorrow
Posted Image
just a quick pic

mike

#53 blue min 1

blue min 1

    Mini Mad

  • Members
  • PipPipPipPip
  • 272 posts
  • Local Club: BMC

Posted 15 January 2011 - 05:13 PM

ok folks had a good few days on the old girl so more pics
boot sprayed and top coated
Posted Image
door hinges
Posted Image
Posted Image
and roof bace and top coated
Posted Image
Posted Image
Posted Image
Posted Image
so tomorrow its flatting the rest of the shell then bace and lacker it

mike

#54 blue min 1

blue min 1

    Mini Mad

  • Members
  • PipPipPipPip
  • 272 posts
  • Local Club: BMC

Posted 03 February 2011 - 03:51 PM

so today i finally got the bace and lacker on after 3 attempts where the bace coat reacted but i did it and here are a few pics
Posted Image
Posted Image
Posted Image
Posted Image
so ill give it a week to harden off then i can start to put the mini back together at last


mike

#55 markland

markland

    Stage One Kit Fitted

  • Noobies
  • PipPipPip
  • 86 posts

Posted 03 February 2011 - 08:09 PM

Really like the colour and great work!

Just a question though, did you spray it with the doors put on or off? i can't decide if to put mine back on or not for the spray, im wondering about getting in all the corners and stuff with the doors on.

#56 blue min 1

blue min 1

    Mini Mad

  • Members
  • PipPipPipPip
  • 272 posts
  • Local Club: BMC

Posted 03 February 2011 - 08:12 PM

Really like the colour and great work!

Just a question though, did you spray it with the doors put on or off? i can't decide if to put mine back on or not for the spray, im wondering about getting in all the corners and stuff with the doors on.

thanks i sprayed the barcoat,filler primer ,bace and lacker with the doors on as i had no room under the carport to do it with them off. just spray the corners before you put the doors on


mike

Edited by blue min 1, 03 February 2011 - 08:14 PM.


#57 Colliazz

Colliazz

    Stage One Kit Fitted

  • Noobies
  • PipPipPip
  • 53 posts
  • Local Club: Welsh mini club

Posted 03 February 2011 - 09:21 PM

Loving the effect of the colour

#58 DaveJH

DaveJH

    Speeding Along Now

  • TMF+ Member
  • PipPipPipPipPip
  • 393 posts

Posted 04 February 2011 - 02:11 PM

Looking very nice, lovely colour.

#59 MateyTheMini

MateyTheMini

    Speeding Along Now

  • Members
  • PipPipPipPipPip
  • 327 posts
  • Local Club: Welsh Rarebit Minis

Posted 04 February 2011 - 02:16 PM

Those original photos look boss!

I really like your car :thumbsup:

Good look with the rebuild!

#60 blue min 1

blue min 1

    Mini Mad

  • Members
  • PipPipPipPip
  • 272 posts
  • Local Club: BMC

Posted 13 February 2011 - 03:21 PM

thanks for all the comments got a bit more done over the weekend rear beam in and bolted down
Posted Image
radious arms in and brake pipes in
Posted Image
front passengers side done
Posted Image
Posted Image
and 1 to see how it looked with a wheel on
Posted Image
so tomorrow ill strip the outher drive shaft down and rebuild the drivers side up


mike


1 user(s) are reading this topic

0 members, 1 guests, 0 anonymous users