


My Mk1 Mini Rebuild
Started by
minimikej
, Sep 26 2010 06:48 PM
202 replies to this topic
#76

spike 25
-

- Members
-

- 322 posts
Speeding Along Now
- Location: KENT
- Local Club: Kentish Mini Club
Posted 09 December 2012 - 09:41 AM
Your doing a great job mate keep up the good work.......i'm gettin itchy feet i need a new challange
#77
minimikej
-
- Members
-
- 355 posts
Speeding Along Now
- Location: Derbyshire
Posted 16 December 2012 - 01:54 PM
With the scuttle out of the way, more rot was discovered at the top of the inner wings. What with the flitch repairs and the front half needing replacement I decided to go for full inner wings rather than patches and repair panels.
Ordered from Moss, who have a sale on, got about 20% off. Panels duly arrived exactly when I'd asked them not to, very badly packaged, just flopping around in a box with a bit of hamster cage nest in the bottom.
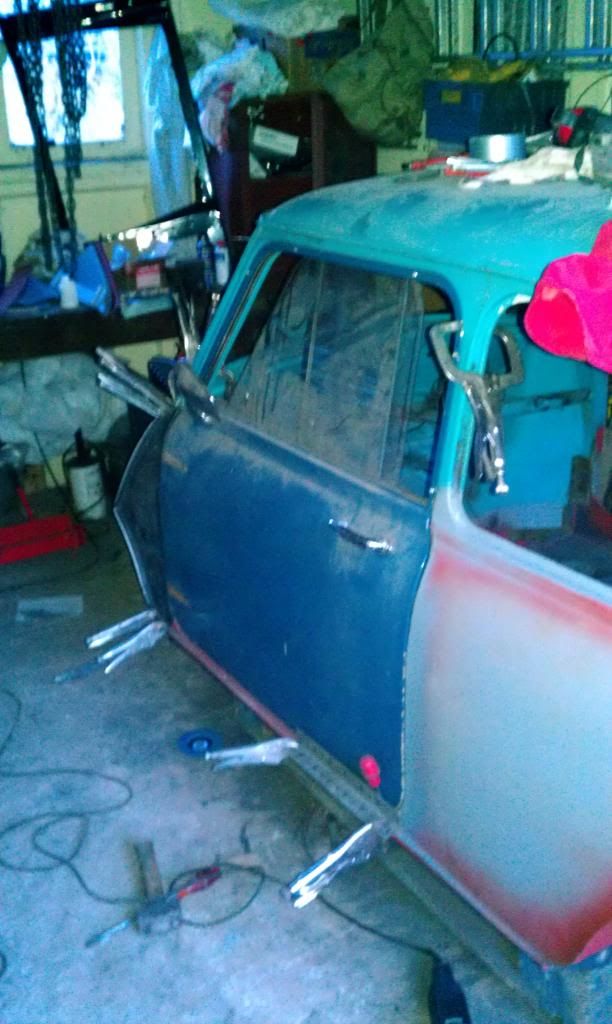
So, I hacked the wing off yesterday but have a question. There is a reinforcement plate that goes between the crossmember end and inner wing which I need to replace and it doesn't come as part of the heritage inner wing. Outlined in red on the picture but on the inside.
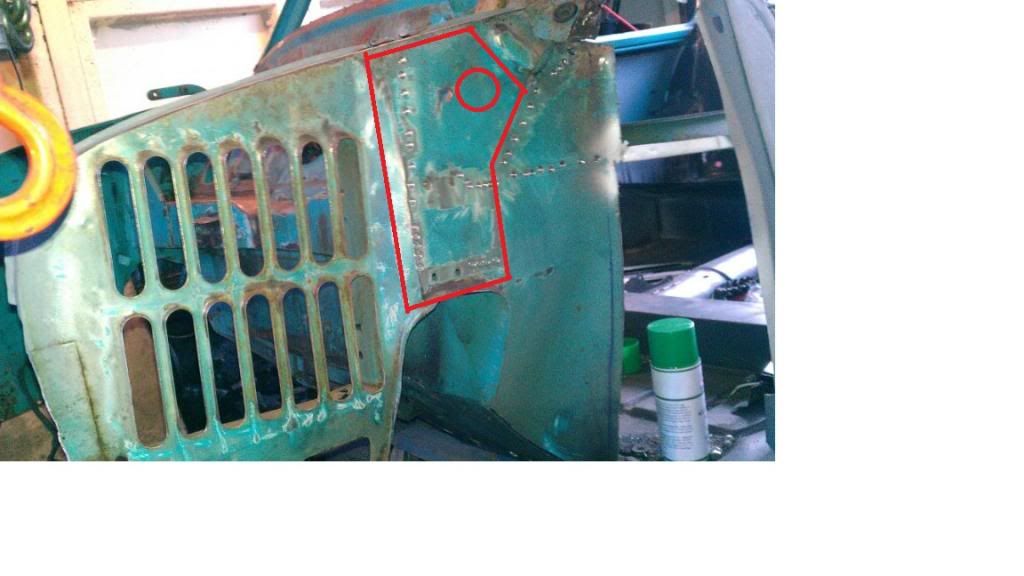
Does anyone know if these are available? Can't see listed on m-machine or somerford. I could make my own, just wondering. What have other people done in this respect?
Cheers
Mike
Ordered from Moss, who have a sale on, got about 20% off. Panels duly arrived exactly when I'd asked them not to, very badly packaged, just flopping around in a box with a bit of hamster cage nest in the bottom.
So, I hacked the wing off yesterday but have a question. There is a reinforcement plate that goes between the crossmember end and inner wing which I need to replace and it doesn't come as part of the heritage inner wing. Outlined in red on the picture but on the inside.
Does anyone know if these are available? Can't see listed on m-machine or somerford. I could make my own, just wondering. What have other people done in this respect?
Cheers
Mike
#78
Anomaly
-

- Noobies
-
- 17 posts
Learner Driver
- Location: Tewkesbury
Posted 16 December 2012 - 02:27 PM
Excellent work!
Have a look on this thread (about half-way down), they suggest m-machine have them but not pictured in catalogue.
http://mk1-forum.net...&t=659&start=90
Have a look on this thread (about half-way down), they suggest m-machine have them but not pictured in catalogue.
http://mk1-forum.net...&t=659&start=90
#79
ChrisCityE
-

- Members
-
- 418 posts
Speeding Along Now
- Location: Bristol
Posted 16 December 2012 - 02:38 PM
I actually just posted a picture of exactly the same repair in my thread, I didn't bother to look for a part - made my own, it's simple enough.
#80
minimikej
-
- Members
-
- 355 posts
Speeding Along Now
- Location: Derbyshire
Posted 16 December 2012 - 03:07 PM
Brilliant, thanks guys
#81
PNL629G
-

- Noobies
-
- 48 posts
On The Road
Posted 17 December 2012 - 09:10 PM
Wow, epic rebuild - thanks for taking the time to share! Looking great!
#82
okc78
-

- Noobies
-
- 169 posts
Mini Mad
- Location: Gloucestershire
- Local Club: none so far
Posted 17 December 2012 - 10:15 PM
Thanks for taking the time to post your build its been a great read. I'm about to put in the new M-Machine complete floor panel in my mkII project but cant seem to see your pics of the floor operation, there all missing for some reason.
Did you use the subframes to help align before welding? Excellent work, Cheers.
Did you use the subframes to help align before welding? Excellent work, Cheers.
#83
minimikej
-
- Members
-
- 355 posts
Speeding Along Now
- Location: Derbyshire
Posted 17 December 2012 - 10:41 PM
I think the missing pics were from before I had a photobucket account and they got lost during one of the forum hack attacks.... cant seem to see your pics of the floor operation, there all missing for some reason.
Did you use the subframes to help align before welding? Excellent work, Cheers.
Short answer - yes I used the subframes for reference and you can't really go wrong provided you've got something to attach the subframes to :)
I will try dig out the original pictures - but the operation involved bracing the shell across the door frame, across widthways to make a square, and I welded an old bed rail across diagonally from floor to ceiling just to be sure.
Hacking the floor out was a horrid noisy painful job though. Got through soooo many cutting discs. Easier with air chisel that's for sure.
Cheers
Mike
#84
okc78
-
- Noobies
-
- 169 posts
Mini Mad
- Location: Gloucestershire
- Local Club: none so far
Posted 18 December 2012 - 12:39 AM
Thanks for that Mike, yeah I was thinking along these lines. I've already got the bracing in and the floors all out but as I replaced the boot floor and am 99% sure the new one went in the same place as the old I was thinking on using subframes and centers to make sure all was straight. Take a look at my build thread if you get time as I'd appreciate any input from you as your doing a great job and are a little way further along than me.
Cheers, Ollie
Cheers, Ollie
#85
minimikej
-
- Members
-
- 355 posts
Speeding Along Now
- Location: Derbyshire
Posted 23 December 2012 - 05:36 PM
Yuletide greetings etc.
Sounds a cliché but I had to escape the mother-in-law :) and got a couple of hours down the garage.
Trying to ensure that everything fits from the B post forwards but the problems just get worse the further forwards I get :-S

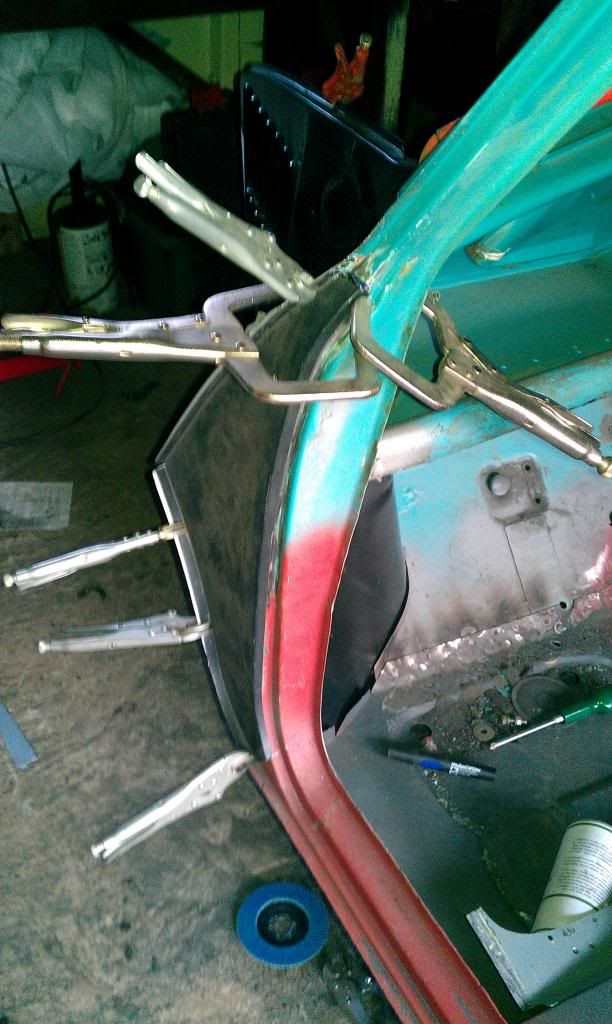
So. I can get the door square in the frame, a bit tight on the upper edge though. But when I do that the A panel trailing edge is about 5mm too far backwards in relation to the vertical edge of the A post - the one with the interior light switch.
Inner wing seems to fit ok, but the inner A panel cannot push backwards to line up with the outer because the flange on the bottom hinge section is pushed right onto the sill.
They're not original A panels, and I'm not expecting a great fit. I have a Hadrian outer and actually that fits the A post perfectly, just the hinge holes are 8mm too high.
Pretty sure I can clamp and cajole the lot into place but I'm a bit worried that if I start tacking into place the wings will be a farmer's yard out...
Sounds a cliché but I had to escape the mother-in-law :) and got a couple of hours down the garage.
Trying to ensure that everything fits from the B post forwards but the problems just get worse the further forwards I get :-S
So. I can get the door square in the frame, a bit tight on the upper edge though. But when I do that the A panel trailing edge is about 5mm too far backwards in relation to the vertical edge of the A post - the one with the interior light switch.
Inner wing seems to fit ok, but the inner A panel cannot push backwards to line up with the outer because the flange on the bottom hinge section is pushed right onto the sill.
They're not original A panels, and I'm not expecting a great fit. I have a Hadrian outer and actually that fits the A post perfectly, just the hinge holes are 8mm too high.
Pretty sure I can clamp and cajole the lot into place but I'm a bit worried that if I start tacking into place the wings will be a farmer's yard out...
#86
okc78
-
- Noobies
-
- 169 posts
Mini Mad
- Location: Gloucestershire
- Local Club: none so far
Posted 24 December 2012 - 12:17 PM
Good work, I must say I'm a little nervous about taking on this area on my project, the old panels I cut off in this area were pattern and were miles off, thick weld had been fired into all the gaps where panels didn't fit properly which made picking it appart a pain. I'm a way off rebuilding this area yet so its useful to have yours for reference and future consideration.
Cheers.
Cheers.
#87
Thorpsta
-

- Members
-
- 327 posts
Speeding Along Now
- Location: Wisbech
- Local Club: Kings Lynn Mini Owners Club
Posted 24 December 2012 - 04:30 PM
Your getting there then, every bit on is a little less to do, thats whats keeping my sanity, anyway, I havn't touched mine in ages, I did buy a brand new old stock indicator stalk today but thats the first thing ive done since my last update, How long do you recon it will be till you paint it?
#88
miniman_7
-

- Members
-
- 286 posts
Mini Mad
- Location: Prestwood, Bucks
- Local Club: Looking...
Posted 26 December 2012 - 04:03 PM
Keep going! Great way to spend Christmas! :)
I've put mine to bed for the next couple of months now it is in primer.
Got some nice new number plates from Santa
I've put mine to bed for the next couple of months now it is in primer.
Got some nice new number plates from Santa
#89
Boab
-

- Members
-
- 1,610 posts
Camshaft & Stage Two Head
- Local Club: E*S*M*O*C
Posted 26 December 2012 - 11:41 PM
I believe the best way to make sure the wings etc fit is to clamp everything in place first. Dreading starting mine as every panel needs something welded. MK1 67 by the way
Edited by Boab, 26 December 2012 - 11:42 PM.
#90
72gt
-

- Noobies
-
- 114 posts
Mini Mad
- Location: North Wales
Posted 30 December 2012 - 08:42 PM
Just read the whole topic,great work so far, I will keep checking in for progress and hints for when I get this far with my horrible coloured gt 


0 user(s) are reading this topic
0 members, 0 guests, 0 anonymous users


