11 Jul 13
Sorry posted two versions of this phase, the second was better so I have deleted this one.
Edited by JonnyAlpha, 28 July 2013 - 07:24 PM.


Up Into Fourth

Posted 21 July 2013 - 05:46 PM
11 Jul 13
Sorry posted two versions of this phase, the second was better so I have deleted this one.
Edited by JonnyAlpha, 28 July 2013 - 07:24 PM.
Up Into Fourth
Posted 21 July 2013 - 06:03 PM
12 Jul 13
Again I inadvertently posted two version and the second is better,
Edited by JonnyAlpha, 28 July 2013 - 07:24 PM.
Up Into Fourth
Posted 27 July 2013 - 04:16 PM
11 Jul 13
I managed to spend a few more hours (10:30 – 16:30) on the project today, the plan was to finish off the back end repair.
Last piece to complete (apart from the rear arches) was the LH under rear light repair panel and to weld behind the panels and dress the welds fill and spray (oops a lot more than I thought).
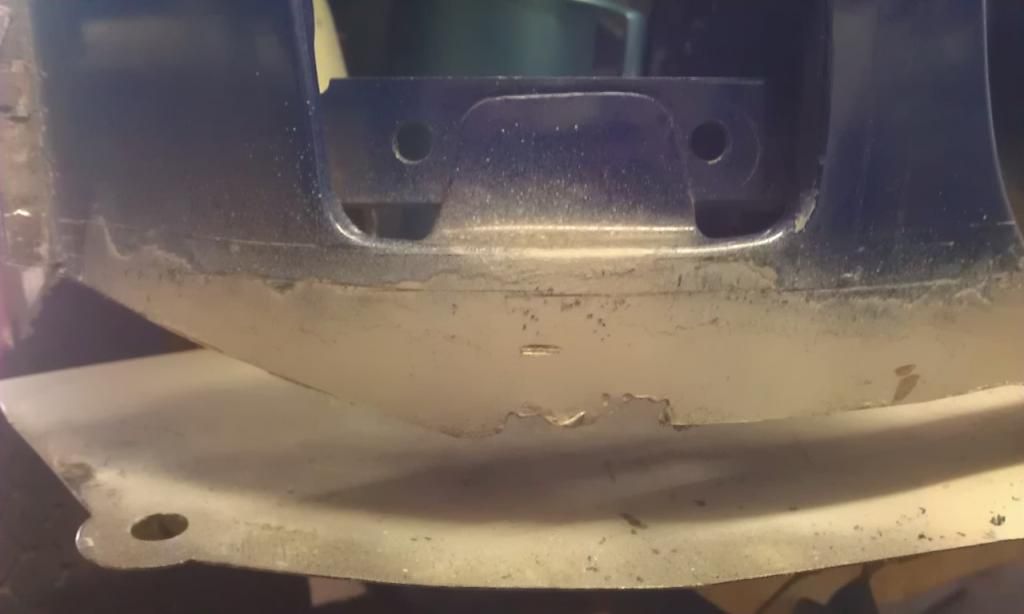
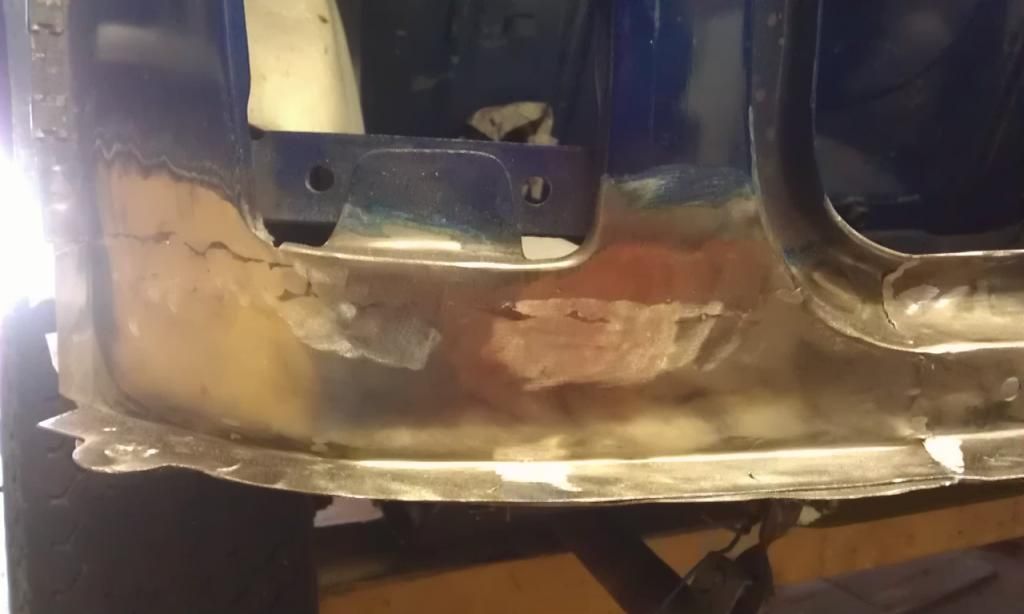
Anyway for the LH Under Rear Light repair first off I marked the area of the existing panel to be removed and cut it off using a DRONCO 1mm Cutting Disc.
Here's a pic of the score lines, the lower line is the cut line and the upper line shows the overlap of the repair panel.
It took most of the morning to trim the panel to fit in place and it seemed to be more difficult than the RH one and took a lot more persuasion - remember the success to welding is in the preparation.
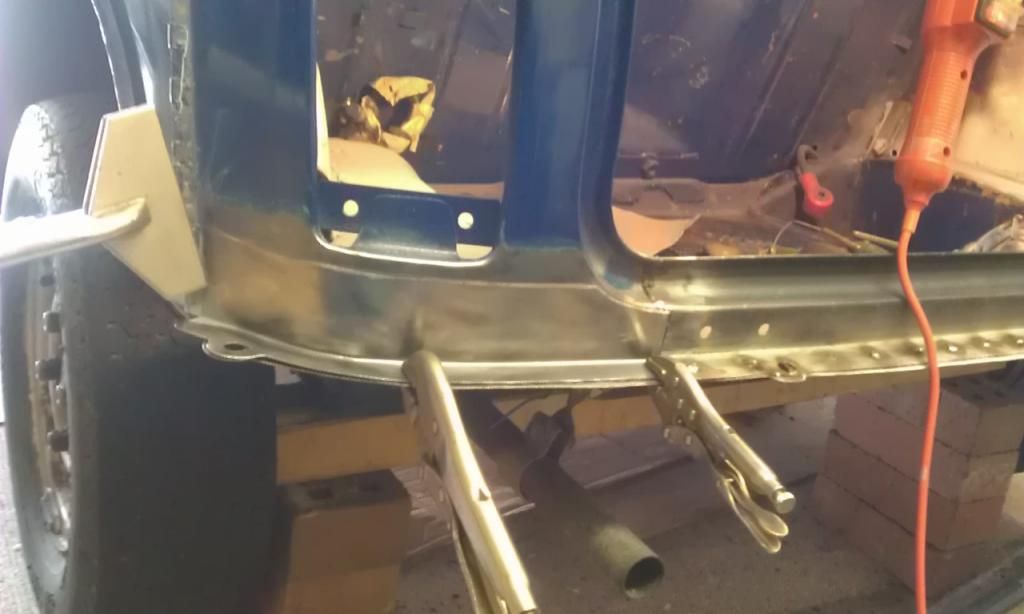
Once the panel fitted to my satisfaction I drilled holes along the bottom edge that would be used to plug weld it to the boot floor and the once it was re-fitted I did a few tack welds on the RH edge to hold it in place and then ran a lap welded where the repair panel met the LH edge to the boot hinge panel and then butt welded the vertical join and the curved join.
I then shifted the C Clamp which was invaluable for this repair, as you can see its a pretty good fit.

Then I tack welded the top seam and worked my way seam welding from right to left.
I had to adjust the welder settings a couple of times and found that Power on Min 1 and Wire Speed 6 for any Butt Welds and Min 2 Wire Speed 7.5 for Lap Welds.
A couple of minor blow throughs but its in the overlap area so it will be filled with more weld.
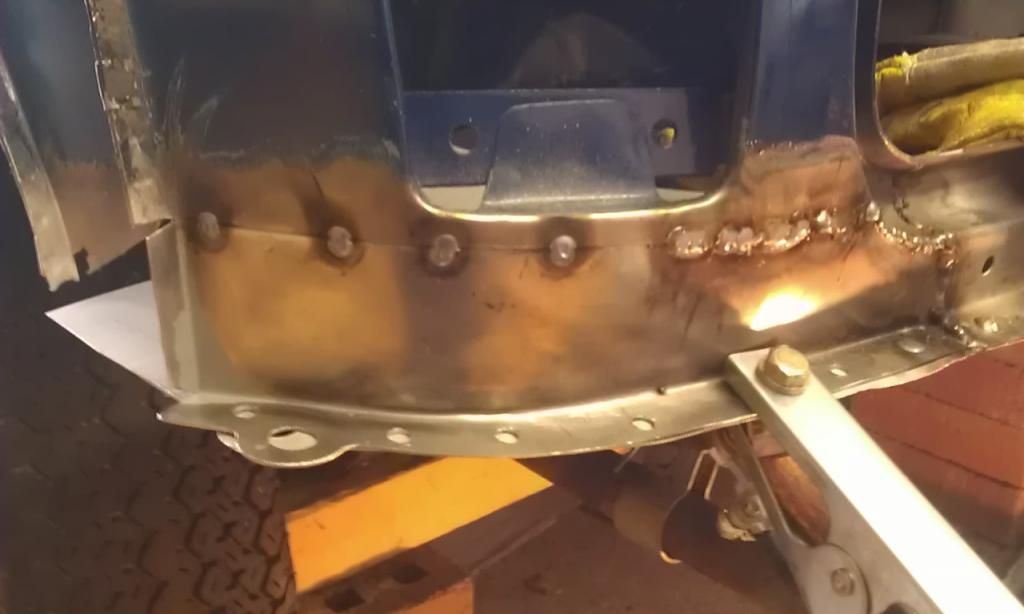
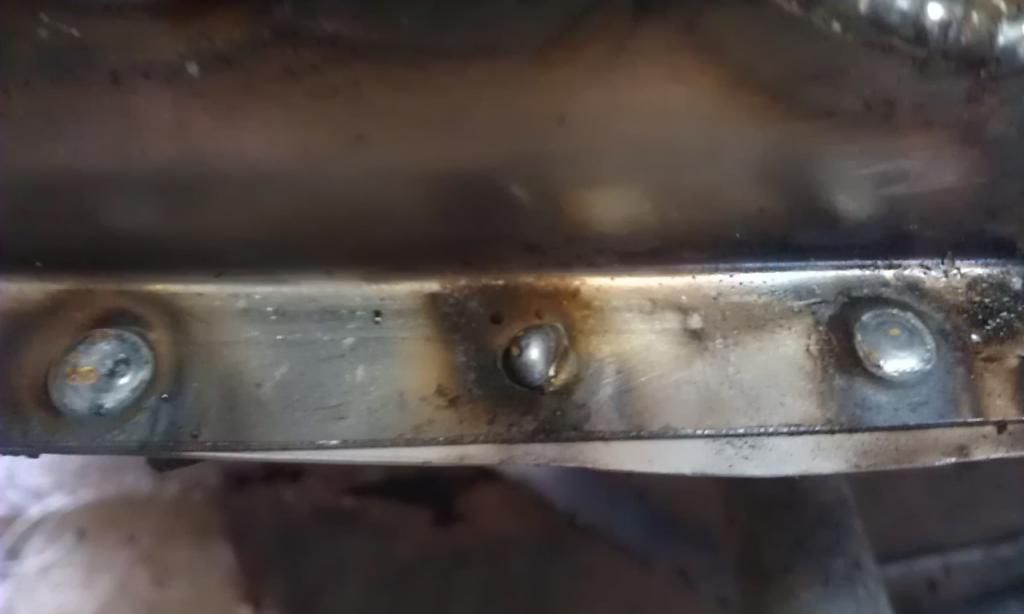
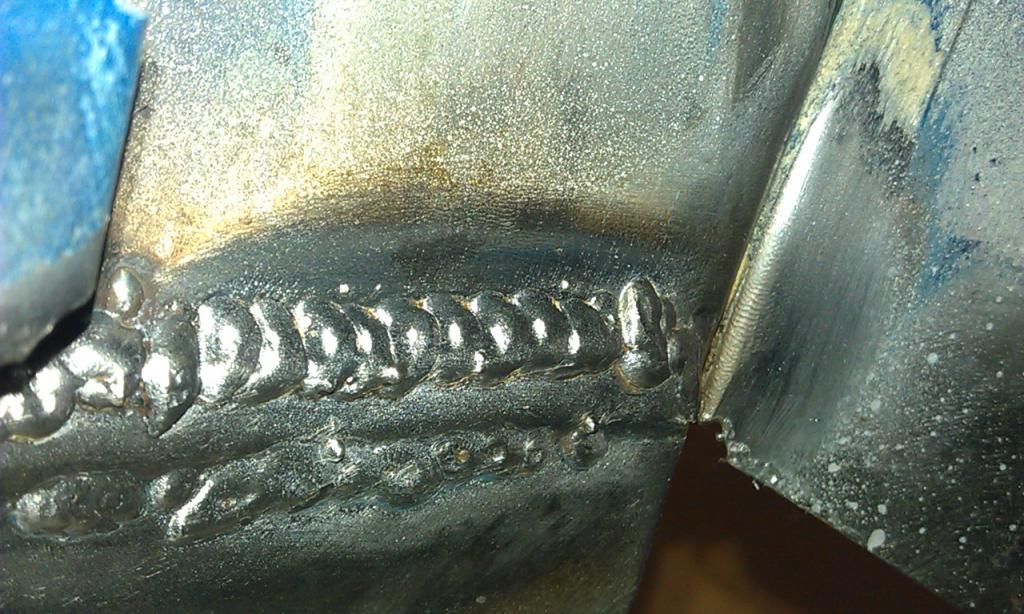
Here's a shot of a couple of the plug welds holding the repair panel to the boot floor panel, as you can see the two outer ones are better (hotter) than the middle one (Colder) this was the difference between Power Min 2 Speed 7.5 and Min 1 Speed 6.
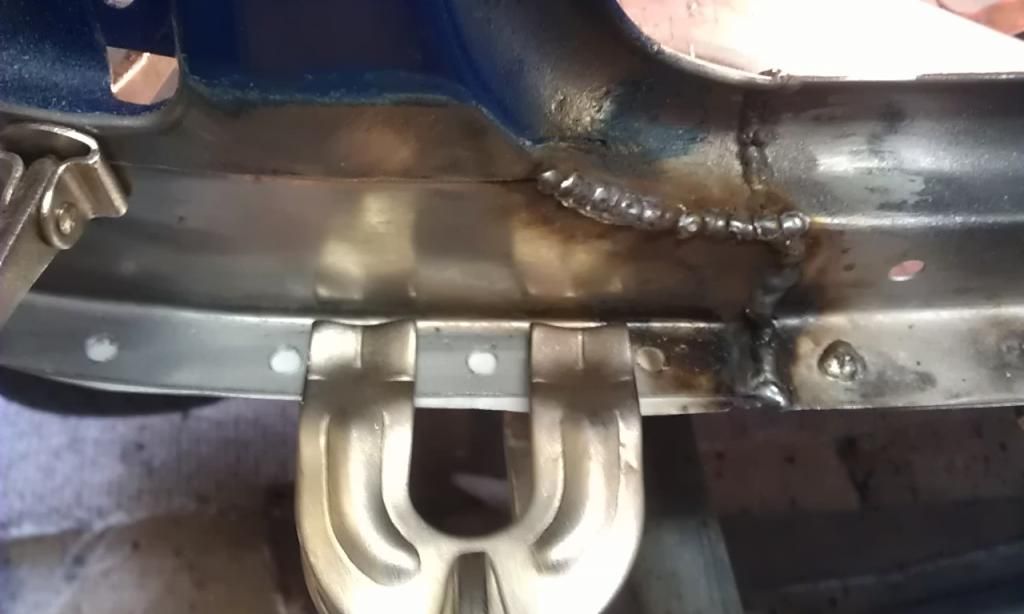
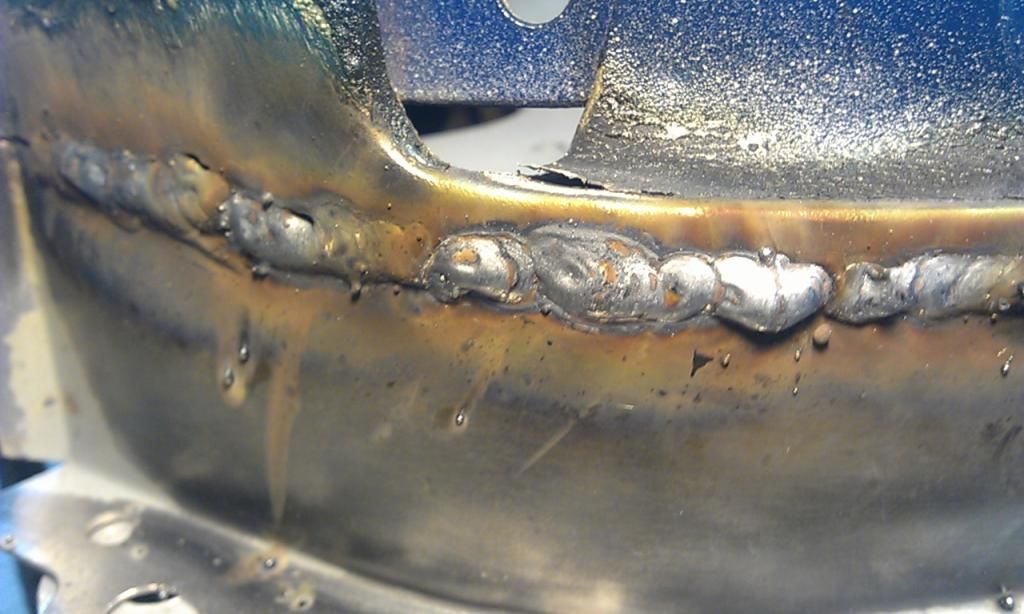
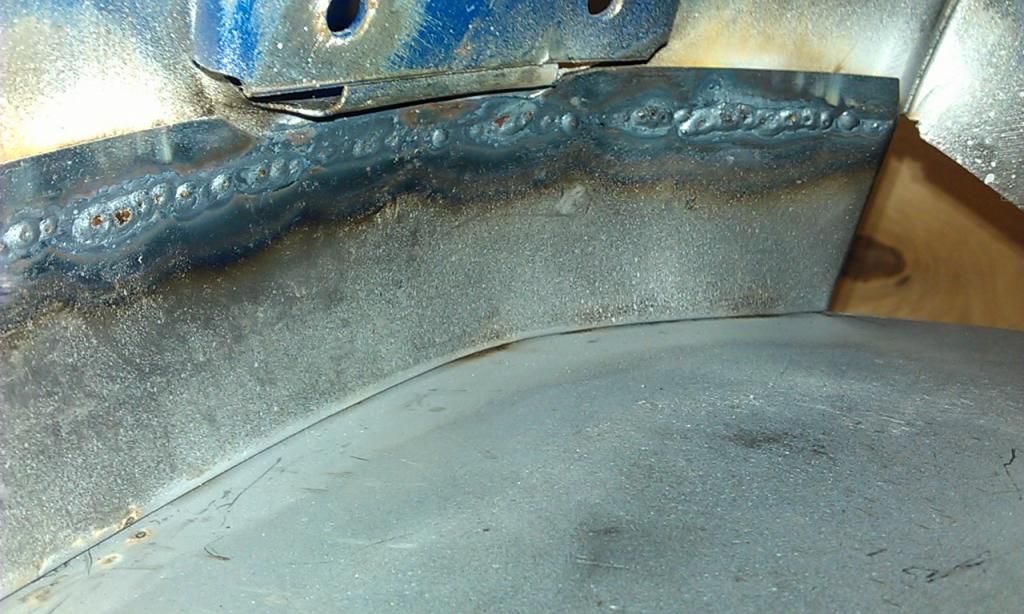
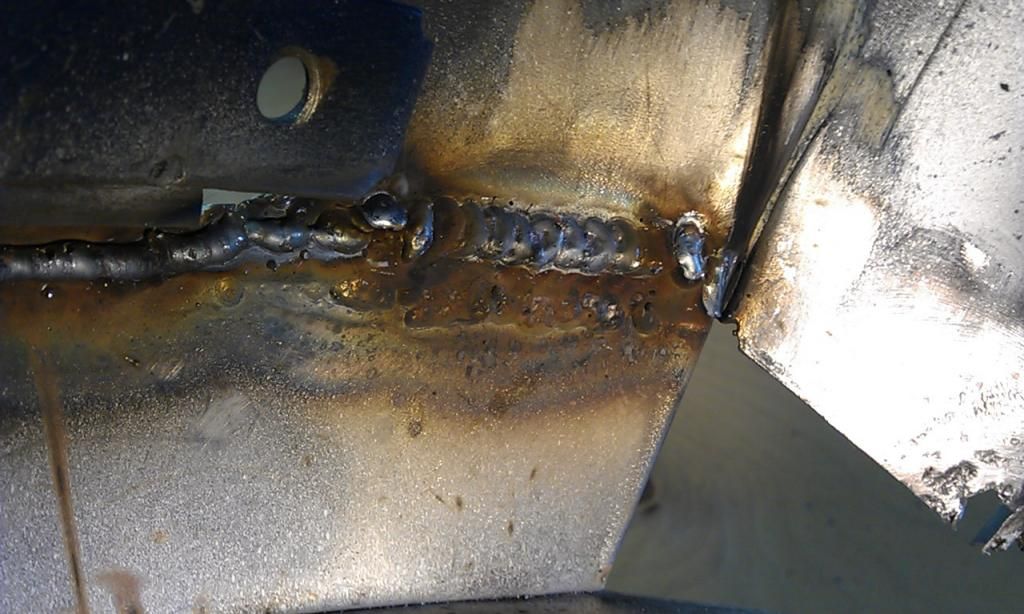
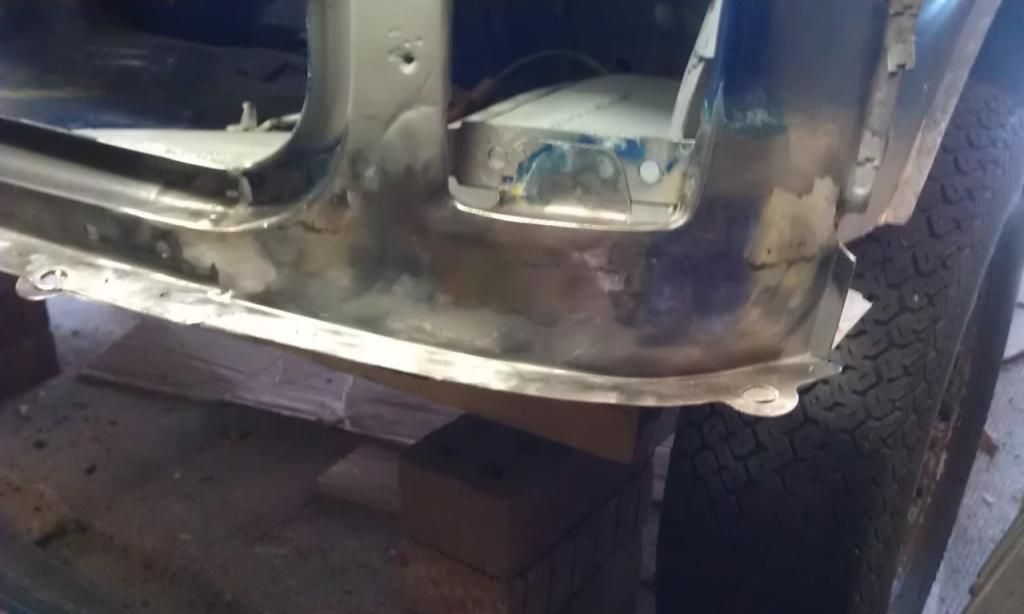
Here's a shot of the panel when finished:
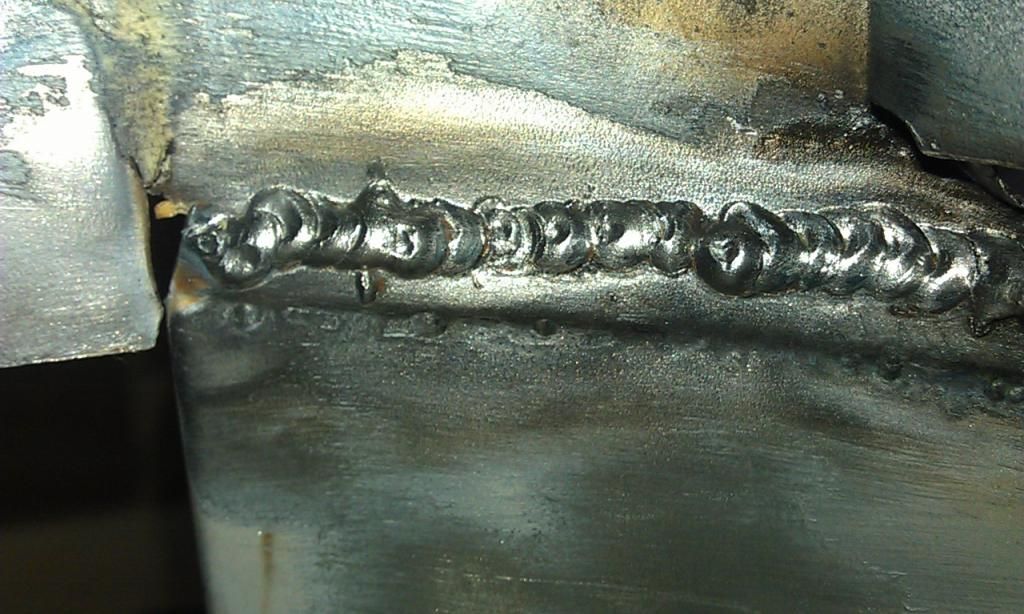
And here it is from behind showing decent penetration (remember this was a lap weld):
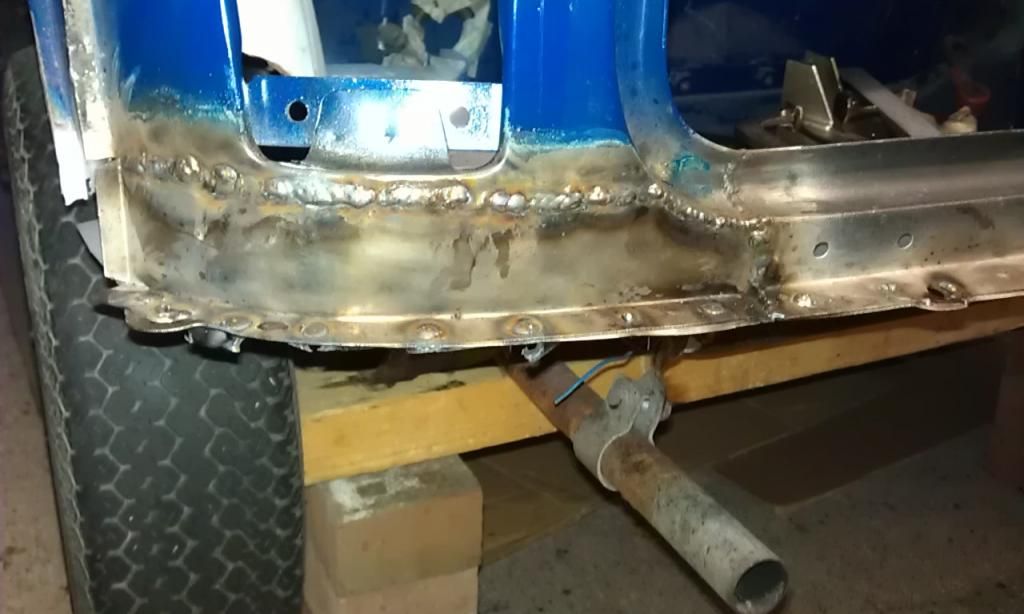
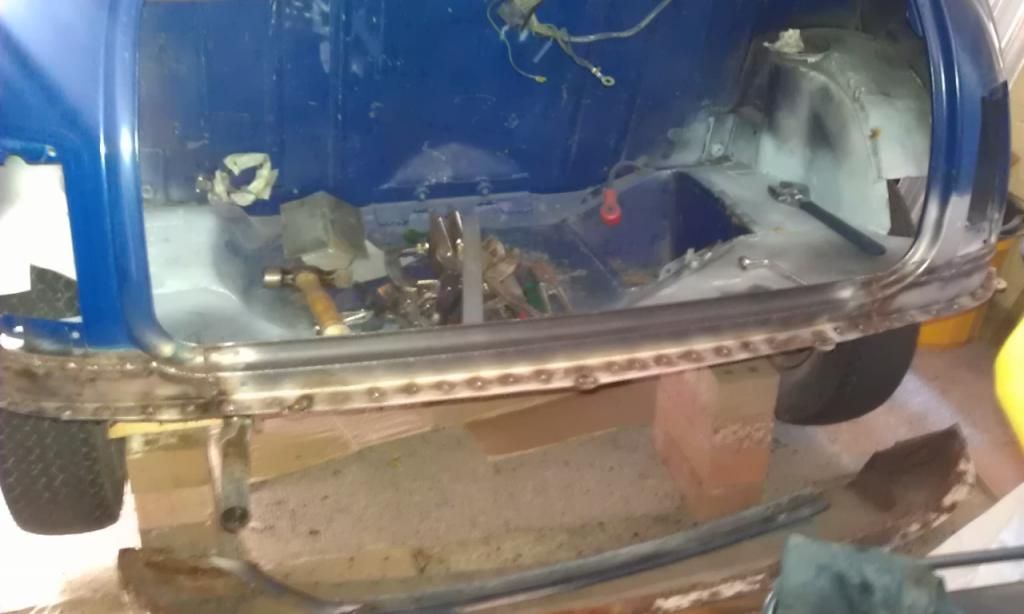
And here's the rear end completed (Well almost), pic is not the best quality - sorry:
Next up - welding the rear of the panels inside the boot.........
Up Into Fourth
Posted 27 July 2013 - 04:28 PM
12 Jul 13
I am now seriously running out of time before I have to return to work - abroad.
Next task was to finish off the welding inside the boot on the boot hinge and under rear light cluster repair panels. Boy it’s not easy welding in a confined space with a respirator, welding mask, goggles etc!! There were a few areas that where née on impossible to get to especially in some tight corners, the swan neck needed to be shorter and bendier!!
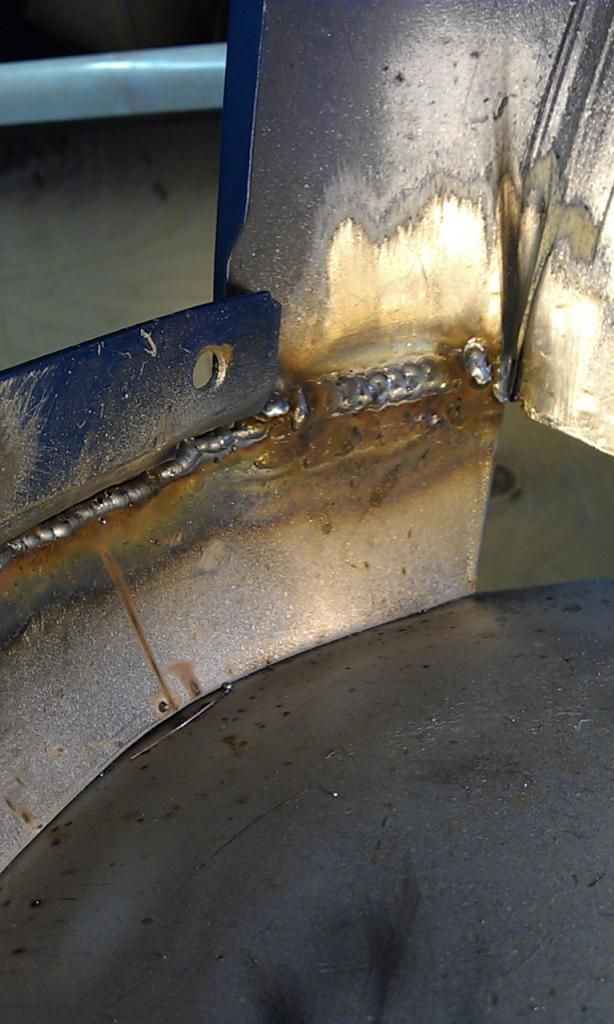
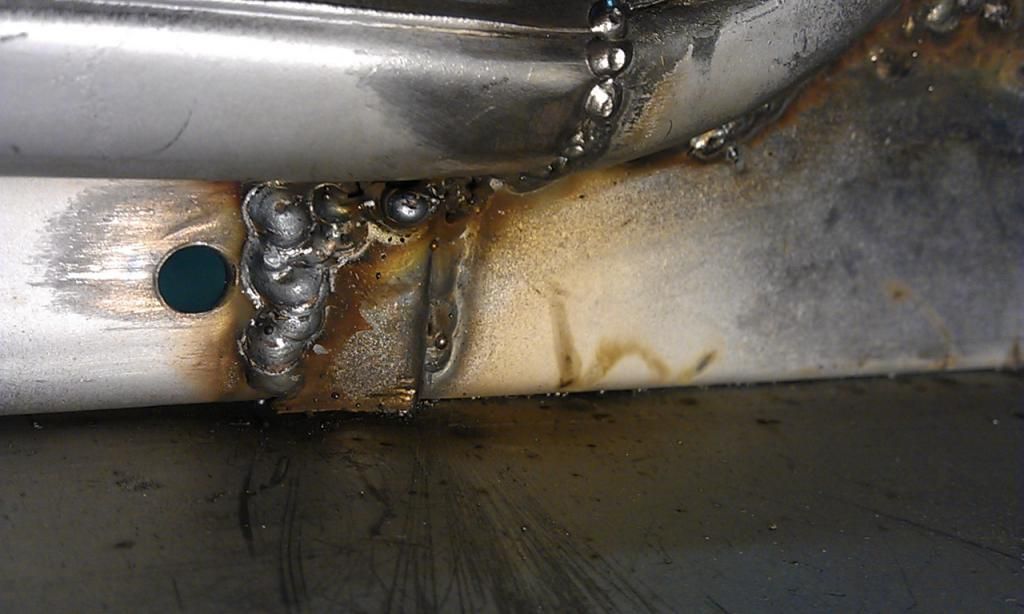
Here are some pics of what I managed to achieve:
Once the welding was done it was time to start dressing down the welds, first off with a DRONCO grinding disc, used to take off most of any surplus protruding weld and then started with a 40 Grit Ceramic Flap Disc, but then ran out of time on this session.

Once the 40 grit has done its bit I’ll tidy up with an 80 Grit Flap Disc.
Its starting to look a lot better but will need some filler to sooth off some the welded areas. I did manage today to find a local supplier of U-POL Fantastic, 3 Ltr Tin for £19.99 + VAT.
Up Into Fourth
Posted 28 July 2013 - 07:44 PM
13 Jul 13
Only had the morning only left on the Mini and needed to prep it for another 6 months storage.
First up I finished off dressing the welds down having already tickled them with a standard grinding disc and a 40 Grit DRONCO Ceramic Flap Discs and then with an 80 Grit.
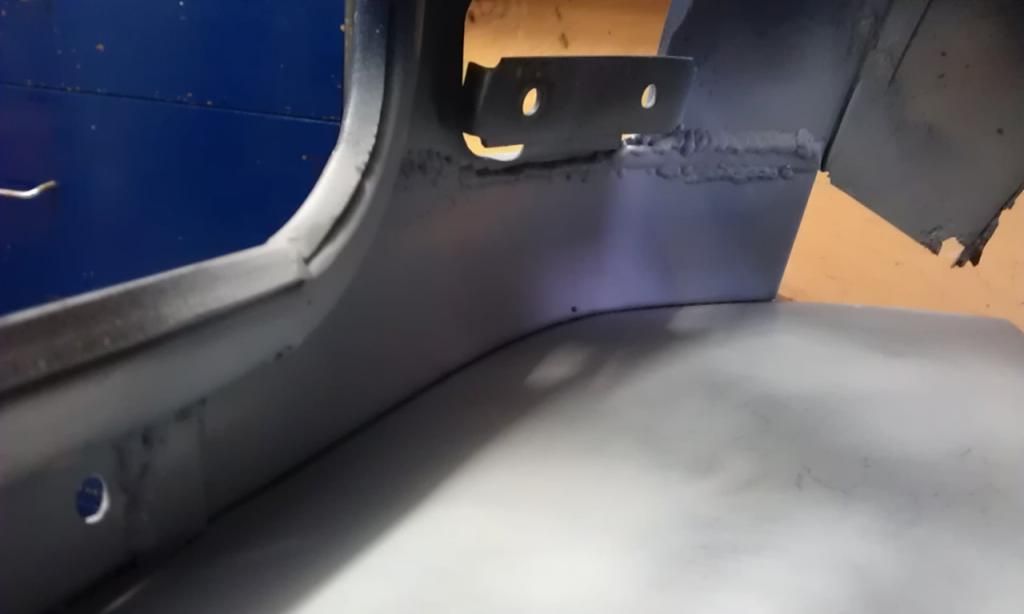
Here's a pic of the LH corner with as much as I dare grind down:
Here's the RH side:
And here's the whole back end:
I decided that I was not going to be able to get a smooth enough finish by just grinding and to avoid thinning the metal I’ll have to apply filler in several areas. Advice on this forum suggests that filler should go on bare metal but I didn’t get any filler and ran out of time anyway so to finish for now I sprayed up all the bare metal with U-POL Acid #8 to stop it rusting. Before spraying I cleaned up the inside welds and any areas that had not been touched by the flap discs with a wire brush attachment to remove surface rust that had accumulated since welding a couple of days ago. Before applying the primer I wiped all area to be painted with some panel wipes.
Here's a pic of the inside welds cleaned up before spraying:
As I have sprayed all the bare metal when I get back I’ll have to strip some of the primer from any areas that need filling using a wire brush attachment.
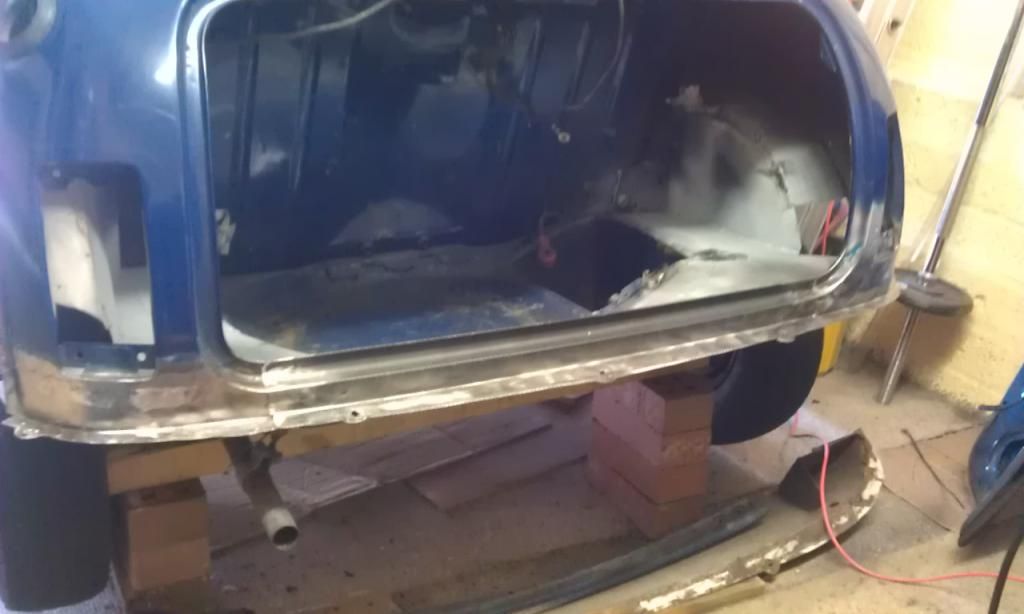
And here are some pictures of the rear end after priming:
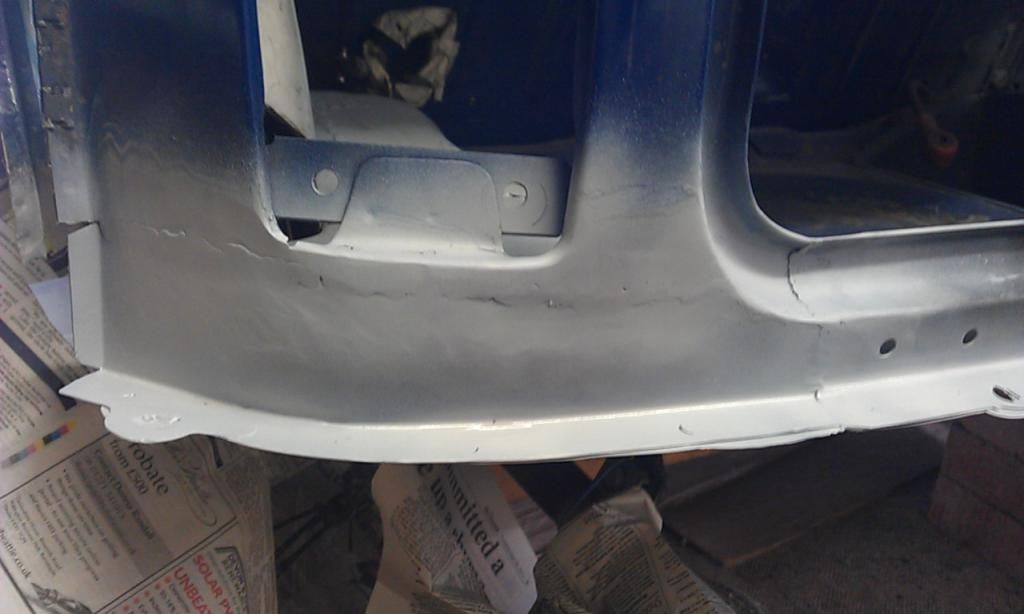
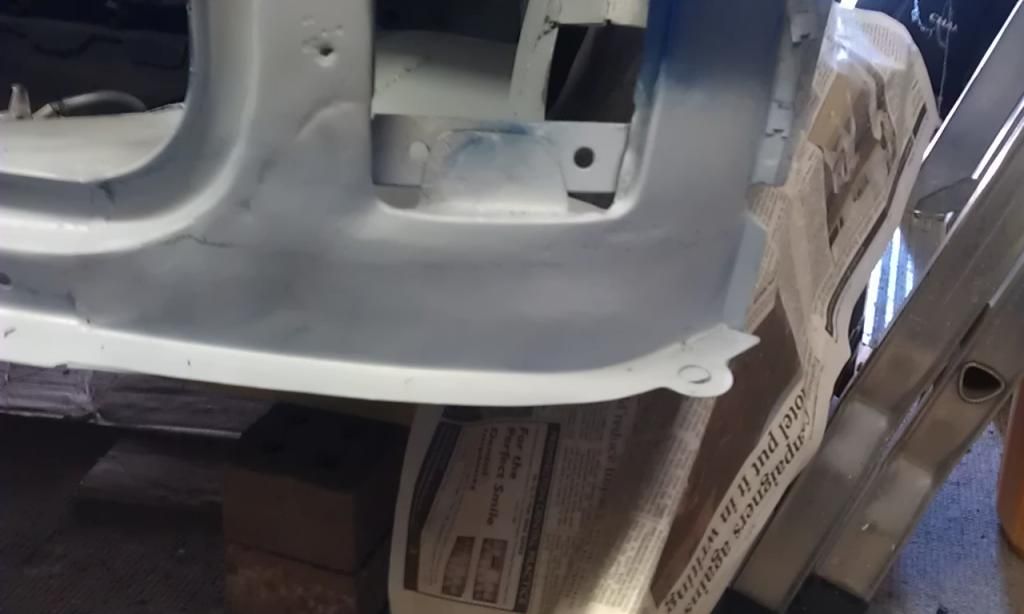
And here is the finished product:

I only dressed down the welds on the outside of the Mini, for the ones inside I am not sure whether to:
1. Dress the welds, seam seal, paint?
Or
2. Seam seal and paint without dressing the welds?
Advice on this forum was to go for option 1.
Whilst dressing the welds I spotted at least 1 x hole which will have to be welded up!!
Summary
All in all I am pretty please with the repair, Its not finished and it wont win any prizes for welding but for my second real go at facilitating a body repair it’s not bad at all 
P.S. Spent the final few hours tidying up and packing up the garage!!!
Up Into Fourth
Posted 09 February 2014 - 07:43 PM
Back in the UK now and although I have lots of other priorities like loads of work to do on my house and I will have to find a new job in 4 months time I may be able to spend some tim on the Mini.
All I have managed so far is to drill through the rear subframe rear mounts into the boot floor, had to do this before I remove the rear subframe in order to ensure that it would be fitted back correctly aligned.
Had to by a longer drill bit as a standard size one meant that the chuck was catching on the subframe.
Whilst I have been away I also bought some new tools for Chrimbo, a Halfords 120 pc Pro Socket Set and a Halogen Light to name a few bits!! Both will be put to good use.
Up Into Fourth
Posted 14 March 2014 - 06:53 PM
Iv'e been posting a few separate posts but I thought I would add an update to this project thread.
Since the above I have removed the Subframe in order to complete the repairs on the boot floor, needed to get at the underside to clean up from the welding so it had to come off. I was expecting some rot in the heelboard however I was not expecting the Subby to be in the state that it was !!! This has knocked me back a touch and yes I know i could buy a second hand bare subframe and yes I have been advised against it but I am for practice and learning sake going to have a go and resurrecting the old one. Fellas make there own custom ones so what's wrong with repairing one as long as the repair is better and stronger than the original.
Here's what Iv'e been up to.
Subframe Removal Preparation
Before I took the Subframe off I had to drill the mounting holes in the rear mounts into the boot floor, this was to ensure that I would fit the Subframe Supprt Brackets and Subframe back in the correct place when I refit it later.
Here's a link on problems drilling the holes.
Subframe Removal
Here's a link on asking some questions in preparation and me removing the subframe and what I found
Whilst removing and stripping the subframe I created a little here's how I did it, here it is for anyone that was wondering:
Probably the dirtiest job I have done so far - next time soak subframe in de-greaser or something and power wash before you take it off as well as afterwards!!!
Here's the step by step some of which I copied from someone else but I added some bits as I went along.
1. Chock front wheels.
2. Place in 1st Gear.
3. Remove brake master cylinder cap and place piece of polytheme over brake cylinder and replace cap. Poly thin enough to be able to re-place cap and screw up.
4. Remove battery - mine was already out.
5. Remove positive terminal clamp - mine was the moulded plastic type!!!
5. Remove Fuel Tank - mine was already out.
6. Jack up rear end and place axle stands under the sills just behone the rear subframe front trunnions.
7. Place wooden beams under rear wheels with bricks under the rear end to support the wheels.
8. Undo both rear Exhaust Pipe Brackets to lower back end of Exhaust clear of Subframe.
9. Release Handbrake and loosen?
10. Remove split pins from Handbrake securing point on rear hubs.
11. Remove handbrake cable spring from rear hub mount to give enough slack to remove handbrake cable from centre trunion.
12. Loose handbrake cable guides on subframe to allow cable to slip though.
13. Remove brake pipe at 3 way junction, really stiff, WD40, 3 in one and a Heat gun? Once undone carefully bend clear of the Subframe.
12. Dismantle Handbrake cable connection at Handbrake - remove self tappers, slacken off handbrake adjust screw and undo handbrake threaded bar. Whole cable spins.
13. Undo the Rear Shock top mounts.
14. Undo the Subframe mounting bolts - evenly.
15. Jack up the subframe to support the weight and undo the rear shock bottom mounts and remove the rear shocks - otherwise you wont be able to pull the subframe clear.
15. Jack up the rear end and slowly move bricks further to the rear and lower the jack, keep repeating this procedure until the subframe is low enough to be pulled out.
16 Job done - tidy up and have a drink!!!
That's all for now got to go out for Fish and Chips
Up Into Fourth

Posted 14 March 2014 - 07:31 PM
Nice pulse welding there on the rear repair pieces, enjoy your Fish & Chips but don't forget to crack on with the mini afterwards ;)
The King Of Retro Cool

Posted 14 March 2014 - 08:31 PM
Excellent work. Nice reference too as ive got the joy of reconstructing the rear end and boot floor in the same way that you have!
Mini Mad

Posted 14 March 2014 - 09:30 PM
enjoyed reading so far good job................ 
Up Into Fourth
Posted 17 March 2014 - 09:56 PM
Nice pulse welding there on the rear repair pieces, enjoy your Fish & Chips but don't forget to crack on with the mini afterwards ;)
Thanks - first compliment Iv'e ever had on my welding, I was advised that some of my welding is still a little on the cold side, always a bit frightened to crank it up and burn everything away :-(
P.S. Fish and Chips were excellent, back on the Mini this afternoon
Up Into Fourth
Posted 17 March 2014 - 09:59 PM
Excellent work. Nice reference too as ive got the joy of reconstructing the rear end and boot floor in the same way that you have!
Thanks - hope it will help, doing the Boot Hinge Repair in three pieces is do-able and cheaper than using the single piece its easier using the single piece, there is a bit of a gap on the underside of the boot door but I have not tried with rubber seal in place yet? It does have a rubber seal doesn't it? I'm happy with the way it went anyway.
Mini Mad
Posted 17 March 2014 - 10:43 PM
like the rear bootrail section nice job im on with that part at the moment just the just n/s to do
Up Into Fourth
Posted 28 March 2014 - 08:53 AM
Been busy practicing panel fabrication so not a lot of progress of late however, I have started to refurbish my Rear Subframe, it's in a bit of state!!
The Doughnut's (Rear Rubbers) were knackered, the metal support ring had corroded and come away from the rubber. I looked at brand new one's and they are about £50 each - ouch!! cheapest I found was about £40 each on Ebay but courtesy of this Forum's For Sale sight I managed to get some really good second hand one's:
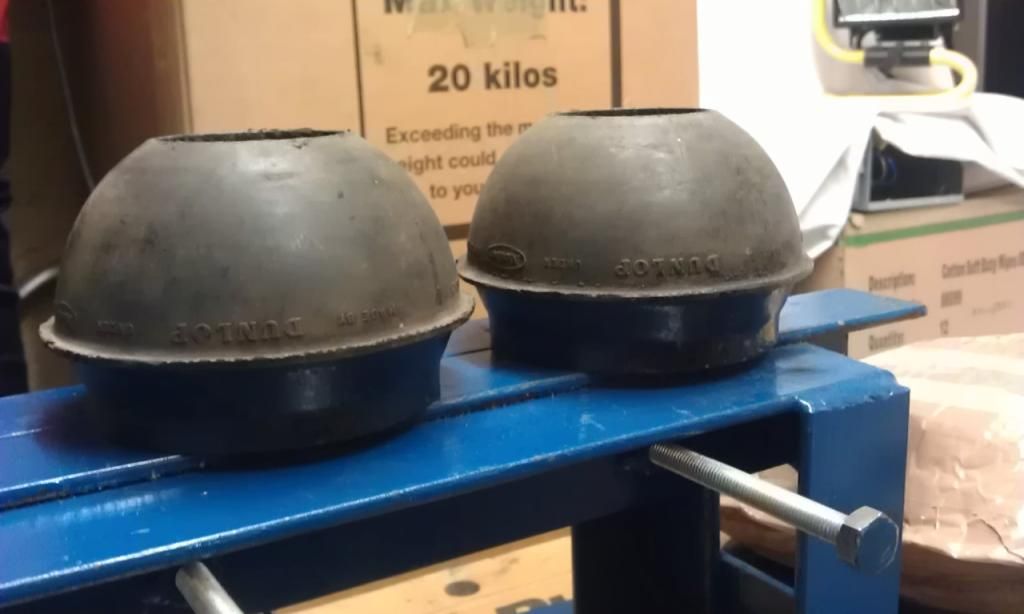
Little bit of surface rust inside and they need a polish but once done they'll look as good as new
Here's a pic of them up against the old ones:
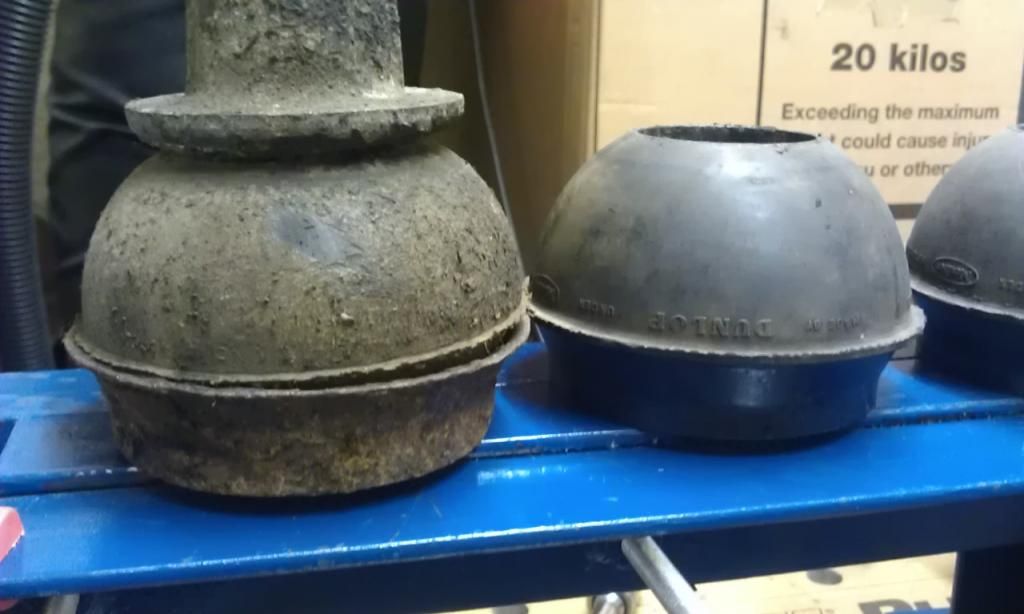
That crud on the rubber is probably where someone painted them, poss with underseal? The metal ring is really badly corroded, here's a pic of them separated (sorry it's a bit blurred but you get the idea):

That's all for now.
One Carb Or Two?

Posted 04 April 2014 - 08:55 PM


0 members, 0 guests, 0 anonymous users


