Nice project, neat work too
Thanks


Up Into Fourth

Posted 05 April 2014 - 06:30 PM
Nice project, neat work too
Thanks
One Carb Or Two?

Posted 05 April 2014 - 07:27 PM
Nice project, neat work too
Thanks
No problem !
Mill Road Garage

Posted 05 April 2014 - 10:14 PM
I really enjoyed reading this!
I bet this would be really helpful for all of the other first time restorers here as you have explained in great deal what you needed to get, how you fitted it and even how you had the welder set. Very good.
Your welding has come on a treat!
All the best with your project mate and i will be popping back to see how you are getting on! 
Ben
Up Into Fourth
Posted 07 April 2014 - 12:19 PM
I really enjoyed reading this!
I bet this would be really helpful for all of the other first time restorers here as you have explained in great deal what you needed to get, how you fitted it and even how you had the welder set. Very good.
Your welding has come on a treat!
All the best with your project mate and i will be popping back to see how you are getting on!
Ben
Thanks Ben, just scanned through your project and build, wish I had the space and nounce to have stripped mine and spun it on its side, I am causing myself a lot of difficulty by trying to do it in stages and in confined spaces!!!! I am about to spend a weekend under the rear end, raised up on Axle Stands, would have been much easier if we could tip it over
Up Into Fourth
Posted 17 April 2014 - 05:49 PM
Been busy doing other things lately but have made a start of finishing up the inside of the boot, even managed to get my lad helping me out, cleaning up the Fuel Tank.
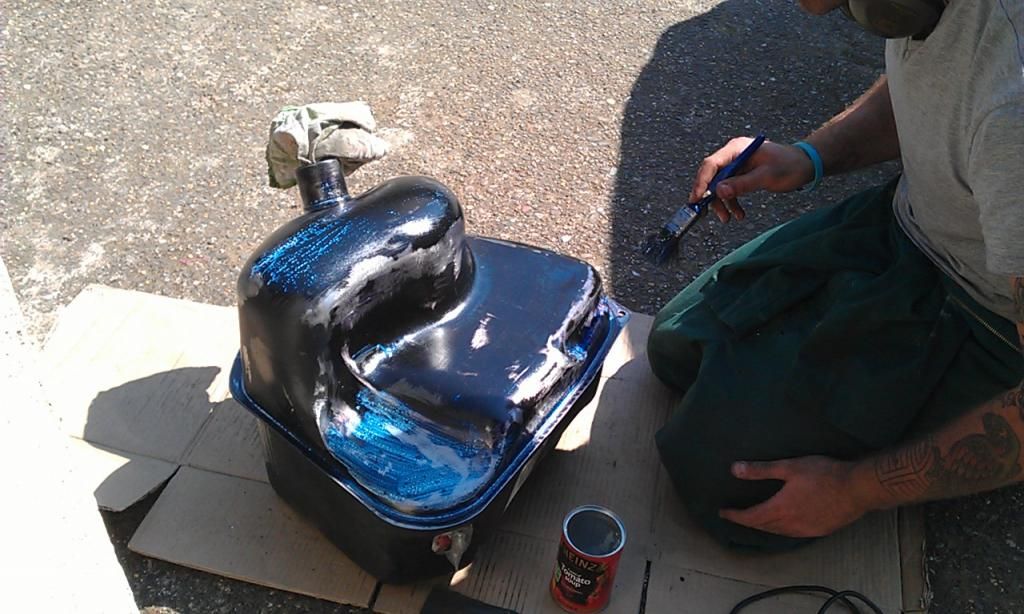
I did tell him to put some gloves on KURUST tends to stain your hands
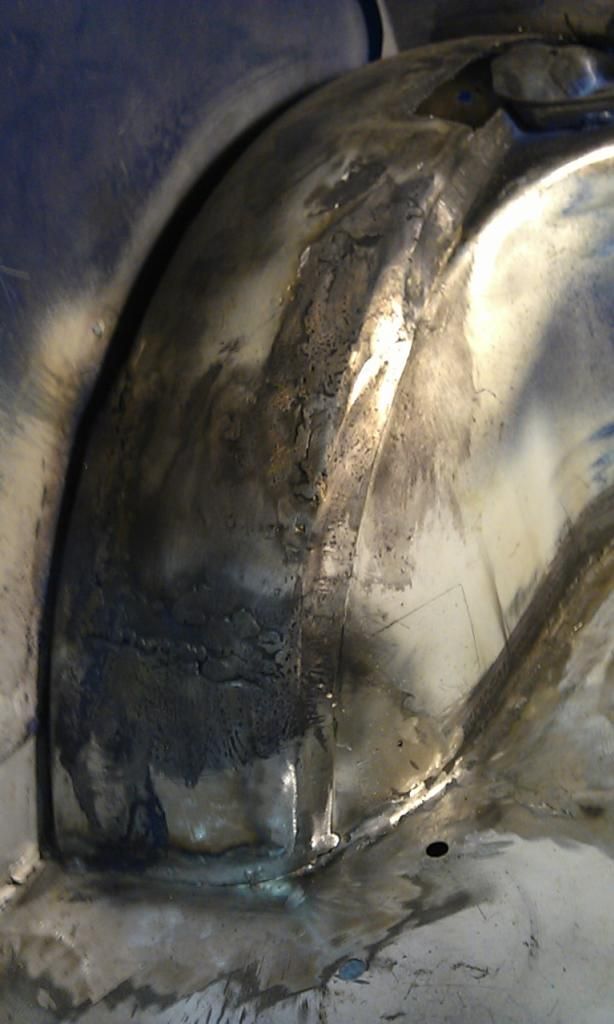
I have also dressed the welds down in the boot ready for a bit of filler.
The bottom of the battery box will also be replaced.
Now that the sub frame is off I have also started to tidy up the welds on the underside, whilst checking out the corners towards the Heel Board I have found a couple of repairs that have been previously done some good welding but looks like they forgot to weld one side, so that will have to come off, one step forward one step back!!!
Also just watched the Classic Car Restoration from the link on this Forum, they managed a restoration in 7 days - really?? I wishe
Mill Road Garage
Posted 17 April 2014 - 08:09 PM
Also just watched the Classic Car Restoration from the link on this Forum, they managed a restoration in 7 days - really?? I wishe
Well if that's what you want to call it! 

Up Into Fourth
Posted 17 April 2014 - 08:29 PM
Also just watched the Classic Car Restoration from the link on this Forum, they managed a restoration in 7 days - really?? I wishe
Well if that's what you want to call it!
They skipped a lot, didn't even bother lifting the Engine and had the audacity to paint and badge it as a Cooper and left the 998 in it and I can't believe the expert pricing of £5000!!!
Mill Road Garage
Posted 17 April 2014 - 08:33 PM
Not to mention the fact that they bodged up MOST of it, the mini they loaded onto the lorry to have the body checked for alignment was not the one they were restoring plus loads of other things that i have chosen to forget.
God i hate that Bernie t!*t too. what a moron
Ben
Up Into Fourth
Posted 17 April 2014 - 08:39 PM
Not to mention the fact that they bodged up MOST of it, the mini they loaded onto the lorry to have the body checked for alignment was not the one they were restoring plus loads of other things that i have chosen to forget.
God i hate that Bernie t!*t too. what a moron
Ben
He liked Minis' though, and where was the Mini dealer in London, I'd love a trolley dash in there
Edited by JonnyAlpha, 17 April 2014 - 08:40 PM.
Up Into Fourth
Posted 17 April 2014 - 08:52 PM
Anyway back to the project, I need to clean up and paint my Radius Arms / Rear Hubs anyone recommend any tips. As the Radius Arms are Cast Iron what would you recommend to clean them up?
Here's the pics:
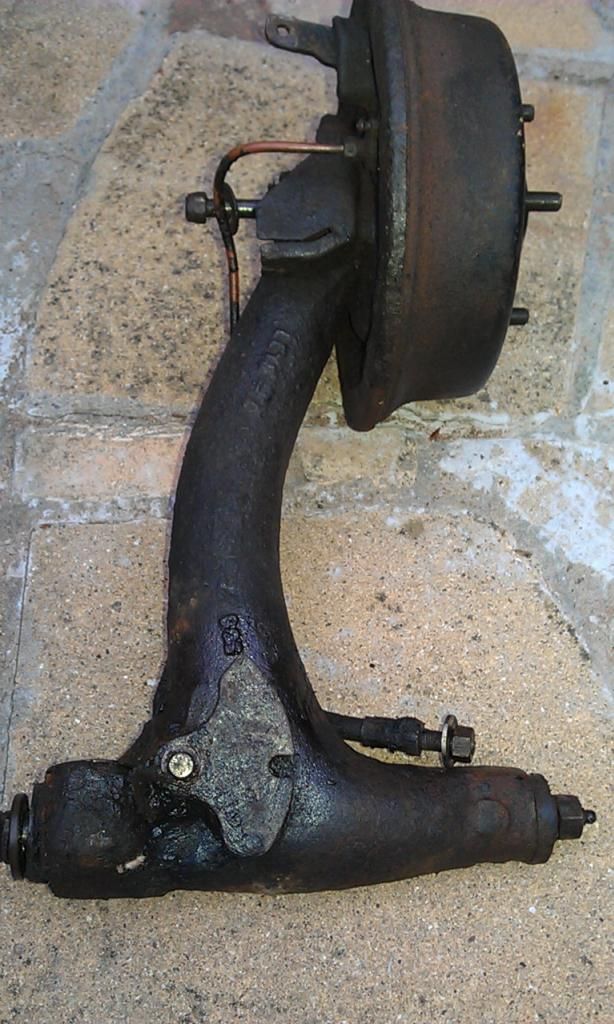
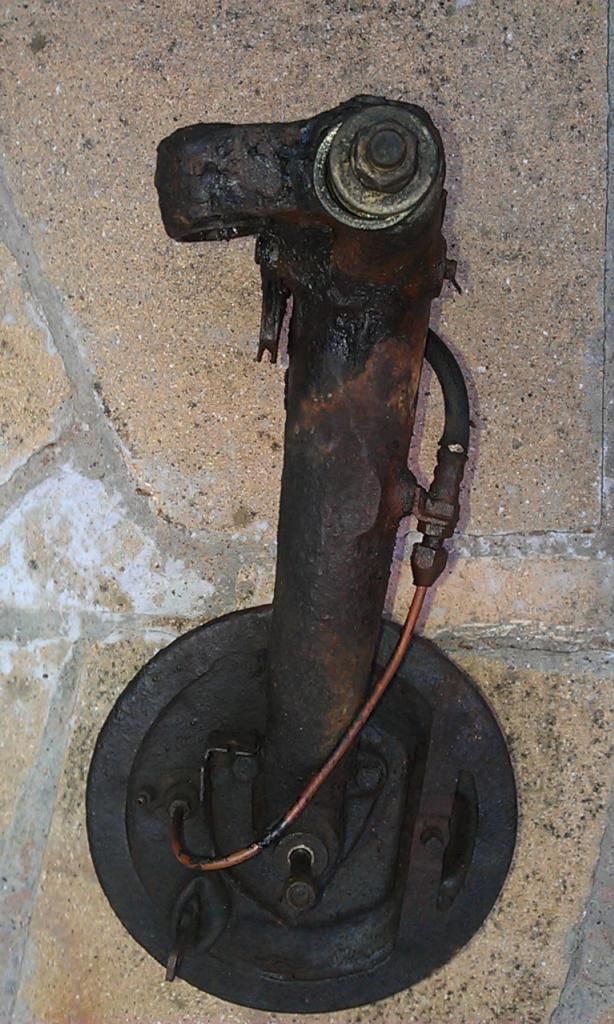
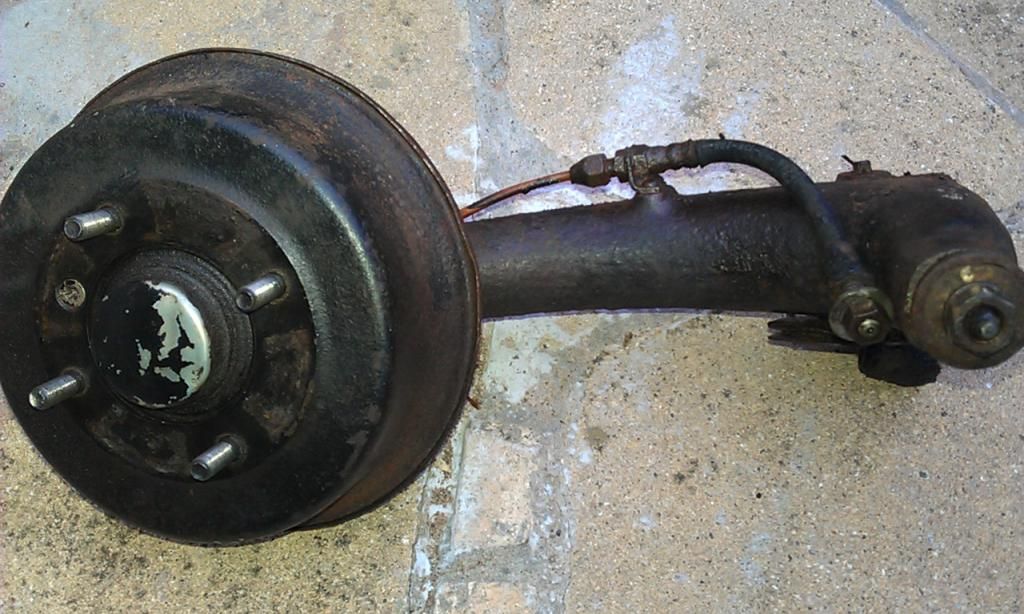
I was going to strip of the drums and clean everything up with a solvent (poss petrol), the Arms themselve are not that bad just a clean and a pint but the drums etc need more work, anything rusty may get the electrolytic treatment (not tried it yet). I think the bushes / bearings are OK so I was not planning on changing them.
The brake hose need replacing and I was planning on braided hoses, the copper pipes and brass nuts just need a clean and polish.
I would like to renew the Quadrants, found some here but may just clean and paint the ones I have??
Mill Road Garage
Posted 17 April 2014 - 09:19 PM
I just used a decent wire brush by hand to get rid of all the loose bits then used a twisted wire brush in the grinder to finish it off. You could always paint on some kurust to finish the job off before painting. Although i haven't used it myself.
Ben
Up Into Fourth
Posted 19 April 2014 - 07:51 PM
Cracked another 7 hour shift in the garage thinking I was going to complete the back end and heelboard - really???
Decided to get real and try and finish off inside the boot before I go in deep Going was slow as I am making my own panels where I can which of course takes time. After reading up info on the Retrorides and Mig Forum regarding Metal Forming / Panel Fabrication I have been practicing and managed to make a couple of small pieces relatively quickly.
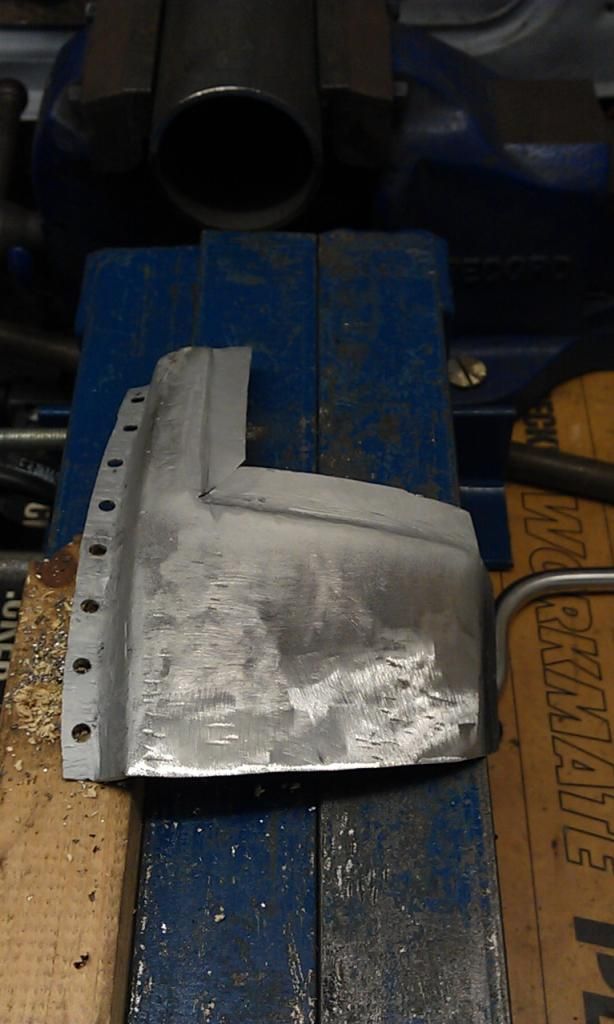
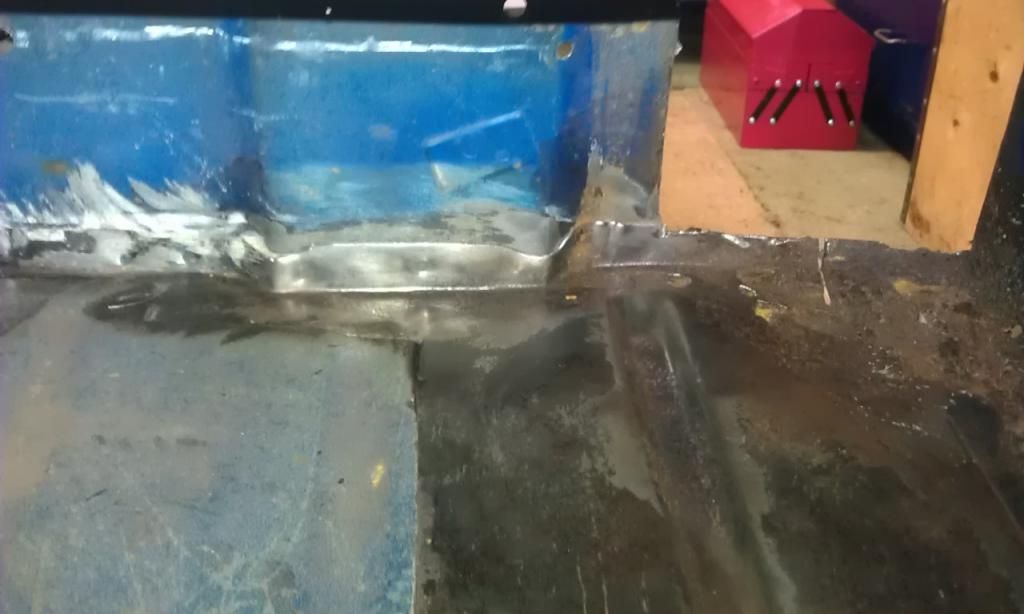
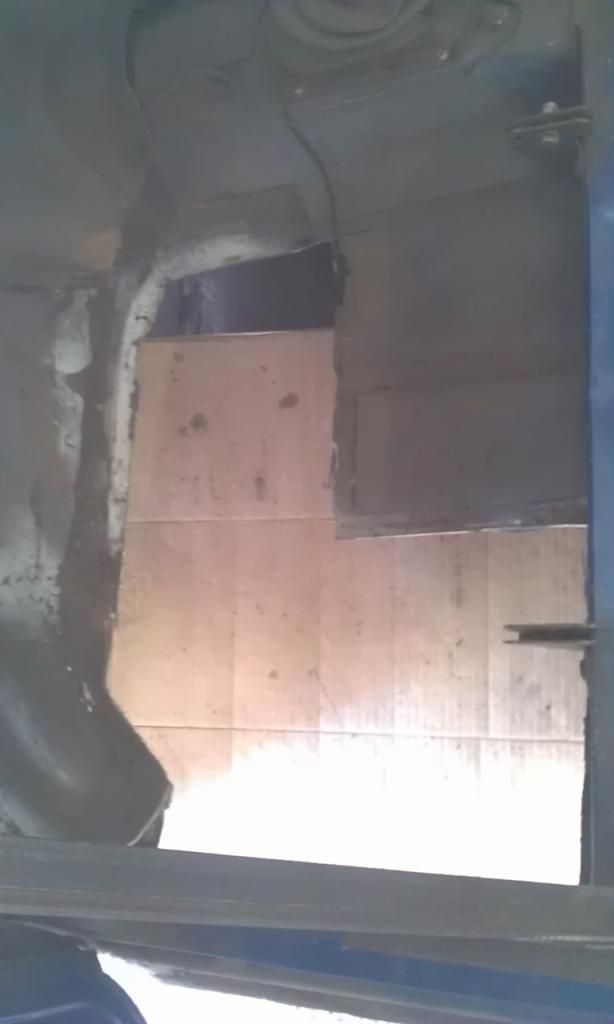
OK so here how I did it, I made the bottom of a Rear Quarter Repair Panel to fill this area here:
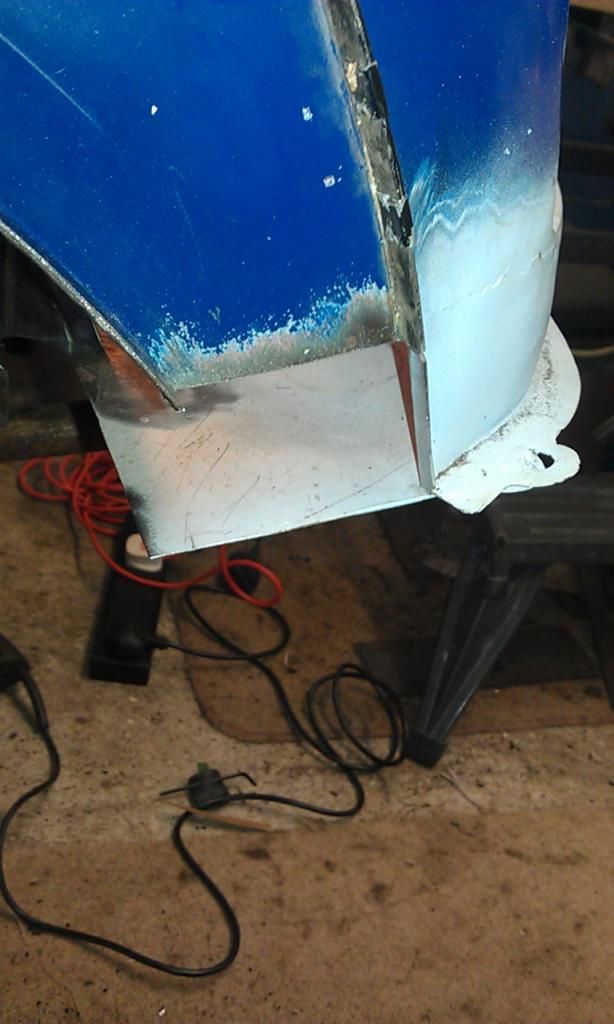
First of all make a template using cardboard (old cereal packet):

Get a piece of sheet steel of the appropriate gauge / size, this is a body panel so I used a piece of 1mm and clean it up if required:
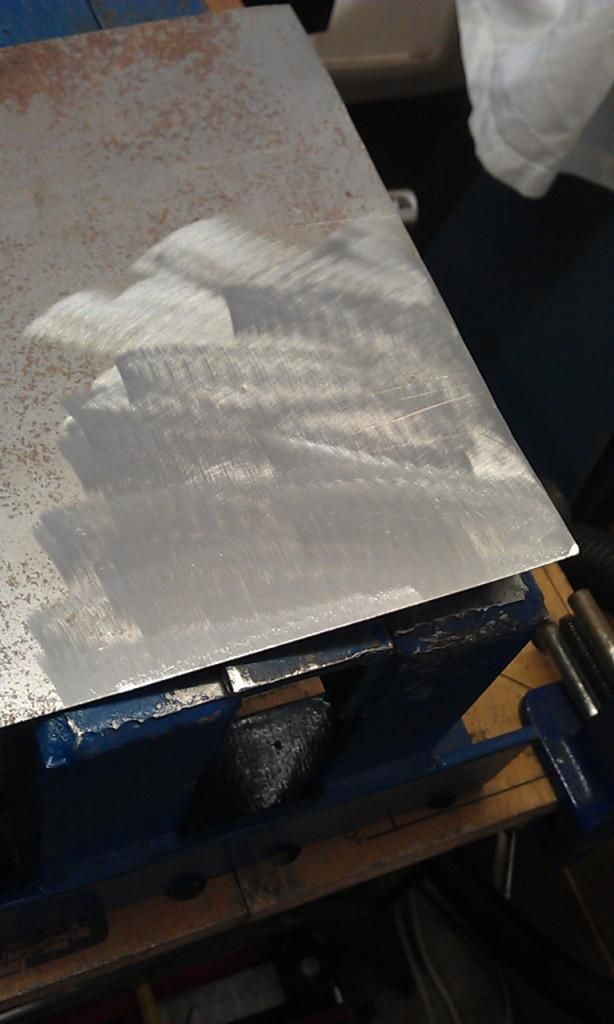
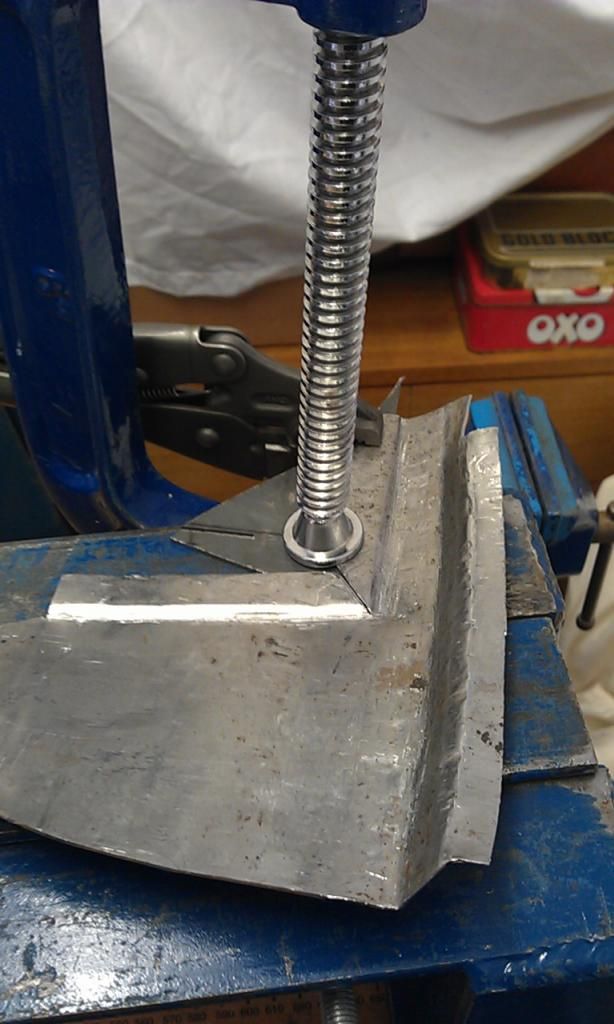
Transfer the fold lines etc to your repair piece and make the appropriate folds using a metal folder / bender if you have one (I made my own using a guide on the Retro Rides forum by a guy called TonyBMW, he is a legend when it comes to making your own panels):
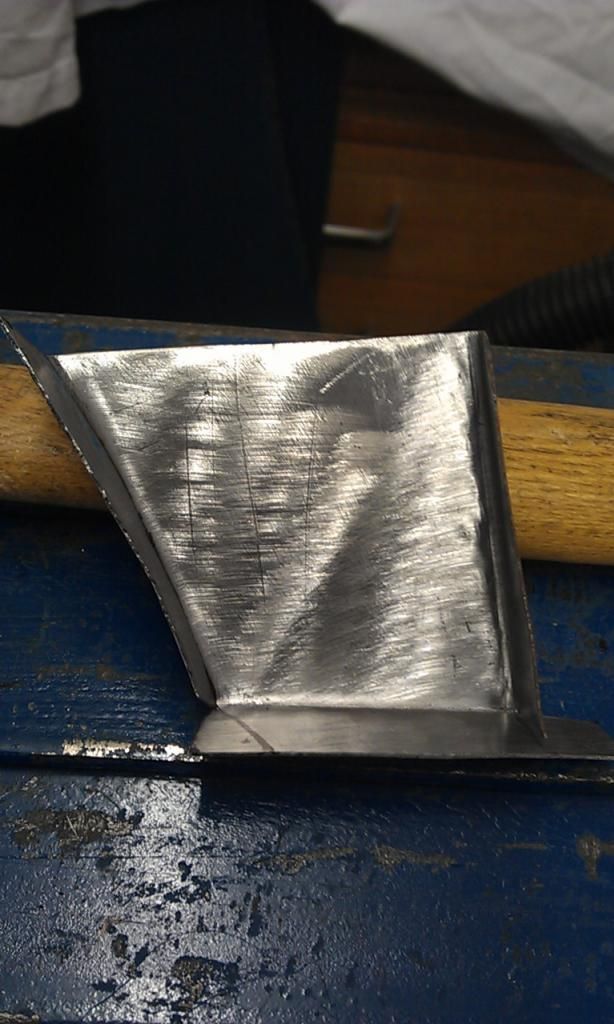
That's a curved edge on the left profiled to match the wheel arch - sorry skipped a bit here on how to do it, if your interested I can help or show you where I found the info on how to.
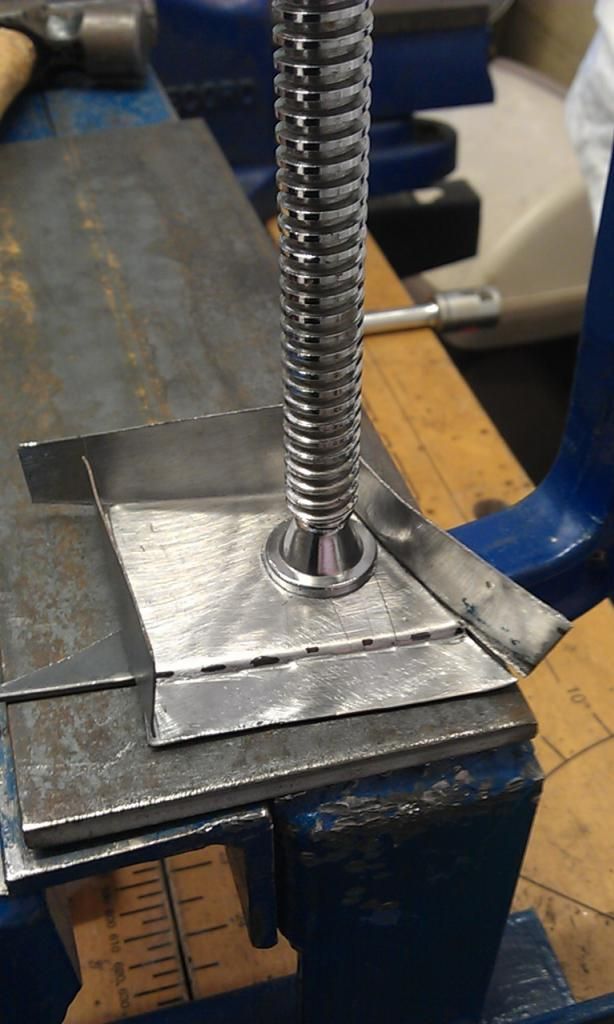
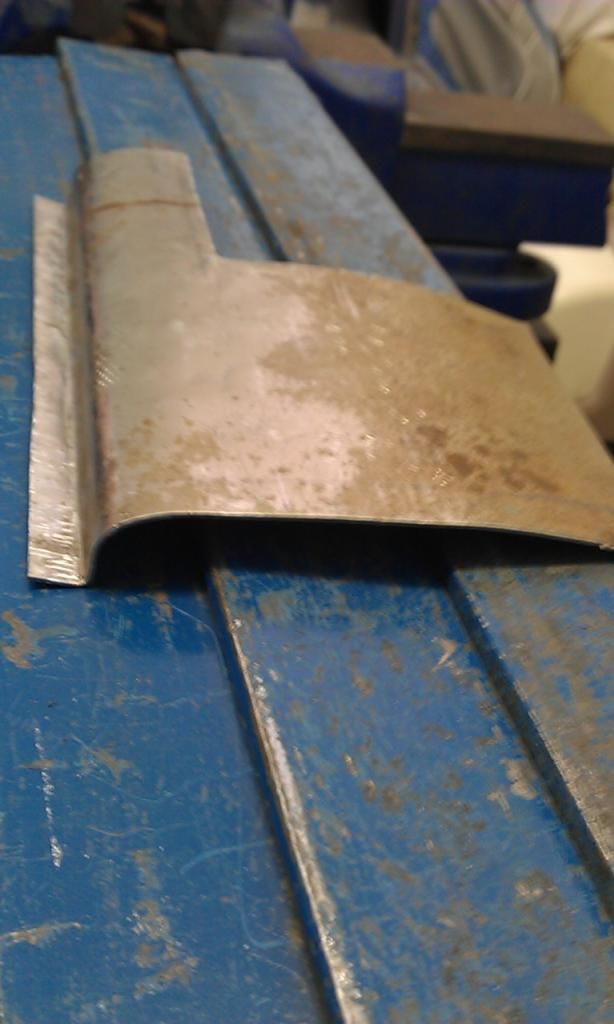
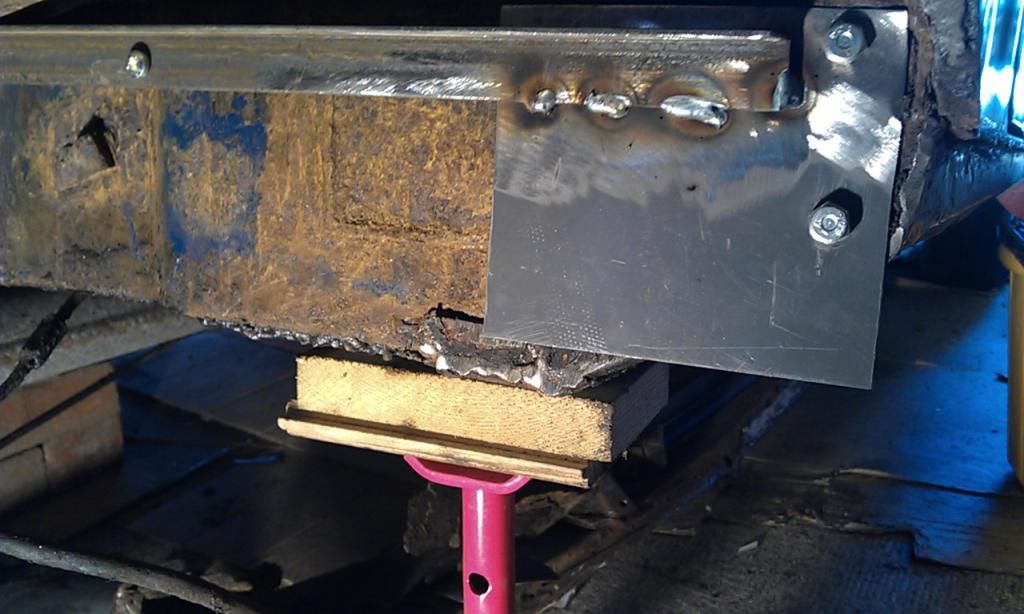
Next I added a joddled edge to the top to add strength, I don't have an edge setter yet so I have to improvise, today I used a piece of 2mm steel and a brick chisel, best method I have found yet:
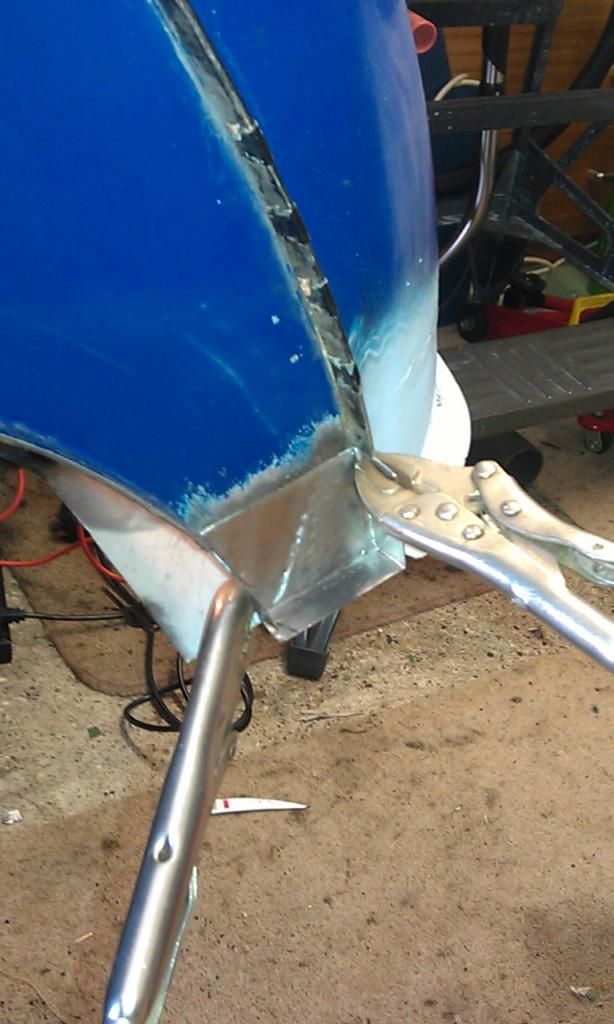
Next test fit and adjust as required:
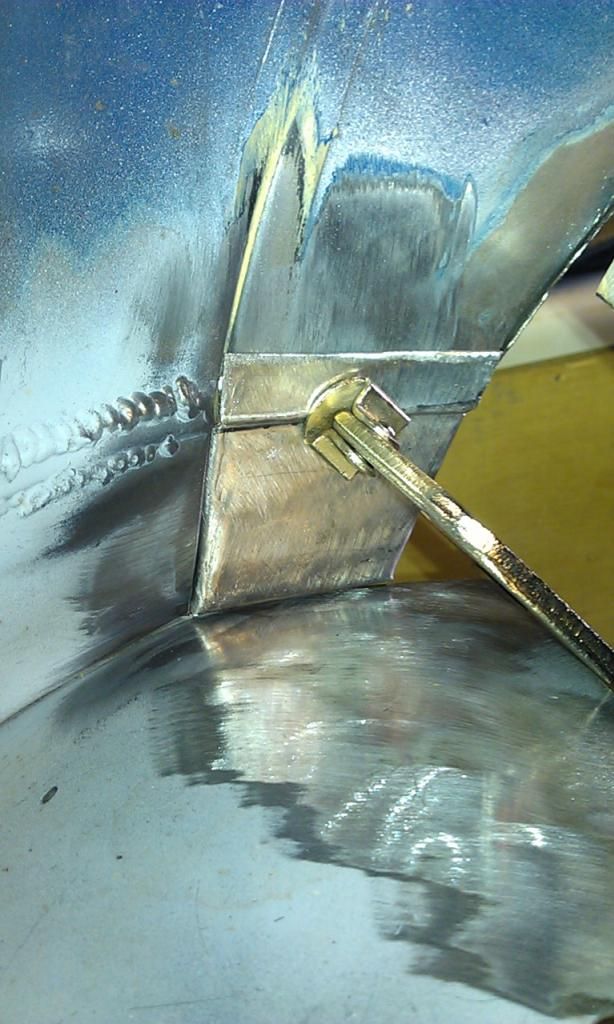
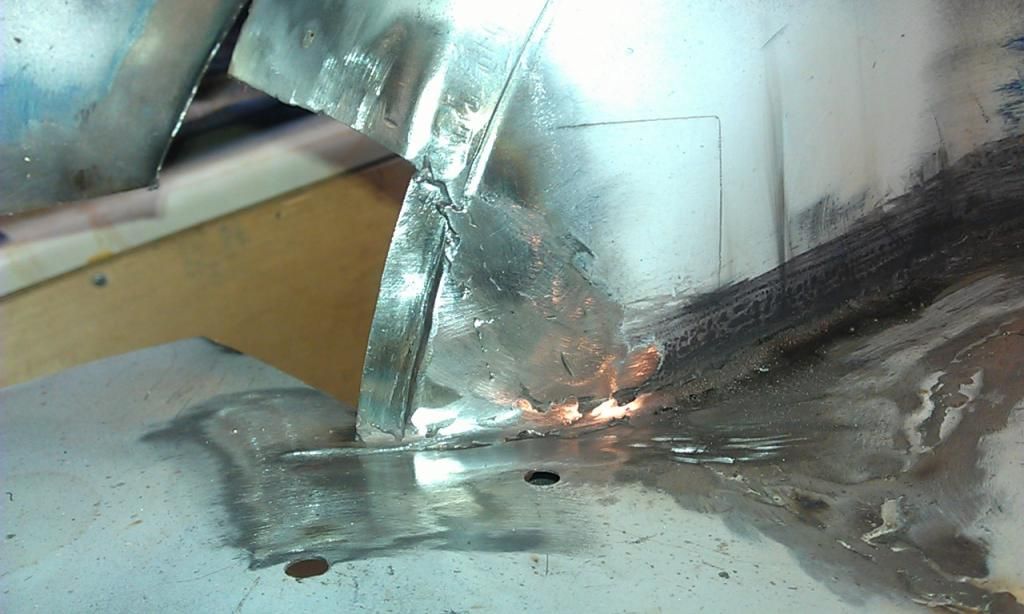
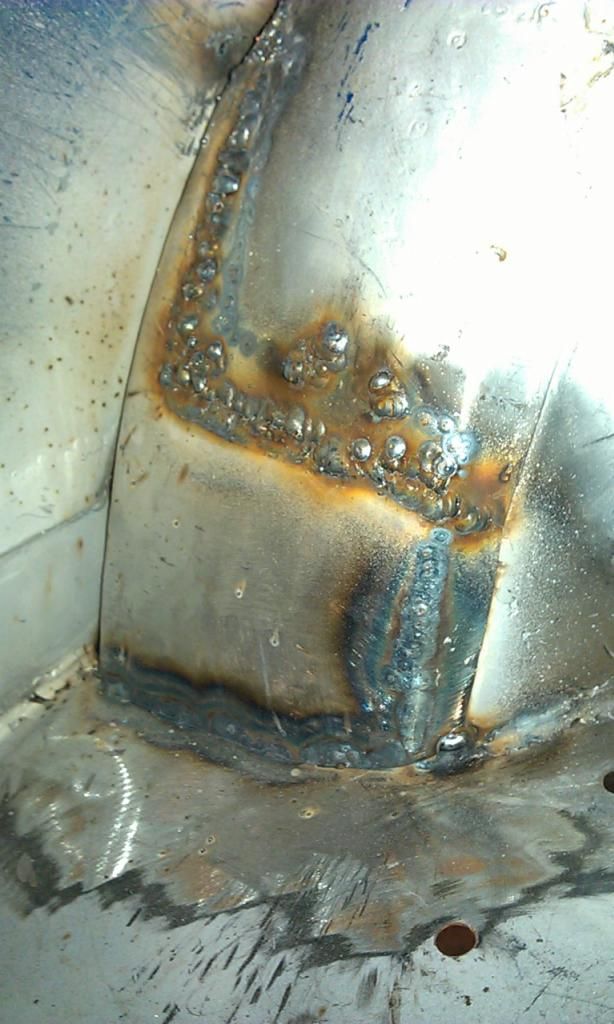
Then clamp in place and weld:
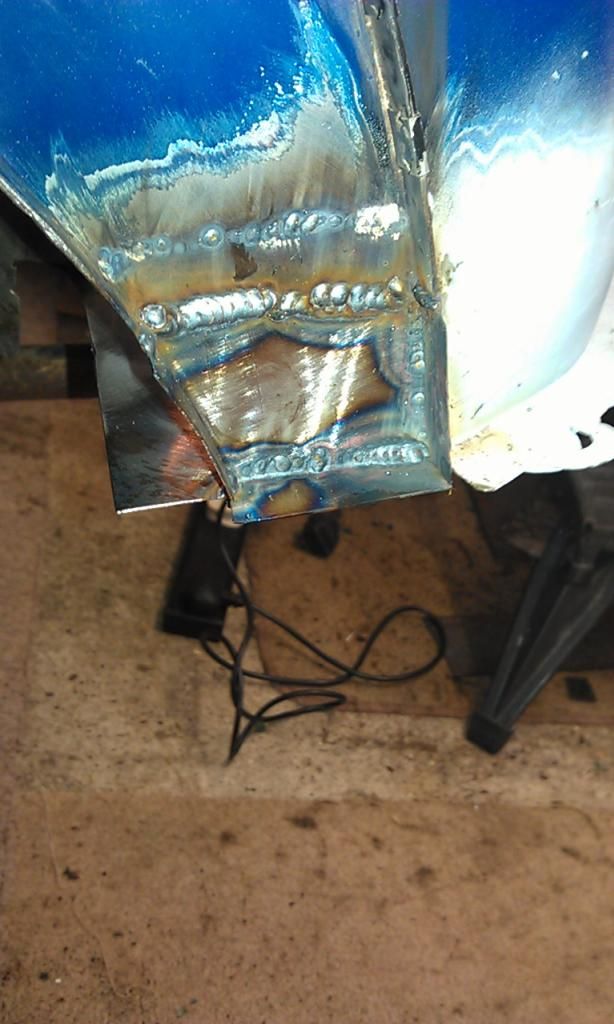
I went a little over the top welding this in especially on the rear where it joins the boot floor the penetration was good but this will be difficult to clean up.
That's all for now folks
Up Into Fourth
Posted 13 May 2014 - 08:48 PM
Here's a few pics and an update of what we have been up to, going has been really slow, seems like every step forward I take two steps backwards!!
Anyway my lad helped out for a week and decided he was going to do the Fuel Tank, he's still got the finished pics on his phone!! He painted it a sort of Antique White (VW) as we have decided to go for a Pale (Sort of Lichen) Green and Antique White.
It came out pretty good for a rattle can job, just needs a lacquer. Problem is now we have a lovely fuel tank and no finished boot to put it in:-(
Also my fuel tank strap is a horrible metal strap about 2 inches wide is there a fibre version to avoid scratching the tank?
I also started to repair the wheel arches, made some pretty good repair pieces but I wished I had done more investigating as in the end I decided I needed to replace both wheel arch outers ordered them whilst on me holiday and they arrived yesterday (the day I got back).
Went to fit them today but decided that I would have to do them along with the sills etc otherwise they would end up being in the way when I weld up the Heelboard Repairs and Subframe Closing Panels.
Anyway here are some pics of my wasted couple of days work!! First though a piece that will stay:
And heres the repair piece that I made that ended up being removed :-(
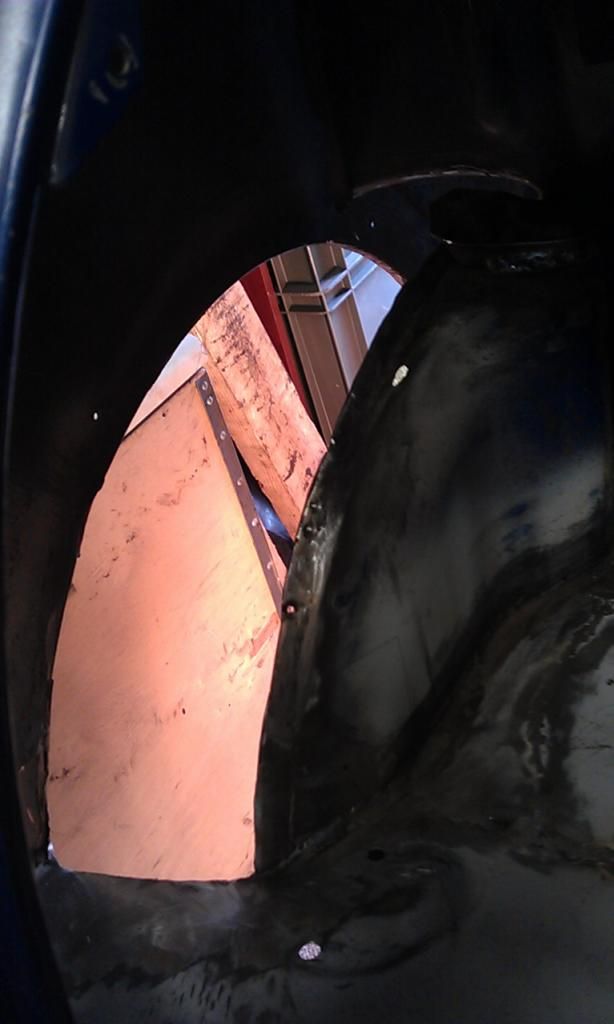
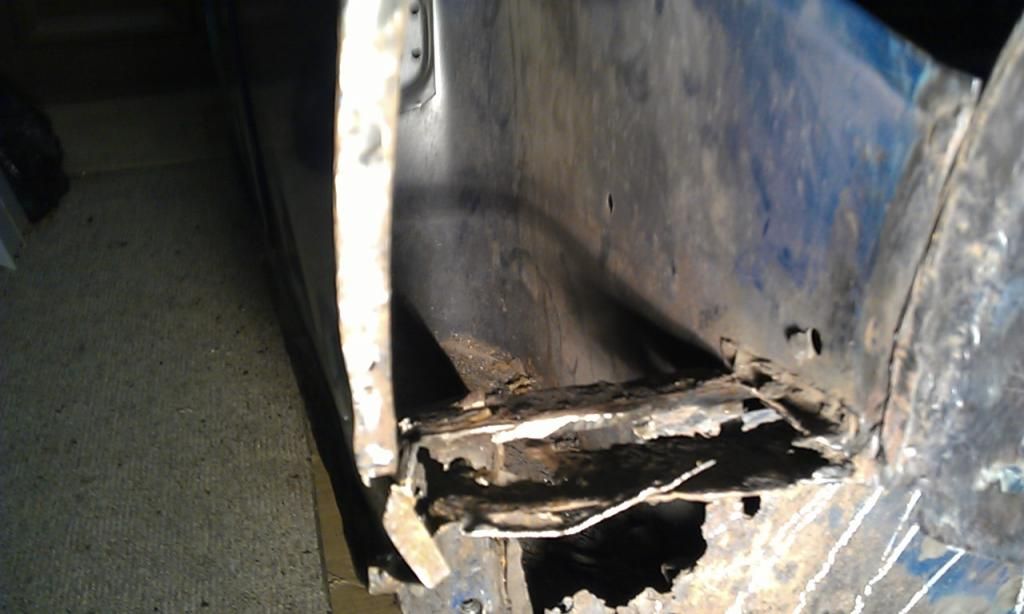
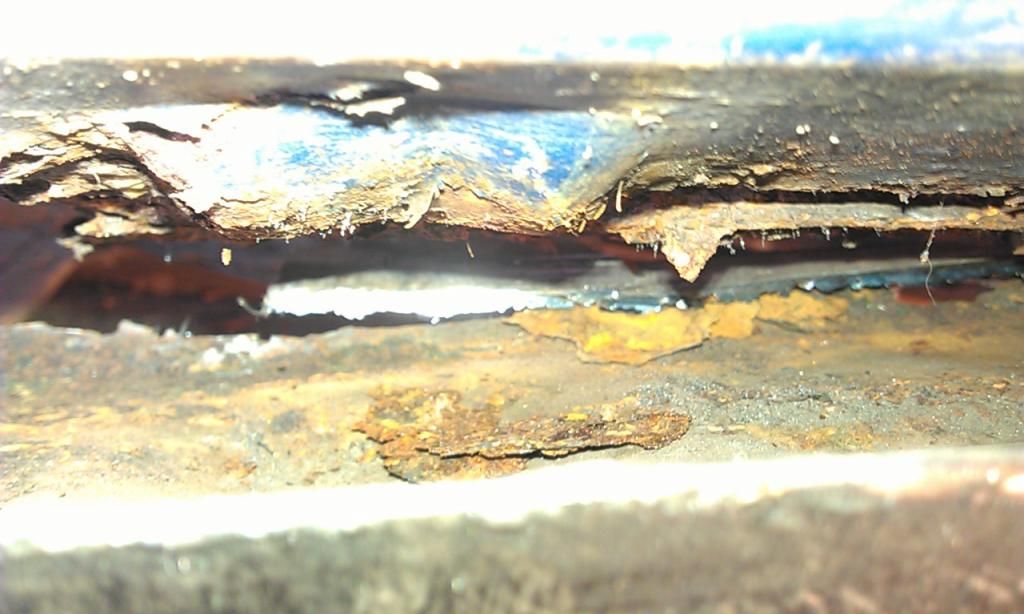
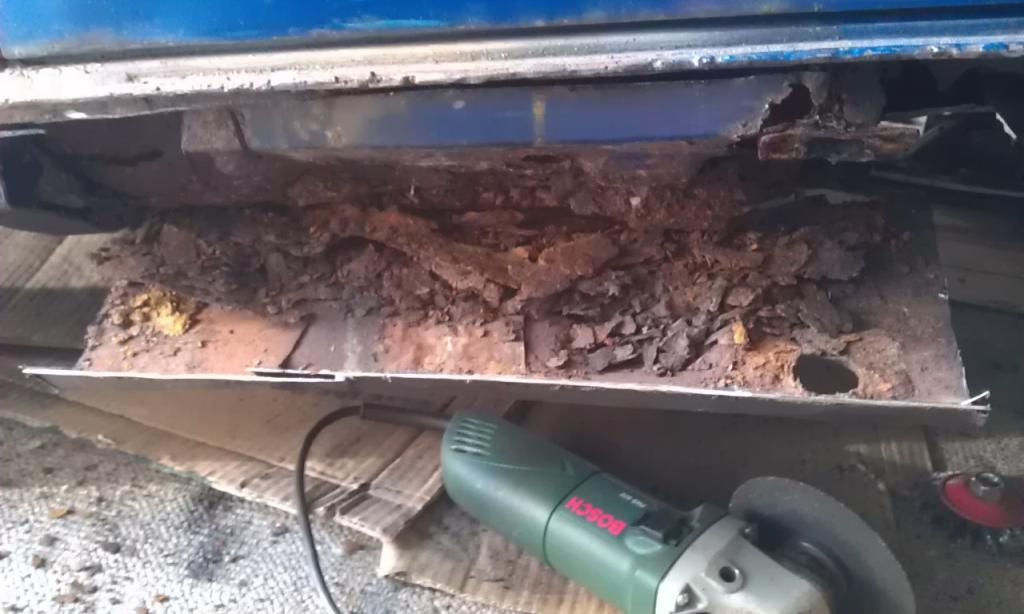
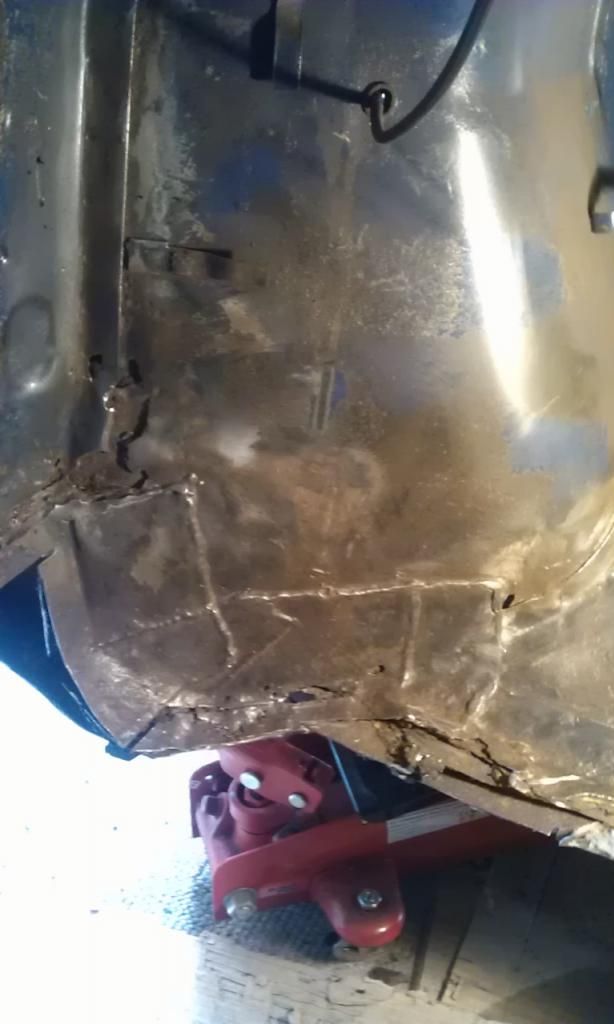
Here's a pic of the LH Wheel Arch taken from inside the Mini showing the rot that I was thinking of repairing, The strip on the LH side was a previous repair that someone had done. All they did was weld a patch straight over the top of the rot (without removing it). This has been done a lot on this car.
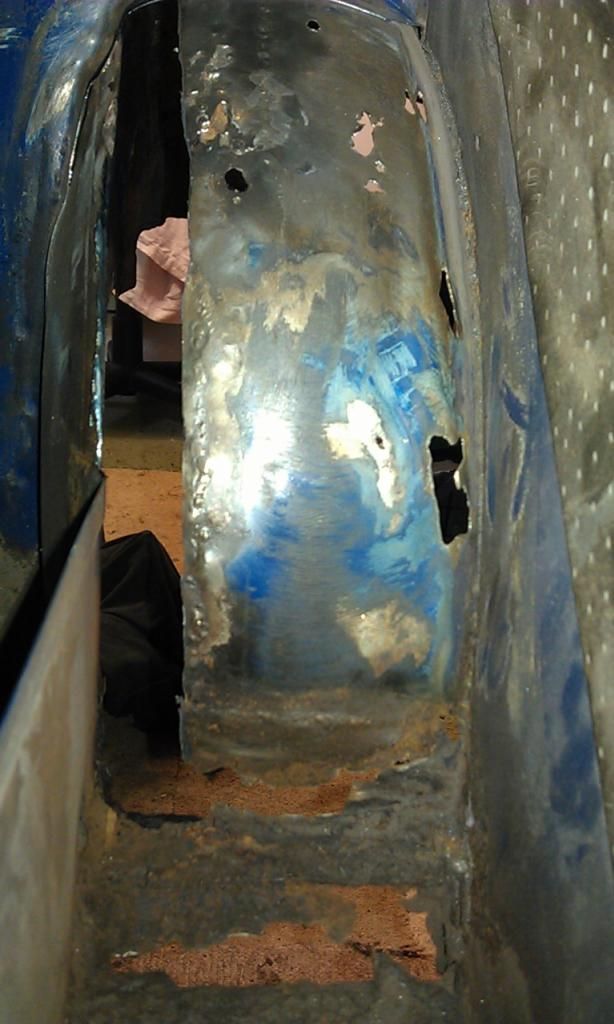
To repair the rot I would have had to make a repair piece almost the size of the wheel arch, I contemplated making a complete arch but bit the bullet and bought some.
As you can see the bottom of the LH companion bin is pretty shot too, the RH is about the same, all got to come out and be repaired, along with the sills and the front LH floor pan.
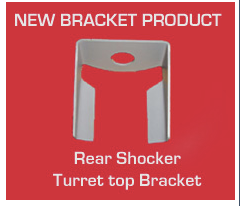
Made a new Rear Shock Support Brace as both mine LH and RH had rotted away at the top, I was quite impressed but then by accident I found a picture of one and realised I have made it wrong, DOH!!
Here's mine:
And here is what it is supposed to look like, still I can salvage it by welding in a top piece and drilling out a hole for the shock.
Before I went away on my holiday I managed to stumble on this find, will be collecting it tomorrow, its a 50Ltr 2.5HP Snapon Compressor:
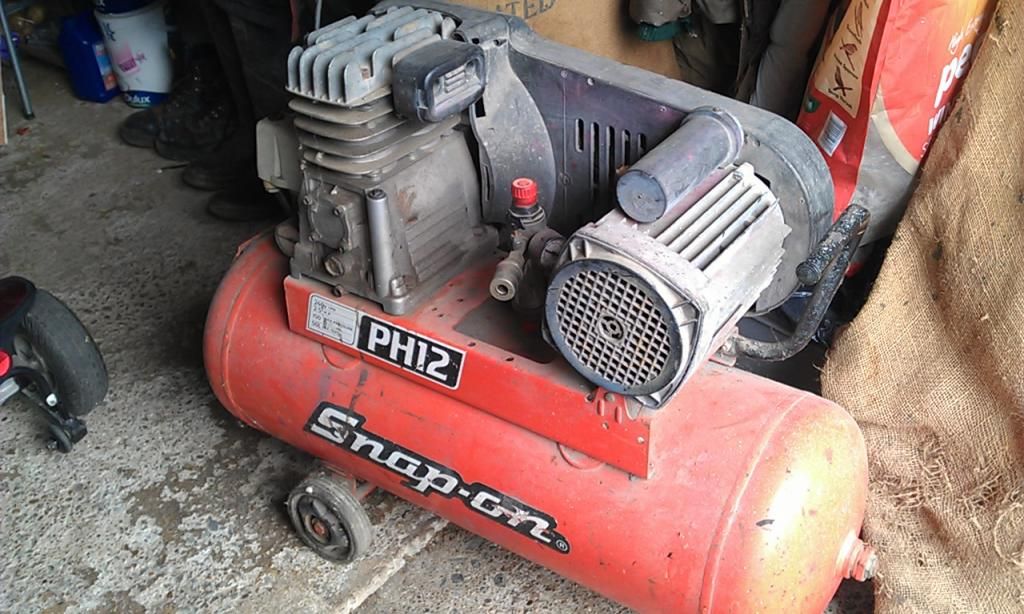
That'll help me out for my spraying.
Spent today removing the wheel arches and making a subframe jig to help fit the Heelboard Repair Panels.
I made the jig based on advice from Sonikk4 here mine will be slightly different as I am making it using lightweight angle iron.
First I made the end pieces and test fitted a cross bar:

Then I drilled a couple of holes towards the centre of the heelboard which will be used to ensure that the jig is re-fitted in the correct location and welded the front mount plates to the angle iron:
Then I lined up another piece of angle iron in line with the rear subframe rear mounting holes, instead of adding another plate i decided that I could simply drill through the angle iron. First I welded the LH front to rear angle iron to the first cross piece and once I have located and welded the RH front to rear piece I'll mark the rear subframe holes and remove the Jig to drill them and seam weld the jig.
Once the holes are drilled I'll bolt it all back in and then cut fit and weld another cross piece.
Like I said I am Just back of a weeks holiday in Menorca and while I was away I decided I need to get all the welding done and get it through an MOT in the next 3 weeks. My plan is to finish the rear end, sills and floor pan then get the car MOT'd and then finish off the rest (Engine Bay, Painting etc) so I will at least have a running project for the summer.
That's the plan anyway.
Edited by JonnyAlpha, 13 May 2014 - 08:57 PM.
Up Into Fourth
Posted 15 May 2014 - 09:37 PM
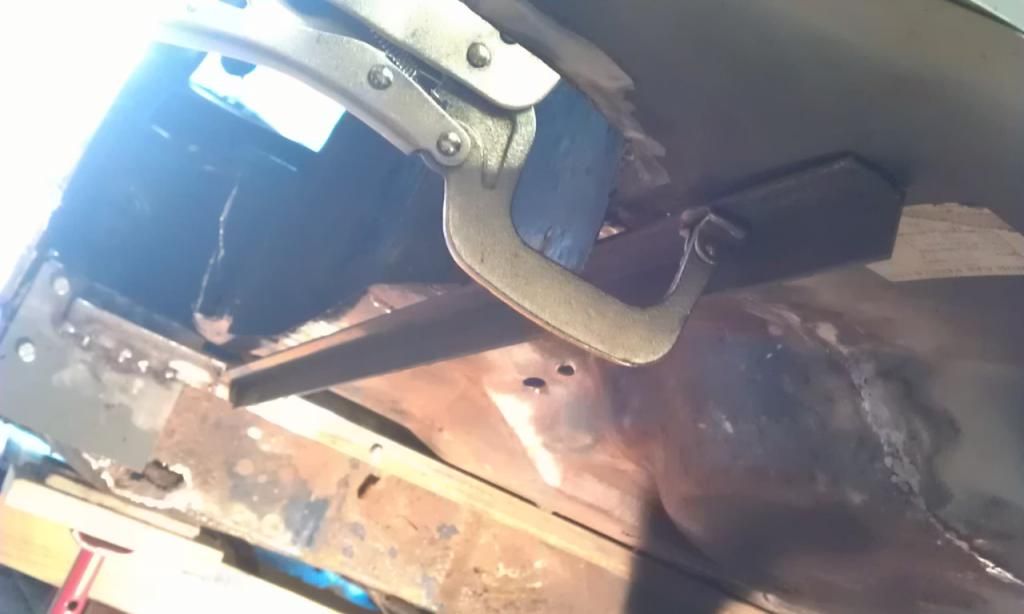
Finished the Subframe Jig this morning, not easy doing this single handed!!!
Here's a pic of it in the vice getting the last few bits welded up:
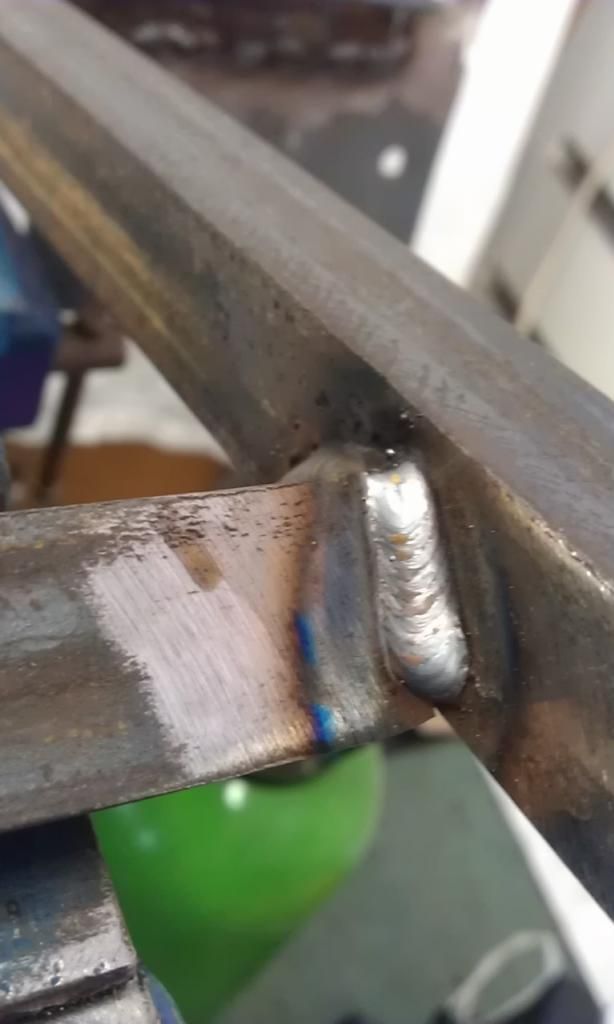
Weldings getting better as well, although I find welding thicker stuff a lot easier:
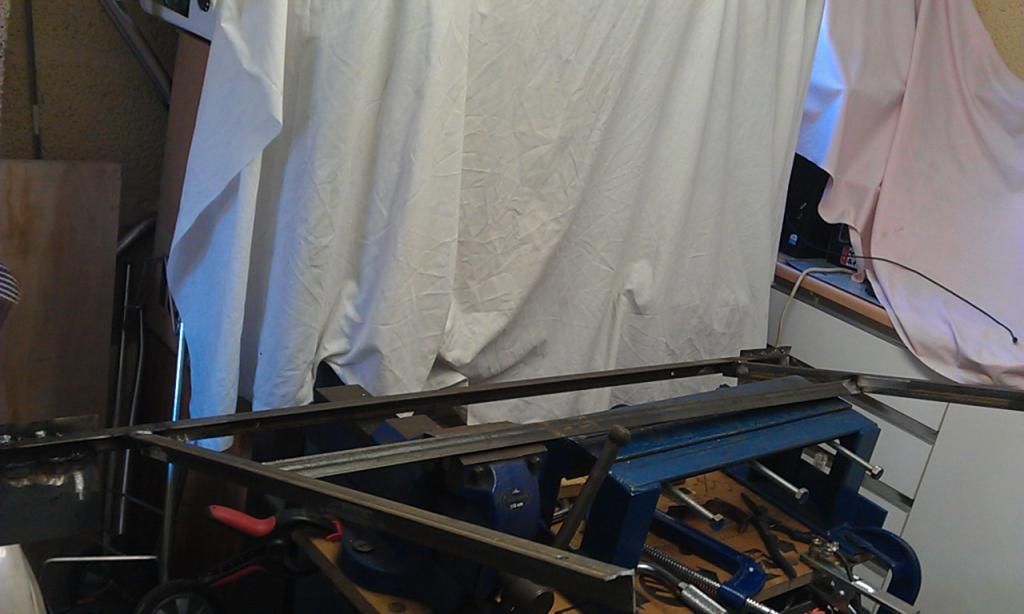
Not a lot of space in my garage as you can see:
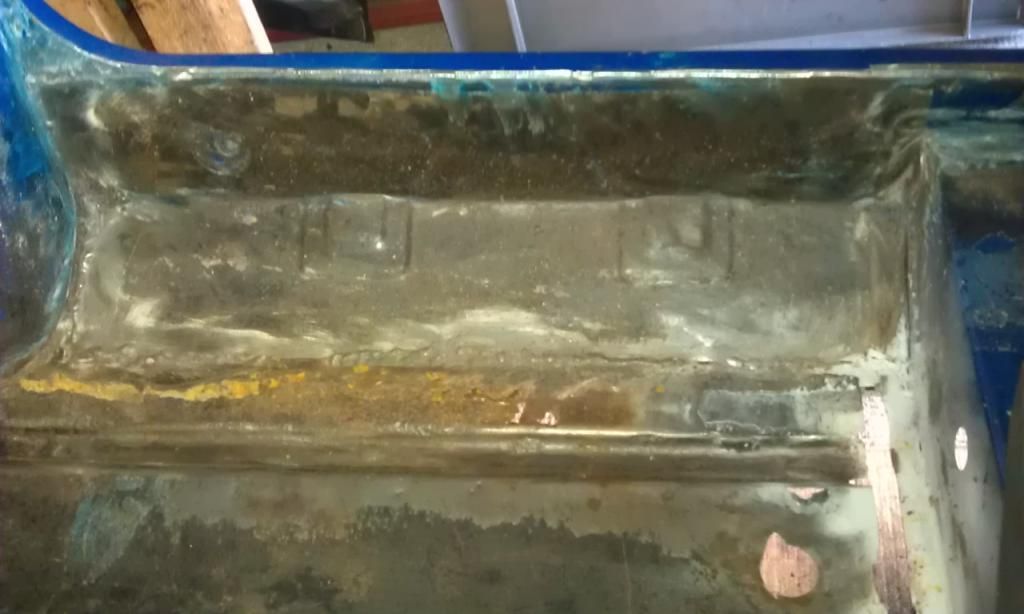
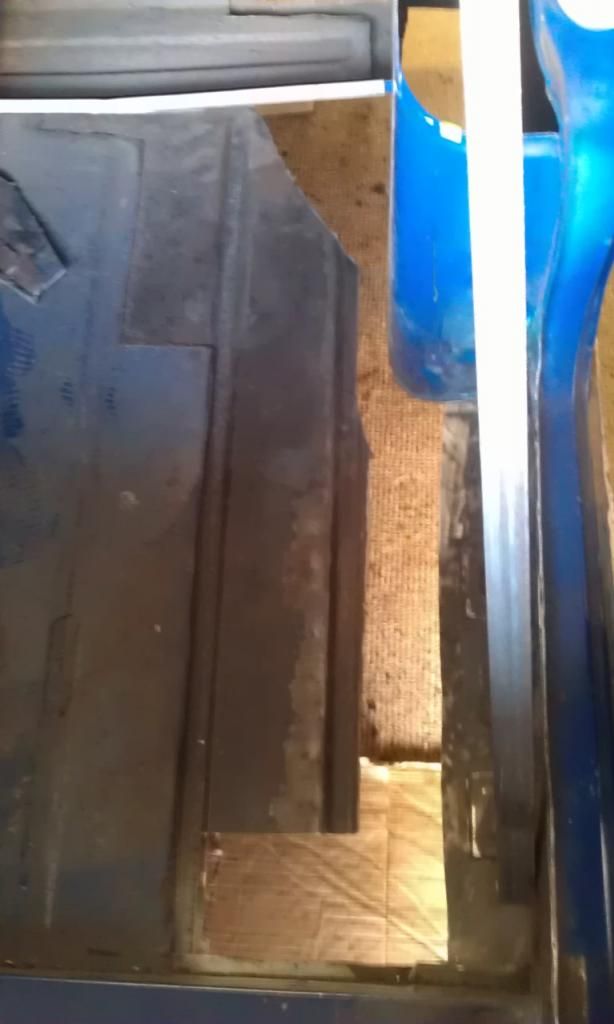
Here's a pic looking into the rear LH companion bin from the rear, taken as a reference:
And here's the Heelboard End LH marked up ready for chopping out:
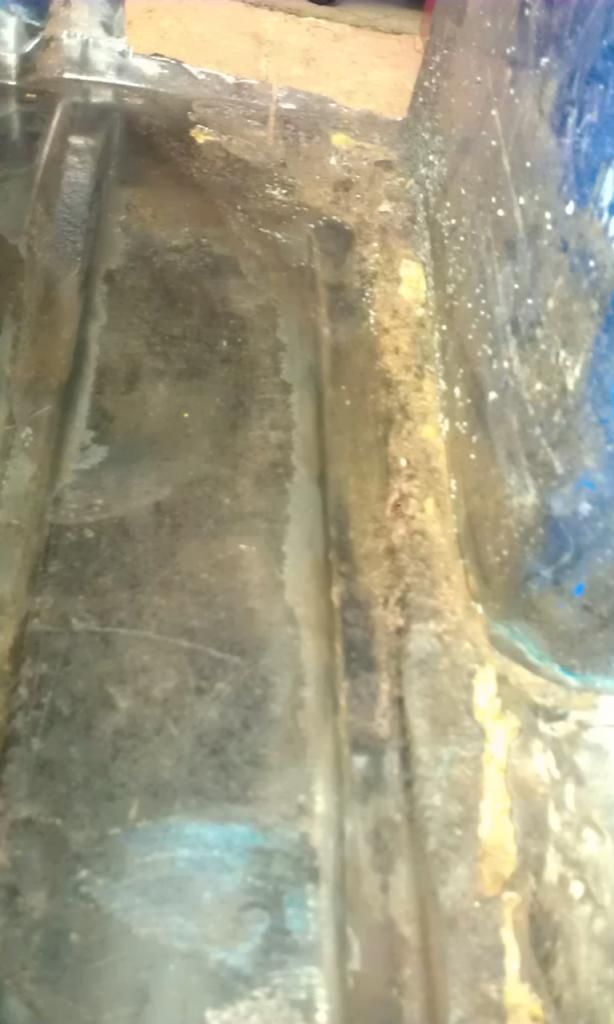
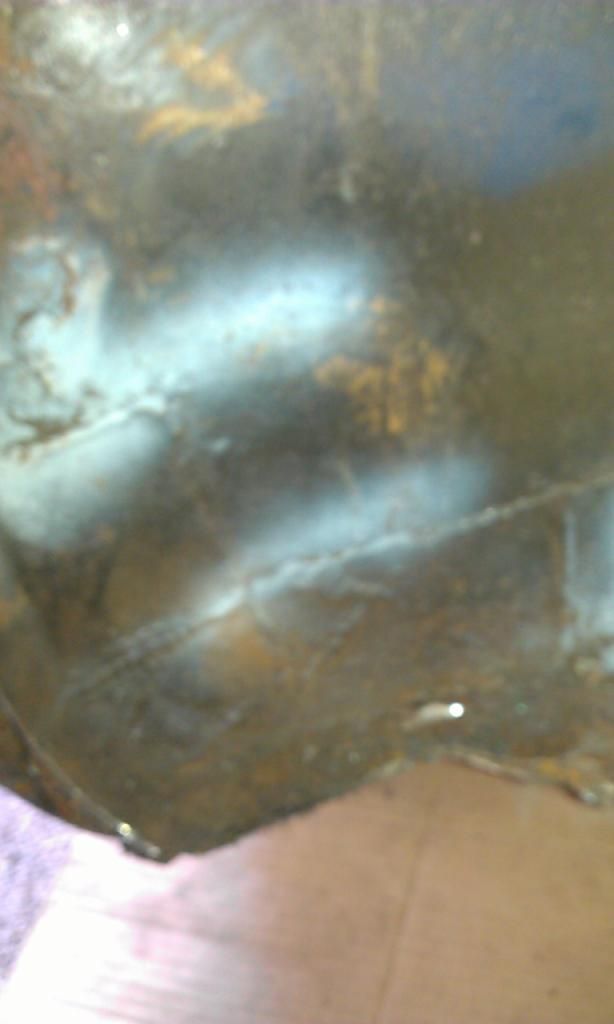
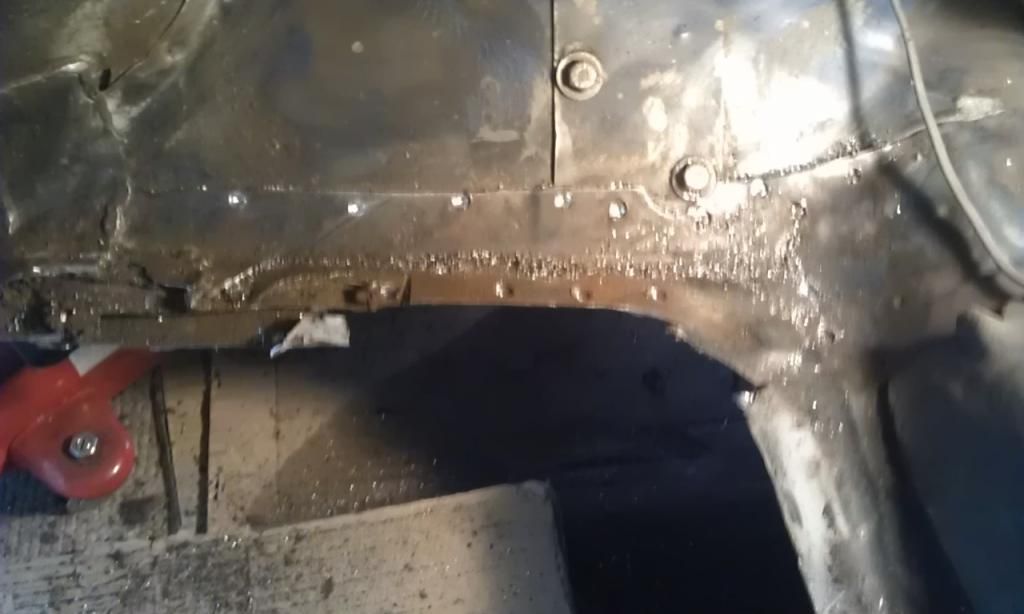
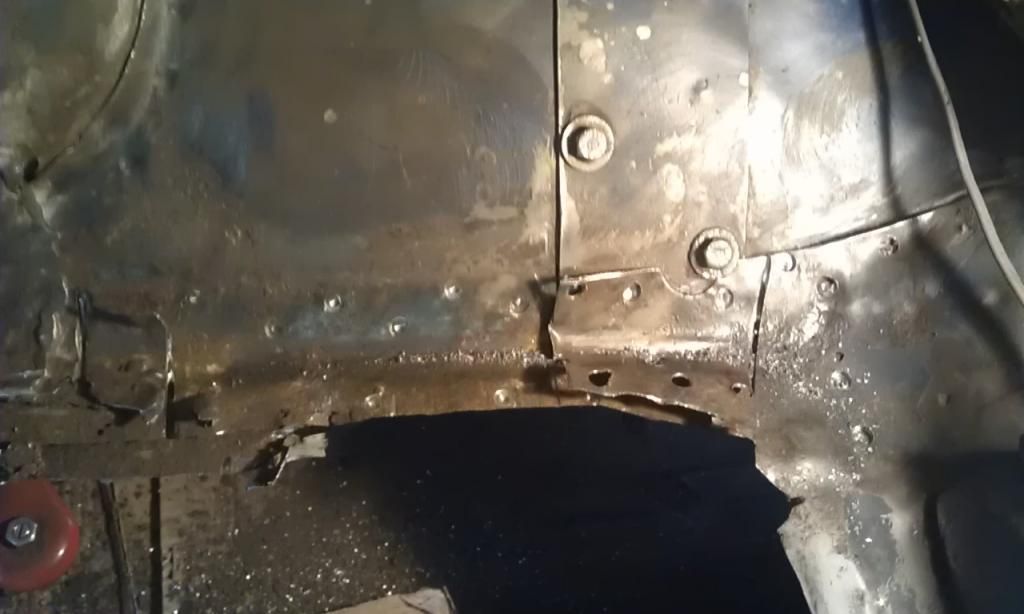
Spent most of the rest of the time cutting out previous owners BAD repairs, here's a pic from under the boot looking up LH side:
And here's a pic from inside looking towards the rear, had to chop out the LH side of the rear seat (all rotten):
Also will be chopping out the corner underneath in the floor, but good news I managed to find some clean metal along the Heelboard YIPEE!!
These look like an Inner Sill repair welded in some time ago, they are still pretty good but the floor where they are welded to is rotten so I not sure whether they will have to go along with the floor edge or whether I can just patch up the floor? Once I get the oversills and what's left of the old outer sills off I'll have a better idea:
More tomorrow
Up Into Fourth
Posted 18 May 2014 - 06:05 PM
Now for the bad news!!!
I spent a day cutting off the LH Oversill / Sill and Front LH Floor Pan however things went from bad to worse, I was kind of hoping not to have to do any more that the sills on both sides LH and RH and the LH Floor Pan having already done the RH A Panel / Flitch and Repaired the Door Post.
Here's the rear LH floor all tatty from the first flute out?
Now more cutting, first I cut off the LH over sill rear from the cross member backwards, I could not do it the proper way (drilling out spot welds as the whole thing had been seam welded to the door step!!!
As you can see I actually cut through the old sill as well:
At first it did not look too bad, then a closer look:
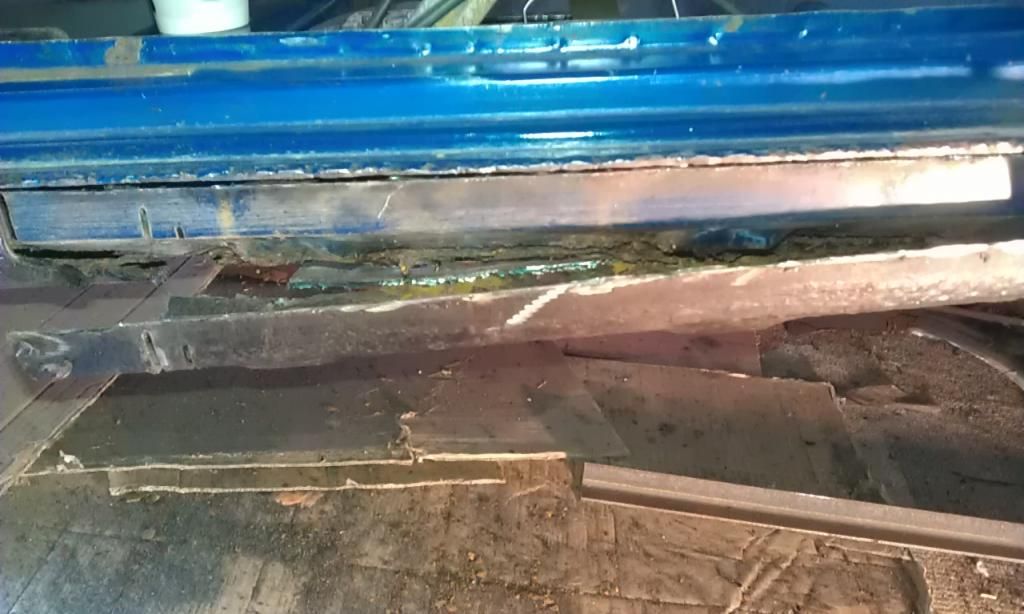
Here's the rear section of the sill looking from the rear of the car - shocking:

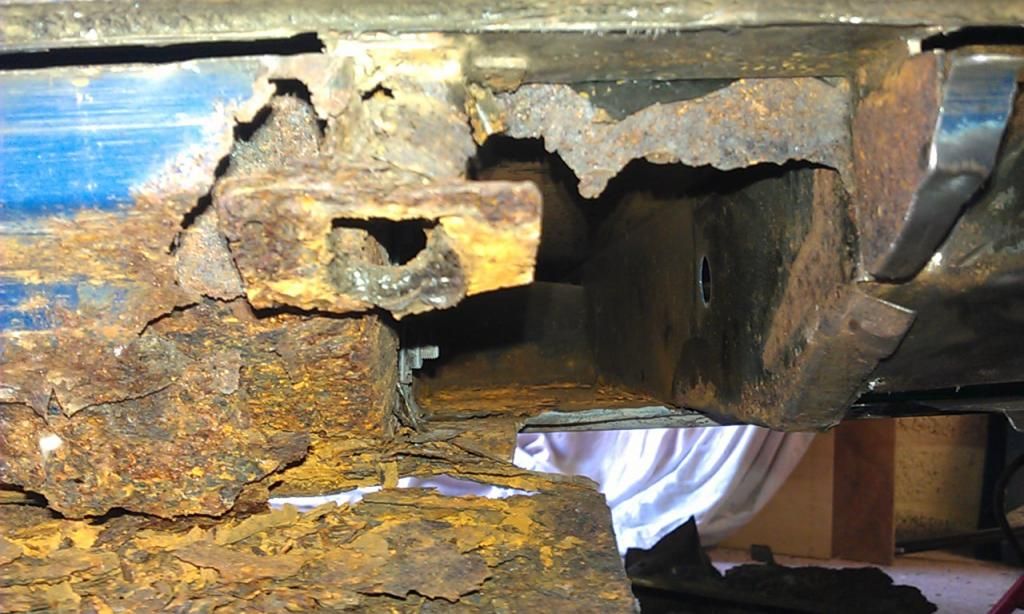
Then I cut off the front section geeeeeze I have never seen so much rust and clag in one place!!!
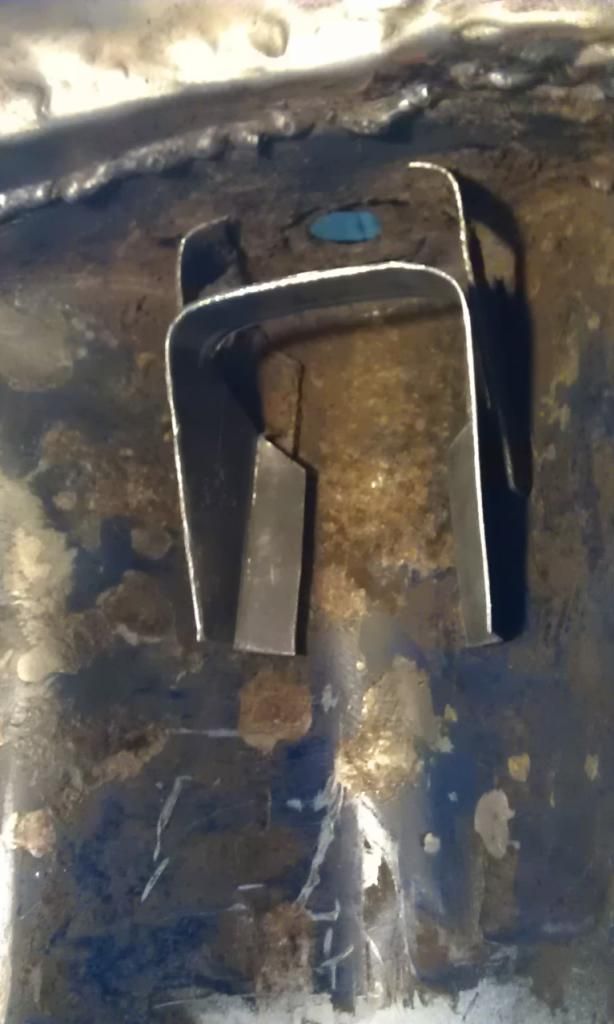
The slinging shoe bracket on the rear has all but rotted away, as has the jacking point towards the front, here's a closer look at the jacking point:
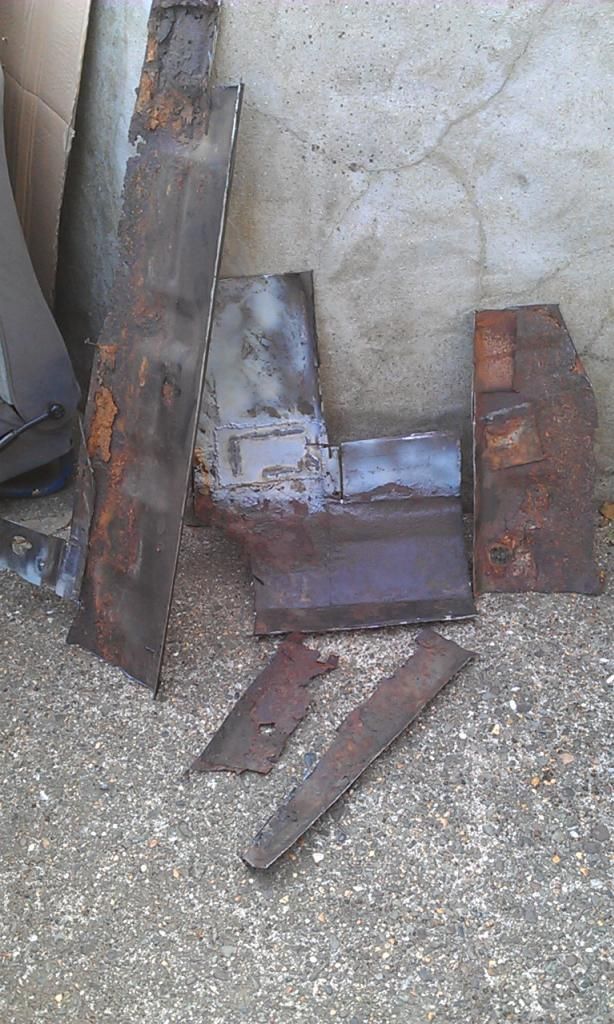
And here's a pile of metal that was cut out:
Here's part of front floor cut out, sorry not a good pic, very sunny here day before yesterday, needs a lot more trimming to get the floor pan of the Toe Board and the lower part of the Flitch has had about a thousand patches welded to it!!!
And here's what's been cut out of the rear floor:
Again not a good pic but this is the bottom of the Flitch from the inside of the Mini:
This all took the best part of a Hot Day to complete!!
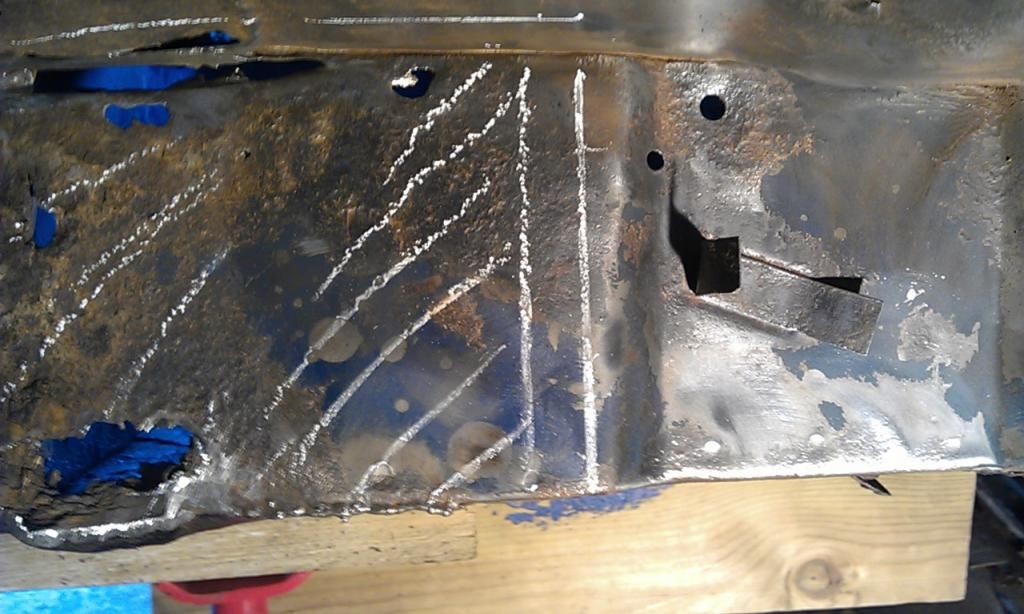
Started late yesterday as I spent the morning testing the old compressor that I have acquired, anyway spent the afternoon cleaning and cutting away at the front LH Floor Pan where it meets the Toe Board and removing the old repairs to the bottom of the Flitch so I can do a proper job on it.
First here is a better pic of the million patches to the bottom of the Flitch:
Sadly there are also a few noticeable holes on the way up to the dash and screen :-(
Next I wanted to remove the rest of the front floor pan where it meets the Toe Board but wanted to be careful not to damage any good parts of the Toe Board. To do this I had to locate the spot welds and drill them out, not easy. Here is a pic of what I thought was most of the spot welds out:
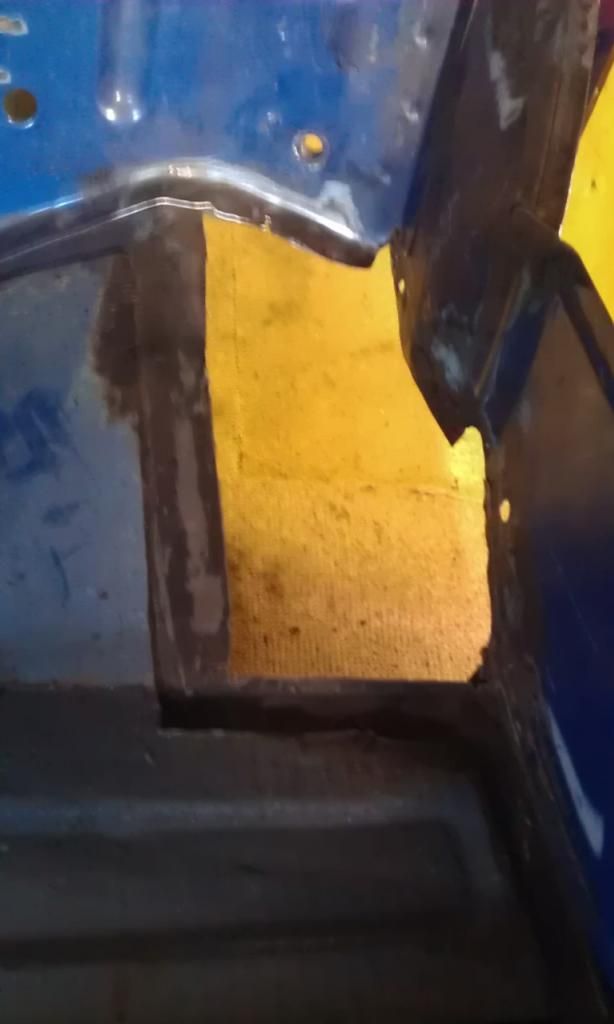
Next using a large old screwdriver or chisel after carefully cutting a line through the floor pan I started to lift up the remaining floor pan metal:
Here's a pic of part of it already removed, as I went I found more spot welds, this area has also been cleaned with a twisted knot attachment to check the integrity of the metal, the left hand portion of the Toe Board will need replacing:
My plan is to cut away the rotten areas of the Flitch Panel and repair it, then repair the Toe Board and Plug Weld it to the Flitch Panel, then drop in and Plug Weld the Floor Pan.
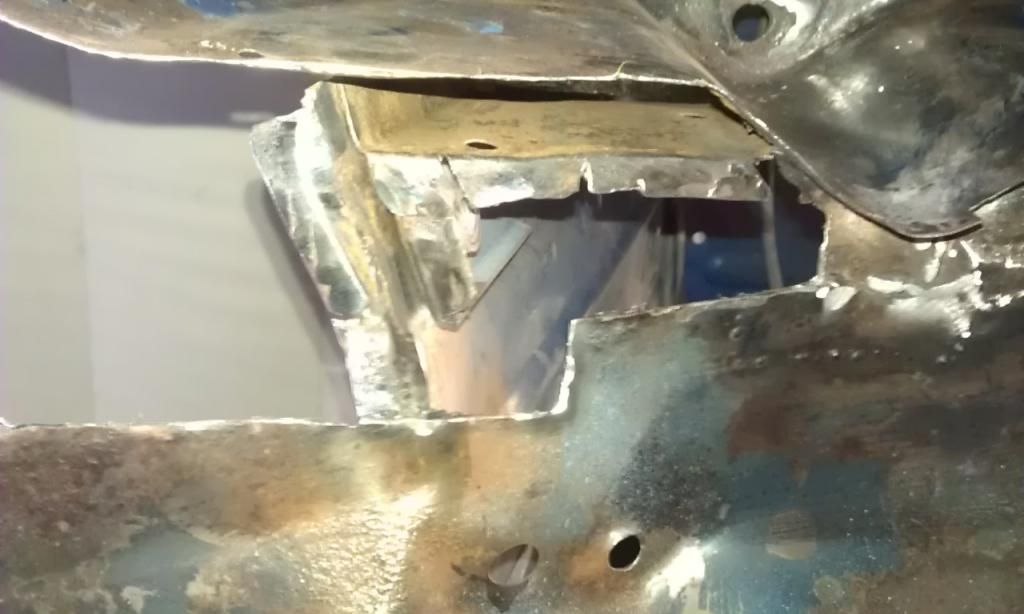
Here's a pic of most of the patches removed to reveal the damage to the Flitch Panel and Toe Board, the Toe Board in this pic looks complete, but actually that LH edge is a previous bad repair which will have to come off:

I am also trying to work out the best way of welding in the Floor Pan especially where it meets the cross member. The original floor sits under the cross member but the floor pan repair panels sit on top.
Also the flutes run under the cross member into the foot well however the part of the floor pan repair panel that sits against the cross member is flat, the flutes start about an inch into the floor pan.
When it is fitted there will be gaps where it sits on the flutes so unless I hammer the flutes flat I am not sure what to do unless I leave in part of the old floor and cut the floor pan repair panel so that it sits in better but joddling curves is not easy?
This won't look to good from underneath so I am trying to make a plan?
Edited by JonnyAlpha, 18 May 2014 - 06:10 PM.


0 members, 1 guests, 0 anonymous users


