Absolutely fantastic - I have just read the entire thread. Be proud! 

1971 Clubman Estate....now Turbo
Started by
woodenman23
, May 23 2011 10:34 PM
297 replies to this topic
#211

MrBounce
-

- TMF+ Member
-

- 2,685 posts
Up Into Fourth
- Location: The Manroom in Kesgrave
Posted 17 January 2016 - 03:47 PM
#212
The Clubby Hubby
-

- Members
-
- 555 posts
Super Mini Mad
- Location: south bucks
- Local Club: Friends with minibitz
Posted 19 January 2016 - 10:21 PM
Looks awesome mate
#213
phil hill
-

- TMF+ Member
-
- 616 posts
Super Mini Mad
- Location: Lincoln, UK
Posted 21 January 2016 - 10:02 AM
Like your wiring diagrams, very professional.
How did you get on with that nylon over-braid ?? I did a loom for an Alfa-Sud race car with it and found it a PITA to be honest.
Phil.
#214
woodenman23
-
- Noobies
-
- 299 posts
Mini Mad
Posted 25 January 2016 - 12:01 AM
Not sure if many people are interested in trimming but seeing as there isn't that much on here about it I thought I'd keep you updated with what i'm doing.
I took a template of the old foams and started to cut the rough shape with a shape knife and electric kitchen knife.


Marked where I wanted to shape the foam. I used an angle grinder with a fairly course sanding disc to shape the foam.


Onto the foam I marked where my seams and notches were going to go. The notches are used as an aid when sewing to make sure i'm not pulling the material and that the pats are lining up.

I then cover the foam with a sticky vinyl film and transfer my seam lines and notches onto it. This is the start of my cover templates.
This then gets cut into its individual panels and transferred to card.


The centre panels of my seats are going to be done in perf leather.


#215
woodenman23
-
- Noobies
-
- 299 posts
Mini Mad
Posted 25 January 2016 - 12:08 AM
I have also been woking on the squab seat frame. Originally there was a bit of card attached to the back of the frame, this was really misshapen. To prevent this from happening again and to give me a firm base to foam on I have replaced it with the thinnest steel I could get. This should also give me a nicer shape to the back once the cover is fitted.


#216
woodenman23
-
- Noobies
-
- 299 posts
Mini Mad
Posted 25 January 2016 - 12:14 AM
Like your wiring diagrams, very professional.
How did you get on with that nylon over-braid ?? I did a loom for an Alfa-Sud race car with it and found it a PITA to be honest.
Phil.
I couldn't tell you, the wiring has been all done thanks to my dad. It is one of the few things I haven't done myself, I wouldn't even know where to start.
#217
Jared Mk3
-

- Members
-
- 1,974 posts
Has a small thing but it does make a difference
- Location: Kokstad, South Africa
- Local Club: MOCKZN
Posted 25 January 2016 - 07:09 AM
Really like the write up on doing the seats.
#218
The Clubby Hubby
-
- Members
-
- 555 posts
Super Mini Mad
- Location: south bucks
- Local Club: Friends with minibitz
Posted 25 January 2016 - 08:37 AM
Look forward to seeing more of this great stuff
#219
minimissions
-

- Members
-
- 3,427 posts
Up Into Fourth
- Location: North West
- Local Club: M.M.O.C
Posted 26 January 2016 - 06:46 AM
Looks great love all the touches to the interior.
#220
woodenman23
-
- Noobies
-
- 299 posts
Mini Mad
Posted 28 January 2016 - 07:10 PM
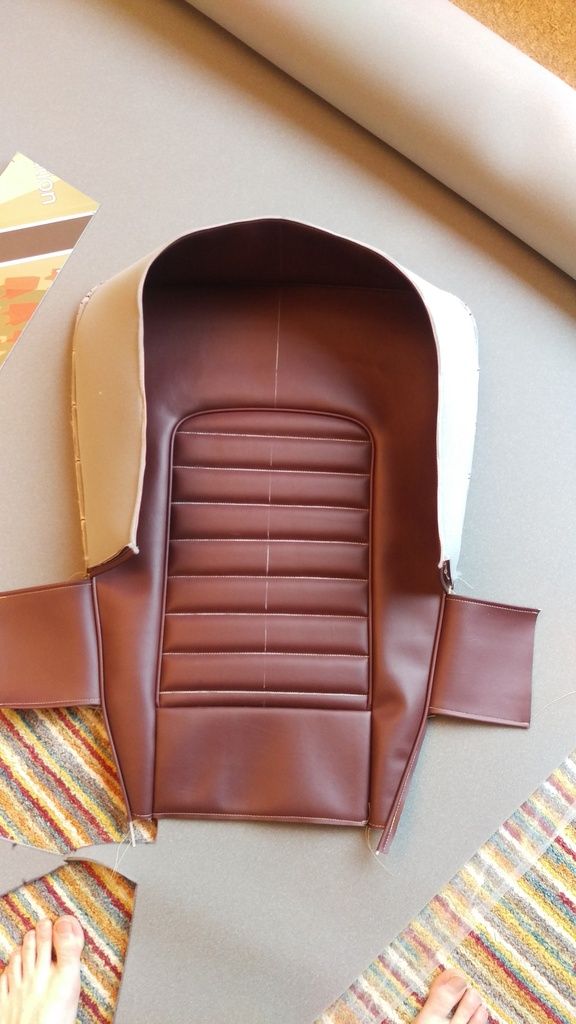
Before making a cover in expensive leather I wanted to one in vinyl. Although I know taking a pattern using the film method will give me a cover that fits it won't be perfect. I'll use this trial to find out any issues with the patterns.
Before I can cut out my patterns I need to add my sewing and handling tolerances. Add 8mm for sewn lines and 30mm for the returned edges around the underside of the seat base.


Knocked this up quickly, it isn't sewn to the same method as the final one will be but that takes too long for a trial.

Piping is then sewn on, I sew this wide so that this line of stitches won't be visible once the cover is all together.

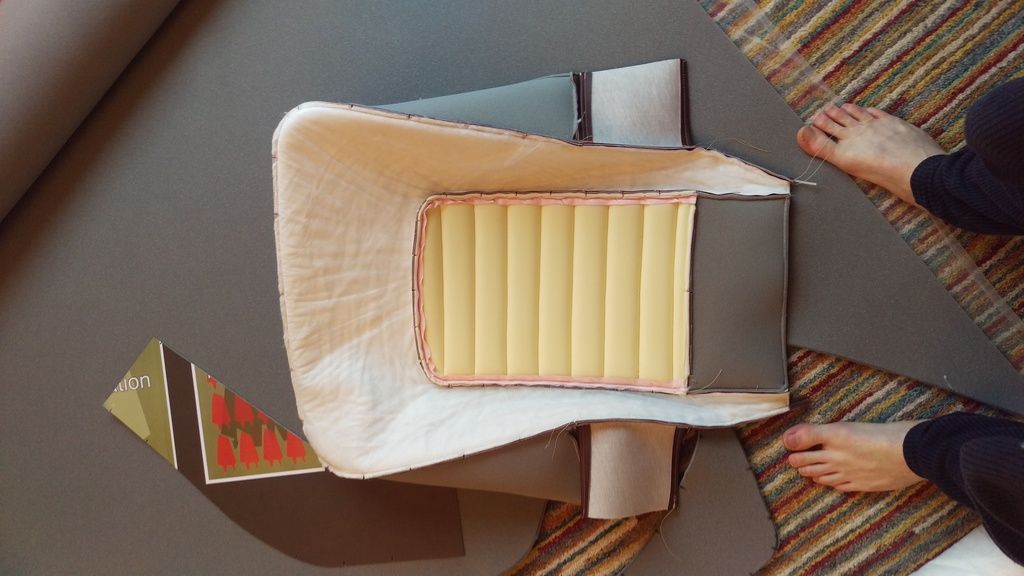
Wadding was sewn to the big top part and the part that wraps around the edge. Again this is stitched at 4mm instead of 8mm to prevent it from being visible.

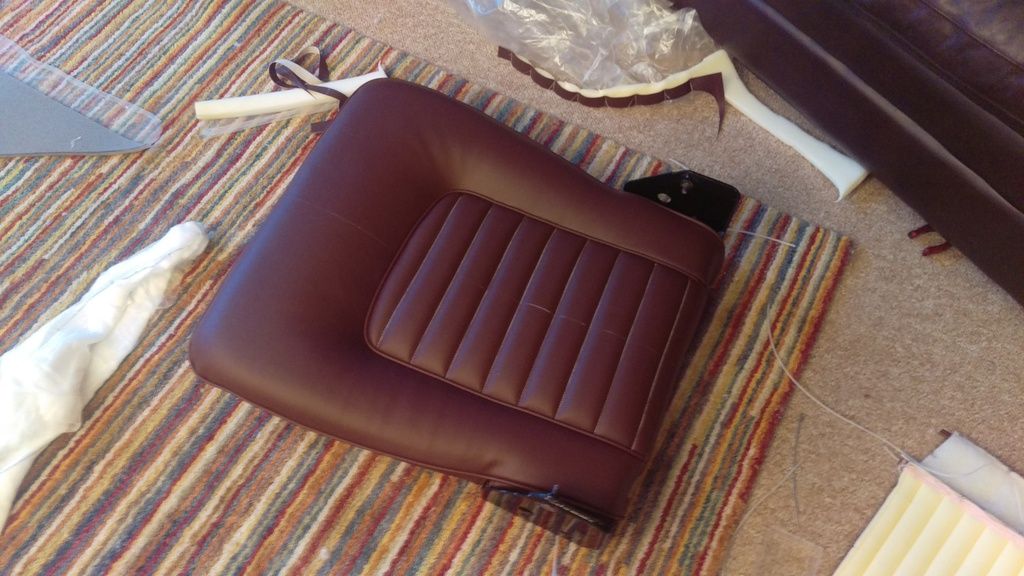
Then it was time to sew it altogether this time at 8mm.


Not perfect but shouldn't take too much to get it there. I have seen people selling worse and this is yet to have any development, straight from the film pattern.
Now that there is a cover on the foam I have noticed that the foam is a little off from side to side.


#221
woodenman23
-
- Noobies
-
- 299 posts
Mini Mad
Posted 28 January 2016 - 07:17 PM
I have also knocked up patterns for the rear companion bins and a template for my dash. For the dash I'm waiting for some alcantara to arrive so I can get on and cover it the bins the leather is cut out just waiting for dad to finish the wiring in the back of the car before I glue them in place. The last thing I want is it to get damaged.


#222
minimissions
-
- Members
-
- 3,427 posts
Up Into Fourth
- Location: North West
- Local Club: M.M.O.C
Posted 29 January 2016 - 10:05 AM
Top work those seats will look amazing!!
#223
The Clubby Hubby
-
- Members
-
- 555 posts
Super Mini Mad
- Location: south bucks
- Local Club: Friends with minibitz
Posted 29 January 2016 - 10:46 AM
Proper nice this will be great effort
#224
woodenman23
-
- Noobies
-
- 299 posts
Mini Mad
Posted 31 January 2016 - 07:19 PM
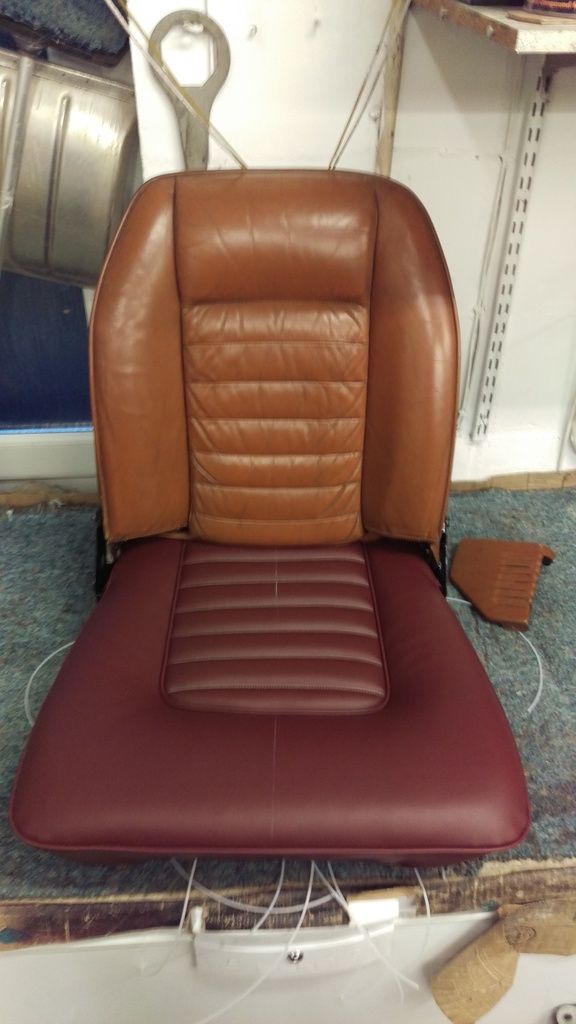
Spent another weekend working on the seat base, made a number of pattern changes. The changes made a massive difference when it came to sewing. Everything lines as it should, no need to stretch the material to get the notches to match. I still reckon I can get it better with some slight alterations.


#225
woodenman23
-
- Noobies
-
- 299 posts
Mini Mad
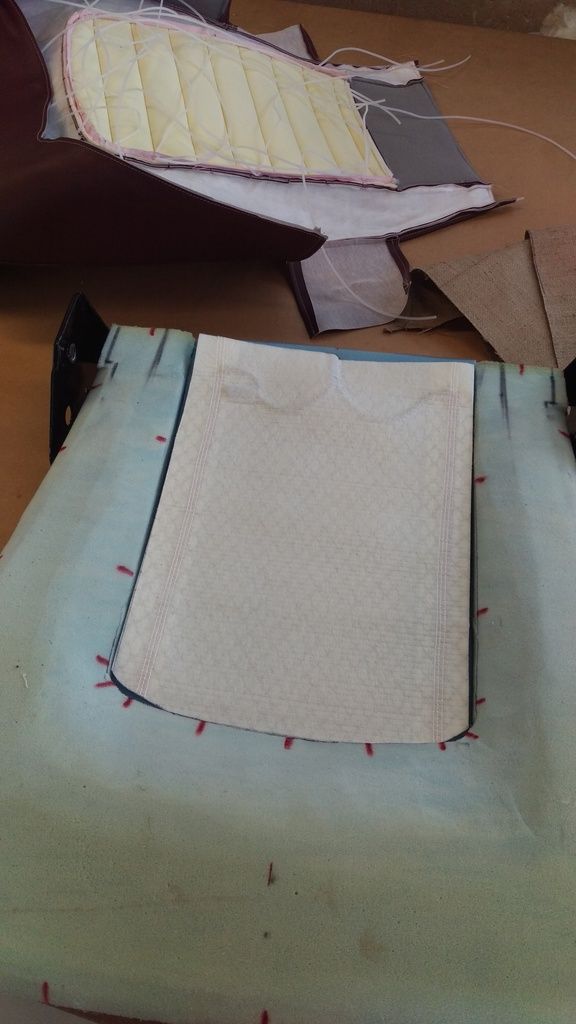
Posted 01 February 2016 - 09:14 PM
I have made a couple more small alterations to the patterns for the seat bases, now I'm happy and all going well should be able to work on making the final leather covers in the evenings/weekend.
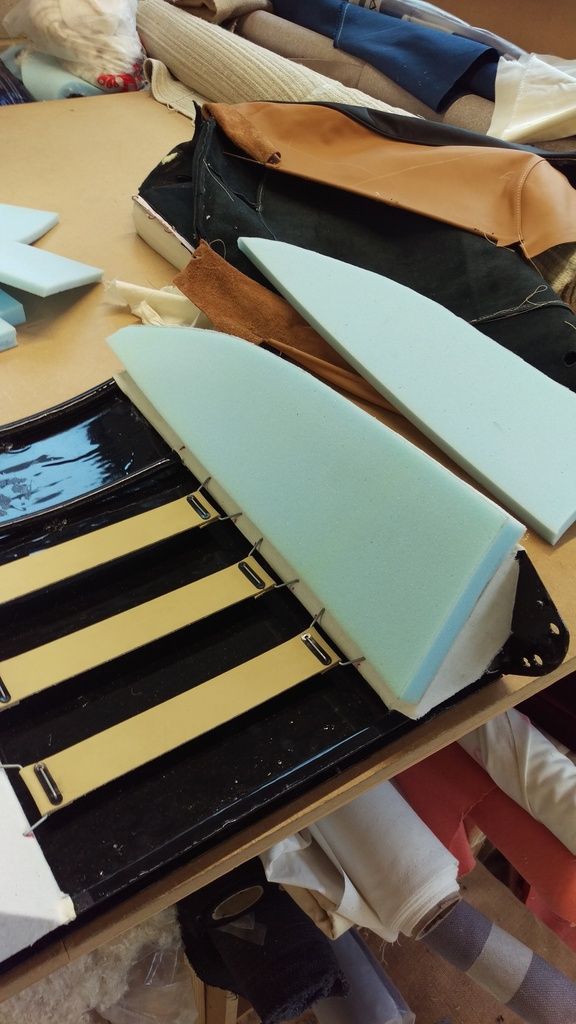
I'm making my front seats heated so I have also trimmed the heater mats to fit and put a hole in the foam to run the cables.
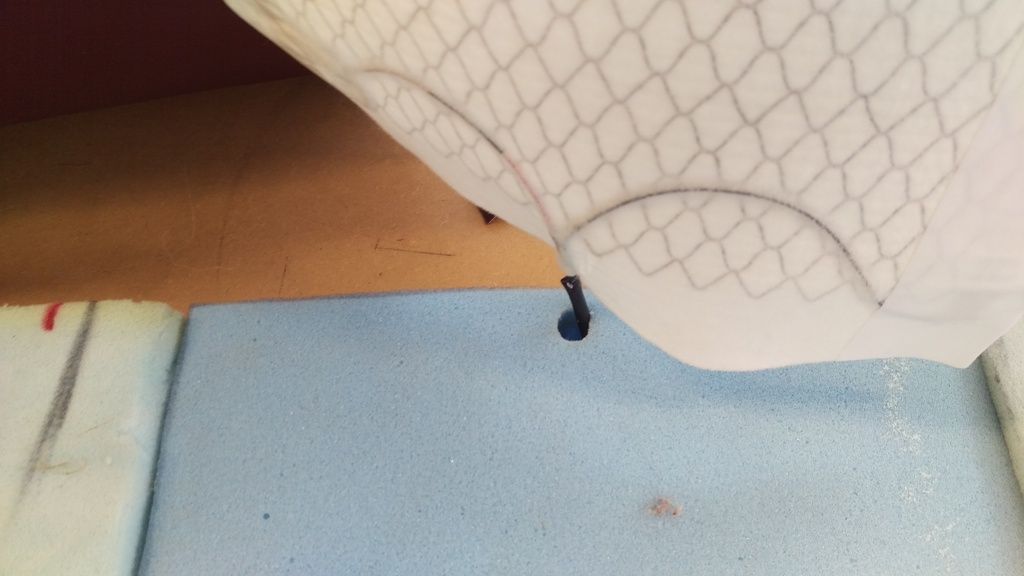
Also started to make foams for the squabs.
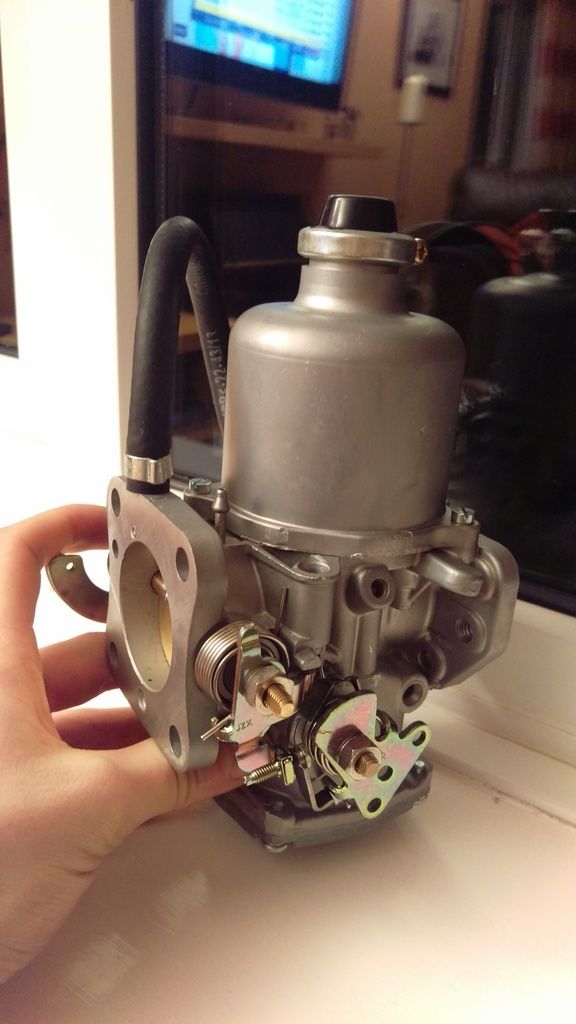
One fully rebuilt turbo carb
I'm making my front seats heated so I have also trimmed the heater mats to fit and put a hole in the foam to run the cables.


Also started to make foams for the squabs.

One fully rebuilt turbo carb


3 user(s) are reading this topic
0 members, 3 guests, 0 anonymous users


