
Wow, awesome progress mate. The car is looking fantastic!


Project Trig - More Fresh Powdercoat!
Started by
Mini 360
, Sep 06 2011 07:30 PM
853 replies to this topic
#197

Mini 360
-
- Members
-

- 4,933 posts
Up Into Fourth
- Location: Aberdeenshire
- Local Club: Independent
Posted 13 February 2012 - 05:43 PM
This is cracking!, followed this from the start and that paint job is mint. Just wish i had mine to do but parents arent so sure. Im working on it. But its a great help and inspiration. Best of luck with the rebuild cant wait to see this done!
Read this out to my mum and she said 'Tell him he could do a lot worse with his money at his age' which is very true. I don't smoke, drink (that often) and Im careful with my money (don't waste it on random crap) which has enabled me to do this out of my own pocket rather than the bank of mum and dad.
Haha that is very true :) i dont drink much either or smoke. Most of it will be my money and all my efforts. Dont want help want to do it all myself as then it truly is MY car!!
Once again though, great project cant wait to see it done!
Exactly! Too many folk are given a brand spanking new car and they abuse it. Building your own makes you appreciate it so much more
Wow, awesome progress mate. The car is looking fantastic!
Thanks!
#198
cjg199
-

- Noobies
-
- 148 posts
Mini Mad
- Location: East Midlands
Posted 14 February 2012 - 11:36 AM
This is cracking!, followed this from the start and that paint job is mint. Just wish i had mine to do but parents arent so sure. Im working on it. But its a great help and inspiration. Best of luck with the rebuild cant wait to see this done!
Read this out to my mum and she said 'Tell him he could do a lot worse with his money at his age' which is very true. I don't smoke, drink (that often) and Im careful with my money (don't waste it on random crap) which has enabled me to do this out of my own pocket rather than the bank of mum and dad.
Haha that is very true :) i dont drink much either or smoke. Most of it will be my money and all my efforts. Dont want help want to do it all myself as then it truly is MY car!!
Once again though, great project cant wait to see it done!
Exactly! Too many folk are given a brand spanking new car and they abuse it. Building your own makes you appreciate it so much more
Very true!! Not only that but when it goes wrong, thay just have a box with 4 wheels full of electronics that has to go to a mehcanics. Me, well i can fix mine in my Garage

#199
Mini 360
-
- Members
-
- 4,933 posts
Up Into Fourth
- Location: Aberdeenshire
- Local Club: Independent
Posted 15 February 2012 - 11:05 PM
Time for an update!
Went out about 8 to get the floor painted in hammerite to give it a bit of added protection. What a mare of a job! Got most of it done apart from the parts where the supporting wheels are holding it up. Will have to go over it again as I know some bits are thinner than others which isnt good enough!
Not really an exciting photo but here you go.....

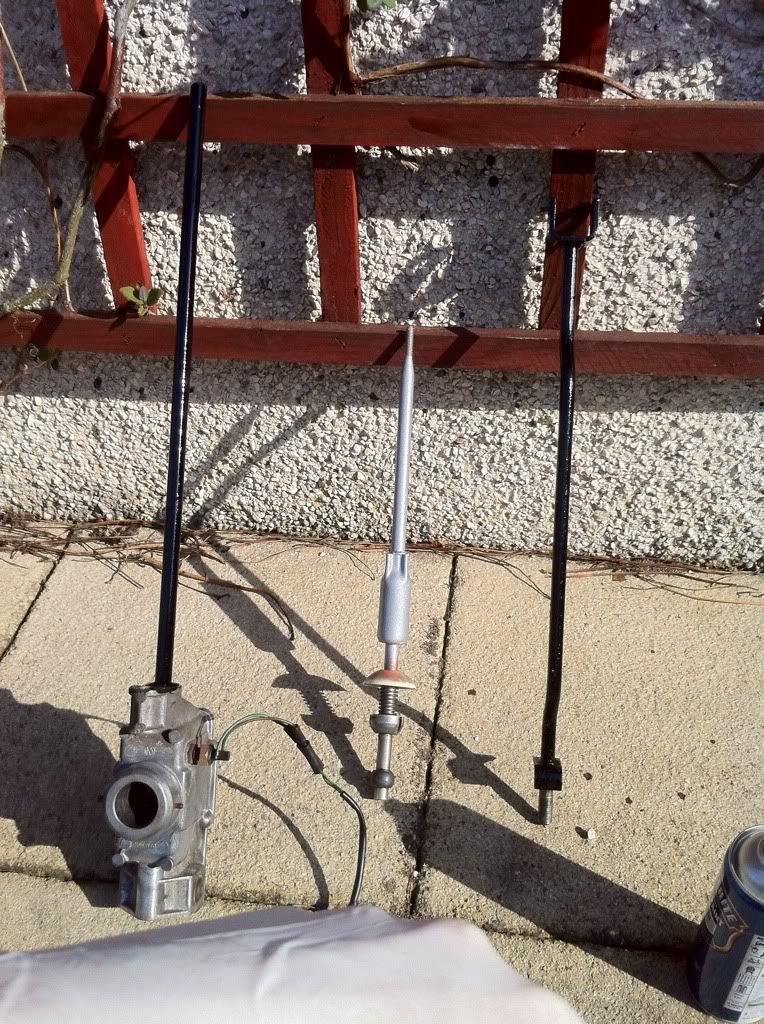
and seeing as I had the Hammerite out I thought I might as well get going on my other radius arm. It was covered in surface rust (as you would expect) so stripped that off with the bench wire wheel, quick rerust with the Deox Gel, degrease and then a coat of paint. Its come up really well!

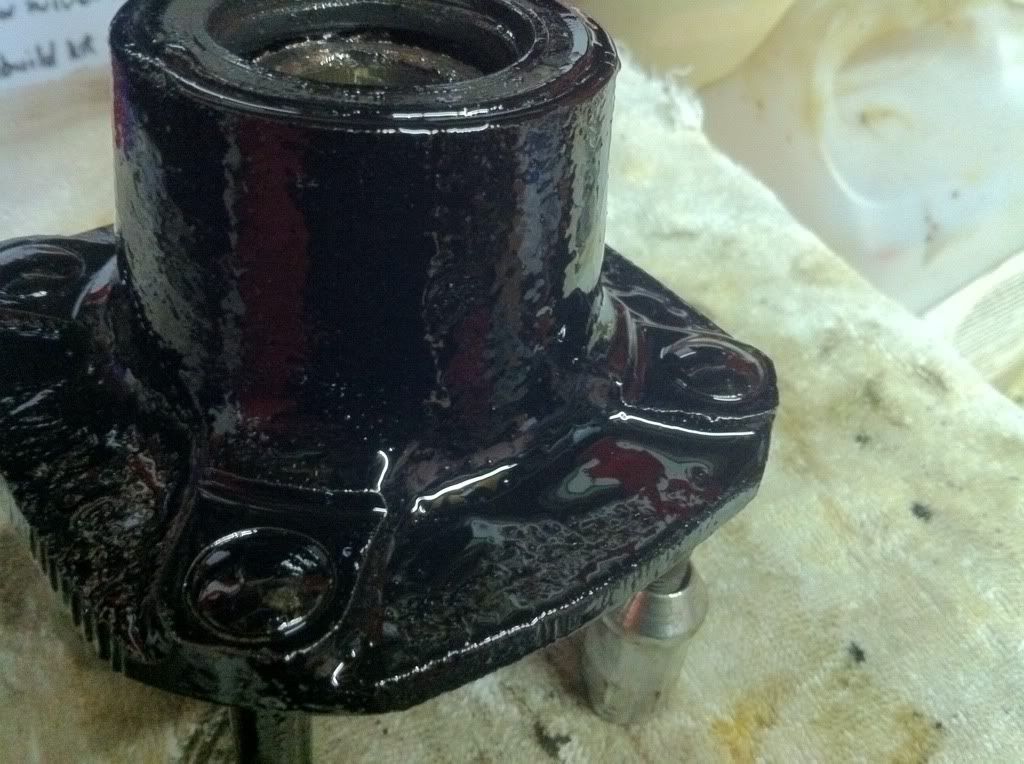
Also did the hub whilst I was at it.
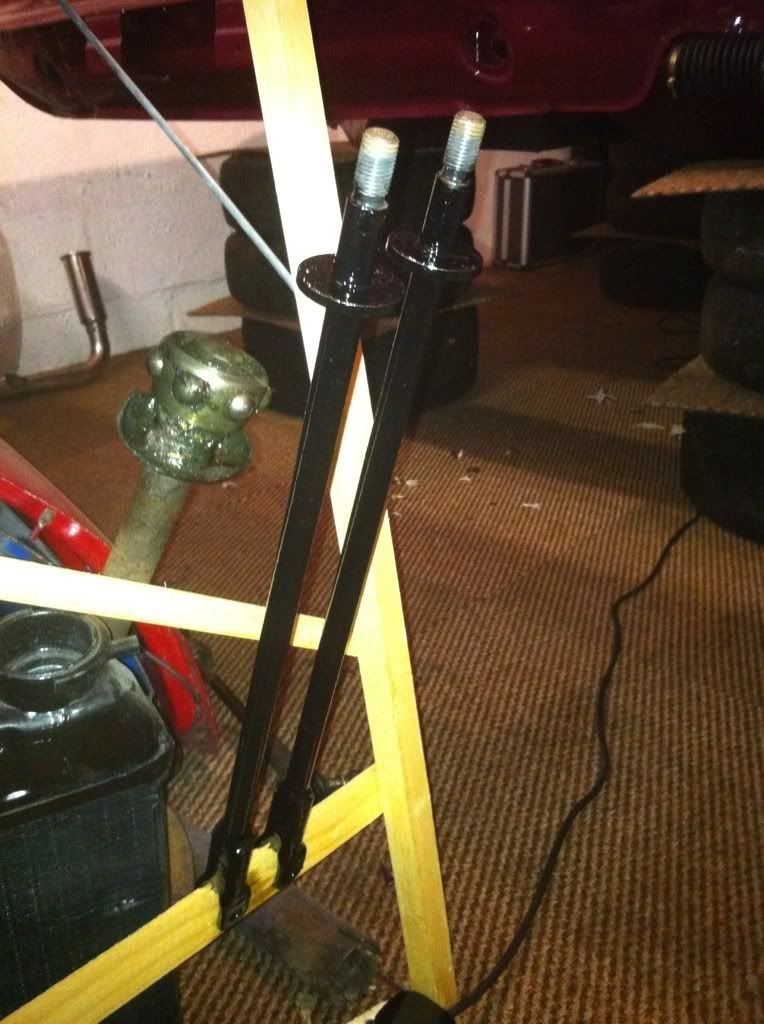
Also I managed to straighten out my tie bars, which were pretty out of shape as on most Minis, with my special precision impact tool (MASSIVE HAMMER)
So with these parts done thats all the suspension stuff tidied up and painted ready for subframes. Just need to get them blasted first but don't have the time/funds at the mo!
Went out about 8 to get the floor painted in hammerite to give it a bit of added protection. What a mare of a job! Got most of it done apart from the parts where the supporting wheels are holding it up. Will have to go over it again as I know some bits are thinner than others which isnt good enough!
Not really an exciting photo but here you go.....
and seeing as I had the Hammerite out I thought I might as well get going on my other radius arm. It was covered in surface rust (as you would expect) so stripped that off with the bench wire wheel, quick rerust with the Deox Gel, degrease and then a coat of paint. Its come up really well!
Also did the hub whilst I was at it.
Also I managed to straighten out my tie bars, which were pretty out of shape as on most Minis, with my special precision impact tool (MASSIVE HAMMER)
So with these parts done thats all the suspension stuff tidied up and painted ready for subframes. Just need to get them blasted first but don't have the time/funds at the mo!
#200
Mini 360
-
- Members
-
- 4,933 posts
Up Into Fourth
- Location: Aberdeenshire
- Local Club: Independent
Posted 24 March 2012 - 11:41 PM
Well tomorrow I plan to get some work done on the car as its a rare occurrence I am off the same day as my dad.
In the meantime check out the third video in the series that Ive just finished off. Click on it to view in HD (recommended)
Enjoy folks!
In the meantime check out the third video in the series that Ive just finished off. Click on it to view in HD (recommended)
Enjoy folks!
#201
Andrew O
-

- Members
-
- 1,425 posts
Previously known as Andrewo330.
Posted 25 March 2012 - 07:36 PM
What a video
#202
Mini 360
-
- Members
-
- 4,933 posts
Up Into Fourth
- Location: Aberdeenshire
- Local Club: Independent
Posted 25 March 2012 - 10:43 PM
Update! Small one but progress nonetheless!
Had a day off work and I forced myself to take advantage of the fine day and not sit inside doing uni work. Im glad I did as I thoroughly enjoyed myself.
Got some supplies in (Hammerite mainly...) so got going with a few bits. I started by painting the bits I missed on the floor. turns out I hadn't missed much but it was good to top up for extra protection. No pics of this but....its a floor.....
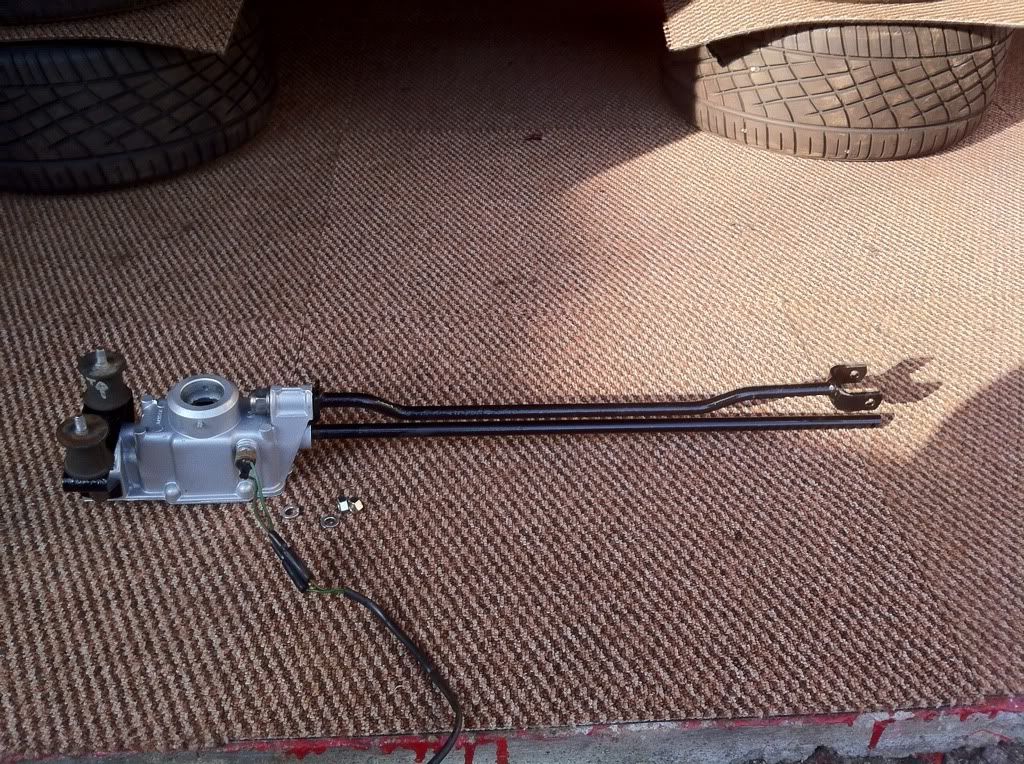
I had the gear linkage on the bench anyway so split it all down and cleaned and painted everything. Reusing the bobbins as they were in perfect, oil covered condition I took advantage of the fine day and let them dry off outside. Didn't take long with temps hitting 21C!
and then reassembled with stainless bolts/washers throughout! I fitted it to the car and held the linkage that attaches to the gearbox with a tie wrap for now to keep it from stretching the bobbins.
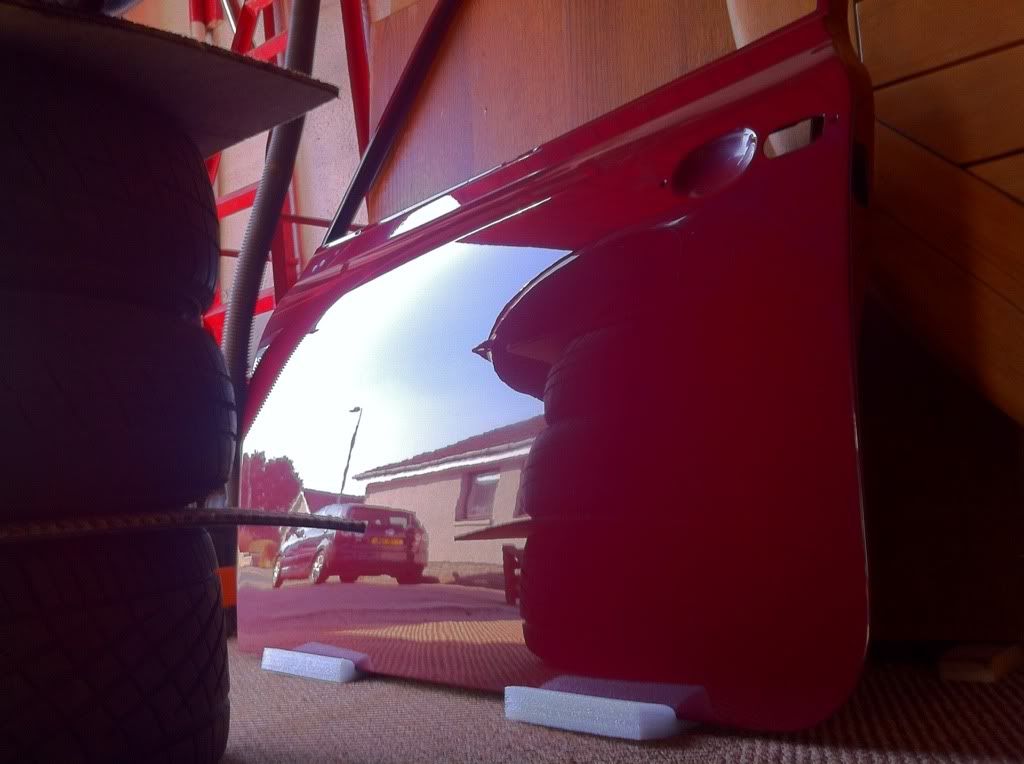
Also when I was under the car I couldn't resist taking a shot of the doors reflection!
After that I took a look at my front subframe in more detail. Decided Im going to degrease it, wire brush drill it and then Deox Gel the few rusty bits and then paint it up. Its not too far gone for blasting so will see how this goes instead :) Should get that done tuesday/wednesday evening all going well....
So as I say, not much progress but god did it feel good to get back to work on the car!
Had a day off work and I forced myself to take advantage of the fine day and not sit inside doing uni work. Im glad I did as I thoroughly enjoyed myself.
Got some supplies in (Hammerite mainly...) so got going with a few bits. I started by painting the bits I missed on the floor. turns out I hadn't missed much but it was good to top up for extra protection. No pics of this but....its a floor.....
I had the gear linkage on the bench anyway so split it all down and cleaned and painted everything. Reusing the bobbins as they were in perfect, oil covered condition
I took advantage of the fine day and let them dry off outside. Didn't take long with temps hitting 21C!and then reassembled with stainless bolts/washers throughout! I fitted it to the car and held the linkage that attaches to the gearbox with a tie wrap for now to keep it from stretching the bobbins.
Also when I was under the car I couldn't resist taking a shot of the doors reflection!
After that I took a look at my front subframe in more detail. Decided Im going to degrease it, wire brush drill it and then Deox Gel the few rusty bits and then paint it up. Its not too far gone for blasting so will see how this goes instead :) Should get that done tuesday/wednesday evening all going well....
So as I say, not much progress but god did it feel good to get back to work on the car!
#203
AndyMiniMad.
-

- Members
-
- 3,290 posts
Up Into Fourth
- Location: Under The Bonnet.
Posted 26 March 2012 - 07:15 AM
Andy Ive got a kwick shift and chrome gear lever that would look super in your nice shiny rod change thingy..A red anodised one!! Pm me if your interested..Just pay the postage and a couple of beer tokens.
#204
Mini 360
-
- Members
-
- 4,933 posts
Up Into Fourth
- Location: Aberdeenshire
- Local Club: Independent
Posted 26 March 2012 - 10:16 AM
Andy Ive got a kwick shift and chrome gear lever that would look super in your nice shiny rod change thingy..A red anodised one!! Pm me if your interested..Just pay the postage and a couple of beer tokens.
Thanks Andy but I've already got a quick shift sitting here waiting to go on! Its going to be topped off with my old No.7 Pool ball gear knob too
#205
AndyMiniMad.
-
- Members
-
- 3,290 posts
Up Into Fourth
- Location: Under The Bonnet.
Posted 26 March 2012 - 11:39 AM
Excellent!! good to see your getting stuck into this again...What is it about mini projects?...no matter how hard we try, there is always something that crops up in the middle of the project that slows the whole thing down..
#206
rosstolley
-
- Noobies
-
- 111 posts
Mini Mad
Posted 26 March 2012 - 07:59 PM
Just read through your project here pal... Really nice work! The new paint is proper smart mate... I'm keeping a close eye on what your doing with the boot there. Very interesting.
Don't keep it too secret!
All the best
Don't keep it too secret!
All the best
#207
Mini 360
-
- Members
-
- 4,933 posts
Up Into Fourth
- Location: Aberdeenshire
- Local Club: Independent
Posted 26 March 2012 - 10:04 PM
Excellent!! good to see your getting stuck into this again...What is it about mini projects?...no matter how hard we try, there is always something that crops up in the middle of the project that slows the whole thing down..
Damned life and what not
Just read through your project here pal... Really nice work! The new paint is proper smart mate... I'm keeping a close eye on what your doing with the boot there. Very interesting.
Don't keep it too secret!
All the best
Thanks! Im beyond happy with the paint
Not keeping it too secret but Im holding a few things back to debut at its first show ;)
#208
Mini 360
-
- Members
-
- 4,933 posts
Up Into Fourth
- Location: Aberdeenshire
- Local Club: Independent
Posted 27 March 2012 - 10:43 PM
Another day another bit of progress!
Went out tonight to see what was needing done next. Thought I would try and tidy up the front subframe as its not too bad but the time it was going to take me I think its just going to be best to get it blasted.
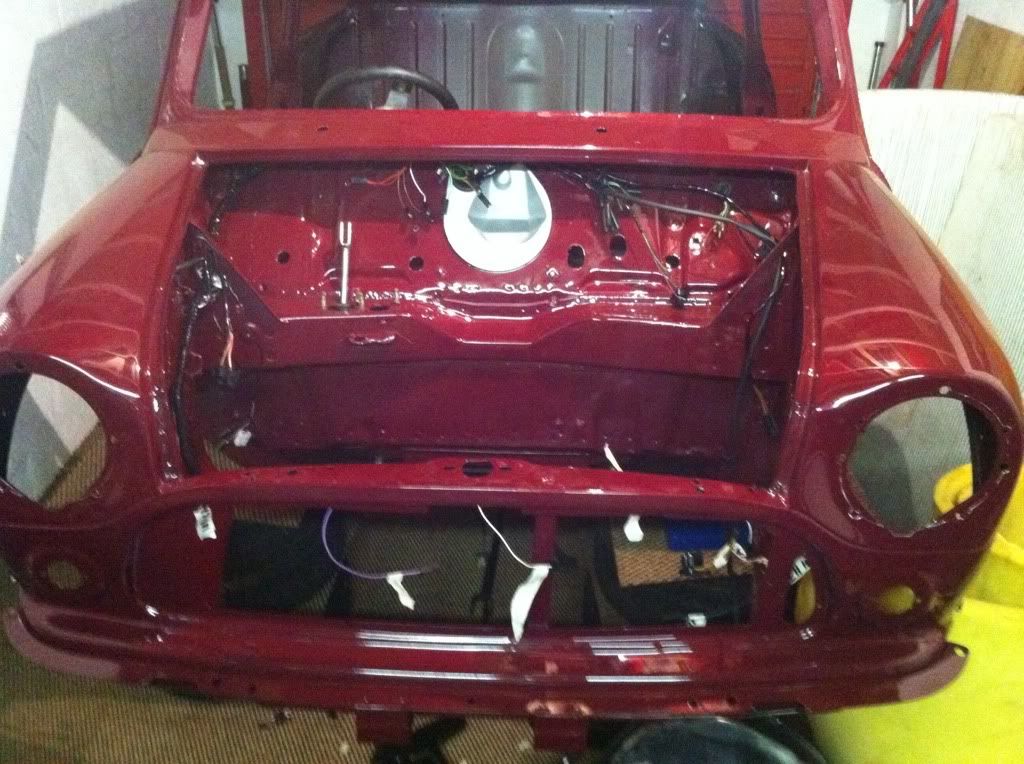
So with that done I routed the loom through the bulkhead blanking plate that had dried off overnight (in silver to contrast with the red. The standard black looks crap)
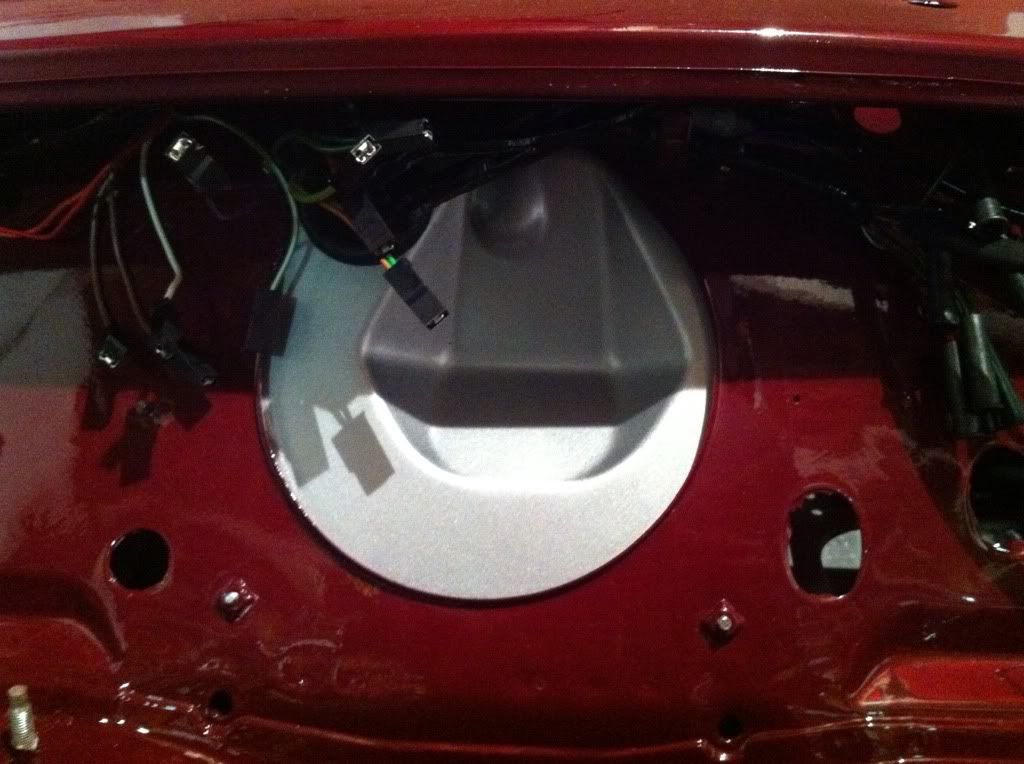
Then I routed it throughout the car ready for attaching to everything. Kinda simple when its all labeled up!
Going to take the frame to get blasted by PPS tomorrow. They haven't returned my calls to book it in so going to doorstep them instead! Hopefully they will be able to get something done with it asap.
Next stage for me is to get lighting stuff located which involves adapting the holding rings to fit the MK2 Golf crosshairs. So still lots to be getting on with!
Went out tonight to see what was needing done next. Thought I would try and tidy up the front subframe as its not too bad but the time it was going to take me I think its just going to be best to get it blasted.
So with that done I routed the loom through the bulkhead blanking plate that had dried off overnight (in silver to contrast with the red. The standard black looks crap)
Then I routed it throughout the car ready for attaching to everything. Kinda simple when its all labeled up!
Going to take the frame to get blasted by PPS tomorrow. They haven't returned my calls to book it in so going to doorstep them instead! Hopefully they will be able to get something done with it asap.
Next stage for me is to get lighting stuff located which involves adapting the holding rings to fit the MK2 Golf crosshairs. So still lots to be getting on with!
#209
Mini 360
-
- Members
-
- 4,933 posts
Up Into Fourth
- Location: Aberdeenshire
- Local Club: Independent
Posted 28 March 2012 - 09:32 PM
No progress so far today (might get out to work on it tonight) but I ordered a load of bits from MiniSpares today. Took advantage of my TMF+ membership and got a nice 7.5% off the whole lot Totally worth the £5 to get the membership! Still came to a fair whack all added up but everything is needed to progress.
Also after weeks of thinking about my subframe and what to coat it in I phoned PPS today and Ive decided to put it to them to get blasted and coated in high gloss black powder coat. The way I see it is that the car won't be doing loads of miles and will be getting regular cleaning. Im thinking of putting some clear laminex on the bottom of it where it faces the road to prevent stone chips as much as I can. The laminex is clear so won't be noticeable and works great on car front ends so why not a frame!
Dropped it off this afternoon and should have it back in just over a week. Means a delay on assembling the frame but hopefully my parts will arrive quickly as they are coming by courier.
I also ordered some Scooter deck grip tape. Answers on a postcard for the uses of this......
I got more done to the car tonight though! Not much but what I was doing is complicated....
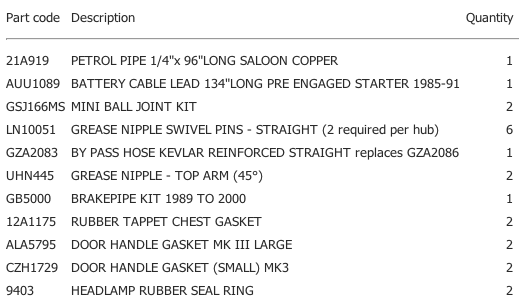
As you will probably know already I have MK2 Golf crosshair headlights to fit. The problem with these are they are ever so slightly too large for the inner mini headlamp rings. So I had to modify these rings to fit!
Heres the light in question....
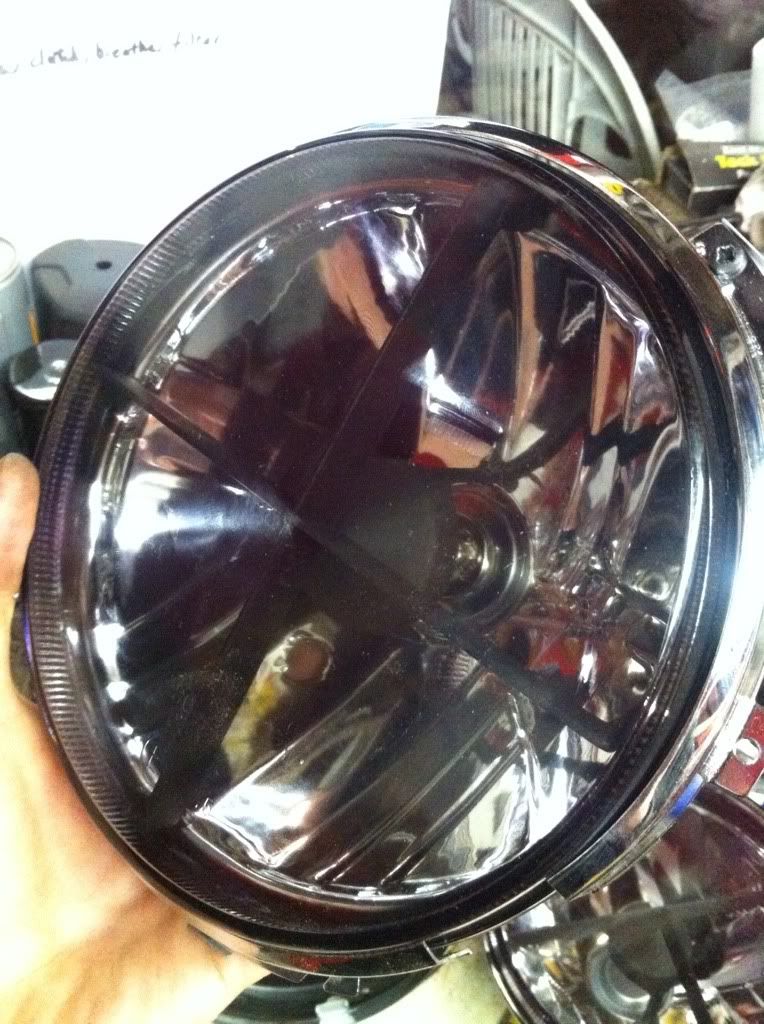
and here is the cut to stretch the ring out to fit the glass.
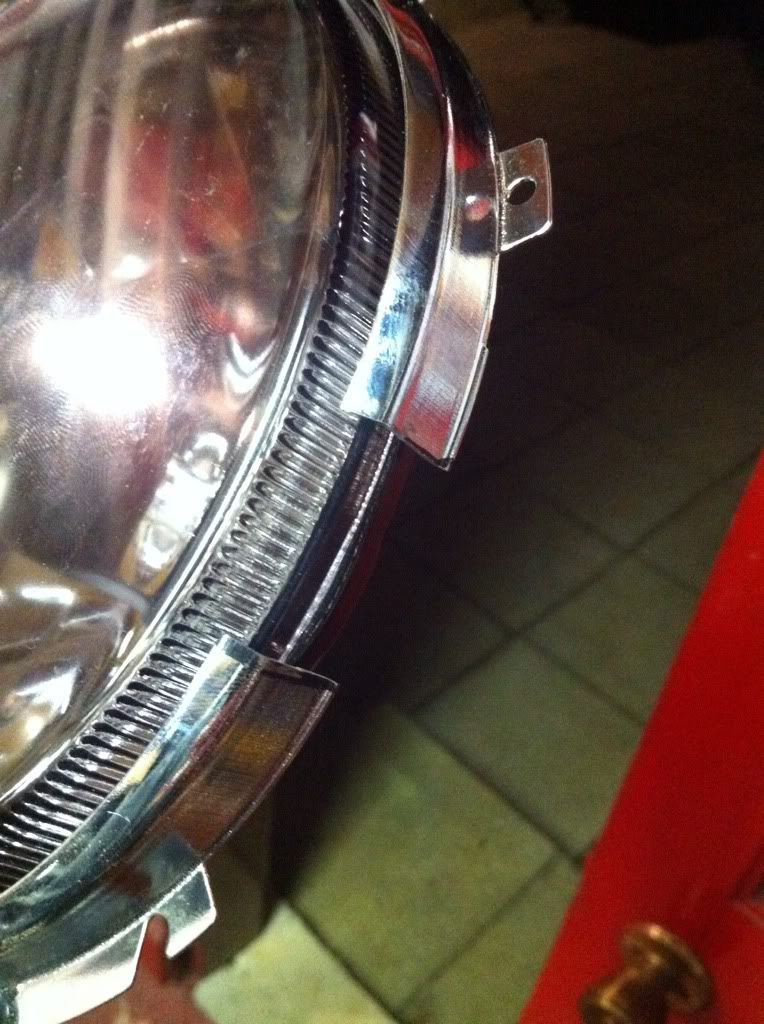
I didn't get a chance to get the placement/orientation done tonight but I did have a quick mockup on the car. Im beyond happy with their look!
Something so subtle but you can guarantee I will be the only Mini on the show field sporting them which is great.
Totally worth the £5 to get the membership! Still came to a fair whack all added up but everything is needed to progress.Also after weeks of thinking about my subframe and what to coat it in I phoned PPS today and Ive decided to put it to them to get blasted and coated in high gloss black powder coat. The way I see it is that the car won't be doing loads of miles and will be getting regular cleaning. Im thinking of putting some clear laminex on the bottom of it where it faces the road to prevent stone chips as much as I can. The laminex is clear so won't be noticeable and works great on car front ends so why not a frame!
Dropped it off this afternoon and should have it back in just over a week. Means a delay on assembling the frame but hopefully my parts will arrive quickly as they are coming by courier.
I also ordered some Scooter deck grip tape. Answers on a postcard for the uses of this......
I got more done to the car tonight though! Not much but what I was doing is complicated....
As you will probably know already I have MK2 Golf crosshair headlights to fit. The problem with these are they are ever so slightly too large for the inner mini headlamp rings. So I had to modify these rings to fit!
Heres the light in question....
and here is the cut to stretch the ring out to fit the glass.
I didn't get a chance to get the placement/orientation done tonight but I did have a quick mockup on the car. Im beyond happy with their look!
Something so subtle but you can guarantee I will be the only Mini on the show field sporting them which is great.
#210
MrBounce
-

- TMF+ Member
-
- 2,566 posts
Up Into Fourth
- Location: The Manroom in Ipswich
Posted 29 March 2012 - 06:02 PM
I'm guessing the deck grip tape is for the pedals? It's all lookin' so good! 


0 user(s) are reading this topic
0 members, 0 guests, 0 anonymous users


