Jump to content


Photo
- - - - -

1961 Mk1 Austin Mini 850 - "flying Flea" - Lot's Of Pictures


  • Please log in to reply
225 replies to this topic

#1 Thorpsta

Thorpsta

    Speeding Along Now

  • Members
  • PipPipPipPipPip
  • 327 posts
  • Location: Wisbech
  • Local Club: Kings Lynn Mini Owners Club

Posted 04 February 2012 - 09:44 PM

I've got to restart this thread, the Images are crashing mine and others internet browsers :( Sorry if this breaks any rules, but I can't edit the old posts.

- Just going to copy and paste, then change the picture sizes.
------------------------------------------------------------------------------
Hello all,

As some of you have noticed by my annoying comments on breaking topics, I'm restoring a MK1 850 Austin Mini, with the intent of using it as my first car.

The project originally started when I wanted to restore dad's old MK1, After some research we decided that it was more realistic to do one a bit better off, we went too view many but silly things made them non doable,rotten roofs etc. We spent ages trawling through eBay, trying to find a MK1, when we fount one local, sadly we got outbid at £1650, so once again, an idea scrapped. Eventually, we decided to spend the money on my mum and dads old MK1


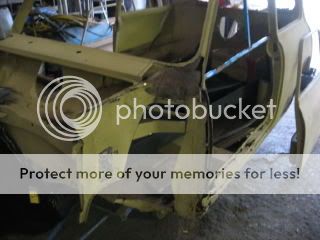
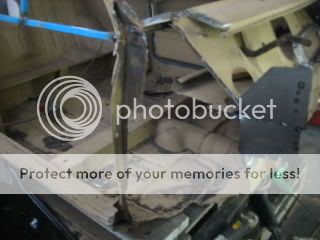
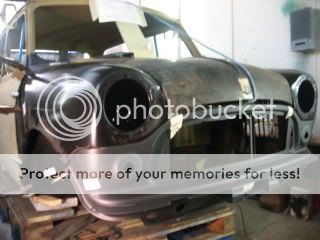
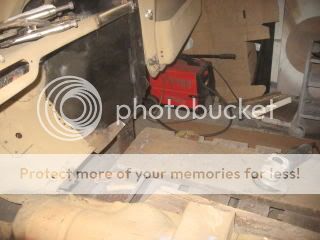
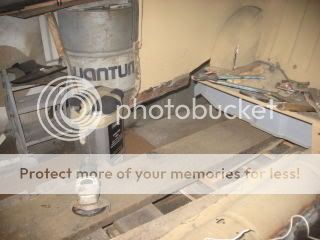
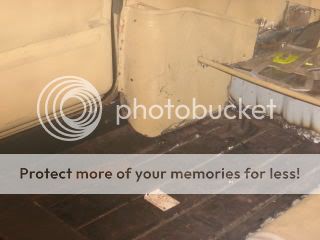
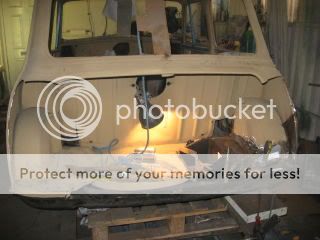
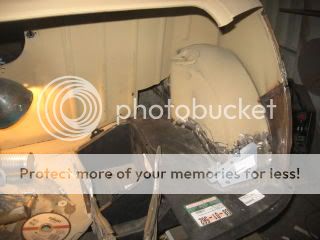
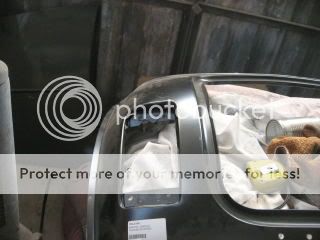
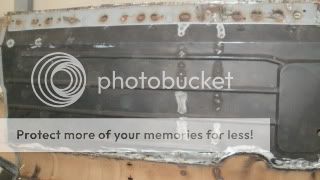
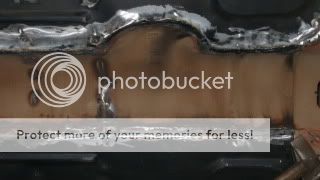
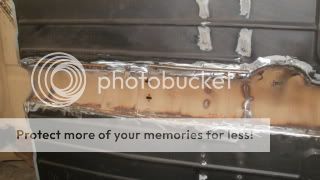
Unfortunatly I lost all of my pictures before shock blasting, so my restoration story begins after shot blasting.

[IMG=http://img515.imageshack.us/img515/8779/pb060269.jpg][/IMG]

[IMG=http://img585.imageshack.us/img585/8581/pb060270.jpg][/IMG]

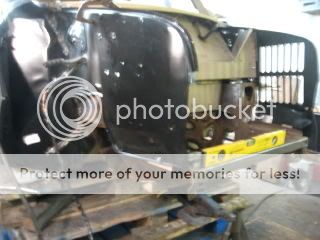
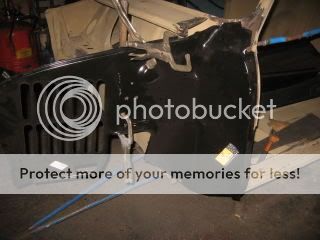
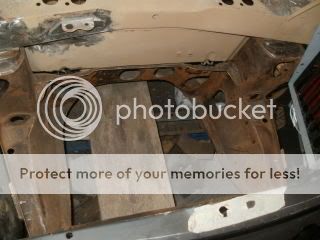
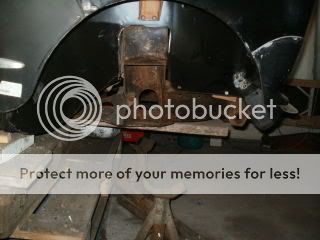
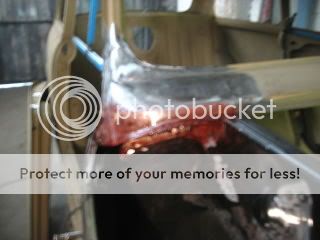
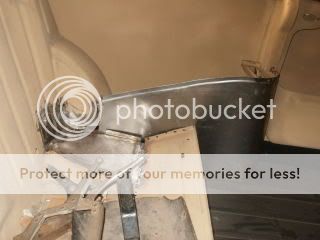
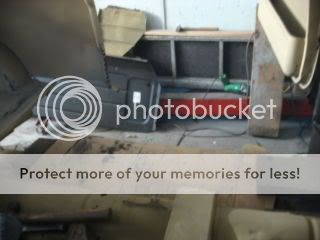
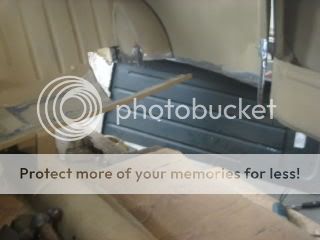
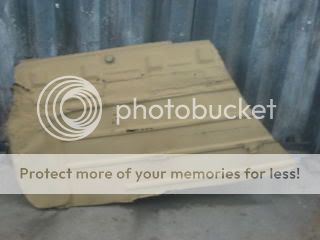
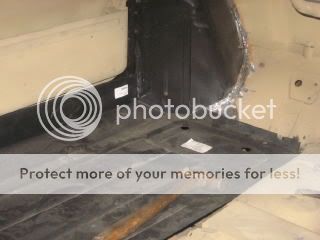
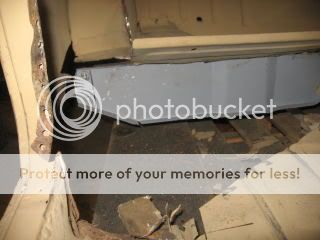
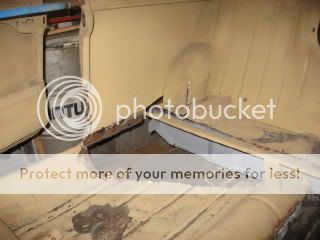
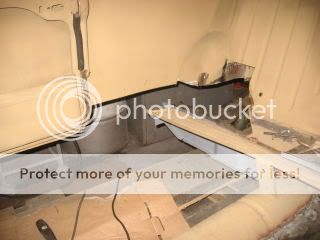
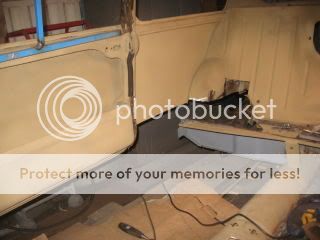
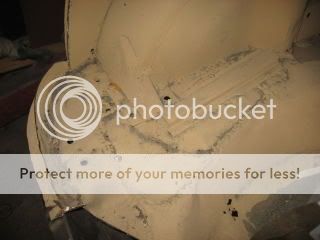
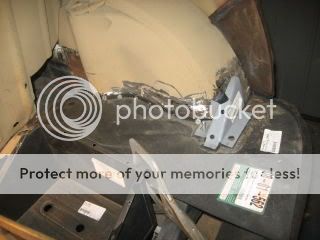
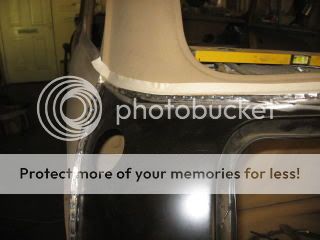
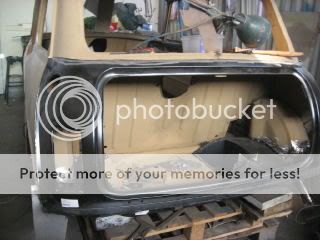
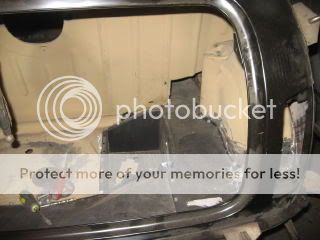
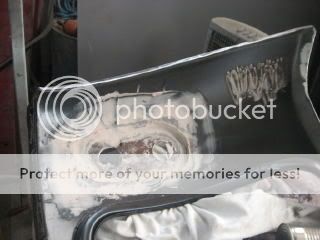
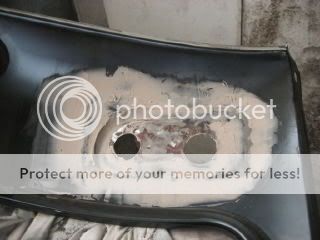
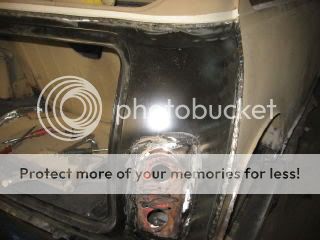
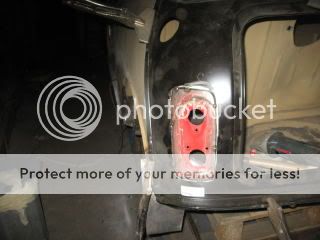
As you can see, it does look fairly solid, but, any shock blast reveals the hidden distasters, which it did.

[IMG=http://img820.imageshack.us/img820/3056/pb060276.jpg][/IMG]

Posted Image

[IMG=http://img21.imageshack.us/img21/3740/pb060274.jpg][/IMG]

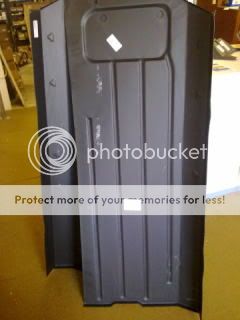
[IMG=http://img33.imageshack.us/img33/8938/pb060272x.jpg][/IMG]

[IMG=http://img829.imageshack.us/img829/6130/pb060271.jpg][/IMG]

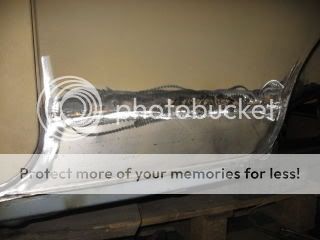
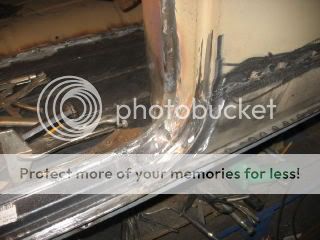
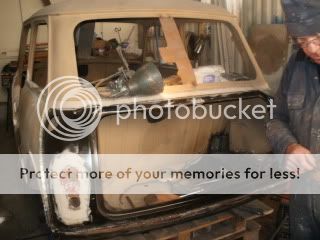
So, with the list of panels to replace, we set of, to a place in Attleborough, called DSNClassics, and came back with a car FULL of panels, luckily a cheap purchase meant we could replace more panels.

[IMG=http://img862.imageshack.us/img862/5313/17092011065.jpg][/IMG]

In that picture there are:
Inner wings x2
Outer wings x2
Full floor pans x2
A panels x 2
Door skins x2
I don't have pictures of the rest but so far we've also bought:

Front panel
Boot floor parts
Battery box
Sills x2
Subframe - Front and back
Back panel - With conversion kit
Enough bolts to last a life time
Cross-member
And that's as much as I can remember.


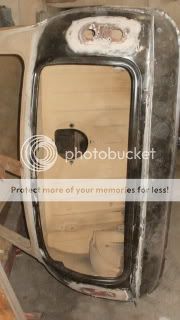
As you can see, in this picture, the doors are fairly battered,


[IMG=http://img194.imageshack.us/img194/6088/p9180222.jpg][/IMG]


A simple door skin, and a few 100 saved later


Posted Image

This

[IMG=http://img811.imageshack.us/img811/3149/10336973.jpg][/IMG]


I'll post another update shortly, just changing the rest of the pictures. - Once again I'm sorry about this >.<


~Will.

Edited by Thorpsta, 13 April 2013 - 04:23 PM.


#2 Thorpsta

Thorpsta

    Speeding Along Now

  • Members
  • PipPipPipPipPip
  • 327 posts
  • Location: Wisbech
  • Local Club: Kings Lynn Mini Owners Club

Posted 04 February 2012 - 10:35 PM

I still havn't caught up to where I am now, but when we got the Mini in its current home, seeming how the doors now fit the hole, we braced it up (using a golf club carrier :P) And started on the front.

Because we decided to chop the wings of before shock blasting, the front wasnt much hassle to get off.

So, as the front was fixed, I cleaned the subframe to line the inner-wings up


1.jpg

2.jpg

3.jpg

4.jpg

5.jpg

6.jpg

And the finished product from the inside :)

7.jpg

8.jpg

9.jpg

And with the front panel and repaired bonnet on -

10.jpg

Once the front was sorted, the window screen corners where repaired.

11.jpg


Edited by Thorpsta, 06 June 2013 - 10:46 AM.


#3 Thorpsta

Thorpsta

    Speeding Along Now

  • Members
  • PipPipPipPipPip
  • 327 posts
  • Location: Wisbech
  • Local Club: Kings Lynn Mini Owners Club

Posted 04 February 2012 - 10:51 PM

With the front all squared up, it was time to start on the floor pans, we started with with the left hand floor pan.. unfortunatly, we destroyed the back seat passenger pocket, so we had to make a new one, luckily, the back seats needed a new patch aswell

Posted Image

Onto the floor pans

Posted Image

Posted Image

Posted Image

Posted Image

Posted Image

Posted Image

Posted Image


And the final product (in the back)


Posted Image


Gonna leave it there for tonight, I'll finish the rest tomorrow, take care :)


~Will.

#4 Thorpsta

Thorpsta

    Speeding Along Now

  • Members
  • PipPipPipPipPip
  • 327 posts
  • Location: Wisbech
  • Local Club: Kings Lynn Mini Owners Club

Posted 12 February 2012 - 10:06 AM

Hello all, time to update my thread again, still sorting the picture sizes out, but I 'should' be going to get some new pictures tonight :)
_________________
Hey everyone, time to update my thread, the back panel is on, and so is the boot floor, just some underside welding left.

I didn't do this part, so I'm not sure in what order they where done, I'll just leave the pictures in the order they where taken/uploaded.

Posted Image
Posted Image
Posted Image
Posted Image
Posted Image
Posted Image
Posted Image
Posted Image
Posted Image
Posted Image
Posted Image
Posted Image
Posted Image
Posted Image
Posted Image
Posted Image


Now, onto the back panel. - Unfortunatley MK1 back panels arn't available, so we used a MK2 with the conversion kits.

And to our luck, the conversion kits, didn't fit the hole >.>

But! We did have an old rusty back panel, so we switched the light apetures over.


Posted Image
Posted Image
Posted Image
Posted Image
Posted Image

Posted Image
Posted Image
Posted Image


Next up, to weld the bottom up, stone chip it, under seal, paint etc.

Still struggling to find a MK1 boot, don't want to fork out £200 for a new one, can anyone help?


~Will.

Edited by Thorpsta, 12 February 2012 - 10:07 AM.


#5 ToM 2012

ToM 2012

    Up Into Fourth

  • Members
  • PipPipPipPipPipPipPipPipPip
  • 4,066 posts
  • Location: halesowen

Posted 12 February 2012 - 10:14 AM

hi looks like a great project i have a set of those mk 1 rear light panels and are they hard to fit? how did you get them level? also for your boot floor maybe try old skool minis? http://www.oldskoolminis.co.uk cheers tom

#6 ToM 2012

ToM 2012

    Up Into Fourth

  • Members
  • PipPipPipPipPipPipPipPipPip
  • 4,066 posts
  • Location: halesowen

Posted 12 February 2012 - 10:16 AM

sorry just realised you said boot still try these anyway :proud:

#7 Mini-Mad-Craig

Mini-Mad-Craig

    Crazy About Metro's

  • Members
  • PipPipPipPipPipPipPipPipPipPip
  • 9,298 posts
  • Location: Travelling in a fried out Kombi

Posted 12 February 2012 - 10:34 AM

Very nice mate!

Edited by Mini-Mad-Craig, 12 February 2012 - 10:34 AM.


#8 Bean

Bean

    Queen of 'shoppin, Voted Miss TMF 2011

  • Members
  • PipPipPipPipPipPipPipPipPipPip
  • 8,054 posts
  • Name: Jean
  • Location: Malvern

Posted 12 February 2012 - 10:48 AM

Oh thank god! I wanted to see this, but every time I came in, my computer completely died! :lol:

Fantastic! :thumbsup:

#9 Thorpsta

Thorpsta

    Speeding Along Now

  • Members
  • PipPipPipPipPip
  • 327 posts
  • Location: Wisbech
  • Local Club: Kings Lynn Mini Owners Club

Posted 12 February 2012 - 11:57 AM

hi looks like a great project i have a set of those mk 1 rear light panels and are they hard to fit? how did you get them level? also for your boot floor maybe try old skool minis? http://www.oldskoolminis.co.uk cheers tom


Unfortunatly our conversion kit didn't fit, but we had a old mk1 panel laying around so we cut it up, try to make sure your conversion fits before you do any real work, they should just slot in, and line up anyway, i dont know how to explain it, if you get the sides to touch on all 4 sides, and make it flat (as if you was to rub it from the panel to the apeture) there shouldnt be a bump, I cant remember how we did ours that well >.< just make sure you check it fits first

Very nice mate!


Thank you :)

Oh thank god! I wanted to see this, but every time I came in, my computer completely died! :lol:

Fantastic! :thumbsup:


Yeah, It kept crashing mine too, I had to hit stop before the pictures loaded >.< But most of the time I checked the thread at school and forgot about it :P all sorted now though :D

#10 leaky

leaky

    Iv never hit a penguin in the face with a casserole

  • TMF+ Member
  • PipPipPipPipPipPipPipPipPipPip
  • 6,890 posts
  • Location: Costa Del Tadley
  • Local Club: Basingstoke Mini Club

Posted 12 February 2012 - 12:08 PM

This may help you with your boot lid problem!

http://www.theminifo...l-to-mk1-style/

#11 Thorpsta

Thorpsta

    Speeding Along Now

  • Members
  • PipPipPipPipPip
  • 327 posts
  • Location: Wisbech
  • Local Club: Kings Lynn Mini Owners Club

Posted 12 February 2012 - 12:13 PM

This may help you with your boot lid problem!

http://www.theminifo...l-to-mk1-style/


We have considered it :P But apparantly it rusts from the inside?

#12 leaky

leaky

    Iv never hit a penguin in the face with a casserole

  • TMF+ Member
  • PipPipPipPipPipPipPipPipPipPip
  • 6,890 posts
  • Location: Costa Del Tadley
  • Local Club: Basingstoke Mini Club

Posted 12 February 2012 - 12:40 PM

I cant comment on that as I'v not got one. Pretty much anything on a mini rusts anyway and I'm sure it cant be that bad if done properly. I would rather buy a boot lid for a tenner and that for £15 and fit that and have it rust in 5 years time then spend £200 on a mk1 boot lid that will still rust anyway but just may take a couple of years longer.

#13 Thorpsta

Thorpsta

    Speeding Along Now

  • Members
  • PipPipPipPipPip
  • 327 posts
  • Location: Wisbech
  • Local Club: Kings Lynn Mini Owners Club

Posted 12 February 2012 - 09:22 PM

I cant comment on that as I'v not got one. Pretty much anything on a mini rusts anyway and I'm sure it cant be that bad if done properly. I would rather buy a boot lid for a tenner and that for £15 and fit that and have it rust in 5 years time then spend £200 on a mk1 boot lid that will still rust anyway but just may take a couple of years longer.


True, I'll probably have to do that once I've saved up the money

Edited by Thorpsta, 13 April 2013 - 04:27 PM.


#14 Thorpsta

Thorpsta

    Speeding Along Now

  • Members
  • PipPipPipPipPip
  • 327 posts
  • Location: Wisbech
  • Local Club: Kings Lynn Mini Owners Club

Posted 16 February 2012 - 05:13 PM

I'm back with a small update :) - I was playing with the camera settings and managed to get HD pictures, When i took these I set it to the wrong format without checking >.<


Back panels and lights are finally finished, seam sealed and such,

P2160355.jpg

Now to just finish the passanger bin, it wasn't quite right, tomorrow we'll be turning it over so expect some pictures, I am going to a party tomorrow so they may or may not be up tomorrow :P

P2160356.jpg


Edited by Thorpsta, 06 June 2013 - 10:48 AM.


#15 Thorpsta

Thorpsta

    Speeding Along Now

  • Members
  • PipPipPipPipPip
  • 327 posts
  • Location: Wisbech
  • Local Club: Kings Lynn Mini Owners Club

Posted 17 February 2012 - 03:53 PM

Well, It's on its side, that was fairly..easy, I'll post a youtube video showing that soon.


The underside is welded up, and grinded down, just need some stone chip and paint!

Still waiting to get the pictures and other camera >.< So I took some on my camera, unfortunatly it's not that great.


Posted Image


Seam seal

Posted Image

Posted Image
Posted Image
Posted Image

The video's now rendering, I'll post that in a second, once it's uploaded


1 user(s) are reading this topic

0 members, 1 guests, 0 anonymous users