92 Mini City
#61
Posted 26 July 2014 - 07:43 PM
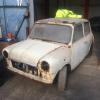
Ive got the other companion bin to do as well got a slightly different approach to this one as I fitted two new ones to the lads car and have learnt from my mistakes mainly the seat base lip is very thin so I'll be cutting out the bin and grinding off the spot welds from the back leaving the lip intact instead of trying to drill out spotwelds from the front
Cheers Mark
#62
Posted 20 August 2014 - 07:48 PM
Jay looking pleased with himself
Just the final few bits to do on the lads car now, it's been 8 months of graft blood sweat and tears but it's off to paint this Saturday
Just got to put it back together.
I'm replacing the inner sill and as the companion bin had gone at the bottom I've decided to replace it this will allow good access to the inner sill and stiffener
Started by drilling out the spot welds along the door frame and floor
Then I removed the ones from the heel board
Then after a quick session with the grinder out it came just had a little battle with a cheeky seam weld that the good folk at Rover had hidden where it joined to the wheel arch !!!!!
After drilling a few more spot welds I removed what was left of the inner sill where it attaches to the inner sill stiffener so left with a nice big hole now.
Just got to remove what's left of the bin where it joins to the seat pan but I'm going to flap that off from the back leaving the lip intact this will make for a nice neat job when I weld the new new bin back in.
Finally just removed the seat belt anchor as the M Machine bin doesn't come with it that will be fitted to the new bin when I get round to it.
Next job is to chop out the inner sill
Mark.
#63
Posted 21 August 2014 - 05:45 AM
#64
Posted 22 August 2014 - 06:42 PM
Jays cars off to the paint shop tomorrow so I'll have time to really knuckle down and get it finished
#65
Posted 31 August 2014 - 09:21 PM
Jay drilling out spot welds
I knew I'd have some use for kids one day ha ha
All the spot welds drilled out of the door step and inner sill
Chopped out the old inner sill and jacking point
I was really surprised how good it was inside the cross member not a spot of rust inside
Tidied up the edges with the flap disc and then trial fitted the new inner sill which is an M Machine panel
Wasn't a bad fit so marked up the floor and trimmed off the excess ,after a bit of hammer and dolly work and a bit of grinding it went into place.
Couple of pics after I held it in place with inter-grips
It will come back out in the week as I've got to give it a coat of zinc primer
The lower part of the flitch will need replacing as it's a bit crusty and I will have to chop out the closing panel by the rear wheel arch before I weld the floor in
Plenty left to do
#66
Posted 31 August 2014 - 09:46 PM
Bet Jay is loving going back to the manual work again!
Cracking job on the inner sill. Can you remind me, how much is that panel? I need to order one next week as my project is going to get a massive kick up the backside after all this time. I want to get the O/S done and dusted.
Ben
#67
Posted 01 September 2014 - 06:01 AM
He loves doing all that stuff
There £27 but you get 10% off if your a mini forum plus member mate
Cheers Mark
#68
Posted 13 September 2014 - 05:34 PM
#69
Posted 14 September 2014 - 08:00 PM
Yes the jacking point welds straight on the inner sill, it also it attached to the outer sill ( when I fit it ) this will be going on next weekend so keep watching.
Anyway I've been able to spend some time on the car this week grabbing the odd couple of hours after work so the inner sill got a coat of zinc primer and I removed some of the bitumen so it looks tidy and will not get in the way and melt when I weld it in
Your probably wondering why I haven't removed all the sound proofing well the rest of the floor is
Mint and I want to keep as much of the originality as I can so that's the reason for that
I removed the old heel board closing panel along with the inner sill stiffener unfortunately one end of the stiffener is badly corroded but I think in going to repair it.
Then it was onto the heel board
After a bit of trimming
I found some rust in this area so I opened up the seam cleaned it out and gave it a good coat of zinc
All welded in and ground down
At this point I refitted the inner sill and test fitted the subframe glad to say it fits well
Started by tacking it all in then fully welded it up
Looking a bit better than before
That's it for now
Cheers for looking in
Mark
#70
Posted 11 January 2016 - 08:10 PM
It's been over 12 months since my last post and a lot has happened
The mini has been moved to a secure garage after the local detritus took an interest in it and decided to make my car cover into confetti
Needless to say I was far from impressed so off it went to a safe location where I can work on it in peace
I'll let the pics do the talking
Here it is in its new temporary home
Jay getting his hands dirty
Removed the battery box quite easy as it was only held in with sealer !! Yes it was a new one on me too !!
Not a weld in sight !!
Cleaned it up and replaced the worst bits with fresh steel
New genuine battery box fitted
Then it was onto the rest of the boot floor
Rot chopped out and repaired bit more finishing to do but happy with it so it got a splash of zink primer
This small hole was just enlarged with my burr and I welded it up and ground it down flush
Then it was onto the other boot floor corner and closing panels
Lip replaced
Same for the other side
Repaired the hole in the wheel arch
Sealed the boot and battery box
Fitted the strengthening brackets
Then sealed all the rear valance closing panels up
Test fitted the valance and it was pretty good
Yes I'm impressed with a magnum panel first time for everything
So holes drilled and on it went
Just had to refit the tank bracket and that was the boot sorted
The car was then turned round so I could start on the jobs on the other side
Quite a long list of things to do these were replace top dash rail,new door step,jacking point,rear quarter corner repair, front floor / wheel arch repair, companion bin,inner sill strengthening plate ,closing panels,rear wheel arch repair and new outer sill oh and I've got 2 door skins to replace too
Mark
#71
Posted 12 January 2016 - 08:40 AM
The car was turned around and I removed the top dash rail it had been ( bodged) repaired previously
I replaced it with a genuine one
Old one out and holes drilled for the plug welds
The scuttle had been replaced previously when the car had had its last half arsed resto by the old owner so to avoid distortion I used frost cold front and it worked very well
With that done Jay ground down the welds flush and I splashed zink primer over it
Then it was onto the door step.
Mark.
Edited by Marco1972, 12 January 2016 - 08:42 AM.
#72
Posted 12 January 2016 - 09:48 AM
Firstly I braced the body to avoid any movement and removed the old step I had a couple of steps from a chap off this forum ( sonic ) and I have to say that they are an exellent fit and quality
This just left a small repair to the door post
With that finished I moved on to the rear quarter repair
Here's the finished job I used an MMachine panel here as they are very good fit and quality
With that done it was back to the front end and off came the A Panel the lip behind had seen better days so I sorted that and gave it a splash of zink followed by a quick test fit of the new genuine A panel
Happy with that I moved onto the new jacking point
It was seam welded on for strength and then I gave the whole area a good few coats of primer and paint
The cavity will be given a good coat of wax after I've put the outer sill on
Mark.
#73
Posted 12 January 2016 - 01:47 PM
With that lot done it was onto the companion bin and surrounding structures
Fitted the seat belt mount to the bin as it was a M Machine panel and they don't come fitted
With that done it had a few coats of primer and paint
Holes drilled and then welded in
Couple of fuzzy pics inside the bin I'd welded in the closing plate and inner sill stiffener at this point and given it all a coat of paint
I've had this hole waiting to be sorted for ages so fabricated a repair panel and welded it in ground down and a splash of zink
Next job to tackle is the front lower wheel arch you can see it was pretty crusty
Mark.
#74
Posted 12 January 2016 - 02:00 PM
Wow just seen this thread it looks great some really nice tidy work there :)
#75
Posted 12 January 2016 - 07:04 PM
Wow just seen this thread it looks great some really nice tidy work there :)
Thanks mate
Getting there eventually I've really got my finger out over the past few weeks I want it finished for the summer
Mark
0 user(s) are reading this topic
0 members, 0 guests, 0 anonymous users