Jump to content


Photo

1963 Surf Blue Mk1 Woody "rusty"

estate

  • Please log in to reply
259 replies to this topic

#46 greenwheels

greenwheels

    Super Mini Mad

  • Members
  • PipPipPipPipPipPip
  • 689 posts
  • Location: Gloucestershire
  • Local Club: Mini Fixers

Posted 12 November 2013 - 06:50 PM

Brilliant work. I feel inspired to do something about the Woody we have in similar condition to yours as was. I promised my girlfriend I would restore it when we met - that was 15 years ago!!!! See how I feel in the morning.

Had the offer of a workshop to rent the other day, very tempting after reading through your thread.


Edited by greenwheels, 12 November 2013 - 06:51 PM.


#47 victor young

victor young

    Mini Mad

  • Noobies
  • PipPipPipPip
  • 138 posts
  • Location: seaburn

Posted 24 November 2013 - 11:01 AM

Go for it, one bit of advice is don't expect fast instant results just concentrate on one thing at a time and slowly slowly it will come together.


I have seen loads of projects where people have gone hell for leather buying loads of new shiny bits but neglecting the hard work on the restoration and they just get nowhere with a rusty shell with lots of expensive shiny parts and then they sell as an unfinished project that they have no chance of getting anywhere near back the money they have spent.


If the budget is tight try to do as much as you can yourself and it is amazing what results a wire brush and some black paint can have on rusty parts. 


My motto is there is only one way to get things done and that is to do it.


Good luck


#48 minimissions

minimissions

    Up Into Fourth

  • Members
  • PipPipPipPipPipPipPipPipPip
  • 3,427 posts
  • Location: North West
  • Local Club: M.M.O.C

Posted 21 January 2014 - 01:13 PM

Hey just had a look through your build there, what was it like fitting the full one peice floor like that did it make life easier? looks nice and tidy.


#49 victor young

victor young

    Mini Mad

  • Noobies
  • PipPipPipPip
  • 138 posts
  • Location: seaburn

Posted 21 January 2014 - 07:58 PM

I have never fitted such a large panel before but it was very easy. I removed the heel panel by the spot welds and locked the height of the rear subframe with chocks of wood.

I removed all the spot welds from the front edge at the base of the bulkhead toe panels, left the front sub frame in place.

Cut out all the inner sills leaving as much as the outer and door steps.

From underneath I lifted the front onto the toe panels and then jacked up the rear and held it into place with the 4 rear subframe securing bolts, refitted the front subframe bolds which realigned the whole floor section into the original position.

Loads of spot welding and mig welding later and it was in place. It was a few quid but it fitted like a glove.

My shell is fully welded and primed now and I am now making good and priming all doors and the bonnet so I will post a load of photos in the next  few weeks once I have stopped paint stripping,rubbing,sanding and priming.

Vic


#50 minimissions

minimissions

    Up Into Fourth

  • Members
  • PipPipPipPipPipPipPipPipPip
  • 3,427 posts
  • Location: North West
  • Local Club: M.M.O.C

Posted 21 January 2014 - 11:29 PM

Thanks for taking the time to explain that to me, it does seem the better option, but its just the shire cost of such a panel... hmm we will see :) your build is looking really good vic :)


#51 victor young

victor young

    Mini Mad

  • Noobies
  • PipPipPipPip
  • 138 posts
  • Location: seaburn

Posted 14 February 2014 - 05:37 PM

Winter Progress....

Attached Files


#52 Simon1867

Simon1867

    Mini Mad

  • Members
  • PipPipPipPip
  • 157 posts
  • Location: Maidstone
  • Local Club: Southern Mini Owners Club

Posted 15 February 2014 - 09:35 AM

Great read,.. I've not been a fan of the traveller but after reading your thread my mind is slowly changing. Look forward to the next update

#53 Archived1

Archived1

    Super Mini Mad

  • Archived
  • PipPipPipPipPipPip
  • 619 posts

Posted 15 February 2014 - 06:13 PM

Wow what a transformation! Thats pretty awesome  :thumbsup:


#54 victor young

victor young

    Mini Mad

  • Noobies
  • PipPipPipPip
  • 138 posts
  • Location: seaburn

Posted 27 February 2014 - 08:22 PM

Attached File  Woody dash 27.02.14 013.JPG   68.86K   50 downloads


My original dash after a clean up and polish.


Edited by victor young, 27 February 2014 - 08:24 PM.


#55 leeuk

leeuk

    Super Mini Mad

  • Members
  • PipPipPipPipPipPip
  • 681 posts
  • Location: Wednesbury

Posted 28 February 2014 - 08:36 AM

attachicon.gifWoody dash 27.02.14 013.JPG


My original dash after a clean up and polish.

Very clean and as good as new mate ;-)


#56 victor young

victor young

    Mini Mad

  • Noobies
  • PipPipPipPip
  • 138 posts
  • Location: seaburn

Posted 09 March 2014 - 09:42 AM

Hello all,

Some advice if someone could help please on my 1963 Morris Mini Minor Traveller Woody:-


What is the original paint colour and code for my engine ?

What is the original paint colour and code for my steel road wheels ?


I am ready to send all my metal work out for powder coating and to start cleaning and painting bits of my engine.

All advice is greatly appreciated.


Thank you for any help.


Vic


#57 victor young

victor young

    Mini Mad

  • Noobies
  • PipPipPipPip
  • 138 posts
  • Location: seaburn

Posted 19 March 2014 - 07:18 PM

Well today i dropped my wheels,subframes,most suspension and engine metal pieces and front grille off at Battablast for powder coating, I have used Bettablast a few times on the motorbikes that I have restored and they are top class.


The road wheels are going back to standard old English white 

Sub frames and all suspension/engine parts going to be gloss black.

My Morris front metal grille which is originally chrome is going to be a new chrome powder coat which in theory should look good but I will decide once it is done.


I will post some photos of the results once they are done.


vic


#58 victor young

victor young

    Mini Mad

  • Noobies
  • PipPipPipPip
  • 138 posts
  • Location: seaburn

Posted 13 April 2014 - 05:24 PM

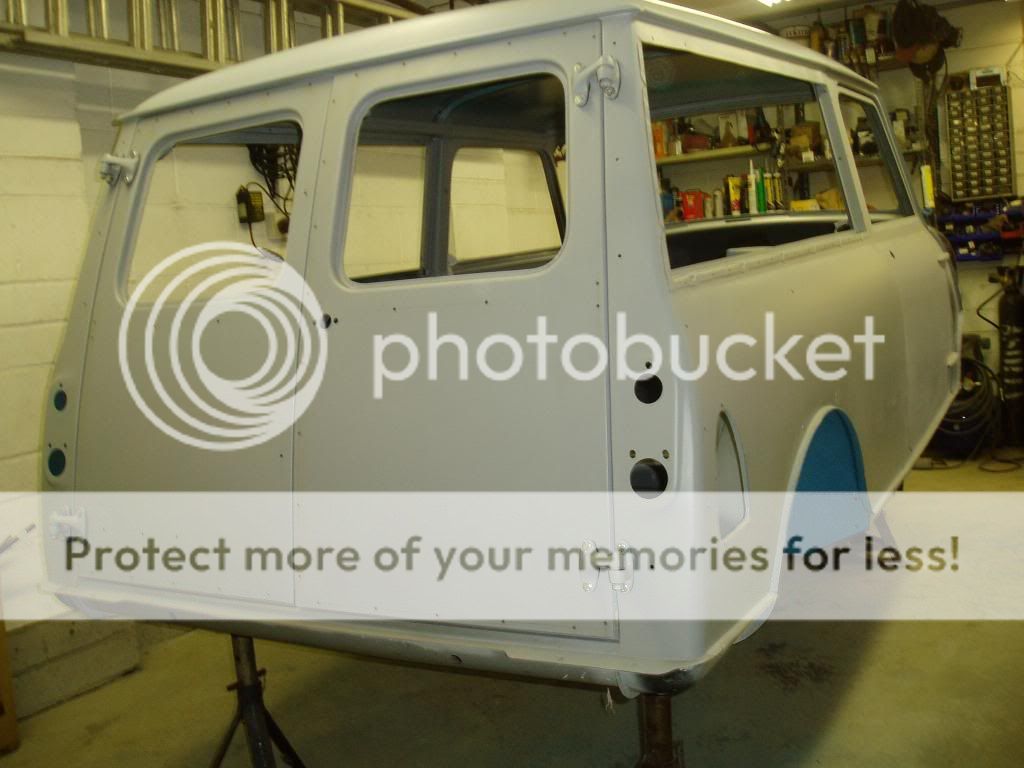
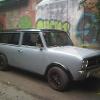
http://s763.photobuc...y/Woody 13-4-14


I can not download any photos anymore for some reason as all of a suddern the files are too large so I have added a link to the progress photos on photobucket for a progress update.


I have all my suspension/subframe parts away for powder coating and when they arrive back i will get it ready as a rolling shell for a trip to the bodyshop.


Edited by victor young, 13 April 2014 - 05:27 PM.


#59 Covert

Covert

    Super Mini Mad

  • Members
  • PipPipPipPipPipPip
  • 526 posts
  • Location: Northampton

Posted 13 April 2014 - 06:26 PM

Just copy the img codes matey, here you go

P4130024_zps40d79e88.jpg
P4130023_zps57360a2d.jpg
P4130022_zps774f98a2.jpg
P4130020_zpsc4eeb693.jpg
P4130019_zps0e03b41f.jpg
P4130017_zps56a1cbbd.jpg
P4130016_zps09a995b5.jpg
P4130014_zps88bb338e.jpg
P4130013_zps231d1c3c.jpg
P4130012_zps3d1c5f38.jpg
P4130010_zpse1057ecf.jpg
P4130008_zpse5d3e97e.jpg
P4130007_zps2a3a439f.jpg
P4130006_zpsb7dd8fa6.jpg
P4130005_zpsb0f02137.jpg

#60 Covert

Covert

    Super Mini Mad

  • Members
  • PipPipPipPipPipPip
  • 526 posts
  • Location: Northampton

Posted 13 April 2014 - 06:28 PM

P4130004_zpsc5fd0a07.jpg
P4130003_zpsc9541e62.jpg
P4130002_zps9b4be866.jpg
P4130001_zps67084913.jpg

Awesome work by the by ..... One very solid shell!


Also tagged with one or more of these keywords: estate

1 user(s) are reading this topic
0 members, 1 guests, 0 anonymous users