Time for an update seeing as its been however many months...  Progress is slow and I haven't really achieved that much to be fair. I've been busy with earning money to fund the whole extravaganza, future career preparation and other silly things. This is also the first time I have used a welder so cut me some slack on the quality to start out with
  I started off teaching myself but I've also got some advice from work and had a good friend who lives up the road and has been in the trade for 3 decades - Tommy, to come round and "show me the ropes" and save my mash up's Anyways, time for some photos!
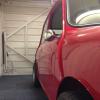
So I got the shell rolled up on its side so I could begin work on the nearside.

So this is what I started with.


And then I started doing the scary bit and drilling out all the spot welds and cutting out all the old rot...


The door step also needed replacing.

After three attempts and waiting on three different panels... Tada! ![=]](https://www.theminiforum.co.uk/forums/public/style_emoticons/default/sideways.gif) I couldn't get the hang of the welder at all! But Tommy saved the day once again after finding the right settings for the welder. It sings along sweetly now! So no excuses anymore I suppose, the poor welds are down to the weldor... I also changed from 0.8 wire to 0.6 and find it MUCH easier to control and prevent burn through. I read somewhere that thin bodywork was much easier with 0.8 wire but I think someone was yanking my chain
I couldn't get the hang of the welder at all! But Tommy saved the day once again after finding the right settings for the welder. It sings along sweetly now! So no excuses anymore I suppose, the poor welds are down to the weldor... I also changed from 0.8 wire to 0.6 and find it MUCH easier to control and prevent burn through. I read somewhere that thin bodywork was much easier with 0.8 wire but I think someone was yanking my chain  Guess that's testimony to the saying "Don't believe everything you read on the internet"! Oh well, a splash of more cash on another reel and I'm cooking with the gas!

Then set about getting the inner sill shaped and kinda tacked in place. I was still running the welder too low at this point.

Then plug welded it along the inside and seam welded it along the floor between the tacks.

A wee dance with the grinder and a coat of etch later!

The Tommy popped down to give me a hand with the outer sill. Pallet was required for a comfortable welding height

Plug welded it along the seam and then seam welded it to the inner sill for strength! Can anyone spot the minor difference in the quality of welds and tell who did them apart?

All done! Just a bit of grinding and a coat of paint to finish.

I then fitted and welded the flitch panel on.


Just noticed I don't have a photo of this side completed! I'll get one this weekend! 
So I then went on to look at the N/S scuttle. Offered up the panel and marked how much I needed. Also had this wee bit of patching to do at the top because I cut the flitch too short 


Got it tacked on, welds getting a wee bit better, other than the bit that blew threw... 

Stitch welded between the tacks, wee tickle with the grinder and some etch! Or at least I think its called "stitch welding"... I'll deal with the gap later on, I've got a plan for that.

Had to modify the bottom of the flitch a bit because I put it too low, probably why it didn't fit at the top but I welded up the door hinge holes because they were a mile out so they were drilled in the correct place at least.

Sorted!

I then cut the companion bin up on both sides, I have a plan for this later!


Then this beauty arrived! Can anyoneee guess what it is?!

And then I treated myself to a new toy at Christmas from handling solutions. 


Makes life SO much easier! Especially having a small workshop, I'd recommend one to anyone. The guys are really helpful and accommodating too. They offset the feet on my jig so that it would fit in my garage, There's about half an inch either end! I should have bought this right at the start! It's really well made, the welds are absolutely beautiful. And yes, I opted for the already welded kit as I didn't want to spend hours welding it up instead of the car but also because I didn't want the car falling on it's roof... My only criticism would be that it would have been nice if it came with a coat of paint for the money that it costs. My one had surface rust on it before I even got it out of the packaging! However, I'll use it as is just now and then maybe get it blasted and powder coated at the end of the build so it'll be all shiny and new for my next resto 

I then moved on to the drivers side and started cutting it apart.

Lots of lovely repair after repair evidence here... This will all be ripped out and replaced with one panel when the posty brings it.

Think I got my moneys worth out of this one...

The rear end was next as I am waiting for a few panels from MMachine for the drivers side so off came the valance!

Which revealed loads of loveliness!

So I then removed the closing panels and strengthening plates as these will all be replaced.

Then the cutting began! I don't really have an explanation for my cutting style...

And to finish off, a wee question! I keep finding these bits of foam in all the wee nooks and crannies. I've been removing them as I come across them as I don't want them going on fire obviously, but does anyone know what they're for? Do I need to replace them afterwards? All I can see them doing is stopping drafts, catching and attracting moisture?

But that's as far as I've gotten just now, really need to pull the finger out and get on with it! The door step was a real kick in the teeth because I spent so much time on it and kept screwing it up so it really gave the morale and motivation a beating , but I'm working on building it back up! Any constructive criticism is welcome as I am a learner! ...