Okay so the engine! Equipped with a Haynes manual, I feel that I could have tackled this engine and gearbox rebuild myself. But! a lovely chap - John, who lives down the road from me, was happy to help me out, as he's seen his fair amount of mini engines inside and out. So, off down the road I went. We first gave it a good wash, then with the help of his hoist, got it on the bench and got busy!


We then ripped it all apart, and cleaned all the parts further to find out what parts I needed.


So off I went, card in hand, and spent an absolute fortune. Lots of shiny things though! 
So all the necessary gaskets, seals, cables, filters, water pump and rebuild kits for the carb etc. I also bought a minispares cross pin diff on John's recommendation. He said I am unlikely to have a problem with it on the 998, but he said that because I have the box apart, I may as well build it to last in case I fancy doing some upgrades. Unfortunately my budget didn't stretch to fulfil all his recommendations but some were better than none!


I wanted a new radiator because I'm going for the waterless coolant so I wanted to renew as much of the system as possible. But I couldn't stretch to a Minispares one. Of course, it had to be shiny! So I took a risk on a fletcher one and I can honestly say, I am fair impressed with it. Well made, better quality than the "winner racing" ones you get off of ebay. Highly recommended.

Fluids, filters and a spare fan belt.

I also got all new mounts and bushes and I even stretched to the two addition steady kits!

And I got a full electronic ignition kit from Accuspark.

But anyway, on to the more important shiny things! Not gonna lie, I'm a sucker for DSN CNC parts and Smiffys bits. 

And of course... 

Another recommendation of Johns was to buy some Wurth "Anaerobic" gasket gel. After using it once, I can honestly say, anyone building an engine, buy this stuff! Its a bit pricey, but its the cats whiskers! It only hardens and seals when there is an absence of oxygen. For example, in between two surfaces. Any excess stays gooy and can be easily wiped away five seconds or five years later. Great if you get distracted! But also, any excess on the inside simply washes away with the oil and comes out in the first oil change. No more blockages if you're a bit heavy handed!

So the following week, after all the parts arrived, I went back to Johns and we got on with the job!
Started cleaning and replacing any worn parts such as the baulk rings and lay gear thrust washers in the gear box. Then assembled the cross pin diff and assembled the differential.


We then reassembled the block and crank etc. Checked the end float. Then mated it with the gearbox and differential.


On went the flywheel casing with a new seal and oil thrower.

Followed by the head gasket, head and gubbins.


Then we rebuilt the carb.

We also replaced majority of the studs for the heater take off, thermostat cover, manifold, etc. We packed all the holes with paper to stop any debris getting inside while I ferried it home. John offered to let me paint all the parts while it was in pieces but I felt guilty having all my parts all over his shop and If I did it at home, at least it meant that I could get on with other things while it was drying.
In addition to my previous comment about minispeed. Look what we found!  I can only think that when they have been trying to fit the circlip, the needle roller has fallen out and been wedged. Preventing everything from lining up. then when I cranked it over for the first time, the roller fell out in to the oil and was washed out in the first change. Fortunately, before causing any damage! But, obviously instead of pulling it apart and investigating what the issue is ( I mean who would do that, that takes time and effort? ) they just ground down the circlip so that it would fit. Absolute cowboys. I had been warned by a well respected mini specialist not to use Minispeed because they had seen an engine and gearbox built with old bearings before. However, I chose not to believe them because I thought they were just trying to steal the business. Obviously not! Only real idiot in this situation is me and I hope no one else experiences the same issues with these "professional people"!

Anyway, after I got it home, I got it all painted up in Ferrari red engine paint and left it in the sun to dry.  I read somewhere that Ferrari red paint adds like 10 horse power or something? So obviously it was a no brainer. I didn't paint the sump because I quite like its weathered look! But it'll also just chip off.


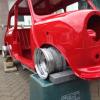
Once it was dry, I got a hand from my Dad - Keith, to wheel the car out in to the sun for the first time! And cart the engine in to the shed and crane it on to the work bench.


And that's the end of the engine rebuild chapter! Next step it to stick all the bits on it!
Edited by Elliskwleisk, 17 December 2014 - 09:57 PM.


