Jump to content


Photo
- - - - -

2000 Cooper Sport Project ( Ollie)


  • Please log in to reply
186 replies to this topic

#46 Zeemax Adventure

Zeemax Adventure

    Speeding Along Now

  • TMF+ Member
  • PipPipPipPipPip
  • 301 posts
  • Location: Llandudno

Posted 10 October 2013 - 07:21 PM

Time for another update.  Its amazing what you get done when you don't have to go to work for a week. Well once again lots of piccys :)


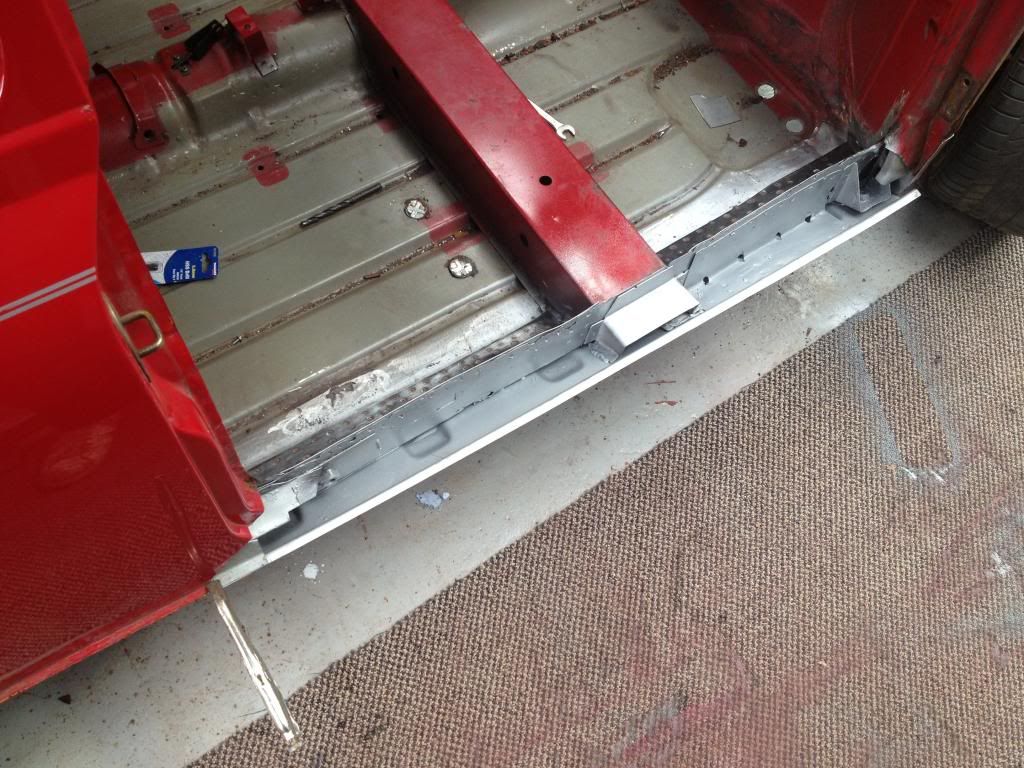
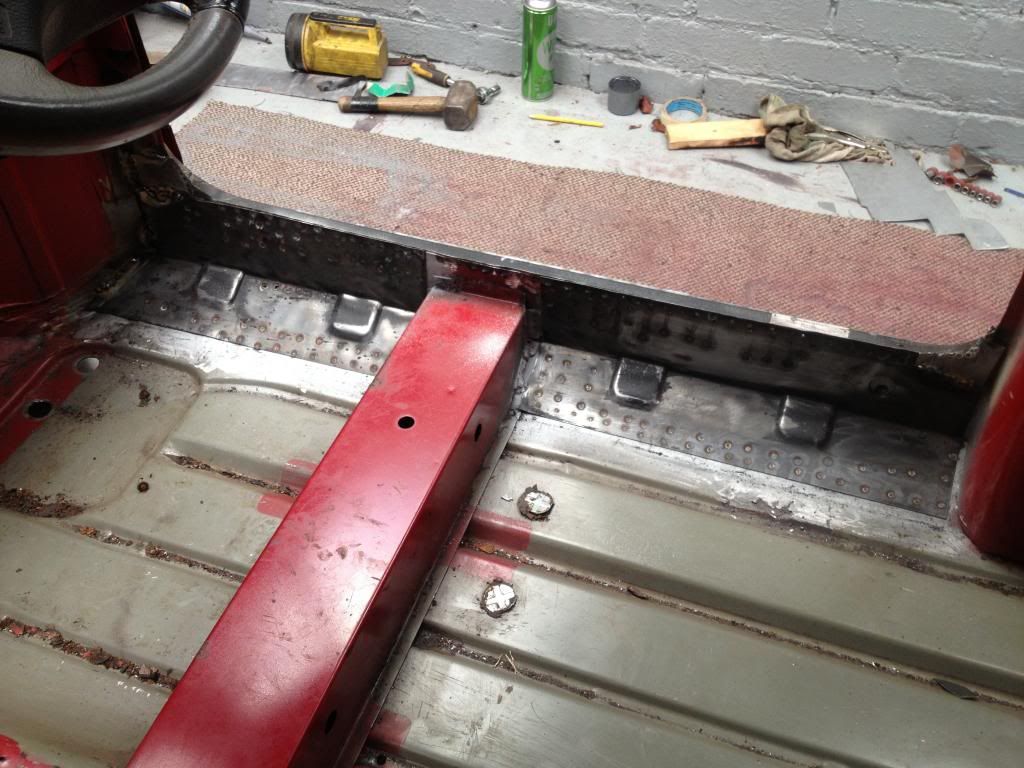
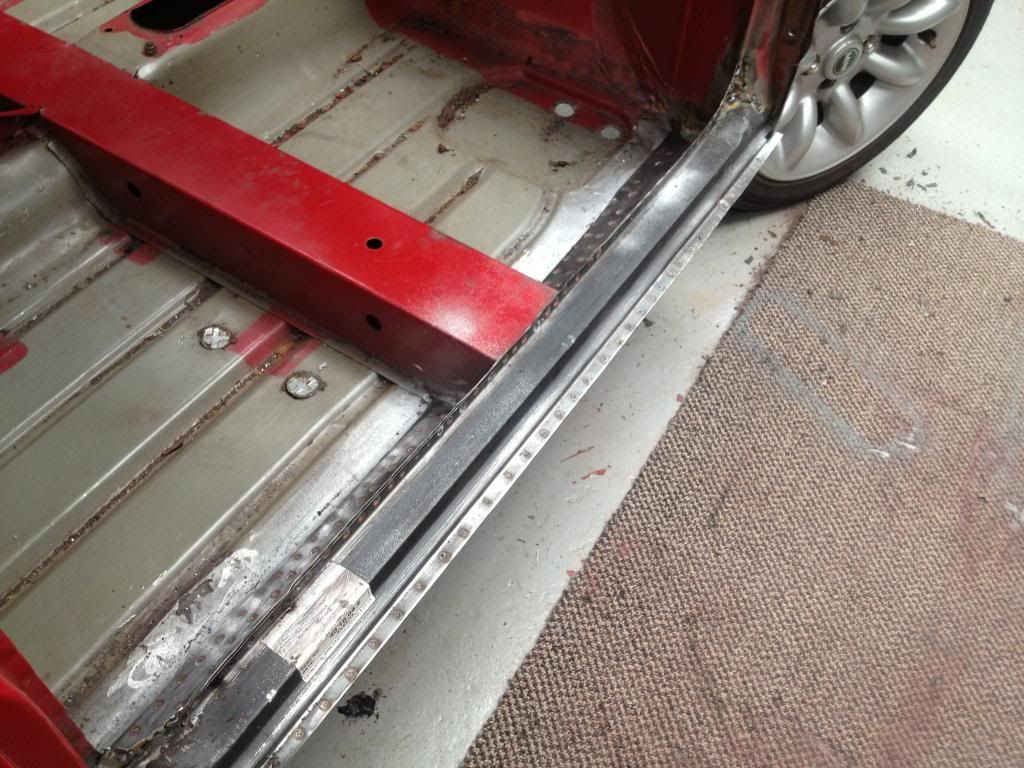
Started getting the strength back into the drivers side...Inner and outer sills sorted.  Still needs a few more welds in places with the mig, then grinding down and finishing.  Want to get the car solid before dressing the repairs.


010_zpsadca5b7c.jpg


014_zps76202075.jpg


012_zpsac8f4168.jpg


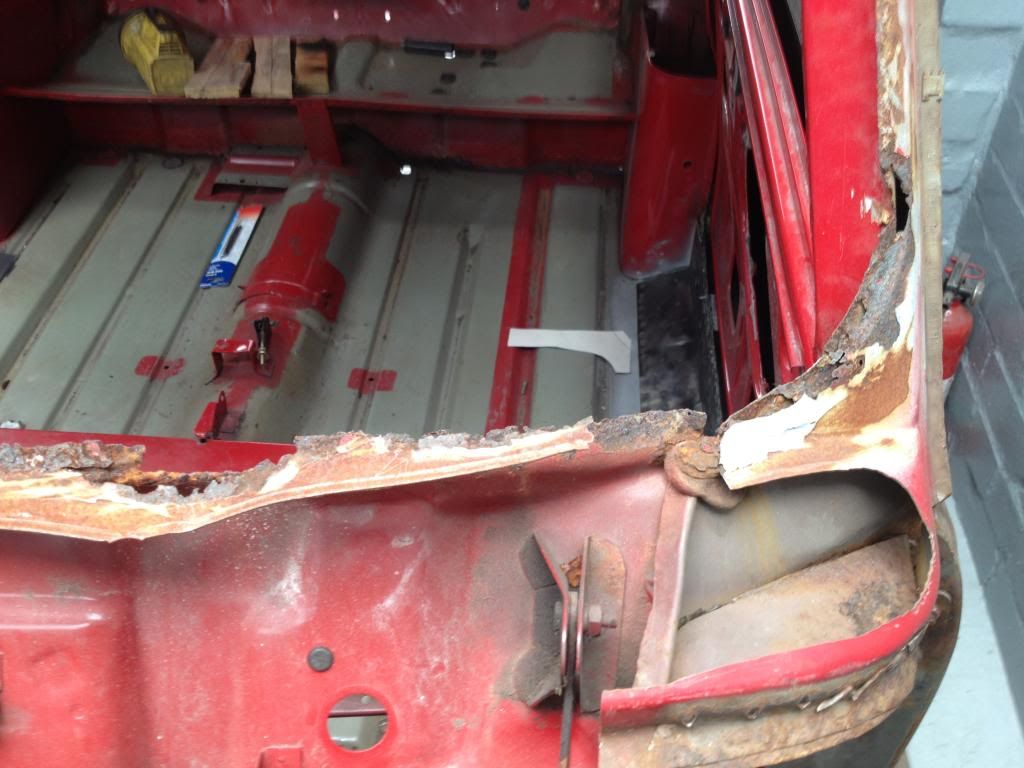
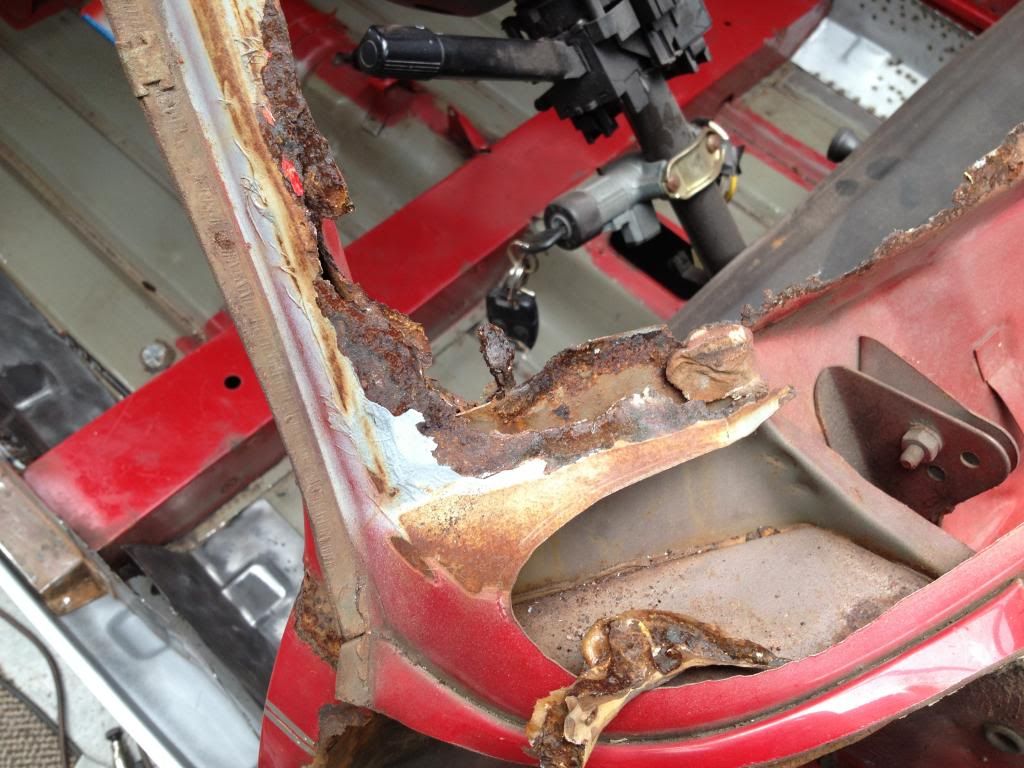
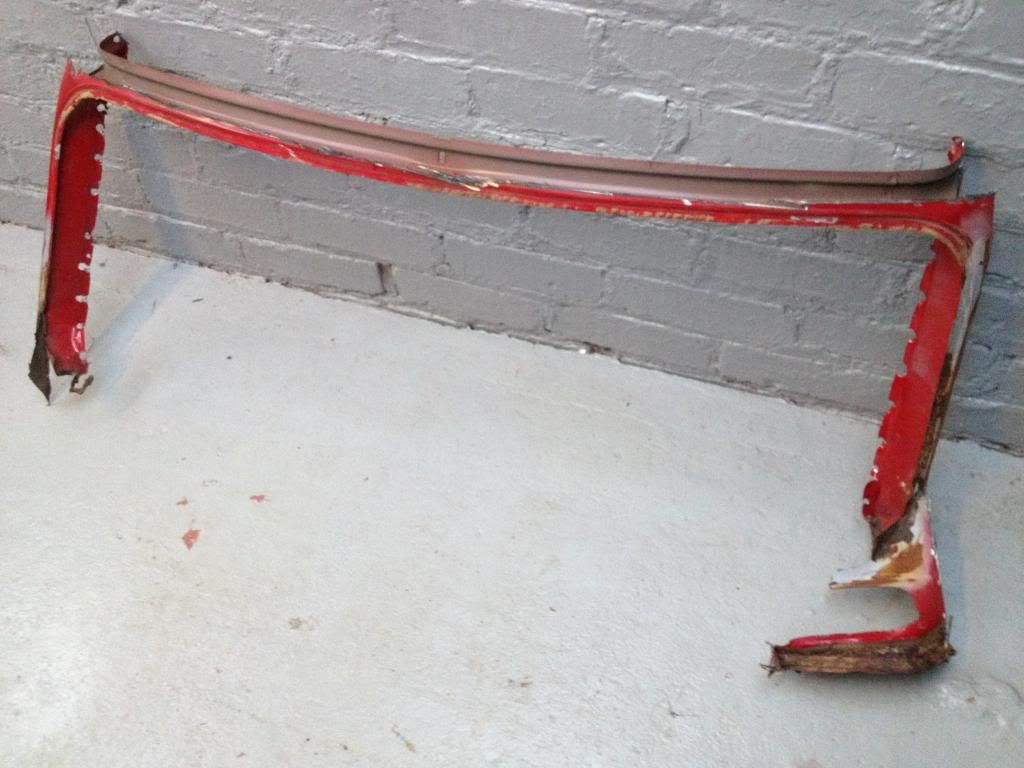
Then turned my attention to the front screen surround.  It was in a bad way and was an absolute **** to remove but got there in the end.


004_zps9f2ad831.jpg


Notice the resin that had been used to cover the rust.  This was everywhere you see the grey primer


003_zpse8792915.jpg


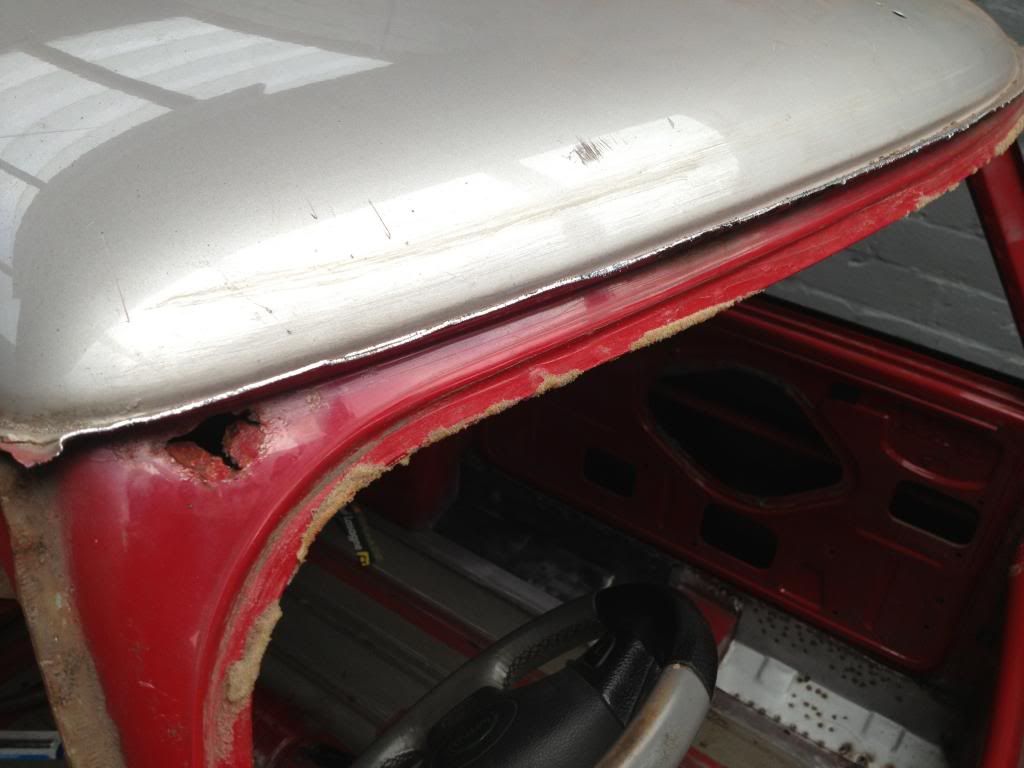
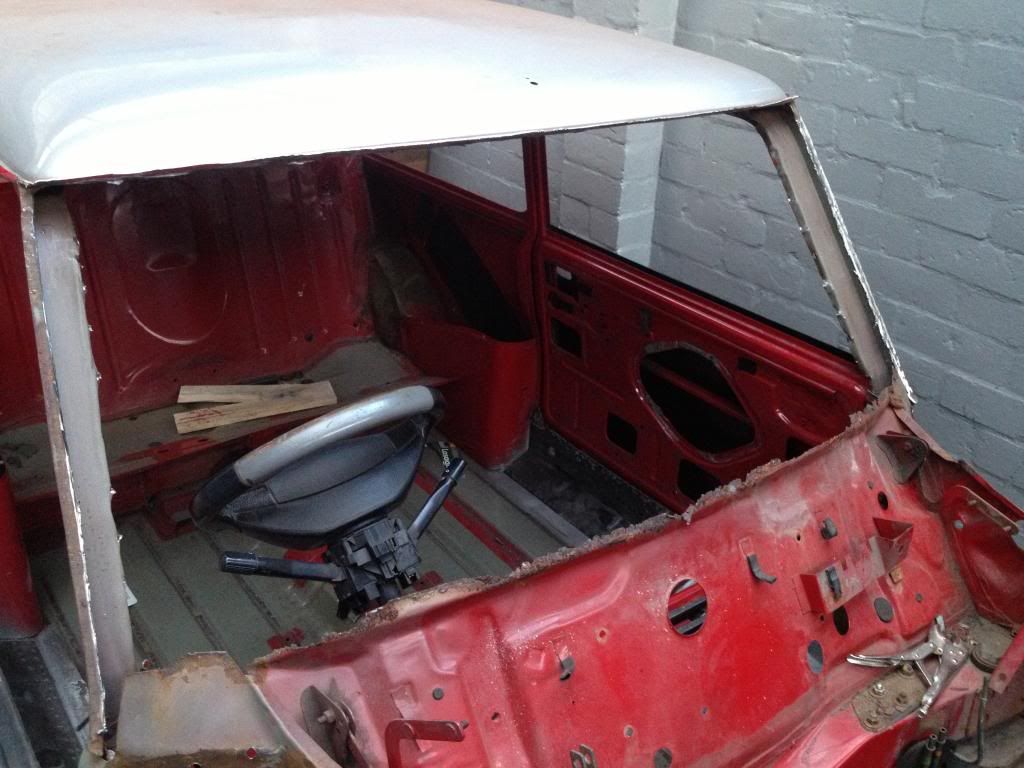
As this is a later car, unfortunately the roof and pillars are roll welded so not much chance of removing that with ease.  Decided the best way to tackle this was to cut it back and spot weld through the three layers.  Last thing i want is to cause distortion to my perfect roof panel trying to hack the old seam off.


Gutter cut off


016_zps8cec21d5.jpg


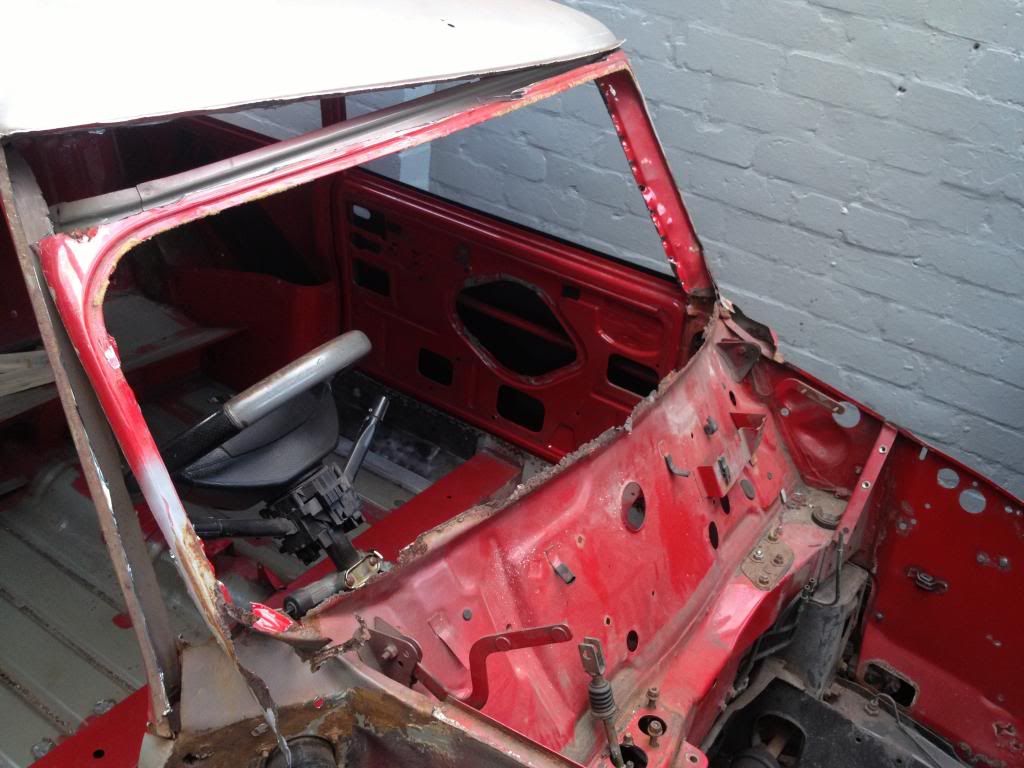
Drilled spot welds on the door frame and cut the rest of the screen panel out on the pillar.


017_zps2b1d5150.jpg


Screen panel removed


018_zps924b063d.jpg


019_zps0b2a7627.jpg


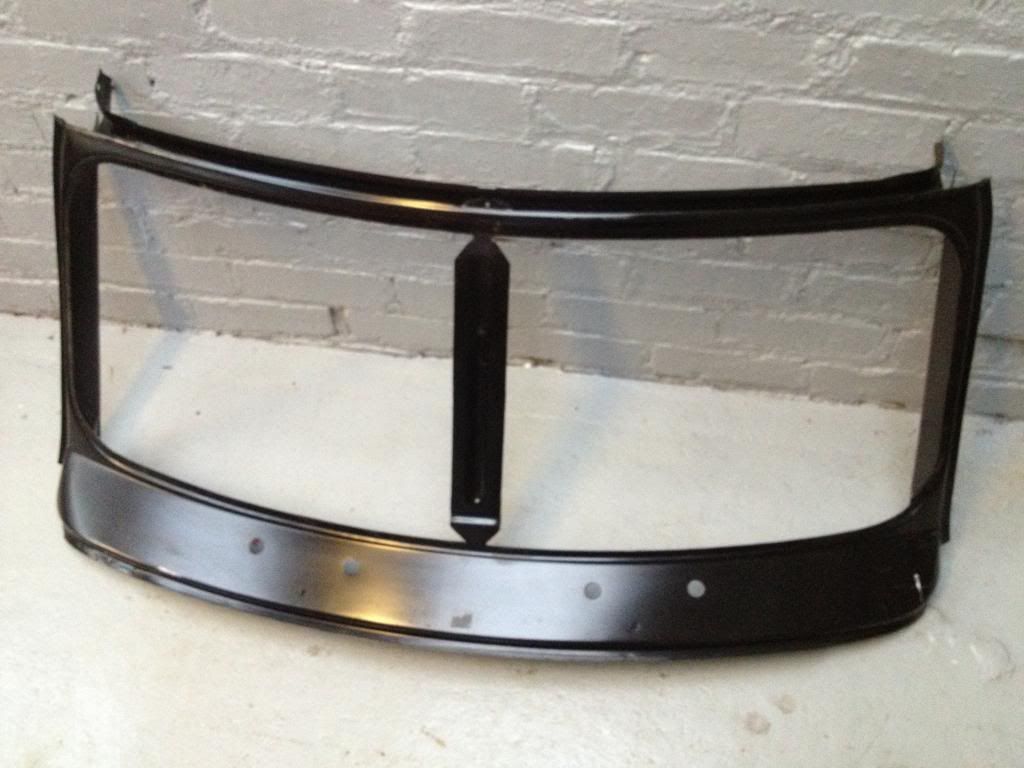
Theres something sexual about new Genuine MG Rover Panels  :P


020_zpsd5beaf4b.jpg


Well thats it for today.  Will start bulkhead repairs tomorrow and hopefully get this new screen surround fitting.


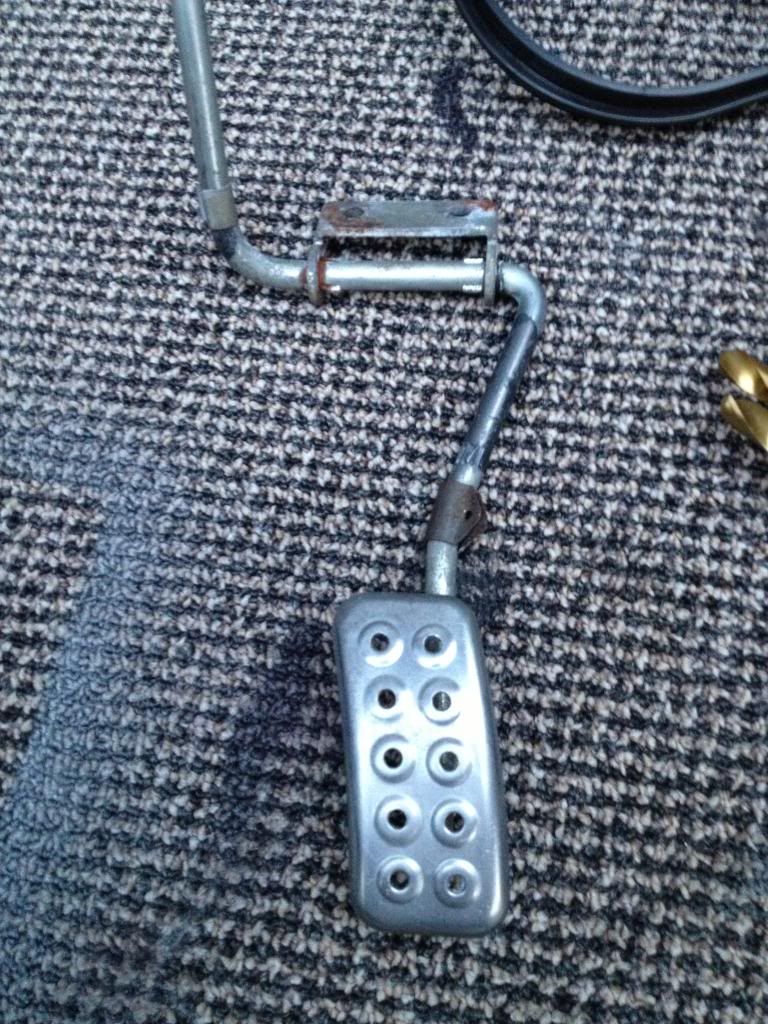
Oh ive also polished my accelerator pedal :)


008_zps866bad74.jpg


#47 hennasxi

hennasxi

    Mini Mad

  • TMF+ Member
  • PipPipPipPip
  • 117 posts
  • Location: Hampshire
  • Local Club: LSMOC

Posted 10 October 2013 - 08:04 PM

This thread gives me great hope for keeping my CS500's on the road forever!!  Great stuff this - would be great to see your Tahiti Blue car finished off, you'll have to bring it on one of our 2000 mini register club stand displays when its done.


#48 Zeemax Adventure

Zeemax Adventure

    Speeding Along Now

  • TMF+ Member
  • PipPipPipPipPip
  • 301 posts
  • Location: Llandudno

Posted 10 October 2013 - 08:29 PM

This thread gives me great hope for keeping my CS500's on the road forever!!  Great stuff this - would be great to see your Tahiti Blue car finished off, you'll have to bring it on one of our 2000 mini register club stand displays when its done.


I know I was going to do it Tahiti, but after do i dont i moments ive decided to keep it red as it was intended.  Its going to be a very nice standard example of a Mini Cooper sport...with a tasteful exhaust of course :)


#49 Zeemax Adventure

Zeemax Adventure

    Speeding Along Now

  • TMF+ Member
  • PipPipPipPipPip
  • 301 posts
  • Location: Llandudno

Posted 13 October 2013 - 09:17 AM

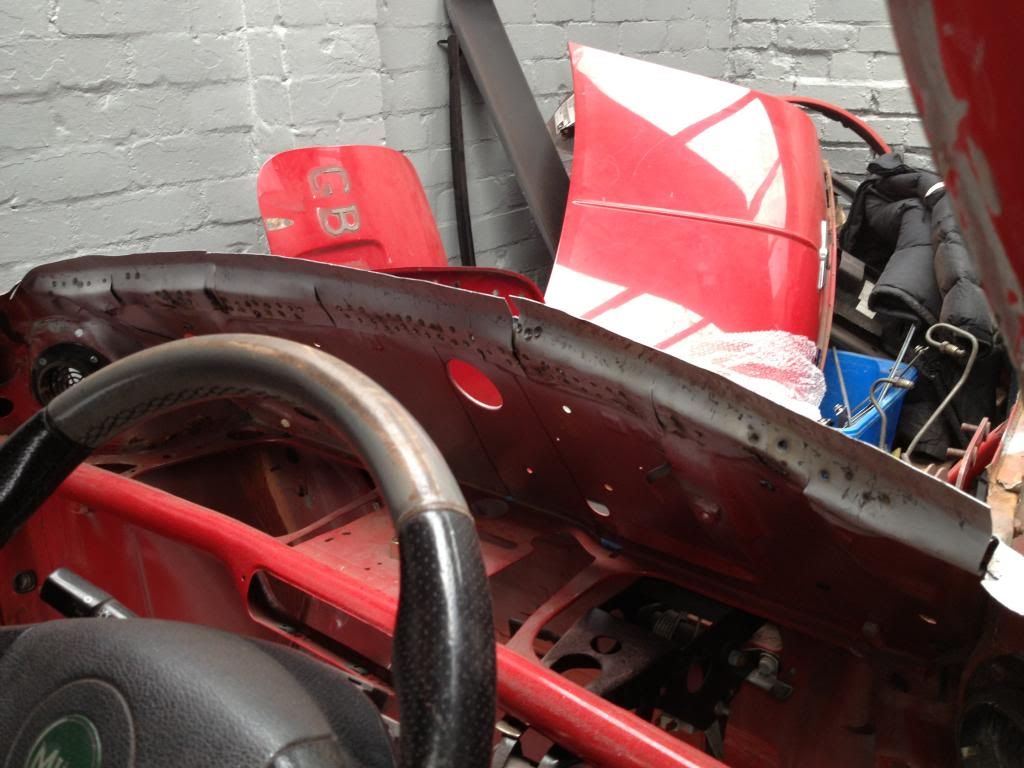
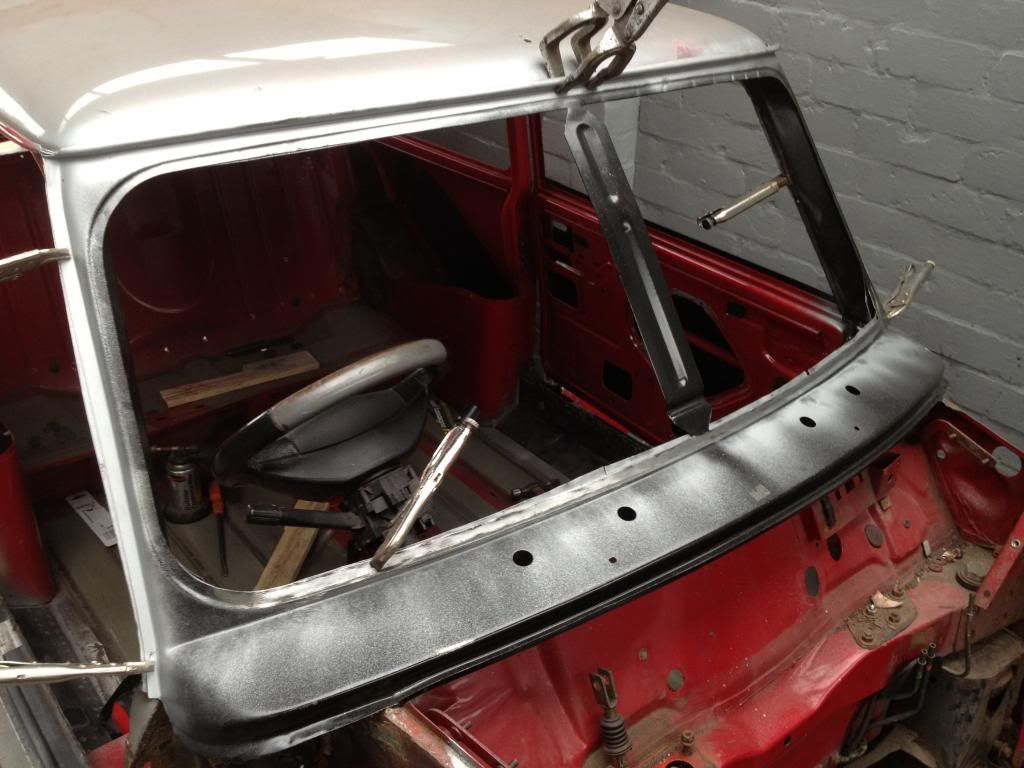
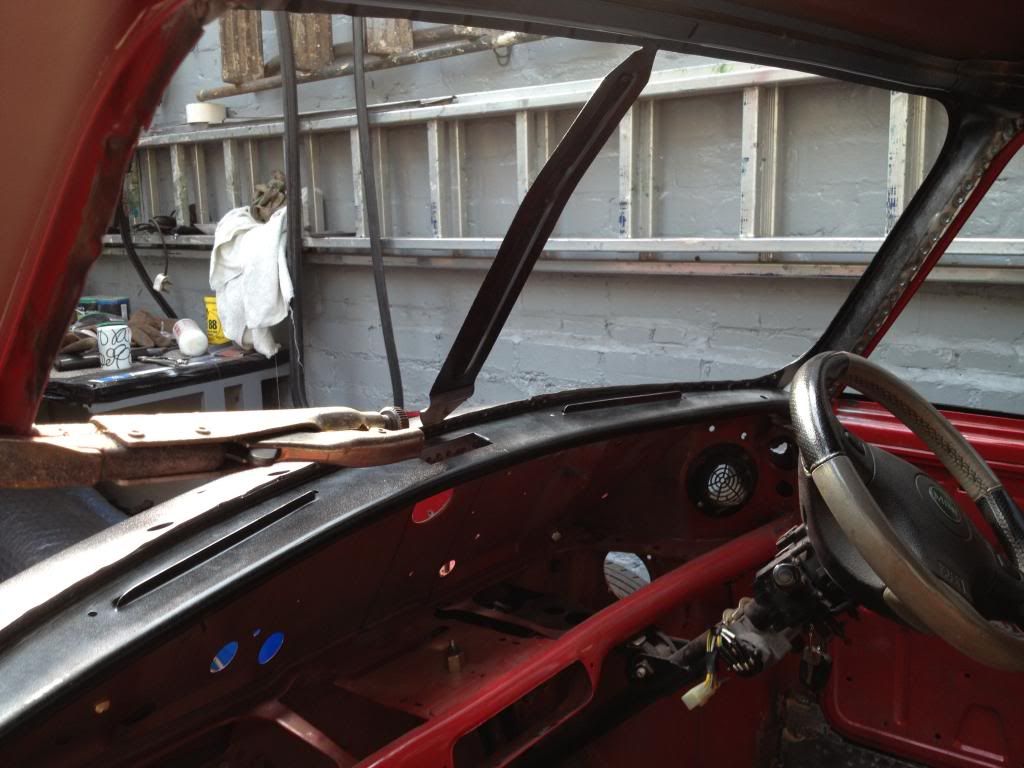
A little bit more progress, ok its quite a big step and im glad its done.  Windscreen panel and dash rail are now in and fitted :) Thats the worst bits over with I hope.  


Started by cutting out the old rust and fabricating a new upper bulkhead edge.  Nothing pretty but its hidden.  The finished article does look nicer than this but forgot to take pic as was too excited to get the screen panel in place


005_zpse2d07f48.jpg


New panel in place and fitting reasonably well after lots of fettling


007_zps7633bb53.jpg


New dash rail in place too


009_zps1b3bf880.jpg


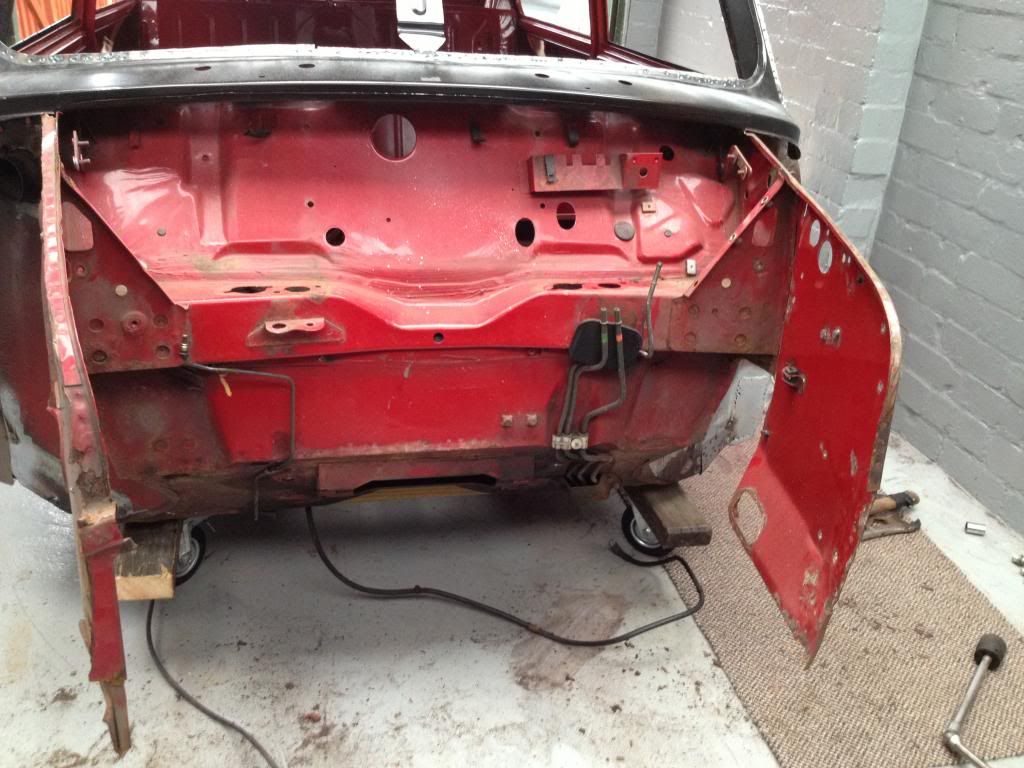
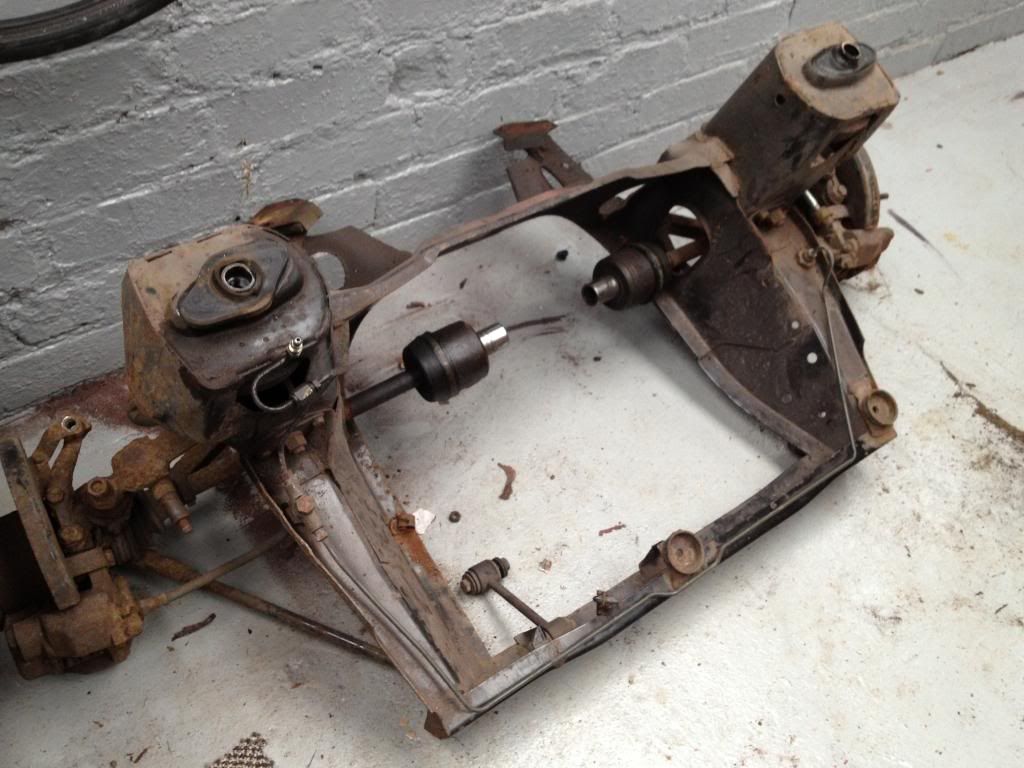
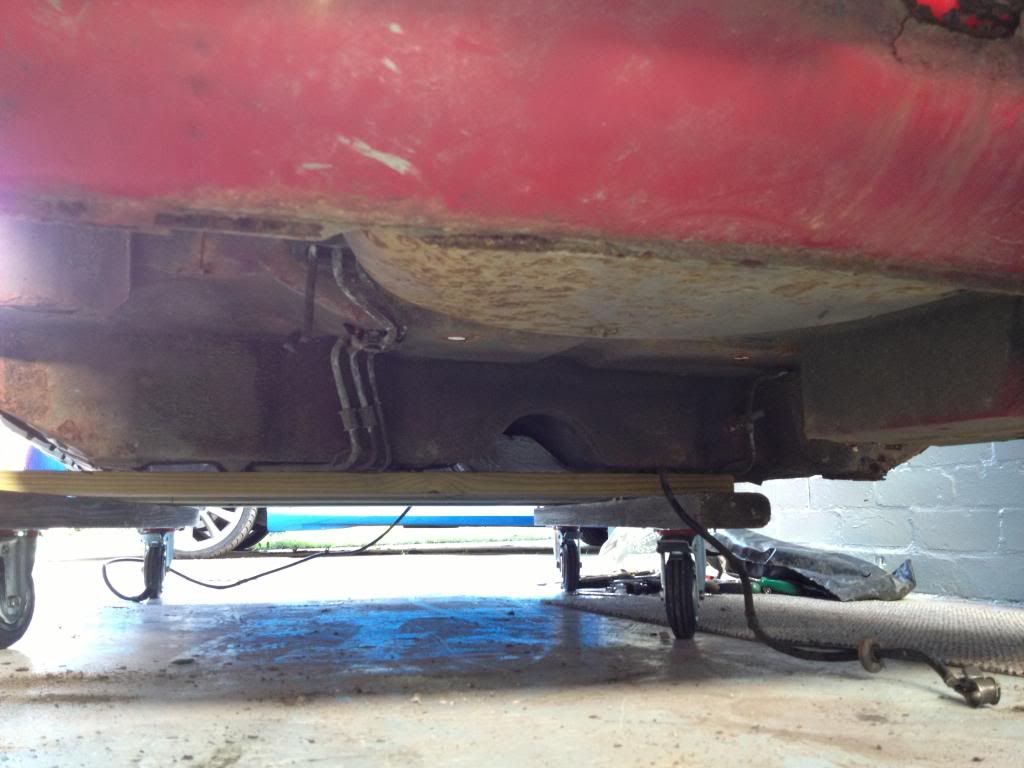
Next decided to get the car on a trolley and  remove the front and rear subframe.  Only got the front done yesterday but heres some pics.  Looking in great condition, so once ive stripped and used it to align the new front end, it will be getting cleaned and painted ready to be fitted with engine after the respray.  Cant wait....


013_zpsfa2889b9.jpg


012_zpsd6c1ab12.jpg


#50 sport2000

sport2000

    Mini Mad

  • Members
  • PipPipPipPip
  • 279 posts
  • Location: UK!

Posted 13 October 2013 - 12:05 PM

Top work....Keep this updated please,very interesting project..

#51 Carvell

Carvell

    Speeding Along Now

  • Members
  • PipPipPipPipPip
  • 316 posts
  • Location: North West

Posted 13 October 2013 - 12:22 PM

Very interesting, jealous of the garage

#52 olds_kool_lews

olds_kool_lews

    Up Into Fourth

  • Traders
  • PipPipPipPipPipPipPipPipPip
  • 3,601 posts

Posted 13 October 2013 - 05:39 PM

009_zps1b3bf880.jpg

Going for the split screen look? lol looking good though! Bet its nice to work on a clean shell!

#53 steven

steven

    One Carb Or Two?

  • Banned from Buying/Selling
  • PipPipPipPipPipPipPip
  • 1,195 posts
  • Location: Uk

Posted 13 October 2013 - 05:45 PM

looks great !


#54 Wigeon Incognito

Wigeon Incognito

    Mini Mad

  • Noobies
  • PipPipPipPip
  • 294 posts
  • Location: Essex
  • Local Club: Essex Mini Club

Posted 13 October 2013 - 09:26 PM

At the start you said it wasn't a 500 but it has the silver roof, silver stripes, half silver leather seats, half silver leather steering wheel, and the turned alloy dash. Is it definitely not a 500?

Matt.

#55 Wigeon Incognito

Wigeon Incognito

    Mini Mad

  • Noobies
  • PipPipPipPip
  • 294 posts
  • Location: Essex
  • Local Club: Essex Mini Club

Posted 13 October 2013 - 09:32 PM

Actually, having read the 500 register site it's not as easy as that so ignore me!

Good luck with the project!

Matt.

#56 Zeemax Adventure

Zeemax Adventure

    Speeding Along Now

  • TMF+ Member
  • PipPipPipPipPip
  • 301 posts
  • Location: Llandudno

Posted 08 December 2013 - 05:19 PM

Ok, so its been almost two months of very little progress due to work, but i have finally got round to updating you fellow mini fans on progress :-) 


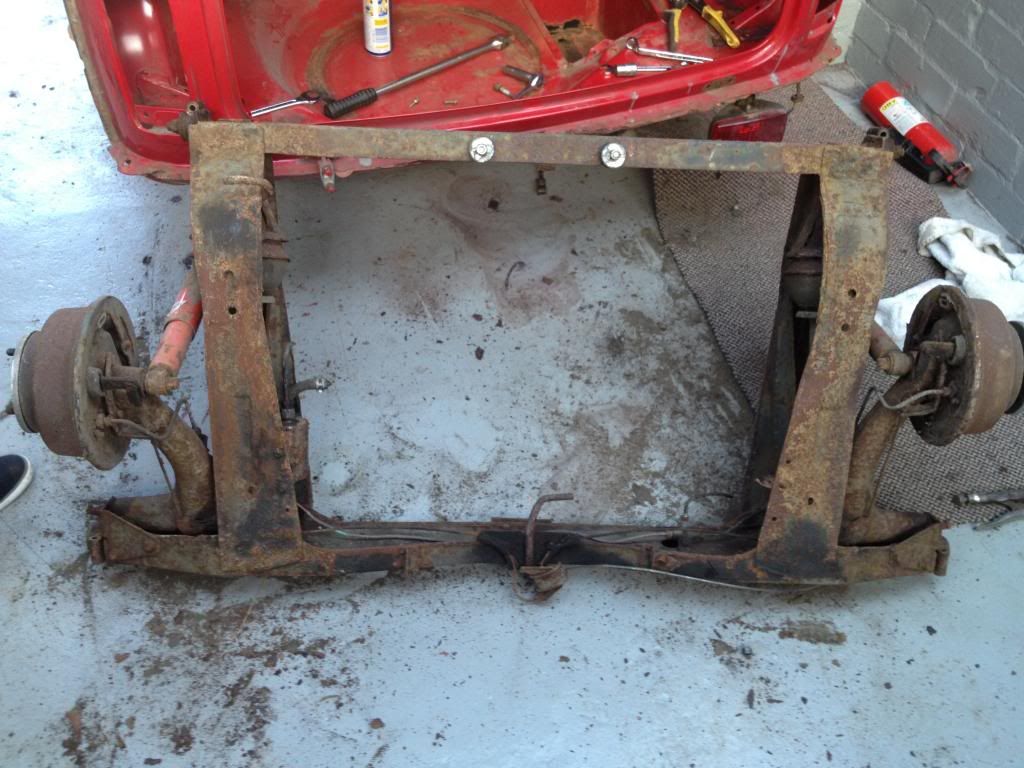
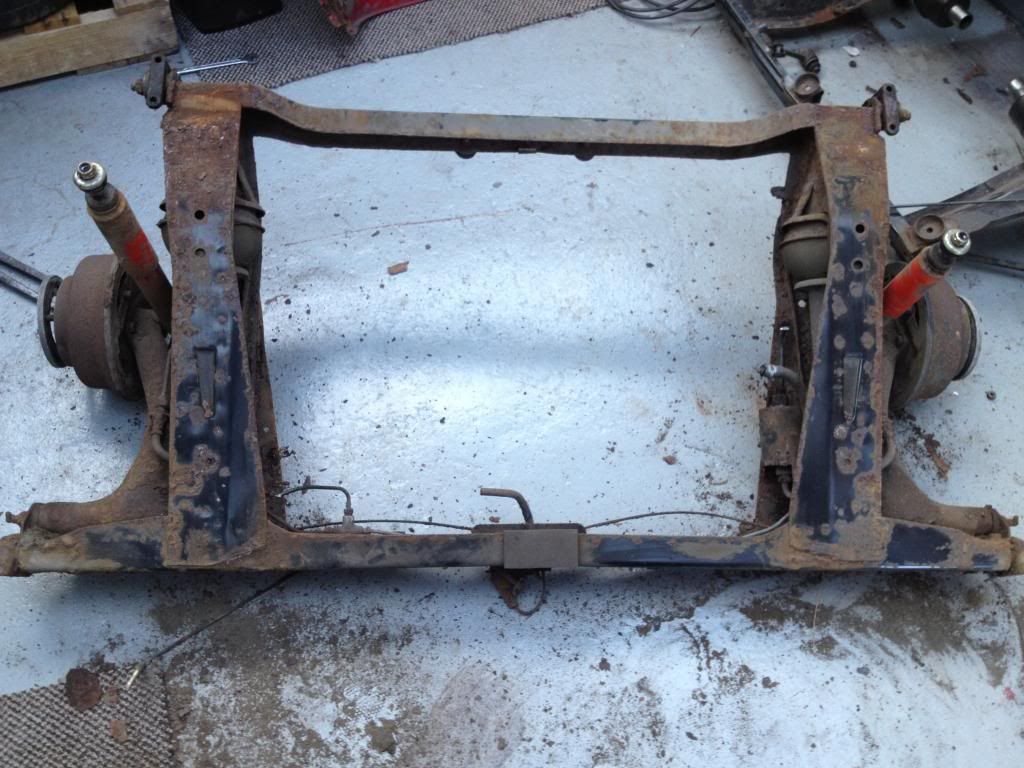
Well following on from where we left off, the rear subframe was removed and turned out to be solid.  So this will be cleaned, all the essentials reconditioned and reassembled, but thats another day.


0032_zps52401b57.jpg


0022_zps6619c97f.jpg


The new wheels ;-)


005_zpsfbbe2cd9.jpg


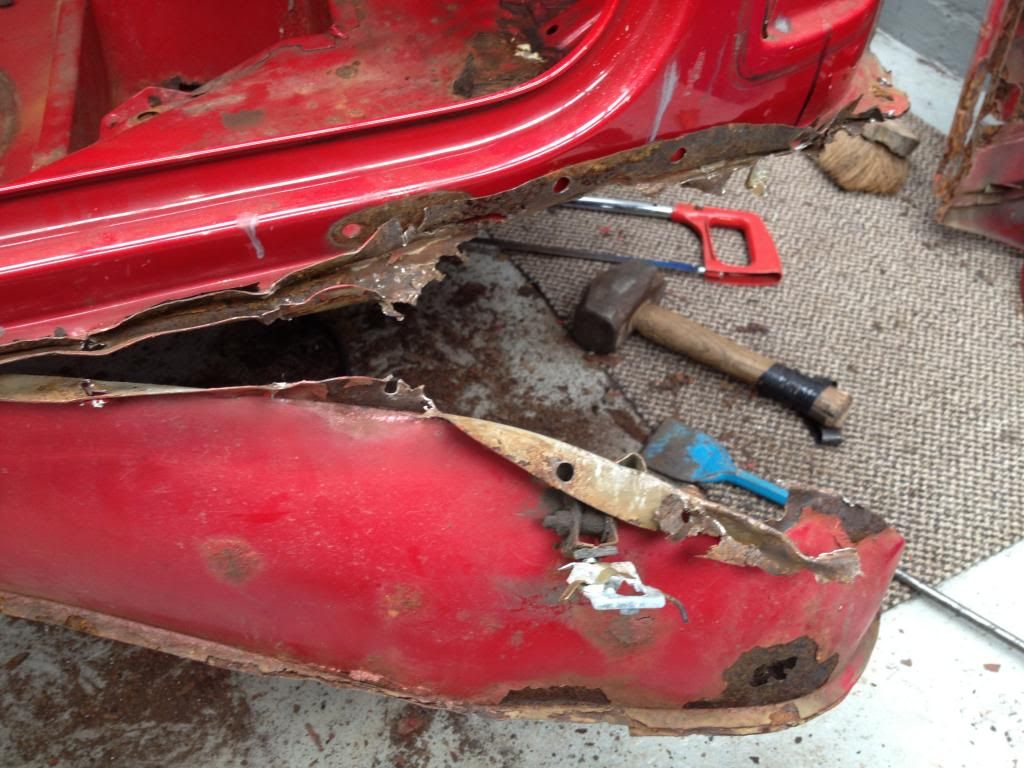
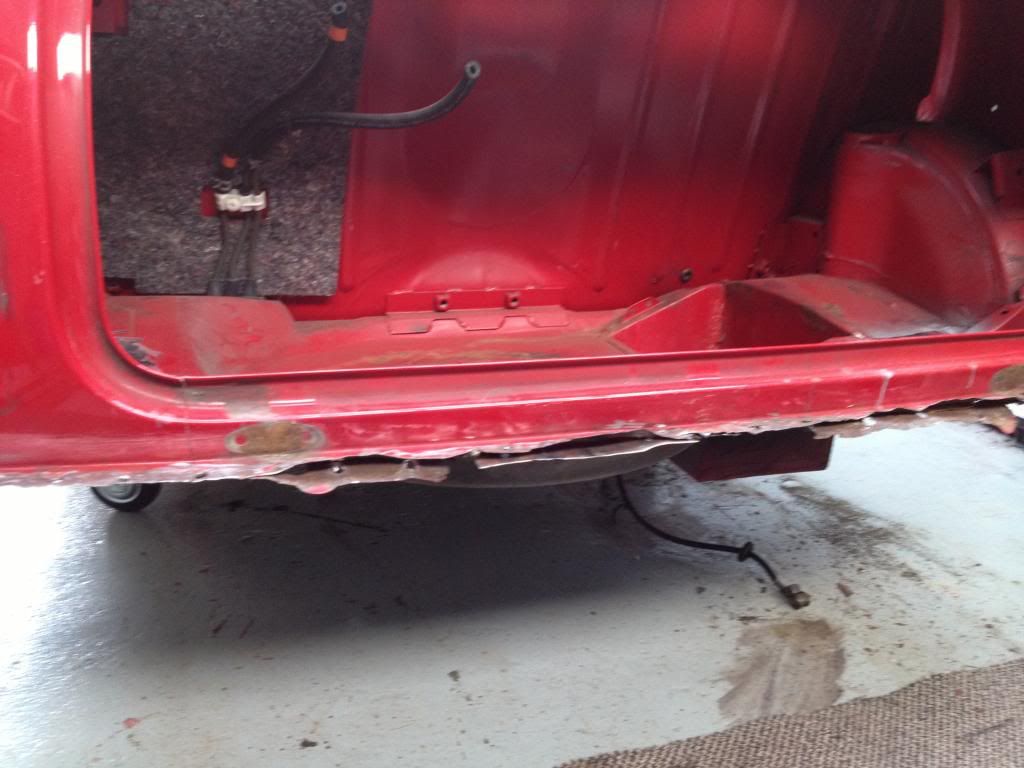
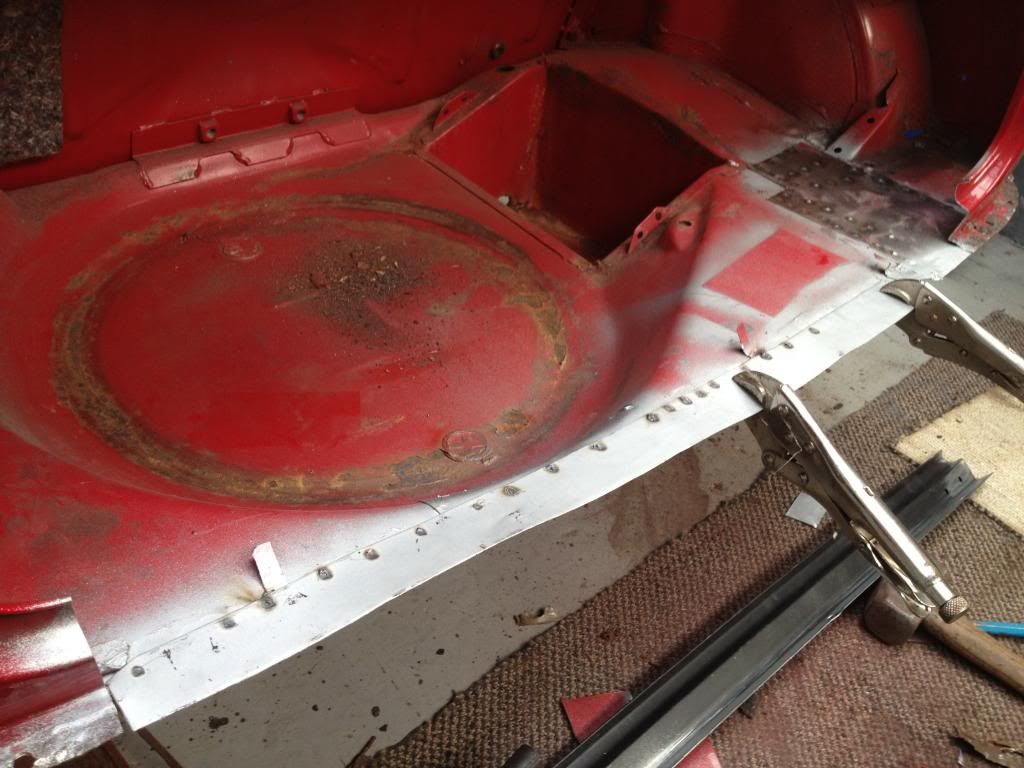
Started to remove the rear valance.  Was hoping the boot floor in between would be solid however this turned out not to be the case.


014_zps971a3cfc.jpg


015_zps52b103eb.jpg


All off and condition of seams is not brilliant


021_zps8b71bed2.jpg


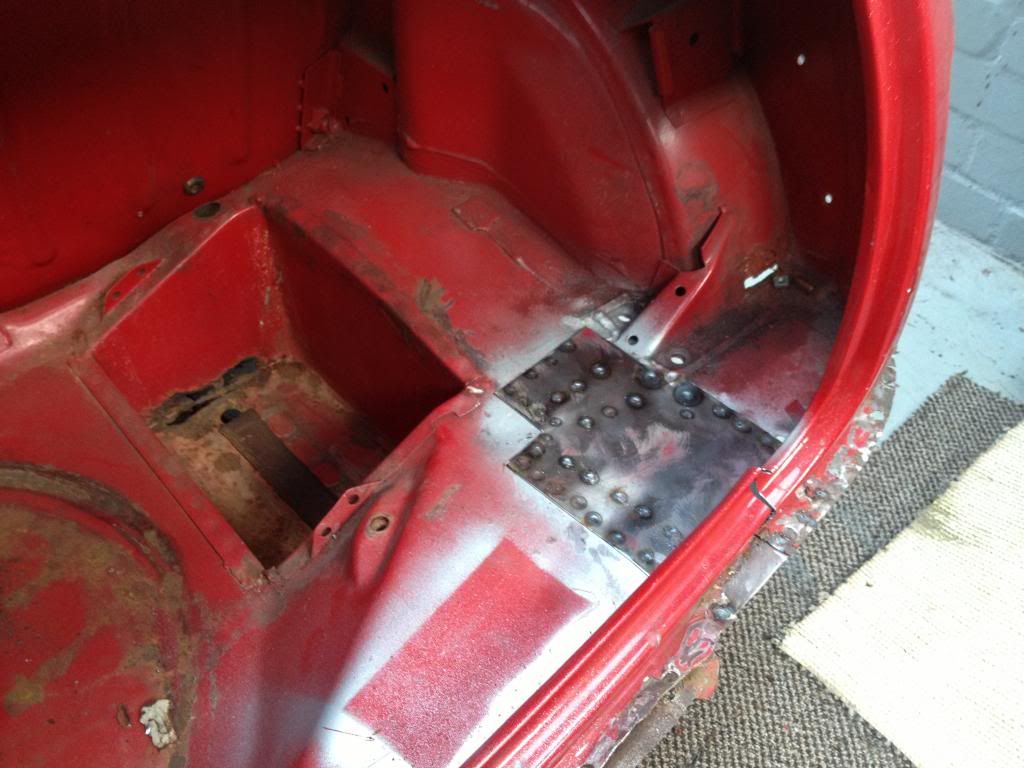
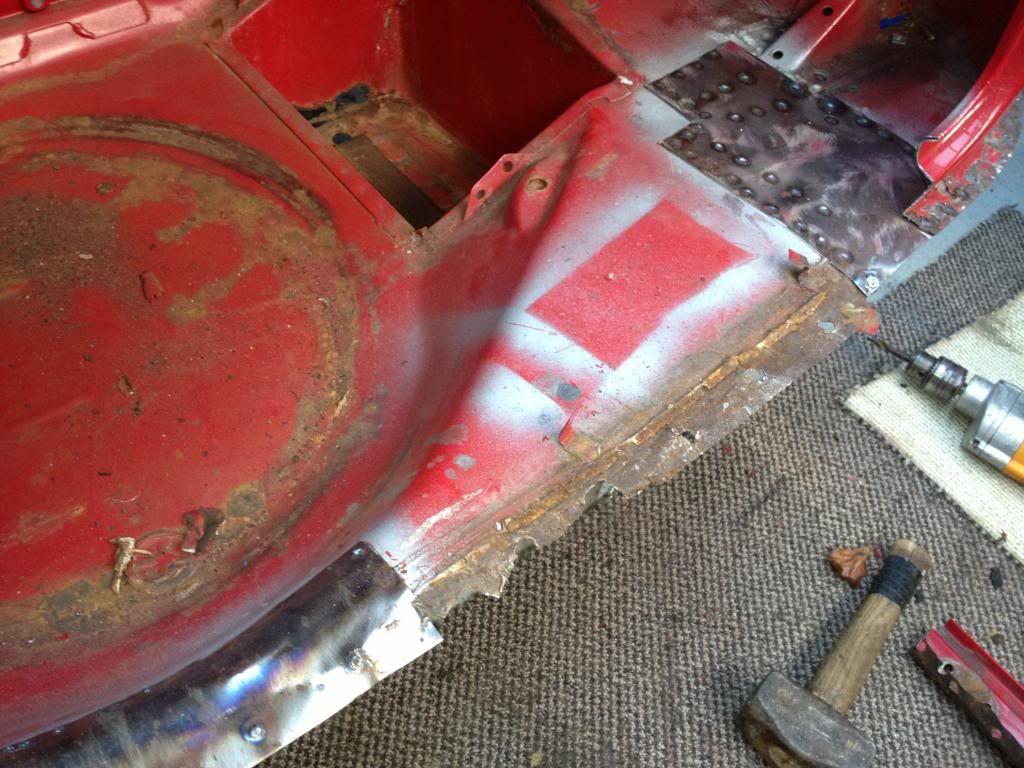
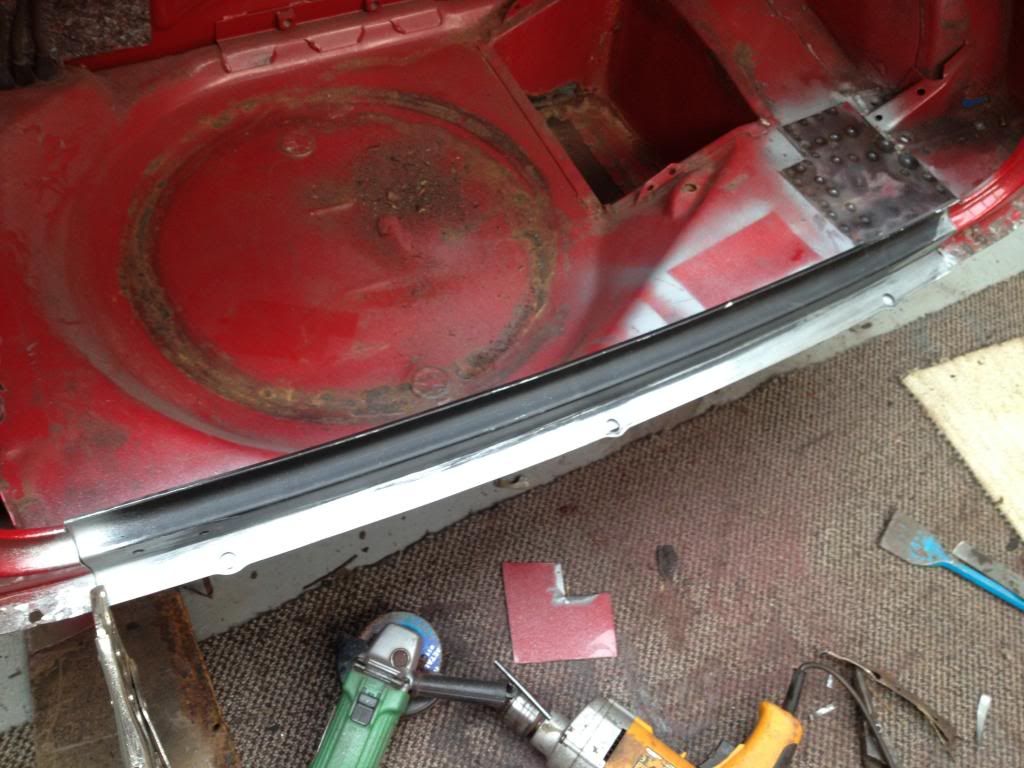
Old rust cut and ground down, and fresh metal spot welded into place 


022_zps156cb9eb.jpg


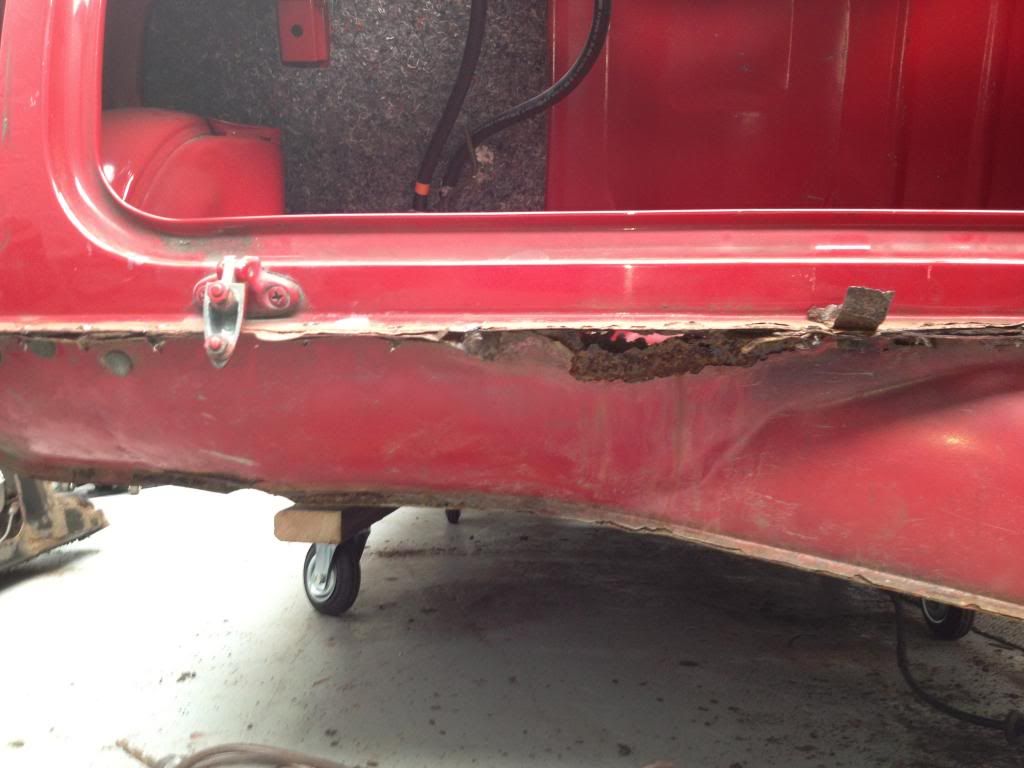
Hinge panel removed, showing corrosion to the boot floor seam


024_zpse0036261.jpg


Corrosion cut out, and a nice fresh piece of metal to replace it.  Ok its part of the old doorskin, but its clean metal 


026_zpsf2eb0e68.jpg


And started to spotweld into place


028_zpsc1ce5709.jpg


New Hinge panel lined up ready for trial fitting of the bootlid


029_zps8533ce07.jpg


And look at this little beauty i found on the very popular auction site.  I was going to repair my old one but saw this and its solid with no holes drilled for the number plates either so no corrosion at all :)  happy boy
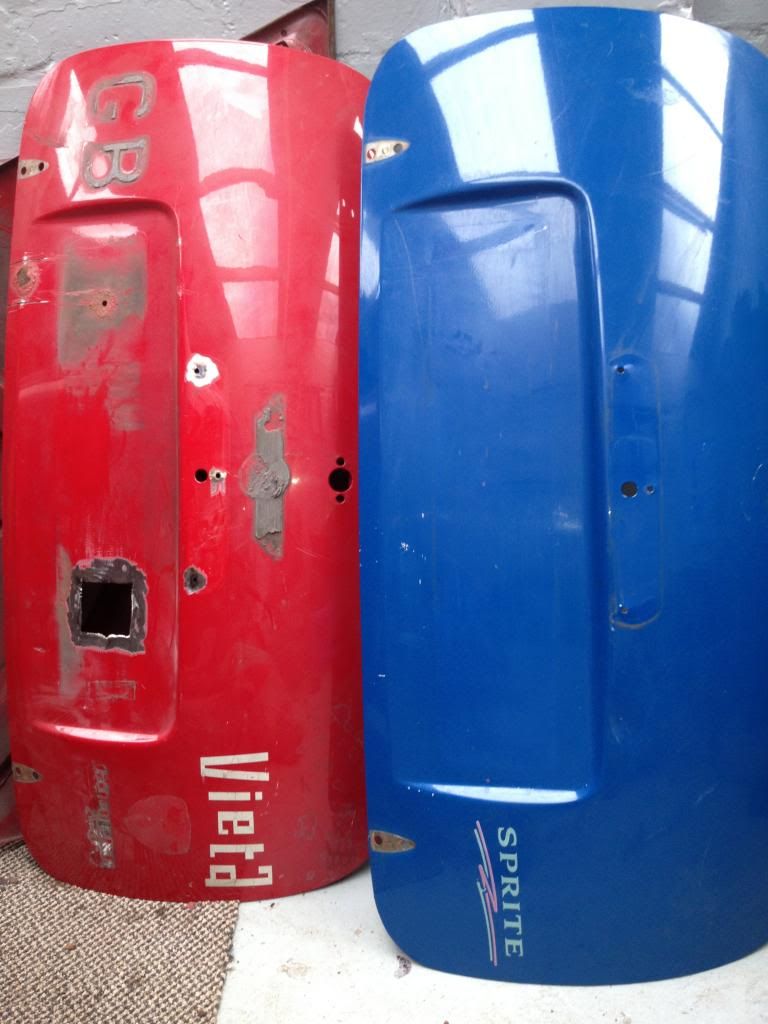
 

 016_zps52369bfd.jpg


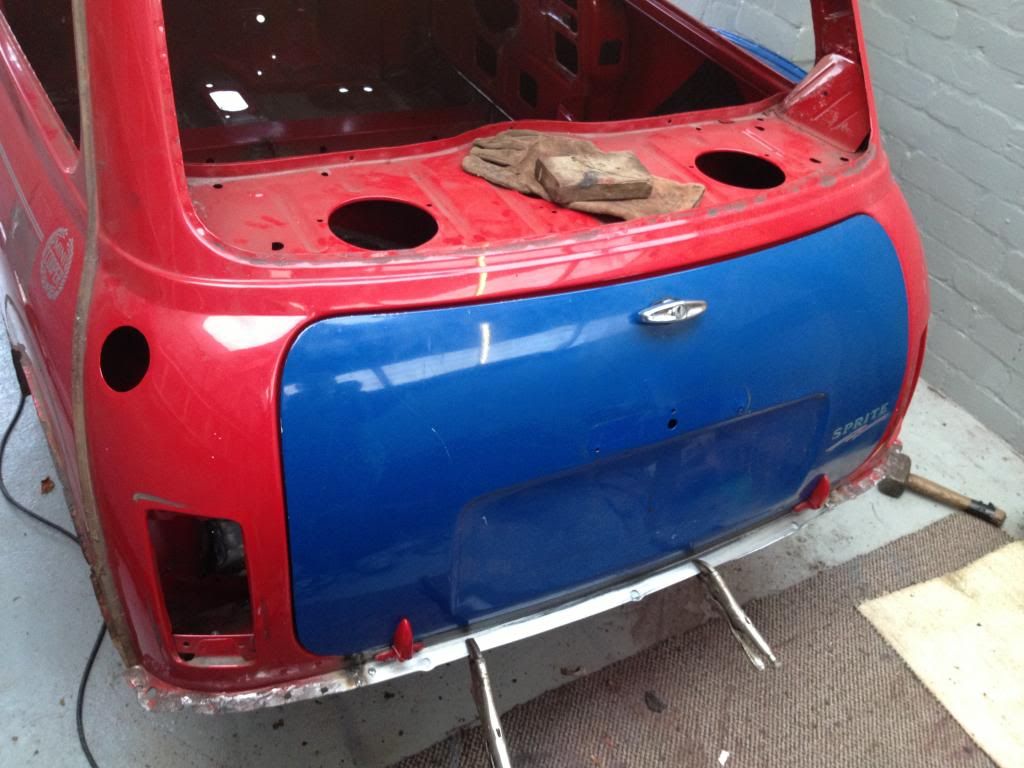
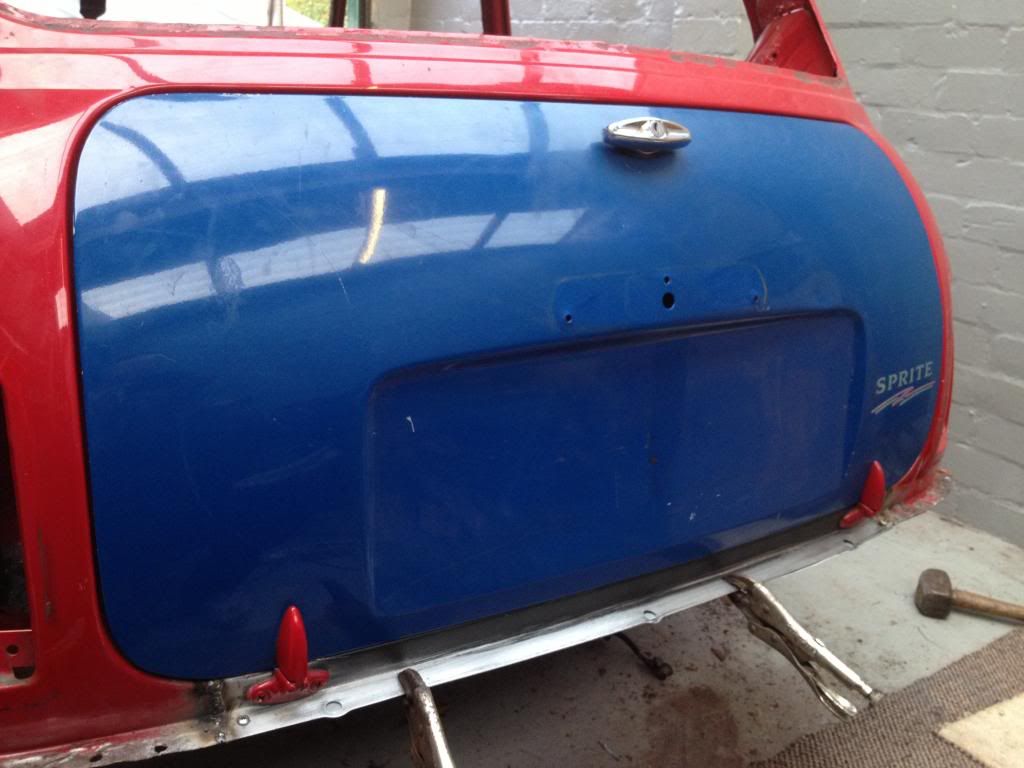
Some replacement bootlid trial fitting.  Needs slight adjustment to the centre of the hinge panel once its fully welded up.  Other than that after a lot of tapping, twisting, hinge adjusting and nudging i'm more than happy with the gaps at this stage


031_zps63bbadf3.jpg


030_zpsd94f60ca.jpg


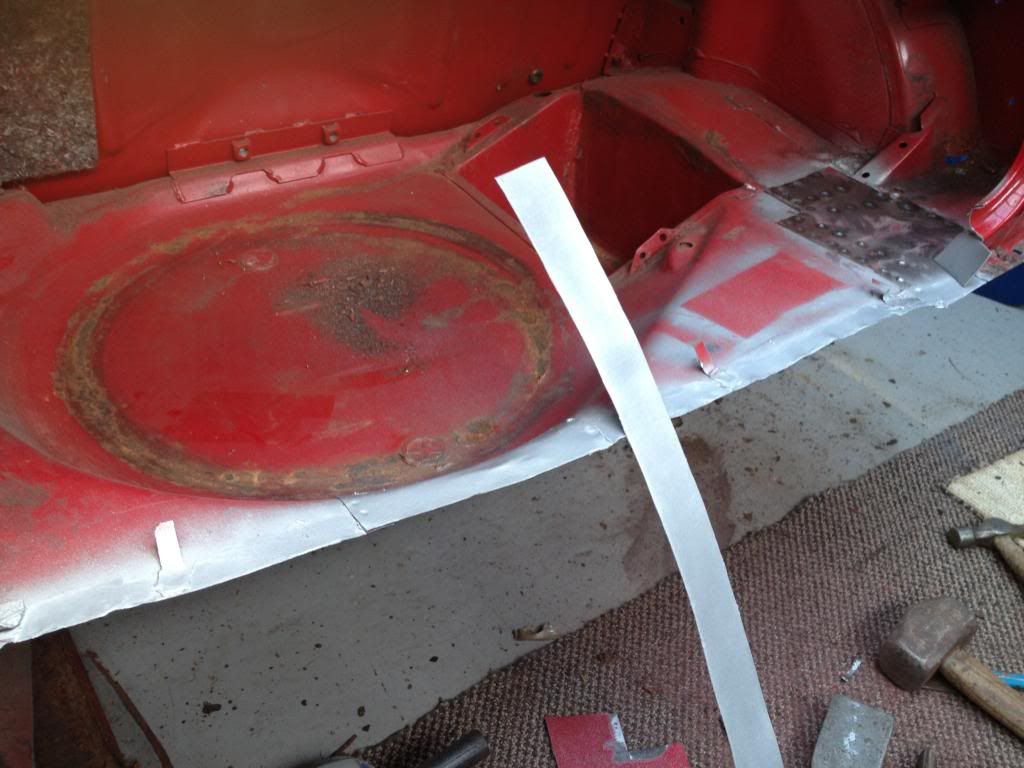
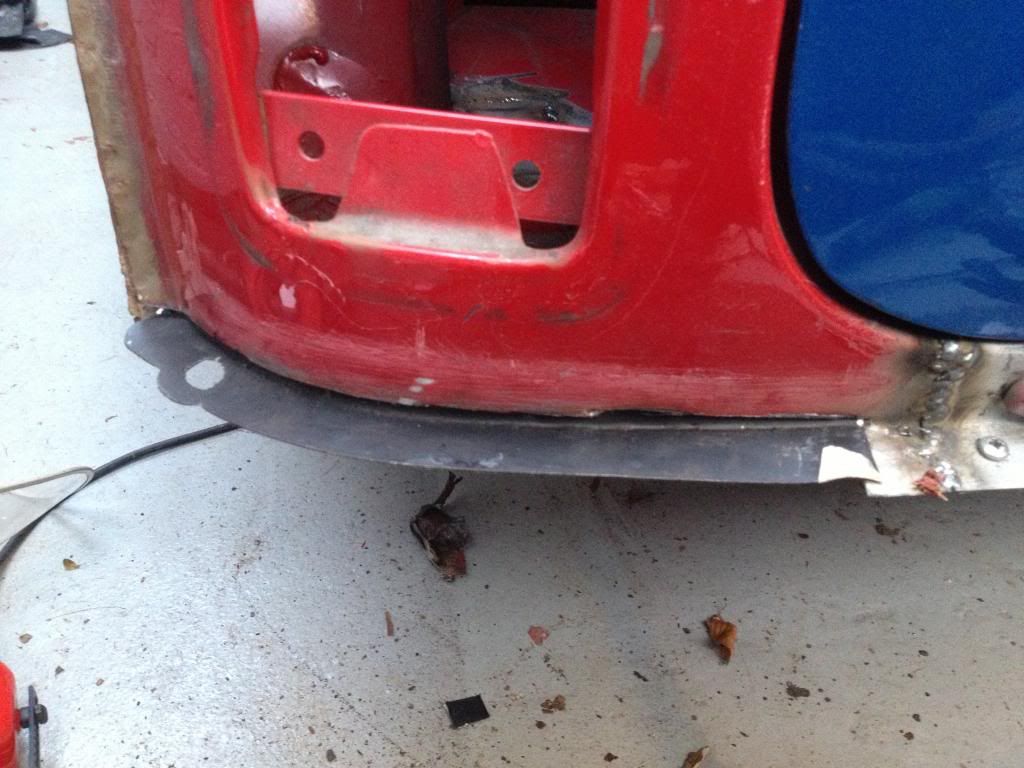
I then started to remove the rust from the corners.  Again a replacement boot floor repair section had to be fabricated and these corner repairs cut down and tapped around to fit.  This is as far as i got today...


032_zps5d3692f8.jpg


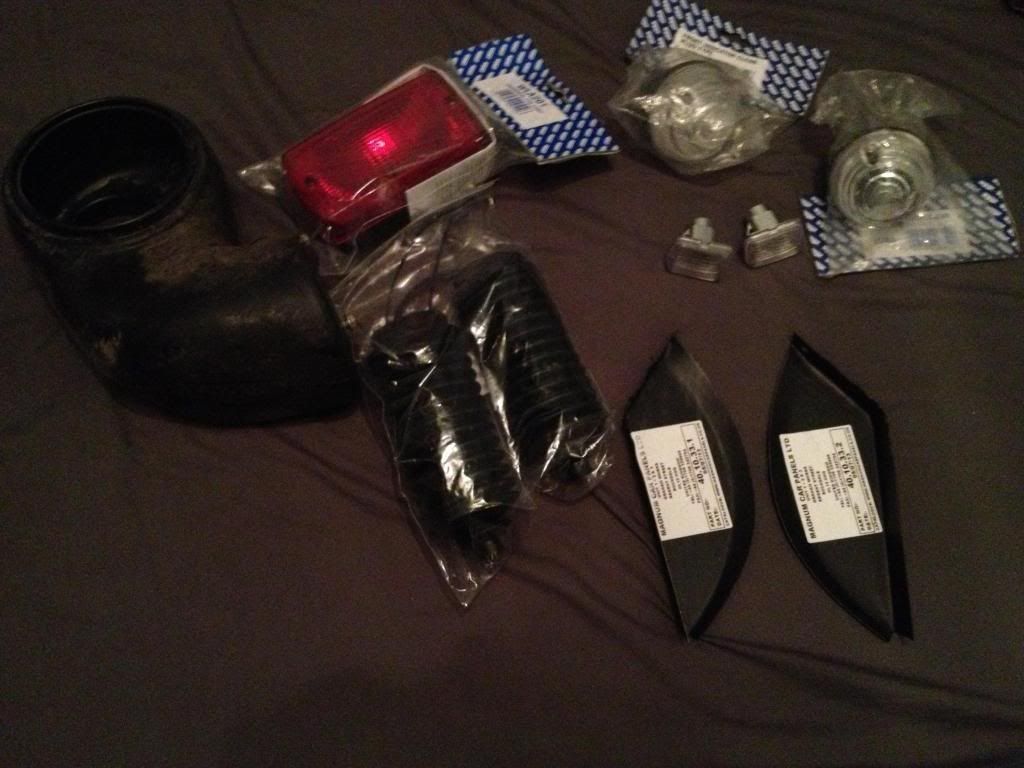
Also went to minifair in coventry and came away with a few bits 


035_zps6f6c37f7.jpg


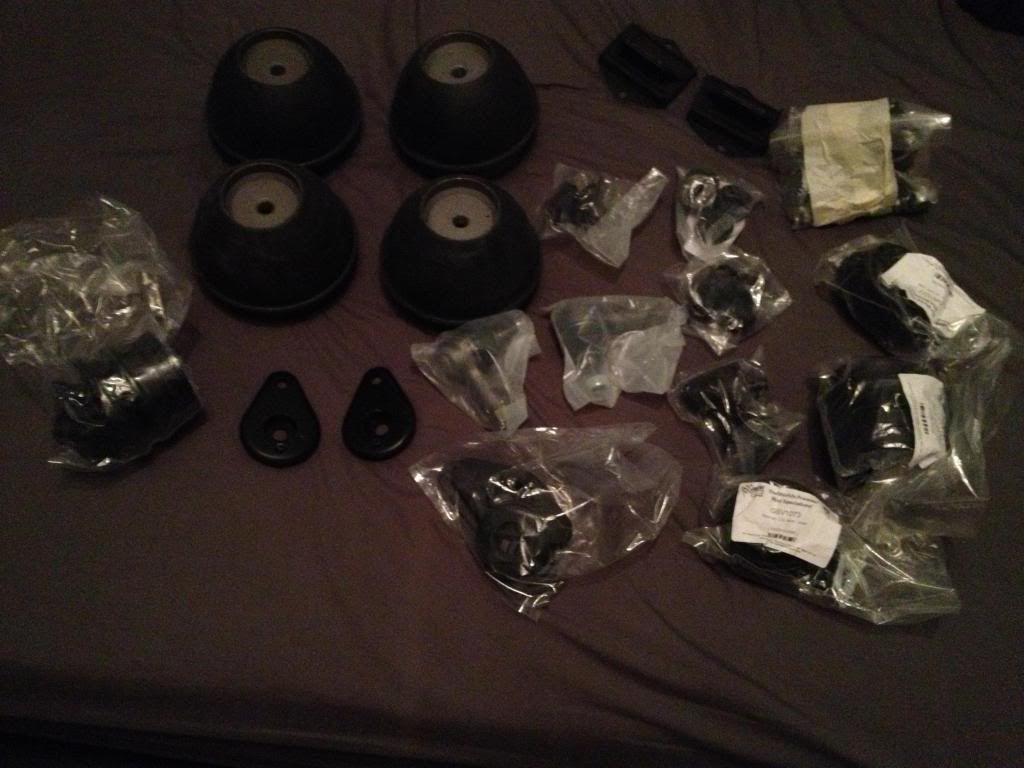
And spent a small fortune at minispares on some new rubbers.  Was going to do the poly bush stuff for everything but after reading a lot of reviews I decided to play safe and choose good old rubber as Rover intended.  Its not going to be a track day car or highly tuned so Im sure these will serve me well for a while.


034_zps0197b663.jpg


Well thats it for now.  Keep watching as Christmas is coming, and that means time off to make more noise, and get Ollie closer to his respray 


#57 ClubbyRacer

ClubbyRacer

    Learner Driver

  • TMF+ Member
  • PipPip
  • 14 posts
  • Local Club: Bournemouth Mini Club

Posted 08 December 2013 - 07:03 PM

Hi there,


I must say this is a cracking looking project - I'm of the same school of thought as yourself with regards to the late MPIs - nice to see another one being saved!!


I really like the use of the heritage screen surround - all too many people try and get away with repairs as opposed to doing what you have done here which should last significantly longer! Which leads me to my main question - which supplier was it that you got all the panels from at Minifest and that you got a deal on the rest with? Need to get a project of my own started and know how much better heritage can be!!


Thanks


Sam


#58 Zeemax Adventure

Zeemax Adventure

    Speeding Along Now

  • TMF+ Member
  • PipPipPipPipPip
  • 301 posts
  • Location: Llandudno

Posted 08 December 2013 - 08:05 PM

I got all of my heritage panels off south lakeland mini centre in cumbria.  They were extremely helpful and provided a great service.  The majority of the panels have been genuine mg rover or heritage but must admit i'm so glad i did.  The car came with some aftermarket panels and the finish of the curves, quality of the steel as well as the fitment was no where near the quality of the genuine.  Ok its cost me a lot more, but its saved me hours of work and the finish is so much better :)


#59 puggered

puggered

    previously known as Mini15

  • Noobies
  • PipPipPipPipPipPipPip
  • 708 posts
  • Location: Livingston

Posted 08 December 2013 - 08:36 PM

Excellent project thread. Good work buddy :)


#60 GraemeC

GraemeC

    Crazy About Mini's

  • TMF+ Member
  • PipPipPipPipPipPipPipPipPipPip
  • 7,315 posts
  • Location: Carnforth

Posted 08 December 2013 - 08:48 PM

I'd be cautious about spot welding repair panels - the MOT man probably won't like them.
They'll only accept spot welds where they were originally used by the manufacturer, all other repairs/welds should be continuous.


0 user(s) are reading this topic
0 members, 0 guests, 0 anonymous users