95 Sprite Rebuild & 16V Conversion
#166

Posted 18 October 2015 - 06:17 PM
JohnR
#167

Posted 18 October 2015 - 09:27 PM
good work matey.
glad you escaped the wrath of the cutting disc!
I had one recently where i was on my back under the car with the grinder and a fibre disc on it. The disc caught something, ripped the grinder out of my hand and across the garage. Once i had overcome the shock, the grinder was just sitting on it's back on the floor still going flat out.
Scary isn't it
It certainly made my heart beat a bit faster! had a grinding disc break a while ago but it didn't go anywhere near me so not so scary, made a dent in my garage door though.
How did i miss this ?
Awesome work so far matey in saving this mini , lots of new panels which i find much easier than cutting out and welding in bits and bobs , if my shell wasnt too far gone i would have done this with "tiny" instead im kinda building a new one lol.
May have missed it but what engine was in it and what are your plans for it ?
Good luck with the rest of the restoration .
All the best
Mark.
Thanks Mark, I think if the car had some value or historical importance I'd be more likely to repair rather than replace whole panes unless it made no sense to do so but like you say this way is much easier and I'm more likely to have made sure I've got rid of all the rust, I'll have to check out the Tiny project :-D
Engine is standard SPI 1275 as far as I know but I've not cracked it open yet, it ran really well with pretty much zero leaking oil, it had 144K Miles on the clock so I suspect it must have had some kind of overhaul at some point. I've not 100% decided yet though and where to go with it, it certainly isn't going to be standard, I've given thought to a specialist components BMW twin cam 16v head kit but it's not cheap so may go with a large valve ported A series head, hotter cam and programable ECU.
Need to start making other decisions soon too such as arches, wheels (10's or 12's, I'm torn!) and so on before it goes to paint.
looks like you're doing a really nice methodical job there - and by really working on that rust it should last!
JohnR
Cheers JohnR, it certainly had more rust than I thought when I started, but hopefully I'll have eradicated it and as long as I'm doing the right thing it should hopefully stay away as it's not going to be a daily driver so won't be constantly exposed to the great British weather and salted winter roads.
#168

Posted 26 October 2015 - 03:50 PM
Small update this week, and might not get much done for a week or so as I seem to have strained a muscle or two in my ribs, no idea how but it's not good for doing anything very physical!
Anyway, I stripped the paint off the top of the rear parcel shelf, this revealed rust, just as I knew it would. Anyway, there were quite a lot of spots that just needed treating with deox both along the inside of the rear screen surround on the shelf itself, a few small sections were beyond salvaging though so I cut these out....
I welded in some repairs in to the tray, but not a small one on the screen surround that you can't see from those photo's (but you can in the next one below) as that firstly required some rust removal from the inside of the rear panel.
Having then left the rest of the rot to soak in some deox gel over night, followed by some mechanical removal, a final few hour of a second lot of deox gel I got rid of all the rust it was time for a thorough clean up and coat of zinc.....
All that is left to do now is to patch that one peice up with fresh steel and fill a couple of small unnecessary holes before I move on to fitting the boot floor.
Might have to just do a couple of odd jobs if I'm not back to full fitness next week.
Edited by alchall, 28 August 2017 - 07:42 PM.
#169

Posted 26 October 2015 - 04:45 PM
Looking good nice tidy work as usual :)
#170

Posted 26 October 2015 - 06:04 PM
Looking good nice tidy work as usual :)
Thanks mate was a much longer job than I anticipated!
#171

Posted 26 October 2015 - 06:25 PM
#172

Posted 26 October 2015 - 10:51 PM
Just had catch up on your progress, it just gets better and better ! Is that the concrete jungle of buckshaw I can see in the background of your pictures ?
Thanks mate ![]() and yes, your powers of deduction are correct, Buckshaw it is....
and yes, your powers of deduction are correct, Buckshaw it is....
#173

Posted 27 October 2015 - 06:09 PM
Just had catch up on your progress, it just gets better and better ! Is that the concrete jungle of buckshaw I can see in the background of your pictures ?
Thanks mateand yes, your powers of deduction are correct, Buckshaw it is....
I thought as much ! I'm only in Leyland, if you ever need an extra pair of hands feel free to give me a shout !
#174

Posted 27 October 2015 - 10:15 PM
Just had catch up on your progress, it just gets better and better ! Is that the concrete jungle of buckshaw I can see in the background of your pictures ?
Thanks mateand yes, your powers of deduction are correct, Buckshaw it is....
I thought as much ! I'm only in Leyland, if you ever need an extra pair of hands feel free to give me a shout !
Be careful what you wish for ![]()
#175

Posted 28 October 2015 - 12:29 AM
#176

Posted 01 November 2015 - 10:19 AM
Not much of an update this weekend as my dodgy ribs are preventing me doing too much but I have finished of the parcel shelf by patching the one remaining hole...
New metal cut to size and bent to shape to fit the hole and clamped in place....
Also drilled a couple of 6mm holes to plug weld it from the outside....
Welded....
And finally ground down and zinc primed....
Was a little bit of a tricky spot to get to so it took some time but at least that's another panel ticked off and one that didn't need replacing ![]()
Edited by alchall, 28 August 2017 - 07:43 PM.
#177

Posted 02 November 2015 - 06:33 AM
Nice tidy repair there, got the same repair to do on my girlfriends car :)
#178

Posted 02 November 2015 - 09:17 AM
Nice tidy repair there, got the same repair to do on my girlfriends car :)
It's a little bit fiddly because of it's shape and position but not especially difficult, I used a cutting disc on the Dremel to cut out the offending metal as the grinder is just too big.
#179

Posted 02 November 2015 - 11:43 AM
Yeah that makes sense and sounds like the best way to get in there :) nice work mate :)
#180

Posted 16 November 2015 - 01:57 PM
Over the past couple of weekends I've progressed the fitting of the boot floor panel, spent a lot of time measuring and checking alignment so hopefully all will be well!
Taken quite a bit of time but mostly went well but had a couple of hiccups along the way.
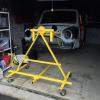
First up alignment, did a lot of shuffling and tweaking, took lots of measurements all over the place to get it square with the rest of the car and for the subframe mounting holes to line up with the jig I made (hope the jig is good!) and judging by how it aligns to the remains of the wheel arches I think I'm probably ok....
Holes drilled along the rear edge ready for the weldathon....
Then here is my first hiccup, I had marked the panel for the area's that needed ecoat removal and weld through priming, unfortunately I missed the join of the seat pan to rear edge of the main floor (I marked it up but didn't clean it up or drill any holes), anyway, despite my annoyance when I realised my mistake when it was too late it wasn't the end of the world as you will soon see.
So on to the welding
Only a couple of holes blown there so wasn't too shabby, penetration looks ok too...
This all cleaned up nicely...
So the other hiccup I had was with the bottom edge of the rear bulkhead, two problems here, firstly the 8mm holes I had to drill to remove the old floor panel were really too big for plug welding, and to make it worse I struggled to get it pulled up tight enough to the new floor so this ended up being very messy, lots of holes to fill and a lot of grinding and re-welding before it was right.
Thankfully getting the seat pan tight to the heal board wasn't as difficult as it looked like it might be, I was able to pull it in with a long clamp and several panel pins, you can see from this photo both the panel pins and the messy welding along the bottom of the bulkhead (I finished this off later after welding the seat pan to the heal board
I was able to mark a line pretty accurately along the seat pan where I needed to drill for the plug welds, I used a 6mm spot weld drill bit here and all but about two were dead centre, only a couple slightly off line but not so much that I ended up blowing any holes, this welded up very easily and was pretty tidy....
Finally all ground down, cleaned up and zinc primed....
All thats left to do now is the little seam welds where the M shaped lower bulkhead bracket meets the floor inside the boot, I'll have a bit of practice before I hit this!
My only reservation now is have I got the main floor and boot floor in exactly the right place so the subframe mounts straight, I was able to move the rear of the main floor left and right slightly and was careful to measure up before committing to welding it but I'm worried that even a couple of mm wrong one way or the other could mean things don't line up straight, hopefully I'm just worrying unnecessarily!
I'll also need to somehow clean up inside where the bulkhead meets the floor, tricky gap to get to this, I will probably fire in some of my internal frame coating paint here to add some protection, it will seep through all the tiny gaps between bulkhead and floor to ensure no bare metal is exposed.
Edited by alchall, 28 August 2017 - 07:48 PM.
1 user(s) are reading this topic
0 members, 1 guests, 0 anonymous users


