Jump to content


Photo
- - - - -

95 Sprite Rebuild & 16V Conversion


  • Please log in to reply
691 replies to this topic

#181 alchall

alchall

    Super Mini Mad

  • Just Joined
  • PipPipPipPipPipPip
  • 604 posts
  • Location: Chorley

Posted 22 November 2015 - 09:43 AM

Made a start on one of the rear quarters yesterday, starting with the drivers side.


It wasn't particularly difficult to remove but I was surprised to find that it had previously been replaced (I could see the other side has been), first thing I found was small plug welds along the rear seam rather than spot welds, a couple of which were almost none existent, and it was joggled where it meets the top part of the rear quarter (couldn't see it before as the join was hidden behind the waist rail).


mini-437.jpg


The waist rail itself isn't too bad, a few area's along the top edge are a little thin but nothing I can't patch so I won't need to replace, just clean up, remove the surface rust and patch the thin and damaged bits along the top.


mini-439.jpg


The B post on the other hand is an entirely different story, it's badly rusted along the outside edge, completely through in places, I think this is probably a result of the previous repair having been done without adequate preparation or rust protection.


mini-438.jpg


And you can see from inside that no attempt has been made to protect the plug welds.


mini-440.jpg


So I'm going to have to do some tricky repairs to this panel as it seems to be almost the only panel you cannot buy, I guess this is going to be a good test of my novice fabrication skills.


Anyway, there's a lot of repair, de-rust and clean up required before I can fit the new panels but I have spent some time offering them up and jiggling them around to fit so I can mark them up ready for drilling holes and removing e-coat for welding and this is how I left it.


mini-441.jpg


It was surprisingly difficult to get the wheel arch into position so it took some time but I'm happy I've now got it right, I also have the small closing panel in the bottom corner clamped in place and it all fits nicely (not taken a photo from inside though).


Edited by alchall, 28 August 2017 - 07:51 PM.


#182 alchall

alchall

    Super Mini Mad

  • Just Joined
  • PipPipPipPipPipPip
  • 604 posts
  • Location: Chorley

Posted 06 December 2015 - 11:04 PM

So I've done a bit more this weekend, but before I went any further I wanted to be sure the main floor and boot floor all lined up properly, so a ordered a new rear subframe and some rather nice DSN billet trunnions and test fitted it as I was nervous that perhaps my subframe jig possibly wasn't great and things were going to end up less than true at the rear.


Anyway, at first glance I was concerned that my fears had been realised as the first side I looked at was certainly off centre to the holes in the boot floor, however, it seems that both sides are off centre but both to the outside and by about the same ammount so it seems to be reasonably straight (panic over I think)....


more lost photos's, thanks photo bucket!


I'm guessing this is because the rear trunnions are sitting in brand new rubber bushes but I've not actually bolted them in place and pulled them in tight, hopefully they will pull in by a couple of mm and all will be good, anyway, at least i'm no longer concerned about it not sitting true.


So next up has been getting rid of rust, cutting out bad metal and patching the B post, waist rail, bulkhead around the arch and the rear panel seam. I've not finished yet, some of the B post is left to do, which is the trickier part that has some shape to it, and also theres a touch of rust still to kill from the rear panel seam.


First up I removed as much rust as I could mechanically without damaging or thinning the steel and then applied some Deox gel, this was left over night wrapped in cling film which did a pretty good job but there's a touch left to go.


mini-444.jpg


mini-445.jpg


I found that the top edge of the waist rail was actually pretty thin in places and badly damaged so I decided to cut out and replace almost the whole length bar a couple of inches in the middle and a little at each end. I also cut out some steel just above waist rail height at the B post where the rust had pretty much eaten right through.


Fresh steel welded in....


mini-458.jpg


mini-457.jpg


mini-456.jpg


Ground back and cleaned up....


mini-460.jpg


mini-462.jpg


And zinc primed....


mini-462.jpg


mini-465.jpg


There was a small section on the bulkhead above the arch that was damaged so I also replaced this, I also straightened the bulkhead in that corner where it was bent; that corner had some crash damage which had caused a bit of a buckle in the bulkhead just above the arch but it was easy enough to hammer back straight.


Same treatment applied....


mini-459.jpg


mini-461.jpg


mini-466.jpg


I haven't quite finished grinding the weld down in that corner, I'll tidy it up a big more once it's plug welded to the arch, didn't see any point in taking it right down twice, I have ensured the under side is clean though so it won't foul the top of the arch. I also have the inside of the welds along the waist rail to tidy up but again I'll do that along with cleaning up after plug welds.


I'll be fashioning further repairs to the B post next as well as completing the eradication of rust from the seam on the rear panel and painting the inside of the waist rail before I set to fitting the new panels.


Edited by alchall, 28 August 2017 - 07:55 PM.


#183 minimissions

minimissions

    Up Into Fourth

  • Members
  • PipPipPipPipPipPipPipPipPip
  • 3,427 posts
  • Location: North West
  • Local Club: M.M.O.C

Posted 07 December 2015 - 06:38 AM

Top work there, nice neat repairs its always bits like that people miss.. What is that de-rust stuff your using it looks ace?


Keep the pics coming :) are you having to do the same on the other side or is that ok?


#184 alchall

alchall

    Super Mini Mad

  • Just Joined
  • PipPipPipPipPipPip
  • 604 posts
  • Location: Chorley

Posted 07 December 2015 - 09:53 AM

Top work there, nice neat repairs its always bits like that people miss.. What is that de-rust stuff your using it looks ace?


Keep the pics coming :) are you having to do the same on the other side or is that ok?


Thanks mate, De-rust stuff is this - http://www.bilthambe...tments/deox-gel - you do need to use some elbow grease as well and if the rust is really bad a log soak overnight wrapped in cling film is required but it does shift it completely. You can end up with deep pitting of course and not a lot of metal left (as per my B post) so it'll need cutting out if that's the case so it's better to just do that if it's clear the rust is really bad anyway.


I'm hoping the other side isn't so bad, this side I knew was going to be bad because a) it was at the bottom when I replaced the door step many months back and b) the rust was bubbling through from under the edge of the quarter panel, the other side has none of these symptoms so hopefully wont be too bad. It's all a result of somebody previously not taking care to ensure the metal on the B post was rust free before replacing that quarter panel.


#185 jpw1275

jpw1275

    Up Into Fourth

  • Noobies
  • PipPipPipPipPipPipPipPipPip
  • 2,803 posts
  • Location: Warrington
  • Local Club: I'm a carb addict!!!!!!!

Posted 07 December 2015 - 01:29 PM

Good work so far mate

Cheers james

#186 minimissions

minimissions

    Up Into Fourth

  • Members
  • PipPipPipPipPipPipPipPipPip
  • 3,427 posts
  • Location: North West
  • Local Club: M.M.O.C

Posted 07 December 2015 - 02:15 PM


Top work there, nice neat repairs its always bits like that people miss.. What is that de-rust stuff your using it looks ace?


Keep the pics coming :) are you having to do the same on the other side or is that ok?


Thanks mate, De-rust stuff is this - http://www.bilthambe...tments/deox-gel - you do need to use some elbow grease as well and if the rust is really bad a log soak overnight wrapped in cling film is required but it does shift it completely. You can end up with deep pitting of course and not a lot of metal left (as per my B post) so it'll need cutting out if that's the case so it's better to just do that if it's clear the rust is really bad anyway.


I'm hoping the other side isn't so bad, this side I knew was going to be bad because a) it was at the bottom when I replaced the door step many months back and b) the rust was bubbling through from under the edge of the quarter panel, the other side has none of these symptoms so hopefully wont be too bad. It's all a result of somebody previously not taking care to ensure the metal on the B post was rust free before replacing that quarter panel.


Thanks for that link and info mate.


Your doing a great job on this car you will have one very rust free mini at the end of all this :) Hope the other side isn't to bad for you mate... I have got both to do on my mk1 and to be honest one day the clubman will need them as well. Well I will keep watching this build :)


#187 Ben_O

Ben_O

    Mill Road Garage

  • Paint Doctor
  • PipPipPipPipPipPipPipPipPipPip
  • 9,794 posts
  • Location: Isle of Wight

Posted 07 December 2015 - 10:54 PM

Might be a bit late but i have a pair of very good b posts if you need them


#188 alchall

alchall

    Super Mini Mad

  • Just Joined
  • PipPipPipPipPipPip
  • 604 posts
  • Location: Chorley

Posted 08 December 2015 - 03:00 PM

Might be a bit late but i have a pair of very good b posts if you need them


Lets see how successful my attempt at completing the repairs are, if I fail I may be in touch :-)


#189 alchall

alchall

    Super Mini Mad

  • Just Joined
  • PipPipPipPipPipPip
  • 604 posts
  • Location: Chorley

Posted 12 December 2015 - 05:35 PM

Made some more progress with the B post today and it's not looking too bad, very tricky though, taken most of the day just to get this far!


Firstly out with the old rot.


mini-473.jpg


I then applied some paint to the internals including the waist rail so it's all protected.


mini-474.jpg


mini-475.jpg


Then it was on to making up a repair piece, I decided to do this in sections rather than trying to do lots of bends in different directions, so far I have completed the first two pieces which I've welded together and then welded in, unfortunately I didn't take any pictures in progress. I cut the large main section to size and roughly to shape, joggled the edge where the quarter panel fits as per the original, then cut the small section that fits at right angles to the bottom of this and closes the gap where the B post juts out forward.


Here it is welded in.


mini-476.jpg


The welding actually wasn't particularly tricky once I'd got the shape all right and clamped in place and I only had two small holes to fill after grinding the welds back.


Anyway, here's how it ended.


mini-477.jpg


So all I have left to do now is the lip, this would have been practically impossible for me to have done as a bend due to the joggle and the fact it bends in two directions, but that's a job for another day.


It will need a little filler I think on the exposed part of the B post just to finish it off when it's all done but I am pleased with the result so won't be requiring BenO's spare panels :-)


Edited by alchall, 29 August 2017 - 08:21 AM.


#190 Ben_O

Ben_O

    Mill Road Garage

  • Paint Doctor
  • PipPipPipPipPipPipPipPipPipPip
  • 9,794 posts
  • Location: Isle of Wight

Posted 12 December 2015 - 08:59 PM

That came out lovely mate.


:thumbsup:


#191 alchall

alchall

    Super Mini Mad

  • Just Joined
  • PipPipPipPipPipPip
  • 604 posts
  • Location: Chorley

Posted 13 December 2015 - 09:28 AM

That came out lovely mate.


:thumbsup:


Thanks Ben, I'm pleased with how this has turned out, I had my doubts


#192 minimissions

minimissions

    Up Into Fourth

  • Members
  • PipPipPipPipPipPipPipPipPip
  • 3,427 posts
  • Location: North West
  • Local Club: M.M.O.C

Posted 13 December 2015 - 01:46 PM

Some very tidy work there as normal :) Looking forward to seeing this one done :)


#193 alchall

alchall

    Super Mini Mad

  • Just Joined
  • PipPipPipPipPipPip
  • 604 posts
  • Location: Chorley

Posted 13 December 2015 - 10:31 PM

Well I grabbed a couple of spare hours and finished the B post off today, just the small matter of creating the edge, it's a bit tricky welding two pieces at right angles from the outside of the bend and no access to the inside but I eventually got there....


mini-478_zpsgzecfvug.jpg


I also zinc primed it and forced quite a lot into the inside to try and maximise protection, this whole box section will eventually be treated to a good dose of the old internal frame coating too once everything is complete.


So I'm now ready to start assembling this quarter, first job will be the bin and the closing panels once I've mocked it all up and marked it out for drilling holes for the plug welds.


#194 alchall

alchall

    Super Mini Mad

  • Just Joined
  • PipPipPipPipPipPip
  • 604 posts
  • Location: Chorley

Posted 29 December 2015 - 07:23 PM

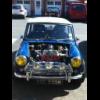
I think this is going to be a lengthy update, I've not been back here to post progress for a little while but I have been cracking on and have finished the right hand rear quarter, which has been trickier and lengthier process than I imagined and despite what looked like a minor disaster towards the end I'm pretty pleased with the result. I've also today made a start on the other side which I have cut out, but before I get to that here's what i've achieved over the past couple of weeks...


After finally finishing off the B post I mocked everything up to see how it all fits together and to mark out where I need to drill etc. for the plug welds.


mini-484.jpg


mini-485.jpg


mini-486.jpg


mini-487.jpg


Now this took some time and I took the panels off and on a number of times before I got it right, I found that as I suspected the accident damage to that corner had set things a little out of whack, so instead of using the measurements I took on this side before removing (plus the position of the rollover jig) I referred to the other side. I also took it off the jig at the rear and put it back up on stands and hey presto it all fit together much more accurately and the jig actually ended up fitting better than it did previously.


So the next job was to prep all the panels then fit the companion bin and closing plates, I didn't take any progress pictures here but the final result I did...


mini-479.jpg


It was then back on with the panels and welding in the wheel arch....


mini-491.jpg


mini-492.jpg


And then off with the quarter panel once more to finish the arch...


mini-493.jpg


I wasn't exactly sure how to weld the rear edge as it wasn't a deep enough lip to plug weld so I did a combination of stitch welds at the top and a seam weld along the bottom....


mini-494.jpg


mini-495.jpg


All cleaned up and zinc primed...


mini-497.jpg


mini-498.jpg


mini-499.jpg


mini-500.jpg


I then applied some seam sealer inside the bin while accessible....


mini-501.jpg


Then it was back to the main panel, prepped including lots of zinc inside the hard to reach area's once fitted...


mini-502.jpg


And clamped...


mini-503.jpg


And finally welded....


mini-504.jpg


I was now very pleased as another milestone was reached, however as I stood back to admire my work I noticed the bottom edge was bowed out slightly, difficult to see in this picture but it was there so it was safe to say my joy was short lived...


mini-489.jpg


So I slept on it and then got back on with it, I was anticipating some surgery to be required but as it turned out it was relatively simple to fix, I drilled out the plug welds along the bottom edge where it meets the floor and bashed it straight with a short length of wood and a hammer, somehow this pulled it straight without creating creases or requiring a slit to be cut anywhere, some gentle knocking and clamping pulled it straight so I was both surprised and pleased with this result.


And here it is cleaned up and zinc primed and back on the jig, looking good I think!


mini-480.jpg


And today I moved to the other side after giving the car a good clean out and removing all the dust!


B post has some rust but not nearly as bad as the other side so just some little holes to fix and rust to remove here....


mini-481.jpg


Waist rail surprisingly in much better shape too so less of a repair job to do here too!


mini-483.jpg


But the rear seam was a real mess, when this panel had previously been replaced it was done with lots of welds and lots of grinding leaving very little of the edge of the seam on the rear panel remaining, so this is what I'm left with....


mini-482.jpg


I'm now regretting not replacing the whole bottom half of the rear panel rather than just the small repair section at the very bottom, there's very little difference in price but at the time it seemed a bit wasteful to go for the larger panel so went for the smaller repair peice, but hey ho, I'm sure I can patch this up well enough. I think I have enough left to install the quarter panel in place then will add new steel in to make up a new rear panel seem once it's fitted.


Edited by alchall, 29 August 2017 - 08:38 AM.


#195 Ben_O

Ben_O

    Mill Road Garage

  • Paint Doctor
  • PipPipPipPipPipPipPipPipPipPip
  • 9,794 posts
  • Location: Isle of Wight

Posted 02 January 2016 - 12:34 AM

Looking excellent!


I had the same issue with my rear seam. I just made up some new sections and welded them in. It came out fine.


You will easily be able to do the same with yours.


Keep up the great work


Ben


1 user(s) are reading this topic

0 members, 1 guests, 0 anonymous users