Jump to content


Photo
- - - - -

My Mini van


  • Please log in to reply
575 replies to this topic

#121 Mincento

Mincento

    Speeding Along Now

  • Members
  • PipPipPipPipPip
  • 443 posts
  • Location: Stoke-On-Trent

Posted 24 February 2007 - 11:41 PM

Nice progress on the van :wub:

on the engine subject depends what you want i have driven my mates 1275 sportspack and if you want smooth, thrashable power its a good choice and from experience of a few they are more reliable BUT a well set up Twin carbed 1275 is whithout doubt the powerful choice and more tunable in many aspects (ecu dont take kindly to mods)

wayne

#122 minivanman

minivanman

    Up Into Fourth

  • TMF+ Member
  • PipPipPipPipPipPipPipPipPip
  • 3,454 posts
  • Local Club: Backstreet Minis

Posted 25 February 2007 - 08:02 AM

Thanks Wayne. Thats pretty much the conclusion I've come to as well. So hopefully I'll be going the way that the blue 1399 one in minimag is - Mpi bits spliced into a carb loom. I'm also thinking of bringing the fusebox inside the car, maybe into the glovebox. Should make things that little bit neater in the engine bay.

#123 minivanman

minivanman

    Up Into Fourth

  • TMF+ Member
  • PipPipPipPipPipPipPipPipPip
  • 3,454 posts
  • Local Club: Backstreet Minis

Posted 01 March 2007 - 10:05 PM

Been working up near blackburn again this week, so I shot down to minisport one lunchtime and got some bits n bobs. Rear suspension rubbers, so now I can get the rear subby built up and painted. Head gasket set for the van, and my 998 (for the 12G295 Morspeed head, which STILL isnt done :proud: ). And an exhaust for the 998 because I think the baffles have moved in one of the boxes and are blocking it. Damn minis. Minisport only had the rubbish flexible bypass hoses, so when I get a solid one, I can get the head swapped on the engine for the van and thats done. I also got the last few bits we had to take off this engine for Mini Matts 1380 from Surf blue - spi filter housing, engine breather, and bottom mount. Now I need a couple of days to actually do something on it!

#124 minivanman

minivanman

    Up Into Fourth

  • TMF+ Member
  • PipPipPipPipPipPipPipPipPip
  • 3,454 posts
  • Local Club: Backstreet Minis

Posted 04 March 2007 - 09:08 PM

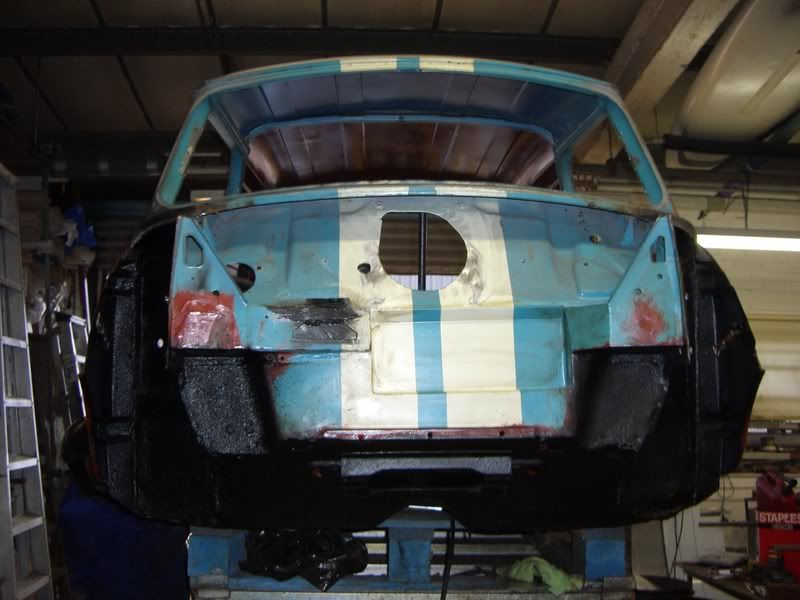
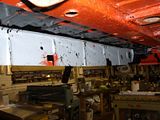
Got a bit done over this weekend - the rear valence is sealed and painted, so now the closing panel can go in, and thats the last panelto be welded in.
Posted Image

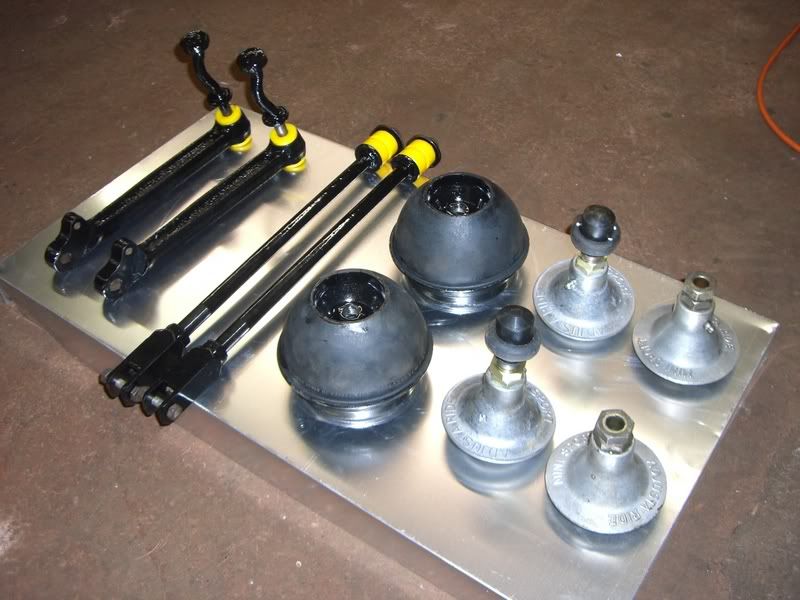
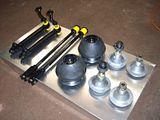
Scrubbed up some of my suspension bits n bobs - adjustable tie bars, bottom arms and hi-los. Typically the front minisport hilos that I bought from Alburglar are different to the rear ones, so the new knuckle joints I bought dont fit. Minisport will be getting an angry phone call tomorrow then....
Posted Image

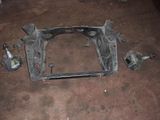
After getting fed up with forgetting to take the cone compressor with me so I could finish getting the bottom arms off, I took the "Jeremy Clarkson" approach and just chopped the subframe towers off. Not to be recommended if you plan on reusing the subframe. When I got the arms out, one is in perfect condition, while the other is utterly fubared. How typical!
Posted Image

#125 Dog

Dog

    Deathwish Fairy

  • Banned from Buying/Selling
  • PipPipPipPipPipPipPipPipPipPip
  • 9,550 posts
  • Local Club: Shatrats.com

Posted 04 March 2007 - 09:10 PM

Tom, why don't you just take the bottom radius arm off, pull the bolt out, and give it a slight tap with a 4lb hammer... its what I did, and they just fell out :)

Its putting them back in where I needed the compressor...

#126 minivanman

minivanman

    Up Into Fourth

  • TMF+ Member
  • PipPipPipPipPipPipPipPipPip
  • 3,454 posts
  • Local Club: Backstreet Minis

Posted 07 March 2007 - 11:05 PM

Well, I can't undo it now, can I? that subby was knackered anyways. I painted the good top arm, hung it up to dry, and the next morning dad cracked his head on it and lobbed it into the back of the van, luckily it didnt dent anything too bad! Today I got the welding and grinding just about done on the back end, and seam sealed it all. Hopefully all I have to do now is about 10" of seam welding in the exhaust tunnel, and thats it! the end is nigh!

#127 minivanman

minivanman

    Up Into Fourth

  • TMF+ Member
  • PipPipPipPipPipPipPipPipPip
  • 3,454 posts
  • Local Club: Backstreet Minis

Posted 08 March 2007 - 10:39 PM

Started spraying stone chip on today, and damn its starting to look good. Hides the welds beautifully! Hopefully I'll have it all stone chipped tomorrow, except the floor which I cant get at because its sitting on the pallet. Coat of gloss black over that and its done. I still feel inadequate compared to speedingorange though! If only you could get heritage van shells....

I really need to start ordering bits to get my subframes built up again so it can go back on all fours again....

#128 Boab

Boab

    Camshaft & Stage Two Head

  • Members
  • PipPipPipPipPipPipPipPip
  • 1,610 posts
  • Local Club: E*S*M*O*C

Posted 08 March 2007 - 11:02 PM

Get some pics of the stone chip up and what make did you use? I'm about to do mine tomorrow with Granville from the local motorstores http://www.livingstonautoparts.com/

#129 minivanman

minivanman

    Up Into Fourth

  • TMF+ Member
  • PipPipPipPipPipPipPipPipPip
  • 3,454 posts
  • Local Club: Backstreet Minis

Posted 08 March 2007 - 11:09 PM

The pics I took didnt look too good, too much glare from the flash. I'll get some tomorrow. I used bodyline body schutz, cause thats what the local factors had. The trick I found is to add a little thinners to it to get it flowing properly, otherwise it jams the gun because the temperature has to be a little higher than what it is at the moment.

#130 Woody

Woody

    Ring Runner 2005

  • Members
  • PipPipPipPipPipPipPipPip
  • 1,763 posts

Posted 09 March 2007 - 10:02 PM

The pics I took didnt look too good, too much glare from the flash. I'll get some tomorrow. I used bodyline body schutz, cause thats what the local factors had. The trick I found is to add a little thinners to it to get it flowing properly, otherwise it jams the gun because the temperature has to be a little higher than what it is at the moment.

Shutz is not best for painting over !
For that you need "stonechip" as in anti-stonechip paint

#131 minivanman

minivanman

    Up Into Fourth

  • TMF+ Member
  • PipPipPipPipPipPipPipPipPip
  • 3,454 posts
  • Local Club: Backstreet Minis

Posted 09 March 2007 - 10:15 PM

Bugger. I thought it was the same thing. Ah well, I'll just give it another good coat of schutz then. Black, Timmy!

#132 miniallsort

miniallsort

    Up Into Fourth

  • Members
  • PipPipPipPipPipPipPipPipPip
  • 4,723 posts

Posted 09 March 2007 - 11:02 PM

LOOKS GREAT!!

#133 minivanman

minivanman

    Up Into Fourth

  • TMF+ Member
  • PipPipPipPipPipPipPipPipPip
  • 3,454 posts
  • Local Club: Backstreet Minis

Posted 09 March 2007 - 11:42 PM

:P ^_^ All the structural welding is done now! Finished the last bit today. There may be a few more bits and bobs, but nothing important. I've got all the front and back schutzed, and one of the sills. The other sill is primered and ready to be done tomorrow. Heres a front end view of it:
Posted Image
I see light at the end of the tunnel! Next job is to reassemble my subframes and get it sitting back on four wheels again. Then I can rock it on its side and tart the floor up. I need another tub of seam sealer and I can start on the inside. I love it when a plan comes together.

#134 d4v1dtyler

d4v1dtyler

    Speeding Along Now

  • Members
  • PipPipPipPipPip
  • 314 posts
  • Local Club: CCMA

Posted 12 March 2007 - 12:11 AM

Looking great mate. I would also like a van. What sort of price could a van in good condition go for?

#135 minivanman

minivanman

    Up Into Fourth

  • TMF+ Member
  • PipPipPipPipPipPipPipPipPip
  • 3,454 posts
  • Local Club: Backstreet Minis

Posted 15 March 2007 - 11:21 PM

Looking great mate. I would also like a van. What sort of price could a van in good condition go for?

That depends on so many things... but generally 2k plus.

Got the last sill schutzed, and its looking good. Got my new subframe out today and started getting it all fitting back on the car. Just need to drill a couple of holes for the brace bars and hinges and give it a last lick of paint and I can start rebuilding it all. I've made a decision about the MPi I bought as well - I'm going to break it up for spares. I know its sad to see another mini shuffle off this mortal coil, but its got to be. It will live on though! Hopefully I will be ready to start fillering it fairly soon now. I've bought a brand new set of mk1 door hinges, because the ones i had werent the best really. Tomorrow I'm going to be ordering all the stuff I need to get the subframes back on so things should start coming together fast. I need a new top arm - minispares lists these for £125, but minisport have them for about £25? weird.


0 user(s) are reading this topic

0 members, 0 guests, 0 anonymous users