Jump to content


Photo
- - - - -

Lost Running-Lights/side-Lights/dash-Lights And Dim-Dip/low-Beams After Replacing Wiper Wheelbox

electrical

Best Answer [email protected] , 06 May 2016 - 03:18 AM

I finally solved this mystery when I decided not to trust the 12V I was measuring in the white socket on the Brown wire feeding the main lighting switch.  


Since I knew the rest of the lighting loom was working when I jumpered from the Brown Pin 2 on the fuse box to the red pin 4 and I got lights, I thought maybe something is wrong not with the "out" wiring of the switch (the red and blue wires), but maybe something is wrong with the Brown "in", 


So I ran a long wire from the lighting switch's Brown wire socket in the cabin out to the pin 4 connector on the fuse box that fed the lighting part of the loom and I STILL could not get the lights to light.  


So I looked upstream of the feed to the lighting switch in the Hayne's circuit diagram and saw that the Brown wire in the cockpit was actually one of the two Brown wires plugged into Pin 2 on the fuse box anyway!


Leaving my long wire connected to the white socket in the cabin, I unplugged both Brown wire connectors form the fuse box and tried to get a continuity "beep" on each to find the one that fed the switch - but neither beeped!  So I switched from the tester clip to a steel needle in the tester clip jaws and I scratched around in each Brown wire connector and then suddenly one beeped.  


I realised there must be a boat-load of corrosion in that clip.  In the end it simply turned out to be a connector on the fuse box that fed the main lighting switch that was badly oxidized underneath its cover - it read 12V in the cabin, but that was half the story.  


Note that it was showing 12V on inspection at the socket/switch... but under a real load, that connection failed to deliver anything strong enough to light the lights..

 
I shot both connectors with WD-40 and plugged them both on and off and onto the fuse box spades several times to restore a good connection.
 
I have lighting again!
 
Yay!
Go to the full post


  • Please log in to reply
9 replies to this topic

#1 [email protected]

[email protected]

    Mini Mad

  • TMF+ Member
  • PipPipPipPip
  • 123 posts
  • Location: East Coast
  • Local Club: Long Island Mini Enthusiasts

Posted 03 May 2016 - 06:40 AM

Hi all!
Any suggestions are welcome to help me solve this:
After pulling the wiper motor and spiral/toothed cable in order to replace a corroded wiper wheelbox, I lost running-lights/side-lights/dash-lights and dim-dip/low-beams. (unrelated systems I know, but it was the ONLY thing I was working on before losing the lights!)
 
I run a LHD 1991 Mainstream carb'd Mini Cooper in NYC.  Had it about 3.5 years.  I have no additional driving lights in place, just the stock headlight housing that has the integrated side-light and the big, round two filament bulb.  I believe I have the "Pink dim-dip" relay, although I have never seen it, but I also believe the PO had removed the resistor by the radiator because A) I don't see the resistor, just the socket and B) the low-intensity filament does not light when I turn on the ignition with just the running/side-lights switched on (that is when they used to work :-( ).
 
First thing to rule out is the main lighting switch:
Approximately 6 months ago I cleaned up the interior of the main lights rocker switch because some melted plastic was preventing the dim-dip/low-beams from illuminating (I'd get sidelights only), but I am confident that it is in proper working order still because I have tested it both with a continuity tester and I have also "flipped it over" in order to plug in JUST the Brown HOT wire lead, exposing the other two pins to test,  I looked for 12+Volts to appear on the Red and Blue pins and it performs properly: in position 1 neither Red, nor Blue have power; in position 2 Red goes 12V; and in position 3 Blue AND Red go 12V.
 
(no need to suggest adding relays, from what I've read on these forums for the past several hours, I've learned that I should definitely be fitting relays on my headlights to prevent further switch melting in future, but for just right now I simply need to get basic headlights back working before this weekend)
 
Next the fuse box:
First I checked each and every fuse in the fuse box along with the inline fuses behind the carb via continuity tester - all good, none blown.
 
Then I looked for voltage for the running/side-lights: I do not get 12V on the fuse box at pin 7 (Red side) when the main switch is in positions 2 or 3 so I feel that the problem must be between the leads from the switch in the cabin on their way to the fuse box.  And this is just running//side light operation - I'm not even talking about dim-dip/low-beams yet (presumably managed by the Pink Relay) - if the red lead from the main switch is not granting power to the Pink dip-dim relay - could that cause no headlights?
 
Further testing tells me the running/side-lights loom (after the fuse box) seems OK:
I jumpered my Brown HOT on the fuse box (via an in-line fuse jumper/tester that I fabricated) to fuse box pin pin 8 (the Red/Green side) and the running/slide lights all came on - I get the same results if I feed 12V to the pin 7 (Red side) as long as the fuse is in place, so I believe that the major portion of the loom is OK and the grounds exiting the various running/slide light lamps are sound.
 
Now the odd stuff you need to know: 
About a year ago some rats chewed through a Blue/RED wire on the engine compartment side of the firewall and I lost dim-dip/low-beams.  Note that I soldered in a new wire segment in and have had dip-dim/low-beams FINE for all this time.  Since this ONLY affected headlights, NOT sidelights too, I discount this as causative this time.
 
A year before that, I took the Mini to a PepBoys for the annual inspection and they couldn't get the blinkers/directionals/turn-signals to light - I popped the fuse in the box and reseated it and got those back, but I noticed my dash lights and right rear tail light (not brake light) were not illuminated.  As a quick fix to drive home I jumpered from the left taillight over to the right and that then illuminated (as did the dash lights).  After several repeat events of blinker-loss (which I discovered was also brake-lights-loss and reverse-lights-loss too), I removed the entire fuse box and cleaned it up, testing the fuse box tabs for conductivity because I understand the rivets sometimes fail to conduct from the fuse to the tabs, What I found was corrosion inside the White and Green wires of fuse 2-3 and fixed that - NO issues with blinkers/brakes/reverse-lights since (although I still have that jumper in the boot that was illuminating the dash lights in place).
 
One other thing that might tie into this problem "timing-wise":
Recently - perhaps coincidentally, I noticed that my high-beam stalk control was no longer locking in the "pushed-away" position.  It still would flash when "pulled" and also flashes when pushed now, but it just won't lock "on".  Could this be part of my problem?  I thought this switch only powered up the high-beams ALONG with the dip-dim/low-beams - am I mistaken - does the stalk in some way "toggle" between the different headlights: pushed=high/centered=low/pulled=flash/high?
 
And now the super weird bit:
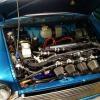
When I gave up trying to track the running/side-lights/dash-lights & dip-dim/low-beam problem down scientifically, I fell back on the "Well, what did you disturb while messing with the wiper repair?" tactic.  Over by the motor there was a loom that is moved around a bit, but the loom tape was intact upon inspection and it wasn't really disturbed too much.  But over on the left-hand-side where the one corroded wiper wheel box was, I was really moving the foam on the bulkhead down and around a bit to get my hand and a wrench in there.  I noticed a rectangular flasher 9FL12V relay nestled in a cutout in the foam there and on a lark I just pushed it down thinking maybe I dislodged it and need to seat it again.  VOILA!  My running/side lights AND my dip-dim/low-beams miraculously began to work.  I couldn't see how a flasher unit would play a part in the main lights circuit, but as it was getting dark and raining by then so I simply I counted myself lucky and headed in for the night.
 
The following morning my luck had run out as neither my running/side lights nor dip-dim/low-beams worked anymore.  Plus, when I pulled that relay out of the foam to get a better look, I found its Purple/Orange terminal had experienced a meltdown.  Based on the condition and lack of any smell, it must have happened some long time ago - see pics (note the black thing under the relay is a car alarm horn that has been in place for 3 years - not a likely culprit here)
Attached File  9FL12V-PU-O-Connector-melted.jpg   39.92K   2 downloads Attached File  9FL12V-old-PU-O-melt-rust.JPG   37.32K   2 downloads
 
It's a wonder that my flashers have been working like a champ.  It's possible that I temporarily grounded the P/O lead, but I do not see how grounding that circuit would contribute to the running/side-lights or dip-dim/low-beams circuit spring back to life. I also found it strange that the "out" wire was Green/White instead of Green/Pink stripe like the wiring diagrams call for.
 
See attached all the wiring diagrams I've been pouring over trying to suss this out - note the "relay" diagram is MY guess at what is going on inside that Pink relay...it could be completely wrong!
Attached File  relay.png   201.54K   6 downloadsAttached File  Indicator-Hazard Wiring MK4.png   75.52K   2 downloadsAttached File  wiring.png   376.78K   3 downloadsAttached File  wiring-2.png   406.86K   6 downloads
 
I'm pretty much at wit's end here as I'm not sure what to check/test next...  
 
Thanks in advance to anyone who can offer help/suggestions/prayers!
Jim

Edited by [email protected], 04 May 2016 - 02:43 AM.


#2 [email protected]

[email protected]

    Mini Mad

  • TMF+ Member
  • PipPipPipPip
  • 123 posts
  • Location: East Coast
  • Local Club: Long Island Mini Enthusiasts

Posted 03 May 2016 - 12:04 PM

Found an amazing MGB reference site for electronics here: http://www.mgb-stuff...ctricstext1.htm


If the wiring in a B is the same as in a Mini, it seems to answer my question about whether the low-beam goes through the stack switch here: http://www.mgb-stuff.org.uk/dip.htm#1


Also from the site's "Dip-Switch" section:


   The column mounted dip-switch can be a bit difficult to puzzle out as it incorporates a headlamp flasher, indicator/turn signal, and horn wiring as well. The accompanying pictures show which contacts are which as far as the dip/main/flash circuits go. Several problems can develop with this unit, like failure to flash or light the appropriate lights, failure to cancel, loss of spring tension, etc. There is some scope for repair, although like many components of that and later eras they were only intended for one-off assembly and use, replacement thereafter, which isn't cheap.

As far as the wires go:

   Blue is the headlight feed into the dip/main part of the switch. Blue/white goes out to the main beams. Blue/red goes out to the dipped beams. Purple is the feed for the main beam flasher (goes out on the blue/white). Light-green/brown is the feed in from the indicator/turn signal flasher. Green/white is the feed out to the right-side indicator/turn signal bulbs. Green/red is the feed out to the left-side indicator/turn signal bulbs. Purple/black is the feed out to the horns.

   The dip-switch should have three fore and aft (towards you and away) positions: Clicked towards you lights the dipped beams. Clicked away from you lights the main beams. Both of these are only when the main lighting switch is in its 'headlights on' position. In the dipped beam position the lever can also be pulled towards you against spring pressure to light the main beams in 'flash' mode, and this is independently of whether the main lighting switch is on or off. When released the lever should return to the central/dipped beam position to extinguish the main beams. If the lever is pulled towards you when the headlights are on, the main beams will be illuminated from the headlamp flasher circuit as well as the dipped beams from the main lighting circuit.

   Some of the contacts are fixed and others are 'springy'. The springiness applies pressure to the contacts to give a good electrical contact, but all the contacts can burn and blacken over time which can reduce headlight brightness and cause the switch to get warm in use. Cleaning of all the contacts and careful bending of the spring contacts can restore functionality, but it is easy to overdo it and mess things up even further. The contact springs are nothing to do with limiting the fore and aft movement of the stalk or the spring return from the flash position, they are derived from plastic 'springs' on the switch body and arm, as indicated in the accompanying pictures.


A confirmation from a Mini expert/owner would be great.


Thanks in advance,

Jim


Edited by [email protected], 03 May 2016 - 12:45 PM.


#3 [email protected]

[email protected]

    Mini Mad

  • TMF+ Member
  • PipPipPipPip
  • 123 posts
  • Location: East Coast
  • Local Club: Long Island Mini Enthusiasts

Posted 03 May 2016 - 12:59 PM

Armed with the above information and looking at the pre-96 injection wiring diagrams (they just seem clearer to me) I made an assumption: my rear fog light switch should get power when the main rocker switch (in position #3 and via the Blue Wire) is supplying power to the stalk assembly...


I did the following test:

Toggled the rear fog switch - result: does not illuminate (this is expected because I know it behaved like this in the past)

Switched the rocker into position 3 - result: still no running/side-lights, still no dip-dim/low-beams

Toggled the rear fog switch - result: does not illuminate (when I know that it did in the past)

Manipulated stalk push/rest/pull - result: rear fog switch still does not illuminate, Hig-beams flash on pull, do NOT illuminate otherwise - conclusion: I am NOT getting 12V on Blue "entry" wire on stalk switch

Toggled the rear fog switch while manipulating stalk push/rest/pull - result: rear fog still does not illuminate

Pulled the stalk to flash - result: High-beams light - conclusion: good direct power on the Purple feed in and good "flow" out the Blue/White wiring


Conclusion: no power getting from Blue wire out of main rocker to other subsystems, certainly NOT stalk switch, possibly not to the Pink Relay either


Next step: I have a bladed DP/ST switch that I will add jumpers to so I can plug it into the main rocker white plastic receptacle just to make sure it is not the stock switch somehow failing under load.


Again, any thoughts/suggestions/prayers are welcome!


#4 [email protected]

[email protected]

    Mini Mad

  • TMF+ Member
  • PipPipPipPip
  • 123 posts
  • Location: East Coast
  • Local Club: Long Island Mini Enthusiasts

Posted 03 May 2016 - 04:17 PM

Found some posts pointing to the Pink Relay for headlight loss.


As I do not have a spare Pink relay, I can't follow the various tips I found about simply testing a new one, but I understand  that I can jumper the #2 & #8 pins (aka the 30 & 87 pins; aka the Blue/Brown to Blue/Red wires) to try and temporarily "bypass" the Pink Relay (see attached pic Attached File  Pink-bypass.png   270.48K   3 downloads )


That won't answer the question as to why the running/side-light & dash illumination have failed, but it should rule Pinky out as causative.


#5 cal844

cal844

    Crazy About Mini's

  • Members
  • PipPipPipPipPipPipPipPipPipPip
  • 9,492 posts
  • Location: Ballingry, Fife
  • Local Club: TFMOC

Posted 03 May 2016 - 05:31 PM

Check behind the speedo binnacle for inline fuses on blue wires(iirc blue/white and blue/red)
Check these carefully for excessive heat(melted plastic etc) replace these with 10amp blade type fuses IF you find the issues there,

#6 [email protected]

[email protected]

    Mini Mad

  • TMF+ Member
  • PipPipPipPip
  • 123 posts
  • Location: East Coast
  • Local Club: Long Island Mini Enthusiasts

Posted 03 May 2016 - 11:05 PM

I haven't been in there yet Cal (because I have a 3-clock burlwood dash and it's a right pita to remove and replace) but I'll get in there next and see what's what.

I did replace a similar "melt'down" in-line fuse behind the carb a month or two after purchasing 3.5 years ago when I did a thorough check (and learned about those "surprise!" fuses).

Nothing was malfunctioning at the time but I didn't want to leave it like that.

Thanks again for the suggestion!

Keep 'em coming please!

#7 cal844

cal844

    Crazy About Mini's

  • Members
  • PipPipPipPipPipPipPipPipPipPip
  • 9,492 posts
  • Location: Ballingry, Fife
  • Local Club: TFMOC

Posted 04 May 2016 - 09:02 AM

I haven't been in there yet Cal (because I have a 3-clock burlwood dash and it's a right pita to remove and replace) but I'll get in there next and see what's what.
I did replace a similar "melt'down" in-line fuse behind the carb a month or two after purchasing 3.5 years ago when I did a thorough check (and learned about those "surprise!" fuses).
Nothing was malfunctioning at the time but I didn't want to leave it like that.
Thanks again for the suggestion!
Keep 'em coming please!


On my 1993 car the fuses are behind the standard speedo binnacle, I cut the inline holders out but be sure to keep the maximum amount of wire you can!

#8 [email protected]

[email protected]

    Mini Mad

  • TMF+ Member
  • PipPipPipPip
  • 123 posts
  • Location: East Coast
  • Local Club: Long Island Mini Enthusiasts

Posted 04 May 2016 - 04:51 PM

Sounds sensible Cal - I researched 10-way mini-fuse holders with tabs on each side of the individual fuses (like the stock fuse holder) last night.  I figured I could replicate the fuse holder/distribution panel functionality of the factory fuse box with strategically placed jumpers.  This would have the benefit of getting the three (3) in-line fuses out from behind my carb (and any from behind my gauges if there are more there).


My Old Box:

Wht           pin 1 Grn

Brn+2nd Brn   pin 2 Pur

Grn/Y         pin 3 Grn/Brn+2nd Grn/Brn

Red+2nd Red   pin 4 Red/Blu


My in-lines (3 behind the carb - Haynes says there are supposed to be four)

:

1 The second Red from the box pin 4 goes to an in-line fuse that looks bodged into the harness immediately below the factory fuse box (running lights?)

2 Yellow (indicators/hazards?)

3 Blue  (dim-dip?)

4 Brn/Wht (rear fog?)


I figured I could wire up the new 10-way like this:


Old Box in = in / out of New Box 

Wht      1 = 1 / 1 Grn

Brn      2 = 2 / 2 Pur

2nd Brn  2 = 3 / 3 with jumper up to 2 Pur (replicates two-into-one double tabs)

Grn/Y    3 = 4 / 4 Grn/Brn

         3 = jumper from 4 down to 5 / 5 2nd Grb/Brn (replicates one-goes-to-two double tabs)

Red      4 = 6 / 6 Red/Blu

2nd Red  4 = 7 / 7 jumper up to 6 Red/Blu (replicates two-into-one double tabs)


In-lines, in / out of New Box 

Yel        8 / 8 Yel

Blu        9 / 9 Blu

Brn/Wht   10 / 10 Brn/Wht


Thoughts anyone?


#9 [email protected]

[email protected]

    Mini Mad

  • TMF+ Member
  • PipPipPipPip
  • 123 posts
  • Location: East Coast
  • Local Club: Long Island Mini Enthusiasts

Posted 04 May 2016 - 04:55 PM

Test results this morning:
 
Trying a new switch as a test this morning went in a totally different direction than expected!
 
I started out:
  1. Putting a 10 Amp fuse between the battery and the chassis ground in case I shorted anything too badly
  2. Removing the factory switch
  3. Confirming that I had 12 volts on the Brown wire entering the main lighting switch in the cabin
  4. Then I clipped in my simple SP/ST switch from the Brown to Red sockets in the white receptacle
  5. Throwing the new switch, I did not get dash lights as expected
  6. Then I clicpped the switch between Brown to Blue
  7. Throwing the switch I had no low-beams either
So same symptoms as the factory switch - no lights at all.
 
Then I thought: "If this is a short, I should see a big current drain, right?" 
 
So I switched over my multimeter to AMPs and placed it in series: Brown wire/white socket/new switch/Ammeter/white socket/Blue wire.
 
Throwing the switch promptly blew the .5 amp fast-blow fuse in the multimeter. No sparks, no smoke though and the 10 Amp fuse at the battery did not blow. This was me being stupid: I should have recalled that the lighting circuit draws 14.7 Amps (I'd read that somewhere in the forum).
 
Now the odd stuff:
When I replaced the fuse in the meter and switched back to Volts, I rechecked the Brown wire at the white socket and it appeared that I was only getting 5 volts now instead of 12V.
 
So I checked the voltage across the battery terminals and saw 5V there too.  Thniking "How could I have drained that much that quick?!?" I got my other meter out and checked again.  Same results.
 
So I disconnected the battery to bring it into the house to charge and when I checked it isolated from the Mini it was again reading 12.5 volts.
 
What would cause the battery terminals to read 5V when wired in, but 12V when isolated and NOT trip a simple 10 Amp fuse?
 
This is a very new (just six months old) Optima Batteries Yellow Top Dual-Purpose Battery ("deep cycle & Cranking power" AGM), Group 34/78, 750 CCA  battery and I seriously doubt anything is wrong with it.
 
When I get home from work I'll pop the battery back in, retest the voltage and check the other subsystems like starting.
 
Something must be wrong in my harness, something must be grounding out somewhere...?
 
Thoughts?


#10 [email protected]

[email protected]

    Mini Mad

  • TMF+ Member
  • PipPipPipPip
  • 123 posts
  • Location: East Coast
  • Local Club: Long Island Mini Enthusiasts

Posted 06 May 2016 - 03:18 AM   Best Answer

I finally solved this mystery when I decided not to trust the 12V I was measuring in the white socket on the Brown wire feeding the main lighting switch.  


Since I knew the rest of the lighting loom was working when I jumpered from the Brown Pin 2 on the fuse box to the red pin 4 and I got lights, I thought maybe something is wrong not with the "out" wiring of the switch (the red and blue wires), but maybe something is wrong with the Brown "in", 


So I ran a long wire from the lighting switch's Brown wire socket in the cabin out to the pin 4 connector on the fuse box that fed the lighting part of the loom and I STILL could not get the lights to light.  


So I looked upstream of the feed to the lighting switch in the Hayne's circuit diagram and saw that the Brown wire in the cockpit was actually one of the two Brown wires plugged into Pin 2 on the fuse box anyway!


Leaving my long wire connected to the white socket in the cabin, I unplugged both Brown wire connectors form the fuse box and tried to get a continuity "beep" on each to find the one that fed the switch - but neither beeped!  So I switched from the tester clip to a steel needle in the tester clip jaws and I scratched around in each Brown wire connector and then suddenly one beeped.  


I realised there must be a boat-load of corrosion in that clip.  In the end it simply turned out to be a connector on the fuse box that fed the main lighting switch that was badly oxidized underneath its cover - it read 12V in the cabin, but that was half the story.  


Note that it was showing 12V on inspection at the socket/switch... but under a real load, that connection failed to deliver anything strong enough to light the lights..

 
I shot both connectors with WD-40 and plugged them both on and off and onto the fuse box spades several times to restore a good connection.
 
I have lighting again!
 
Yay!

Edited by [email protected], 06 May 2016 - 03:30 AM.


Also tagged with one or more of these keywords: electrical

1 user(s) are reading this topic

0 members, 1 guests, 0 anonymous users