


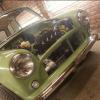
I've been working on my project now for around 10 months. The idea was to build a stripped out weekend weapon which could cope with the odd track day. Wasn't to bothered about having an immaculate car as long as it did the job, I did like the idea of the sleeper look. Oh how things have changed!!
It's now turned into a nut and bolt resto which is currently out for its shiny new paint.
From owning an ep3 type r for a long while the choice of engine was simple. I managed to drop on a b18c4 near full kit from a member who abandoned their project so close to the end. They were unable to get the thing to spark, so I took on the task.
Current spec so far.
B18c4 engine.
New exedy clutch
New genuine timing belt
Skunk2 inlet.
AEM fuel rail.
AEM fpr.
Kjb front subframe.
10" Minisport 4 pots.
Rebuilt front and rear suspension all Fully adjustable.
KAD rear camber brackets.
Gaz adjustable lowered shocks.
DSN alloy rear subframe mounts and front shock mounts.
6 point roll cage.
Removable steel front end.
10x6 weller wheels with AR032 tyres.
Omp silverstone classic bucket seats.
After many panels later and hours of welding, finally got the shell ready for paint. This included new passenger inner wing, a post, a panel,door step, inner and outer sill, both rear subframe heel board mounting points, boot floor, corners and hinge panel, rear valance, door skins.
Well, save boring you all with the rest of the details I'll let the pictures say the rest.
Please let me know what you think.


Removed all unneeded wires from the loom.

Removed and labelled engine loom

So after hours and hours of tracing wires, removing un wanted bits and checking and double checking connections finally found the problem. A wire was in the wrong terminal on the ecu plug. Changed it over and .............
http://i177.photobuc...B55C9FB2ABB.mp4
So with that done I now began the search for a car. Which didn't take long. I needed some room in the garage so decided to get rid of some seats I had lying around. So put them up for sale. A chap turns up, got to talking and turned out he had the exact car I was looking for. Tax exempt, 1973 clubman in black.
Clearly needed some work but emotions got the better of me and we did the deal. Turned out to be shifty off of this forum.
They turned out to be an expensive pair of seats for me!!!!!!
So the build really began....

New inner wing, A post, A panel, door step.


Passenger floor pan.

Inner and outer sills going on along with heel board subframe mounting points.


Moved on to the boot floor. Including both rear corners, hinge panel and valance.


Red oxide, Seam sealant ready for the stone chip.

Then ran brake and fuel lines.

Thought it was easier to get the subframe on while it was on its side. Going on with the DSN classics alloy subframe mounts.

Refurbish the suspension parts. New shafts, bearings,ball joints. And a lick of paint.


Radius arm in. Fitted with KAD adjustable brackets.

I decided that to aid getting the engine in and out id make the front removable. Also wanted to keep it steel. So this happened.

Made up some Brackets for under wings.

And welded a piece of box to the front panel that connects to the front cross member on the frame.

I found that when the exhaust manifold was on, clearance on the front cross member was an issue. So made some spacers to pack that out. I then had to mod the front panel so the frame was not protruding through. This meant cutting and adding some small fillet pieces in to allow clearance. I'll then move the number plate down over this so won't be too obvious what's going on underneath.


Engine in, with front end all bolted on to check clearances. Good all round apart from the rack. Solved this by making a new rear mount bracket that enabled to engine to tilt enough to clear the rack and also take some of the strain off the mounts.

New mount bracket.


Quick mock up of front suspension and brakes.

As the lip on the scuttle was rusted out and a repair already put in I decided to change the full scuttle panel for a genuine one. Also gave me good access for doing the bulkhead box. Which is needed to clear my inlet.

Box in place and bulk head stripped, Seam sealed and primed.
Also note the small square cut outs under the cross member. These are for the wiring harness to come through so keeps the engine bay clean from too many wires.

Plates I made for the harness to go through. These will be cut into 2 halves, which clamp over the loom along with a grommet and gasket.

New scuttle on. And also had a go at a little something different for the engine bay. Bit a homage to Honda. I've used a wrinkle finish paint that Honda's historically use on their rocker covers. Was a right ******* to get right but worth it I think.


Had to make some fillet pieces to finish off the corners. These will also be extra fixing points for the front end.
http://i177.photobuc...s/image_79.jpeg
http://i177.photobuc...s/image_56.jpeg
Alternator bracket.
http://i177.photobuc...s/image_57.jpeg
http://i177.photobuc...s/image_59.jpeg
http://i177.photobuc...s/image_60.jpeg
http://i177.photobuc...s/image_61.jpeg
Test fitting the arches.
http://i177.photobuc...s/image_71.jpeg
And off to paint he went.
http://i177.photobuc...s/image_73.jpeg
So with the car gone, turned my attention to the engine. Cam belt, clutch and a tidy.
http://i177.photobuc...s/image_74.jpeg
http://i177.photobuc...s/image_84.jpeg
http://i177.photobuc...s/image_83.jpeg
http://i177.photobuc...s/image_76.jpeg
Built up inlet manifold. Aem high flow fuel rail and pressure reg.
http://i177.photobuc...s/image_78.jpeg
And as it stands now.
http://i177.photobuc...s/image_85.jpeg
Finished the clutch tonight and finished painting little bits and bobs.
Need to get the front frame off the car and away to the powder coaters now along with the rollcage. Hopefully have the car back next week. Fingers crossed.
Edited by jamus, 13 July 2016 - 09:54 PM.


