Won you over in the end then?!?
Suppose you have some for sale do you?! Haha


1973 B18C4 Clubman Weekender
Started by
jamus
, Jul 13 2016 09:49 PM
73 replies to this topic
#17

Shifty
-

- Admin
-

- 13,139 posts
Sponsored by Fosters (tm)
- Name: Sean
- Location: Shropshire(sunny)
- Local Club: TMF
Posted 01 August 2016 - 10:01 PM
You're so cynical!!
Actually I don't so there!!!
I'll have to pop round and see it in the flesh when you get it back.
#18
jamus
-
- Noobies
-
- 44 posts
On The Road
- Location: Telford
Posted 01 August 2016 - 10:09 PM
Ha I know what your like!!
Yeah dude no problem. I'll give you a buzz when's he's home.
Yeah dude no problem. I'll give you a buzz when's he's home.
#19
jamus
-
- Noobies
-
- 44 posts
On The Road
- Location: Telford
Posted 02 August 2016 - 08:50 PM
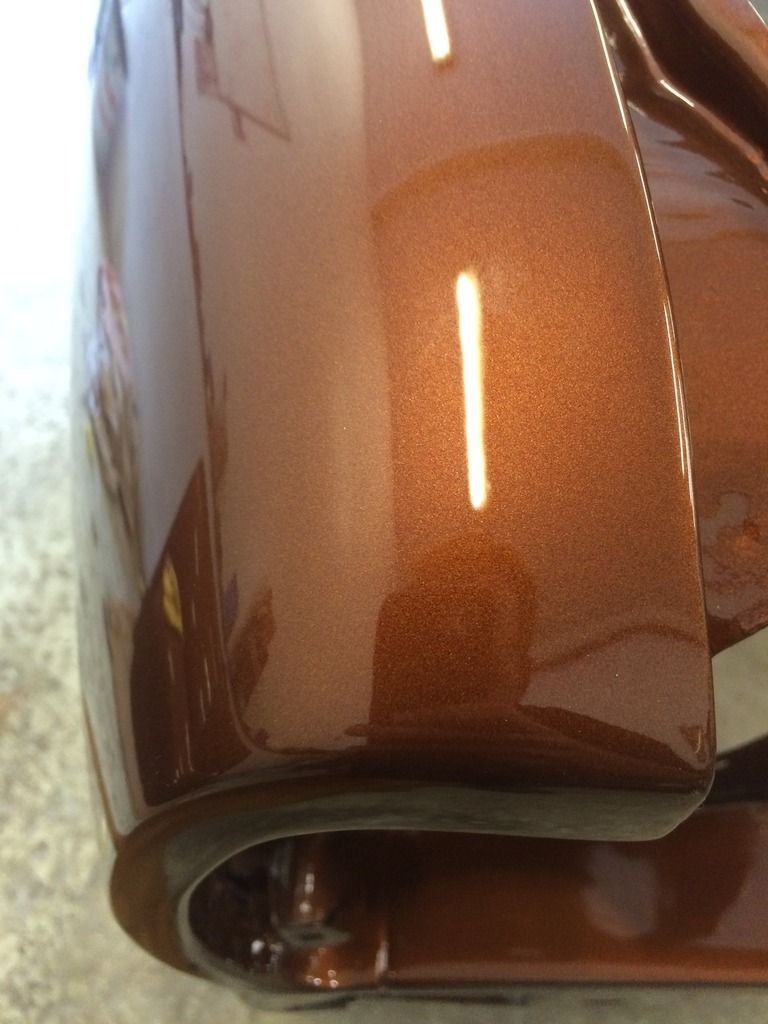
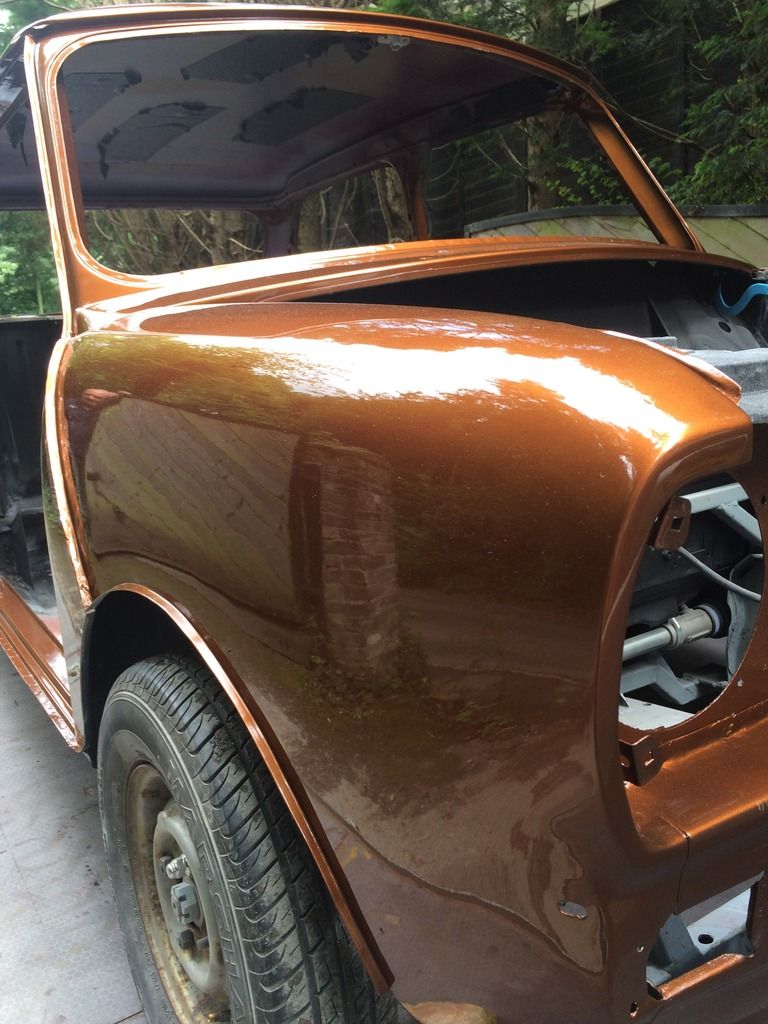
Went to have a look at the car today. Looks great. Fantastic in the sun. Pictures don't do it justice. But here's a few to give you an idea. He was still polishing it when I got there.


Edited by jamus, 02 August 2016 - 08:51 PM.
#20
jamus
-
- Noobies
-
- 44 posts
On The Road
- Location: Telford
Posted 05 August 2016 - 08:03 PM
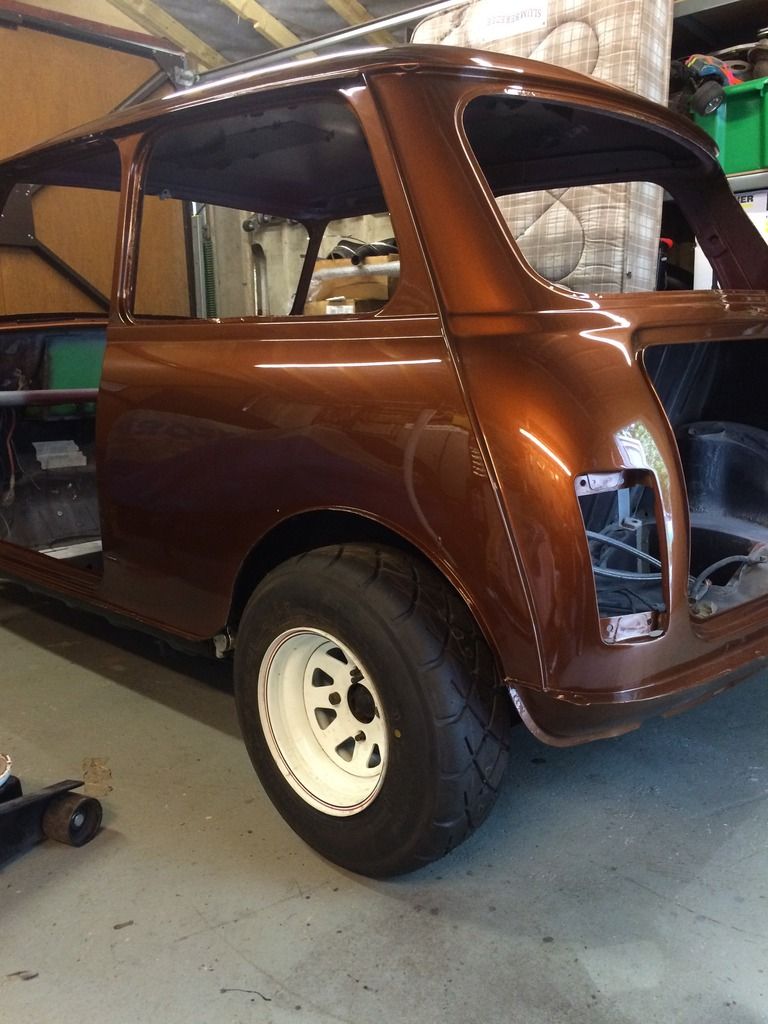
So collected the car yesterday. Looks great.
Stuck the wheels on straight away to try and get an idea of colours so I could send them off to the powder coaters ASAP. I love the look of the wellers but somehow think now that they just don't compliment the car. What's people's thoughts?
I'm away this weekend, but Monday I'll be very busy.

Tried the wheels on.
Stuck the wheels on straight away to try and get an idea of colours so I could send them off to the powder coaters ASAP. I love the look of the wellers but somehow think now that they just don't compliment the car. What's people's thoughts?
I'm away this weekend, but Monday I'll be very busy.


Tried the wheels on.

#21
Mini Manannán
-

- Members
-
- 2,857 posts
Well I'll be buggered if I can find it
- Location: Middle of the Irish Sea
- Local Club: man Estate
Posted 05 August 2016 - 08:26 PM
That colour is so good. Not too sure about the Wellers, maybe some Revo's would look cool? If you give us a decent side-on shot we can 'shop different wheels on to it.
#22
jamus
-
- Noobies
-
- 44 posts
On The Road
- Location: Telford
Posted 05 August 2016 - 08:30 PM
Ah really!!! That would be great. I'll try and get a good shot from the side and post it up.
I've been looking at some of the specialist components wheels which look the dogs, with a gold centre. but going to finish the build first and review the wheels then. Plus gives me a bit more time to save the money for them £££££
I've been looking at some of the specialist components wheels which look the dogs, with a gold centre. but going to finish the build first and review the wheels then. Plus gives me a bit more time to save the money for them £££££
#23
jamus
-
- Noobies
-
- 44 posts
On The Road
- Location: Telford
Posted 11 September 2016 - 09:49 PM
Just realised I forgot to get a decent side shot. Will try and get one ASAP as I'd love to see it with some different wheels on. Anyway
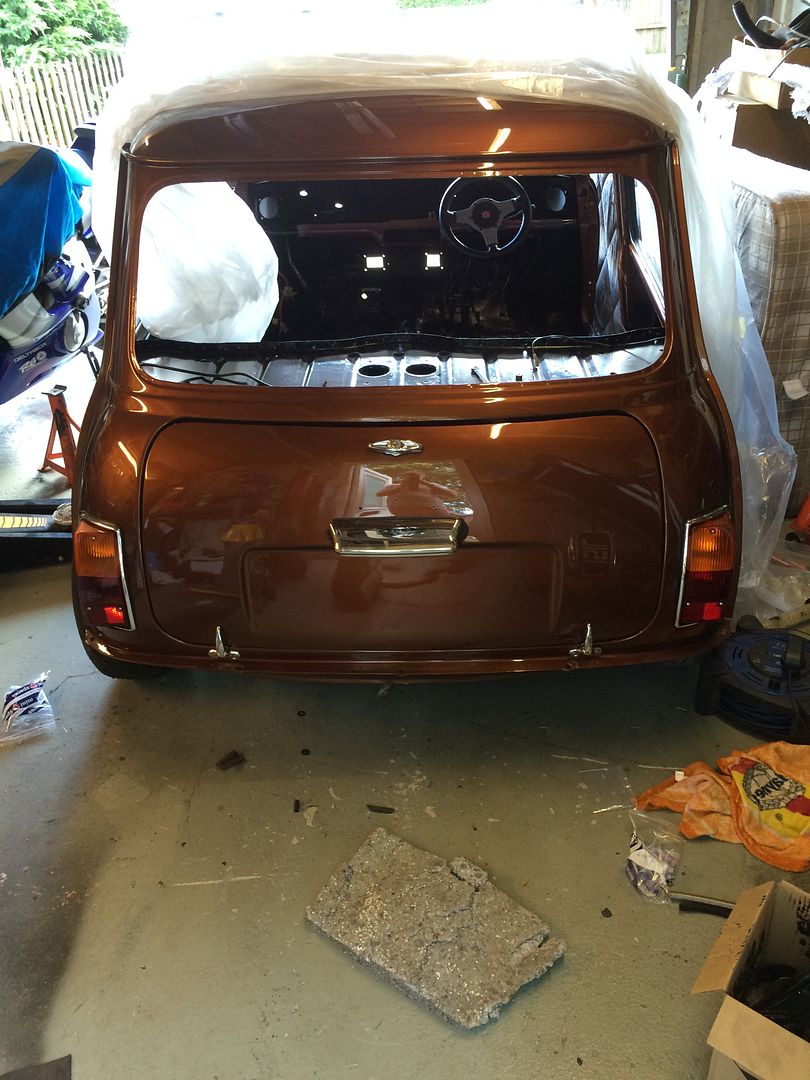
Bit of an update.
Got the floors painted. Used furtan rust treatment then some good old smooth hammerite.
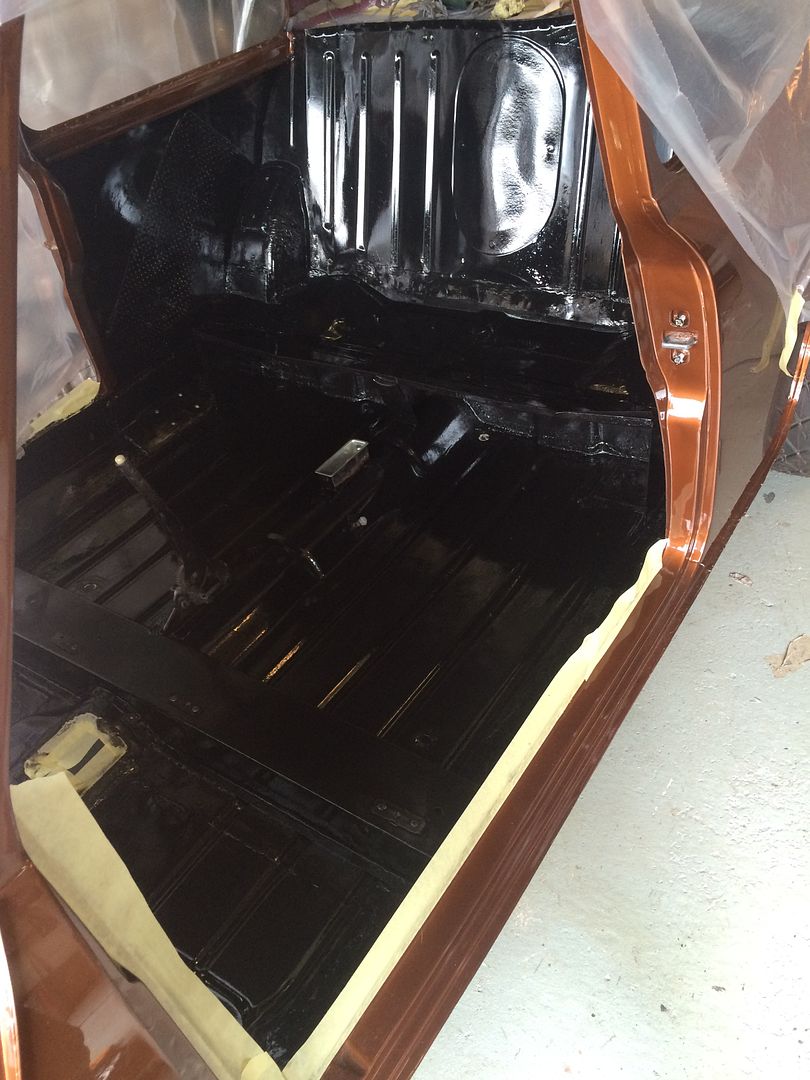
Rear lights fitted with new seals and fuel tank in. Turned out that I forgot to replace the tank stay bracket when I replaced the floor so had to fabricate one and weld it in.
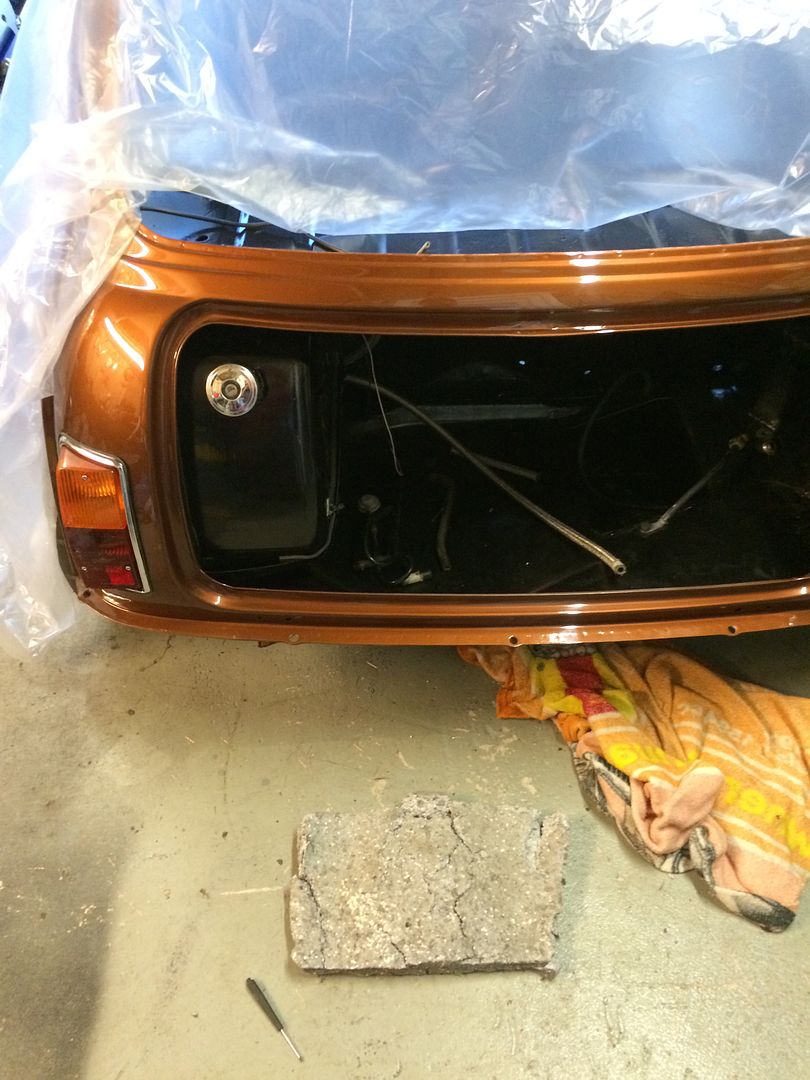
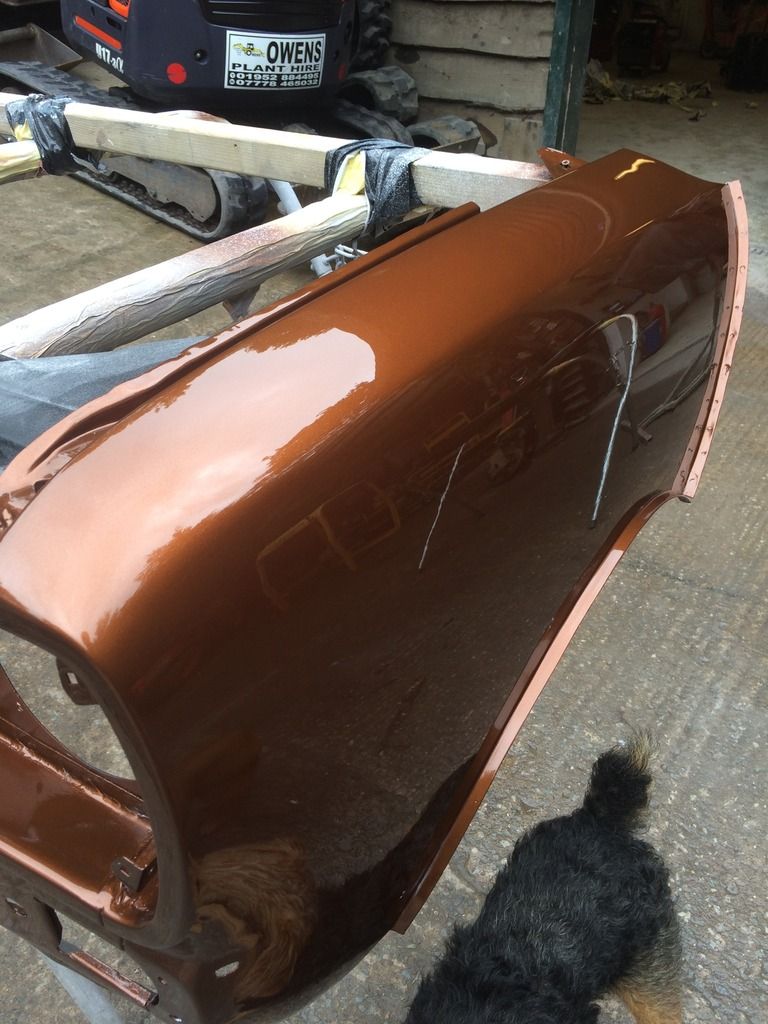
Got the boot lid built up and fitted. I do have a problem though. Whilst replacing the rear corners,hinge panel etc I did fit the boot lid before i welded it all up to ensure good fitment. However I did not have the seal fitted at the time and now with it fitted I can't get the lid to close properly. It's proud on the top right hand side and not compressing the seal. In fact there is a gap between body and the seal. I've tried various things to rectify this, packed the hinges out, filed the holes more, fitted the later type seal which I couldn't even close it with that on.
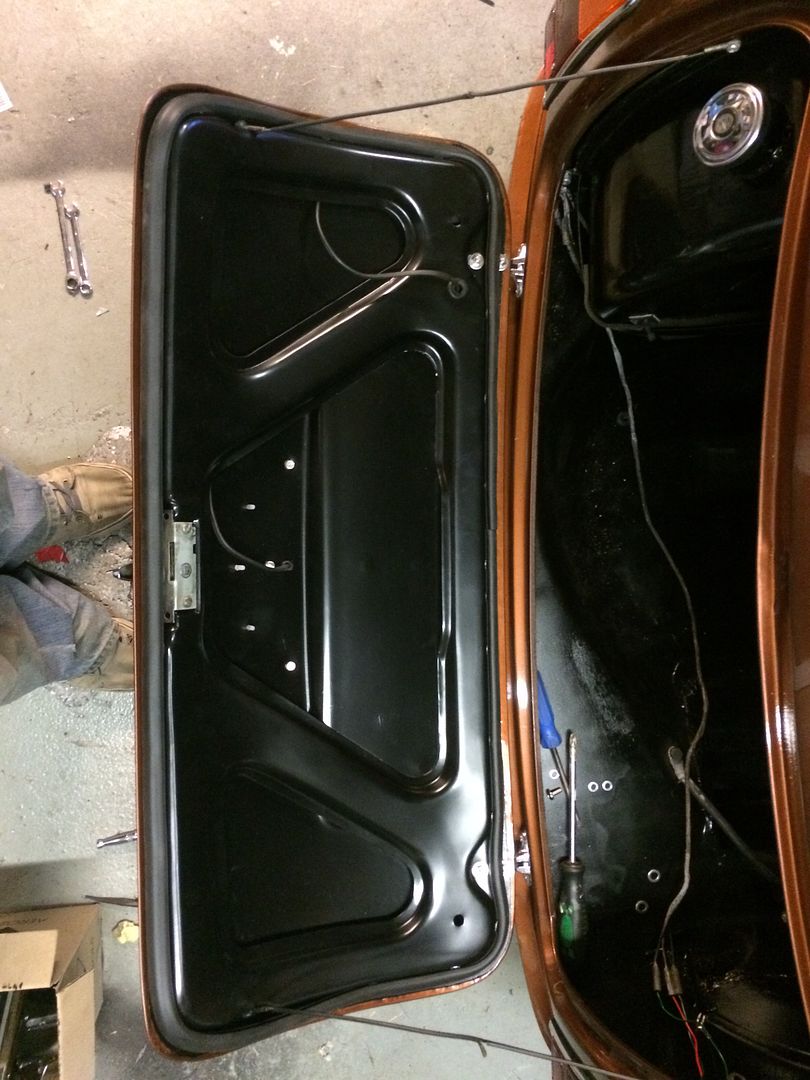
Flush this end
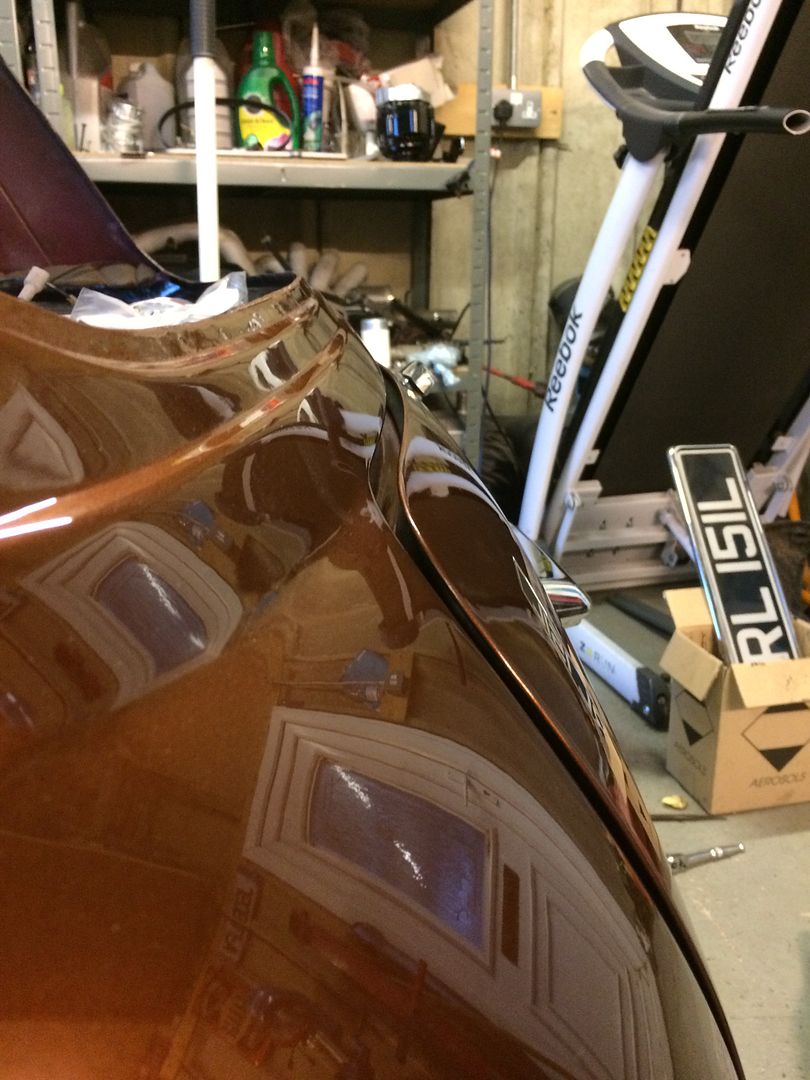
Proud here
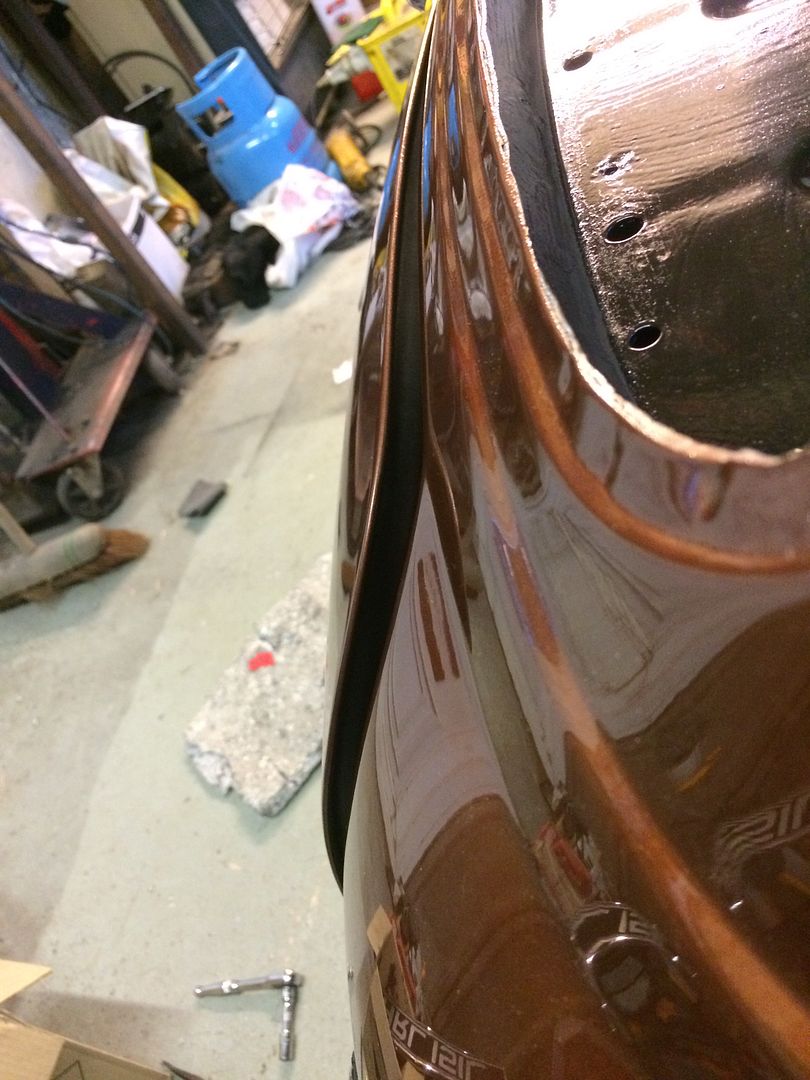
Has to be the seal as when I remove it, it sits fine.
While playing around with this, one of my brand new stainless nuts,that holds the hinge to the body decided to seize itself on to the pin. Which was only finger tight!! What a nightmare! Posi head then rounded off so had no choice but to drill it out! Replaced with another, roughly set the lid and moved on to something else. Will return to this at a later date. But any advice on how to sort this would be very much appreciated.
So thought I'd move on the getting the rear openers in.
I happened to have 3 sets of these, so thought no probs. How wrong was I. Like I said I have 3 sets, 1 clear, 1 with green tint and 1 with a dark tint. But turns out my front screen and door glass are clear and rear screen is green. So best way is to just get another clear rear screen and fit my clear side openers right. No such luck. The frames on my clear ones are rusty and scratched. So thought I could remove the dark tint from my other set and hopefully they will be clear underneath. Which was the case. So removed the tint, polished the frame and got it fitted. Again with new seal.
Came to strip the drivers side and one of the 2 fixed hinges has rusted through and snapped off. So now im in need of a good drivers side clear opener.
I was the going to get the doors fitted but will wait until I can get another set of hands to ensure I don't damage them.
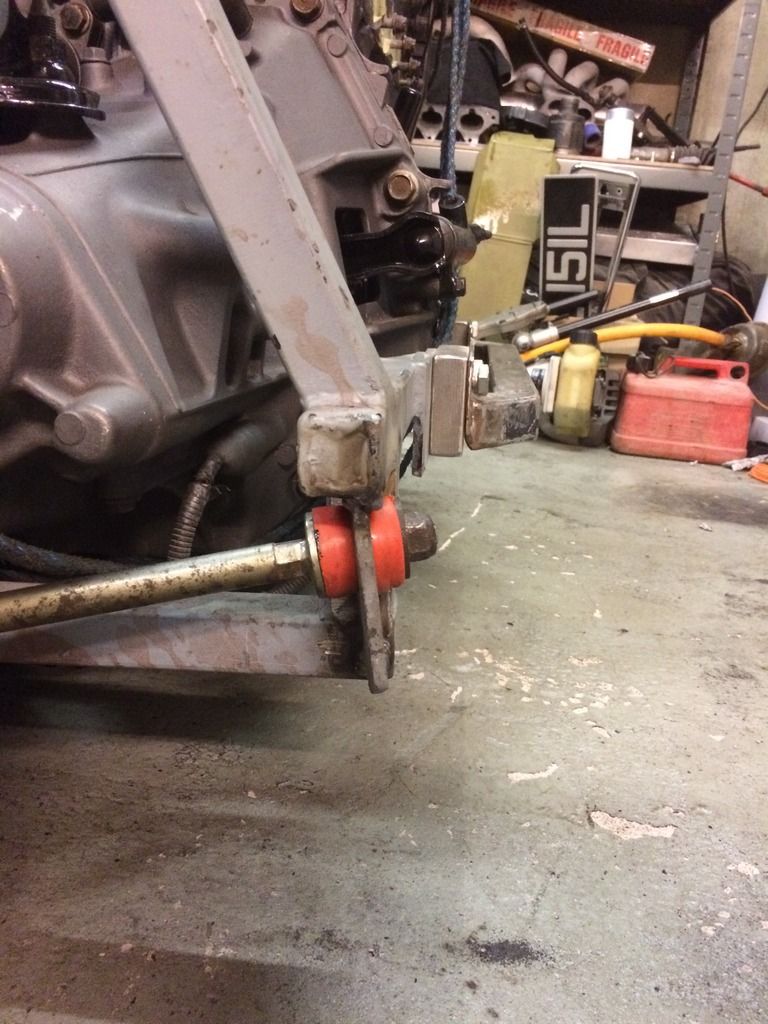
As I still need to make some modifications to the front subframe I decided to get the engine in so I could make a start. These include changing the front mounts for the tie rods and making some tabs for the brake lines to secure to.
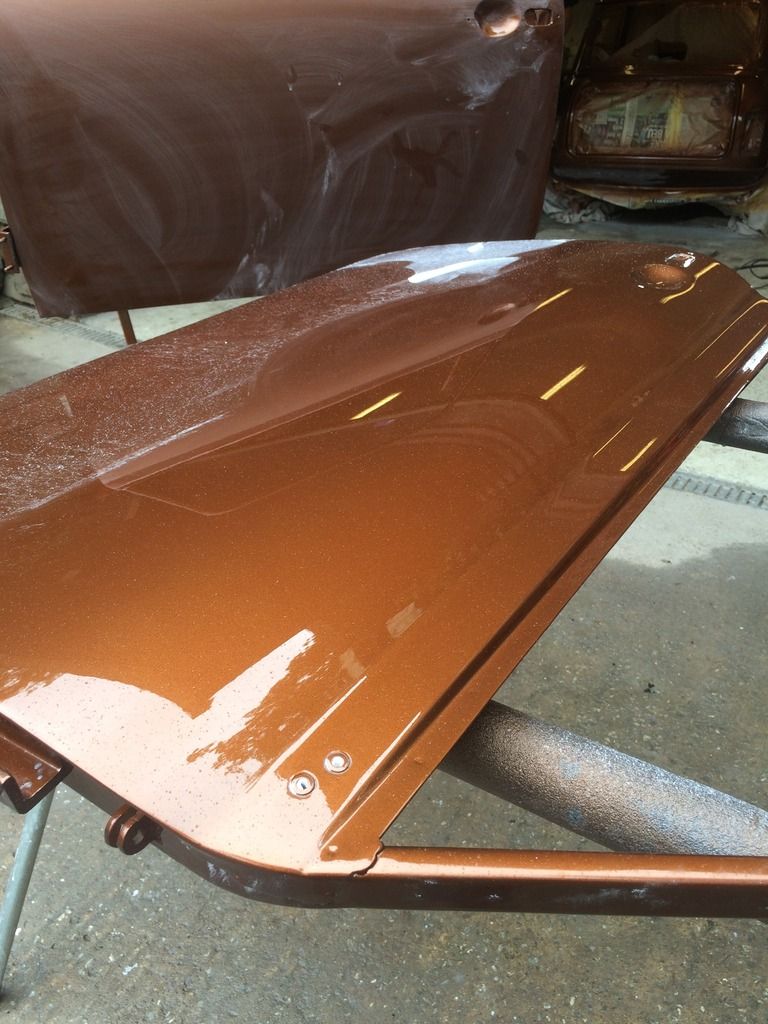
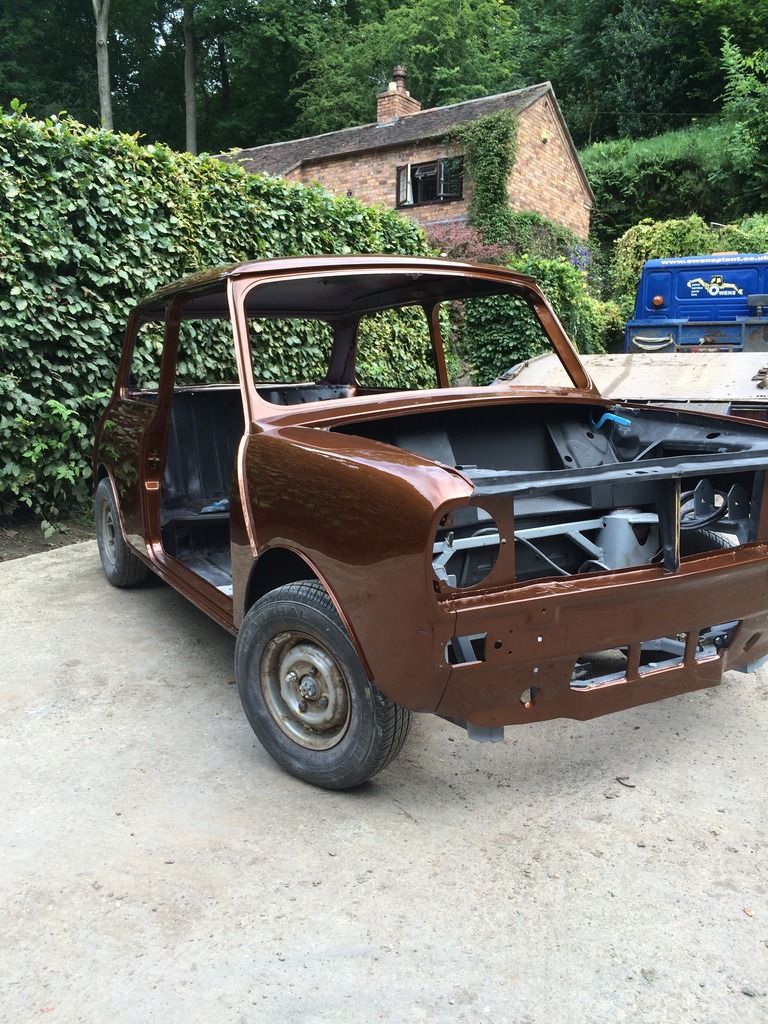
And as I needed to turn the car around in the garage it gave me chance to get it out in the sun for the first time so I could really appreciate the colour! So happy with it.

One of the doors in the sun.
Engine in place. Still un decided on cam cover colour.

As its a custom frame the tie rod mounts are parallel to the bulkhead which causes a problem when mounting the them. Their position also limits the full lock on the steering. So I'm looking at bending the tie rods very slightly to aid with the steering lock and also twisting the front mount. I have a spare set of tie rods so just mocking them up to get the correct angle then I will bend my others.
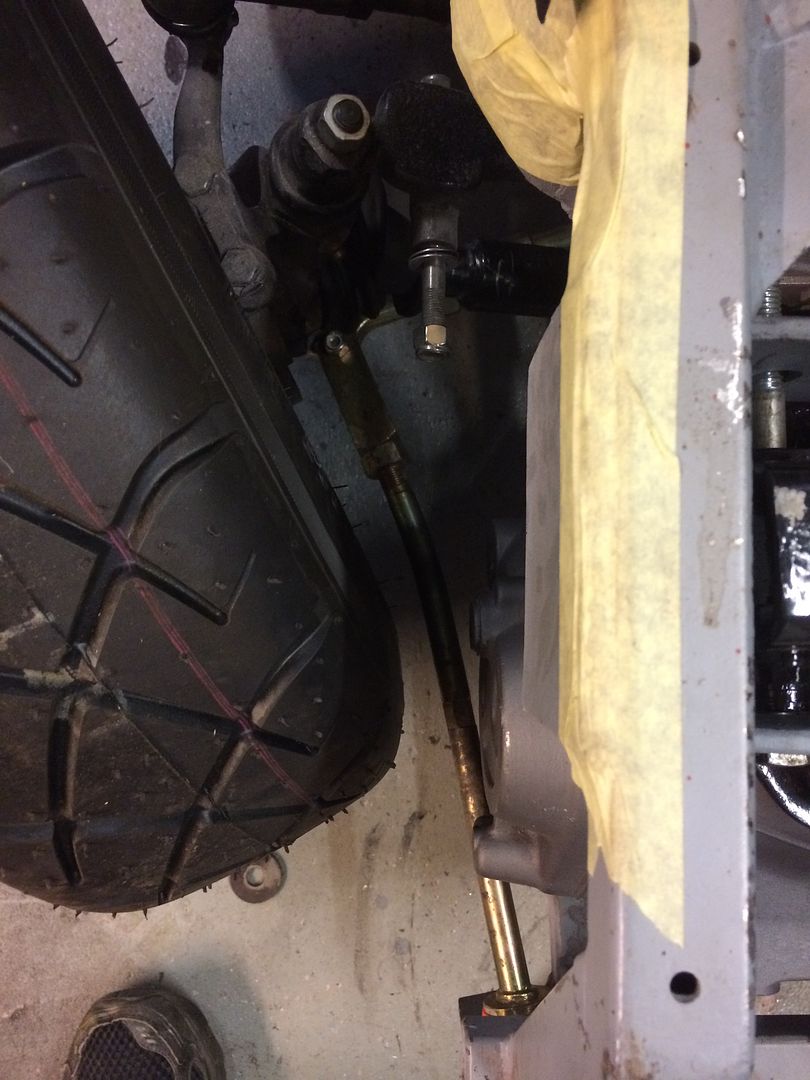
As you can see not much of a bend at all.
People may frown on this, and I do understand how heating the metal will change its properties and potentially weaken them. I will be making sure I don't get them too hot and carry out an anealing process afterwards. This should limit the amount that the metal is effected and may also carry out a crack test just to make sure.
Will bend the other side tomorrow and make sure that clears and go from there.
Feels like everything is taking ages! Even the little jobs but progress is progress is guess.
Bit of an update.
Got the floors painted. Used furtan rust treatment then some good old smooth hammerite.

Rear lights fitted with new seals and fuel tank in. Turned out that I forgot to replace the tank stay bracket when I replaced the floor so had to fabricate one and weld it in.

Got the boot lid built up and fitted. I do have a problem though. Whilst replacing the rear corners,hinge panel etc I did fit the boot lid before i welded it all up to ensure good fitment. However I did not have the seal fitted at the time and now with it fitted I can't get the lid to close properly. It's proud on the top right hand side and not compressing the seal. In fact there is a gap between body and the seal. I've tried various things to rectify this, packed the hinges out, filed the holes more, fitted the later type seal which I couldn't even close it with that on.

Flush this end

Proud here

Has to be the seal as when I remove it, it sits fine.

While playing around with this, one of my brand new stainless nuts,that holds the hinge to the body decided to seize itself on to the pin. Which was only finger tight!! What a nightmare! Posi head then rounded off so had no choice but to drill it out! Replaced with another, roughly set the lid and moved on to something else. Will return to this at a later date. But any advice on how to sort this would be very much appreciated.
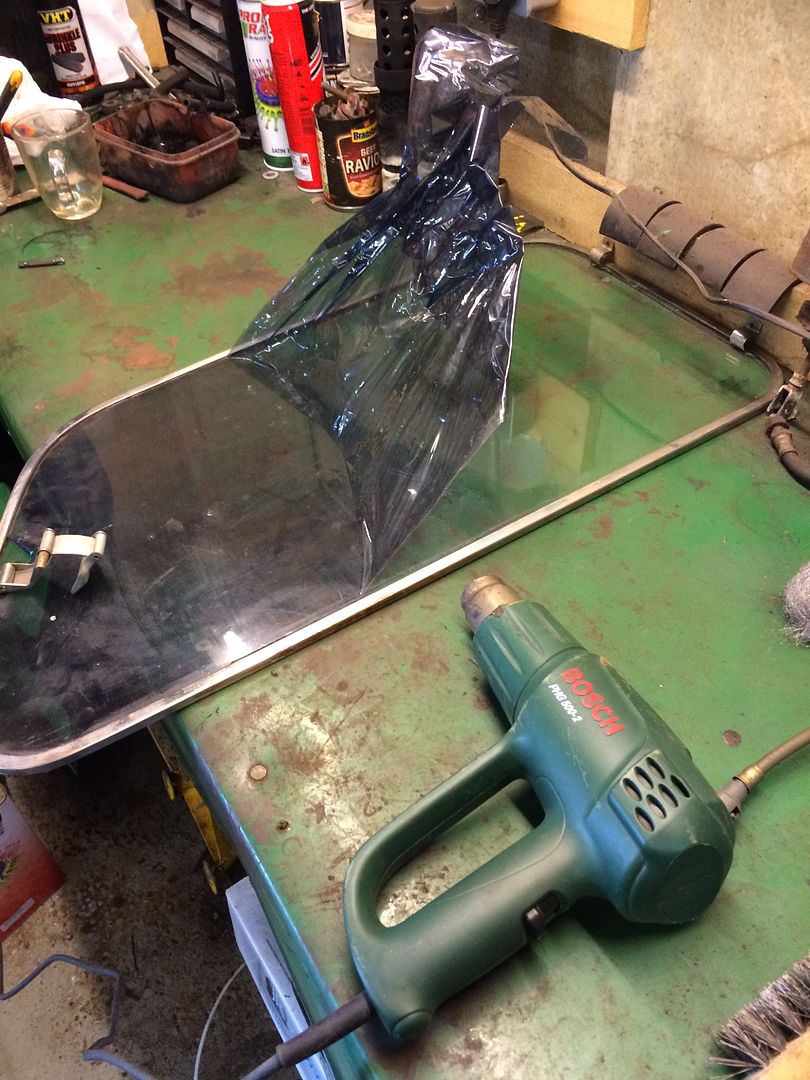
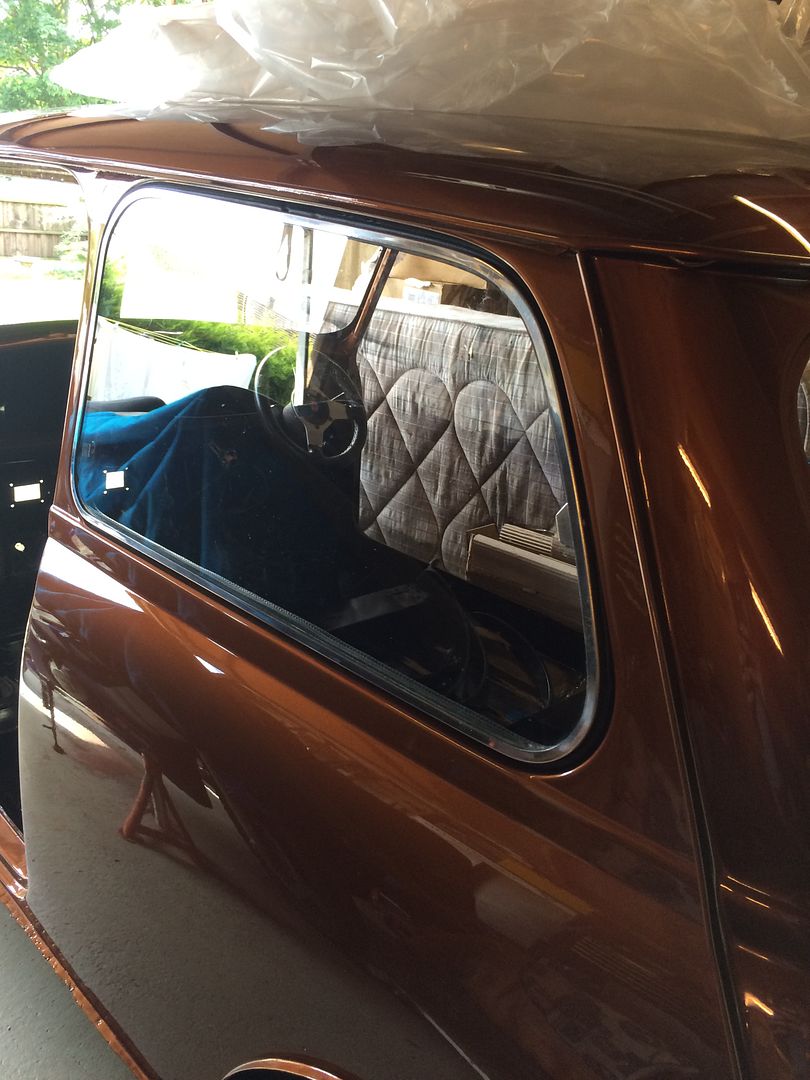
So thought I'd move on the getting the rear openers in.
I happened to have 3 sets of these, so thought no probs. How wrong was I. Like I said I have 3 sets, 1 clear, 1 with green tint and 1 with a dark tint. But turns out my front screen and door glass are clear and rear screen is green. So best way is to just get another clear rear screen and fit my clear side openers right. No such luck. The frames on my clear ones are rusty and scratched. So thought I could remove the dark tint from my other set and hopefully they will be clear underneath. Which was the case. So removed the tint, polished the frame and got it fitted. Again with new seal.


Came to strip the drivers side and one of the 2 fixed hinges has rusted through and snapped off. So now im in need of a good drivers side clear opener.
I was the going to get the doors fitted but will wait until I can get another set of hands to ensure I don't damage them.
As I still need to make some modifications to the front subframe I decided to get the engine in so I could make a start. These include changing the front mounts for the tie rods and making some tabs for the brake lines to secure to.
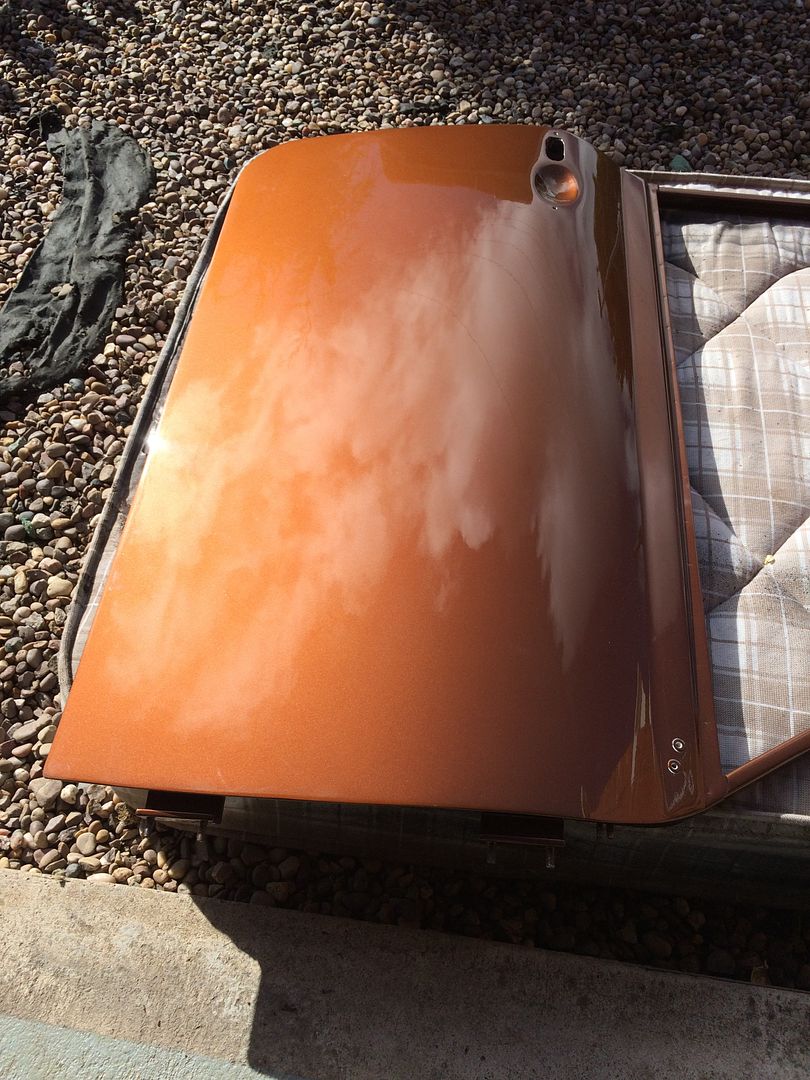
And as I needed to turn the car around in the garage it gave me chance to get it out in the sun for the first time so I could really appreciate the colour! So happy with it.

One of the doors in the sun.

Engine in place. Still un decided on cam cover colour.

As its a custom frame the tie rod mounts are parallel to the bulkhead which causes a problem when mounting the them. Their position also limits the full lock on the steering. So I'm looking at bending the tie rods very slightly to aid with the steering lock and also twisting the front mount. I have a spare set of tie rods so just mocking them up to get the correct angle then I will bend my others.

As you can see not much of a bend at all.
People may frown on this, and I do understand how heating the metal will change its properties and potentially weaken them. I will be making sure I don't get them too hot and carry out an anealing process afterwards. This should limit the amount that the metal is effected and may also carry out a crack test just to make sure.

Will bend the other side tomorrow and make sure that clears and go from there.
Feels like everything is taking ages! Even the little jobs but progress is progress is guess.
#24
Mini 360
-

- Members
-
- 4,933 posts
Up Into Fourth
- Location: Aberdeenshire
- Local Club: Independent
Posted 11 September 2016 - 09:54 PM
Bending the tie rods will mean any future longitudinal forces will be pushing it to bend further which could be bad news. I would be careful with bending them.
#25
jamus
-
- Noobies
-
- 44 posts
On The Road
- Location: Telford
Posted 13 September 2016 - 06:47 PM
Thanks mini360.
At first I was quite dubious about having them bent, and started looking at another way to rectify the problem but this does seem one of the only ways I can manage it.without adding rack limiters. As you can see the bend is very minimal so shouldn't have to much effect. Even the frames from the likes of allspeed have bent tie rods so I'm not too concerned.
Managed to get the other one bent and fitted as a mock up. Just working out where to weld the tabs on that will hold the front flexible brake lines. Then it's engine out time again.
#26
jamus
-
- Noobies
-
- 44 posts
On The Road
- Location: Telford
Posted 15 September 2016 - 10:59 AM
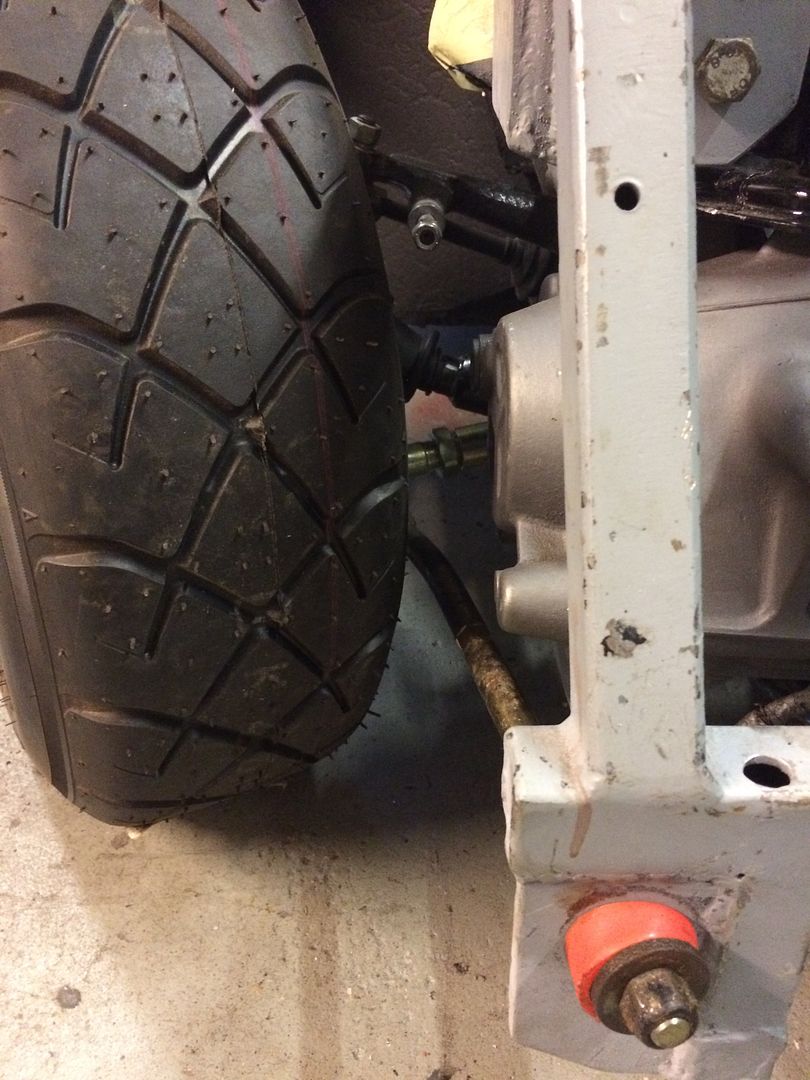
So mocking up for my brake lines, fitted drivers side caliper so I can see where to weld my tabs and..............
Yes! Caliper is hitting the tie rod end mount!!!
I've seen that people have had this problem in the past but not really found any definitive answer as to why or how to rectify it.
Rack is centralised, castor and camber are not set. Could this be as mine is a custom frame the front tie rod mount is higher than standard causing the tie rod to angle up to much??
Only way I can see to fix this is to add some rack limiters or some bottom ball joint steppers.
As the limiters are considerable cheaper I've just ordered some KAD ones so I'll go from there.
#27
Mini Manannán
-
- Members
-
- 2,857 posts
Well I'll be buggered if I can find it
- Location: Middle of the Irish Sea
- Local Club: man Estate
Posted 15 September 2016 - 12:51 PM
That colour is so good. I was thinking maybe a yellow cam cover would go well with the brown.
Anyway! Get us one side shot, stick them in the Digital Mini section - if I don't see it one of the other 'shoppers' will.
#28
bluemini17
-
- Members
-
- 158 posts
Mini Mad
- Location: Bangor
Posted 02 October 2016 - 03:09 PM
great progress, colour is amazing. Keep up the good work!
#29
jamus
-
- Noobies
-
- 44 posts
On The Road
- Location: Telford
Posted 02 October 2016 - 08:40 PM
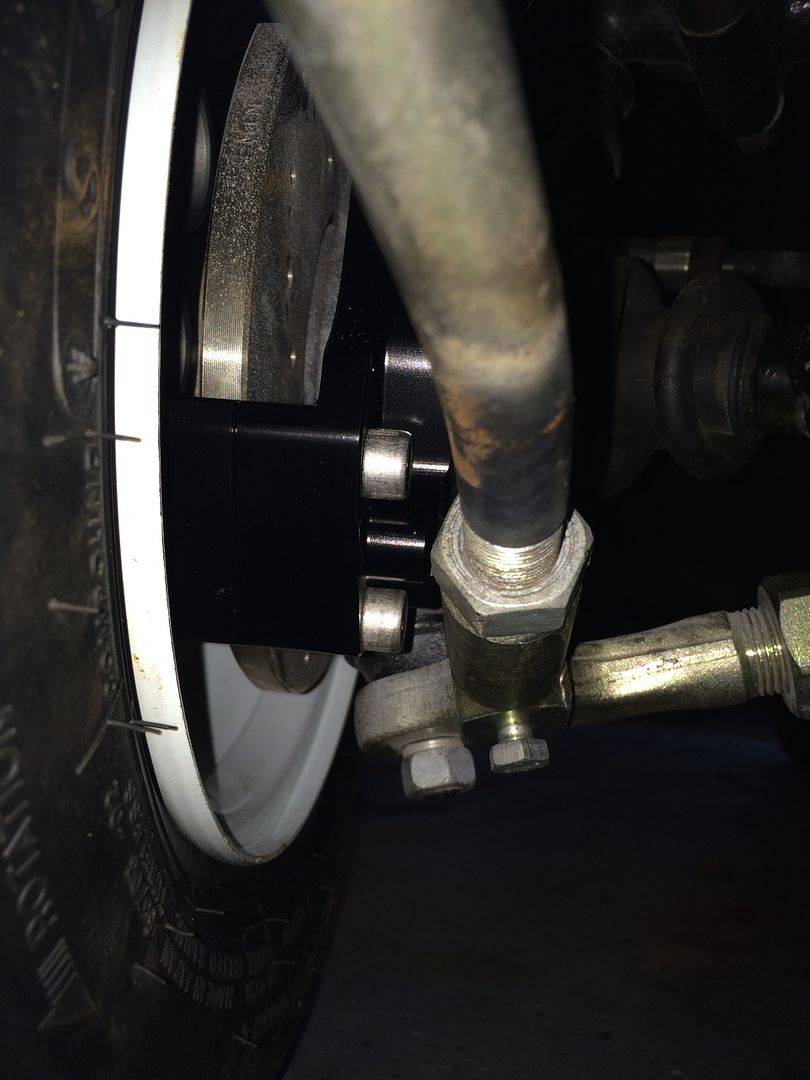
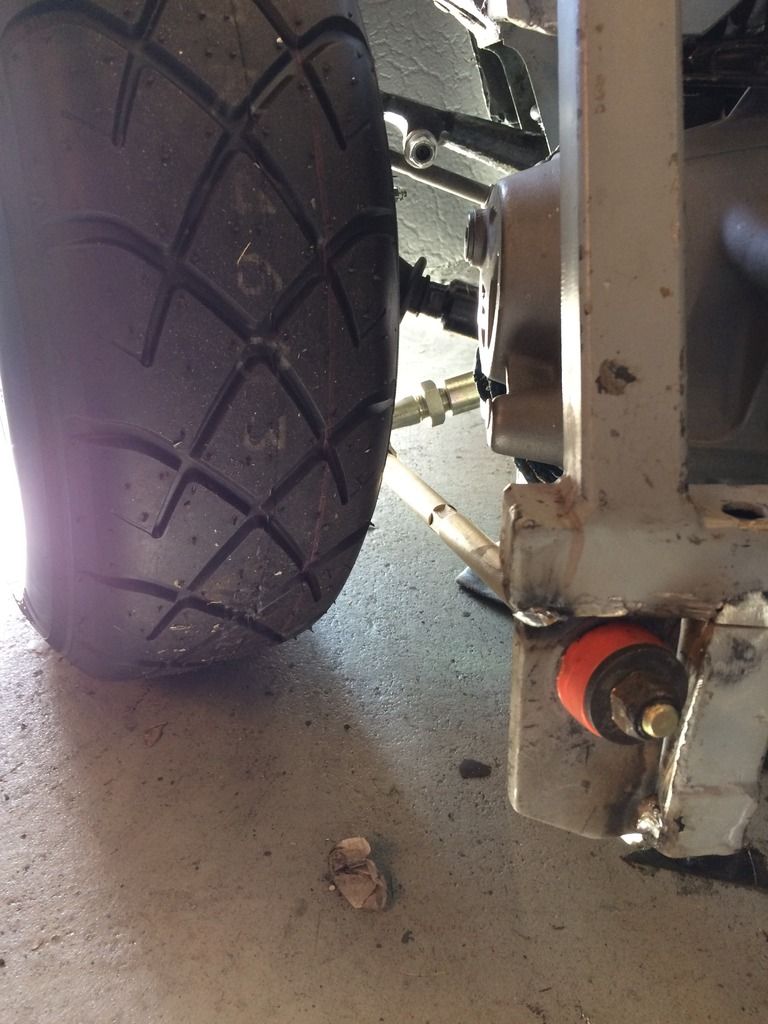
Been away with work for the past couple of weeks so made zero progress. However while away I did manage to order some KAD rack limiters and ball joint droppers from mondosport. These drop the ball joint by 30mm.
So stripped the hubs off and fitted the droppers first, as I was not convinced the limiters would solve the problem.
Got it all build back up and have worked a treat. Loads of clearance now both sides on full lock.
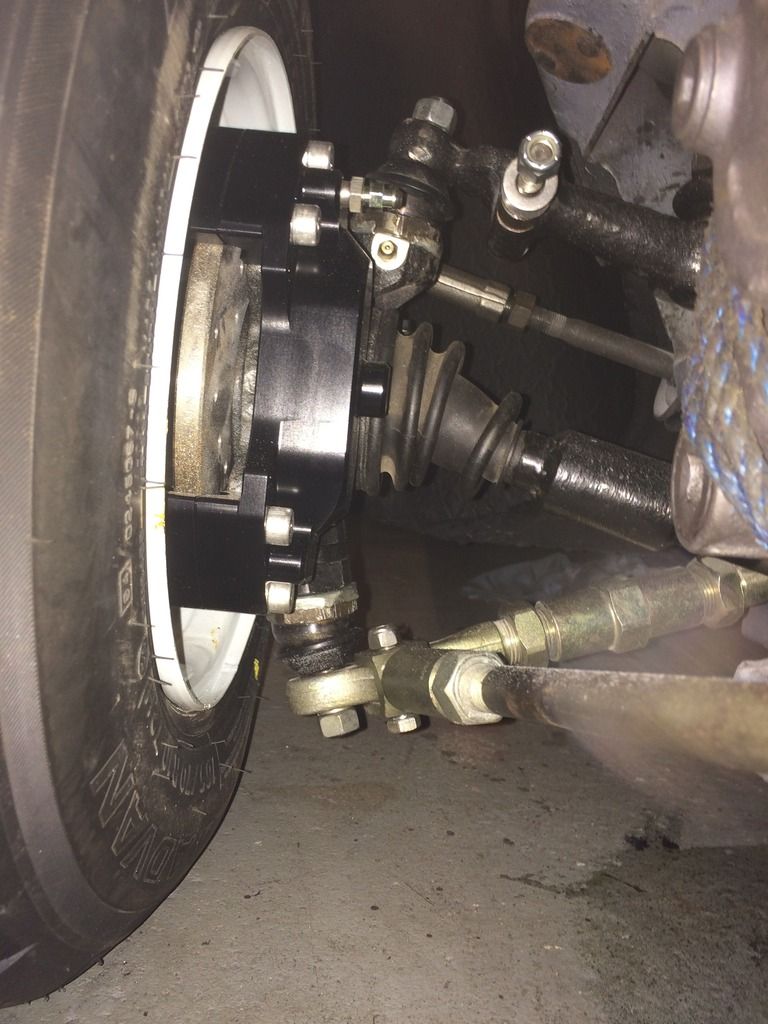
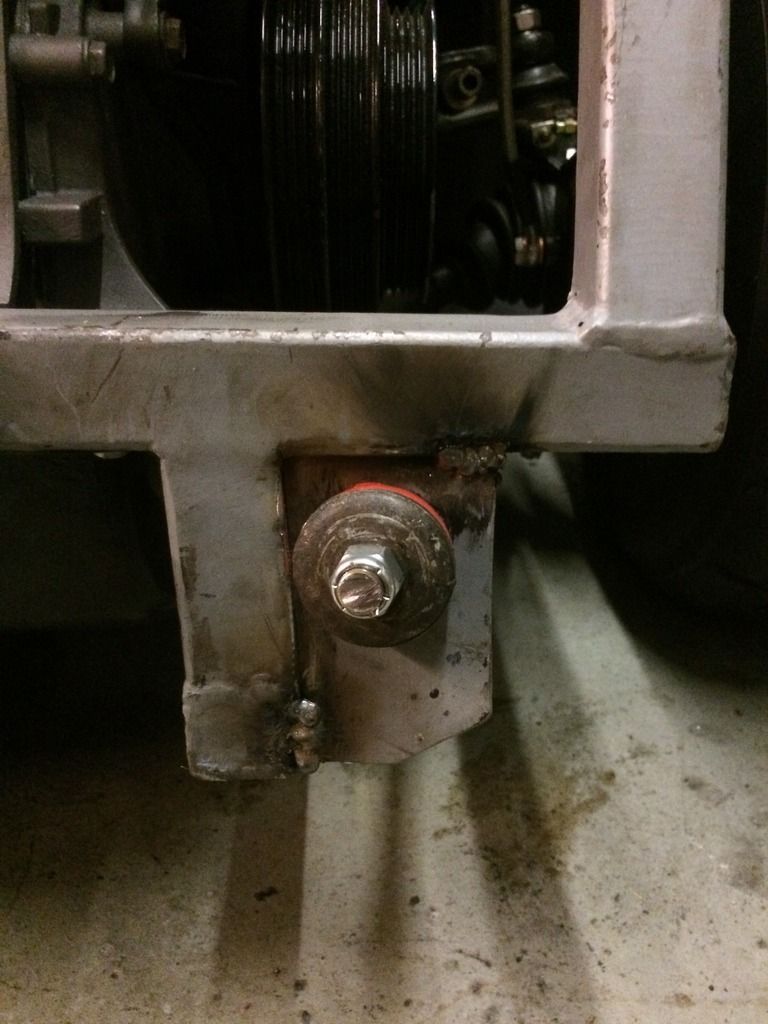
Then went on to angle the front tie rod mounts.
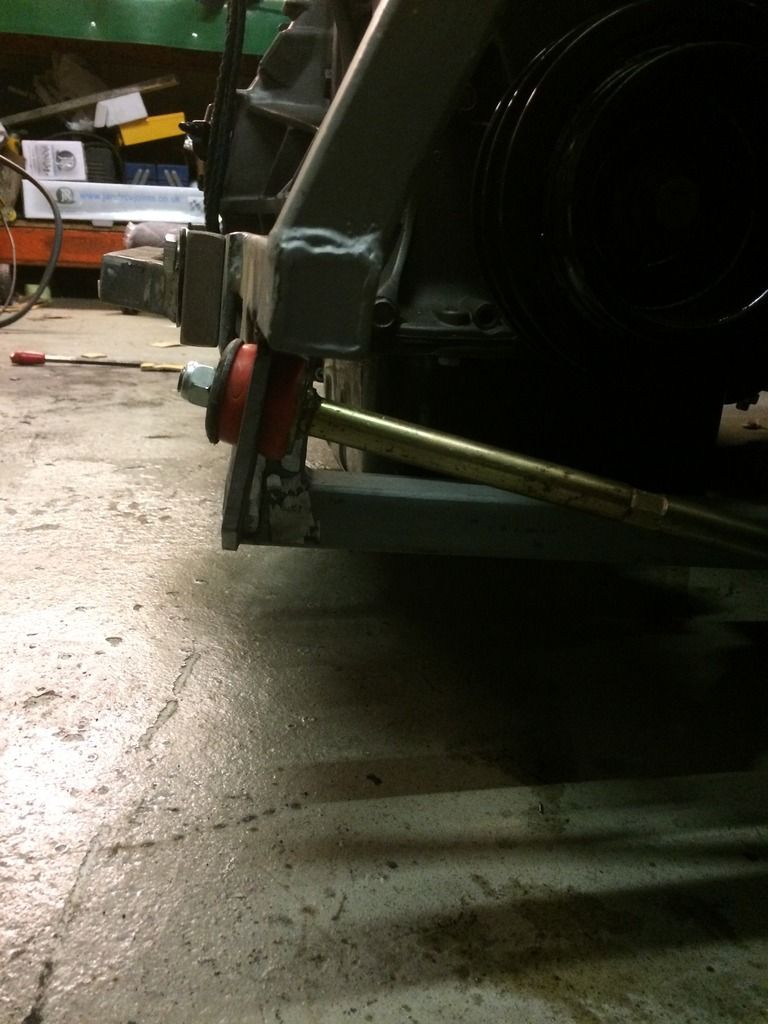
With the droppers fitted and the plates angled I thought I'd try and fit my straight tie bars and great news they fit fine. Plenty of clearance both sides.
So have now removed the engine.....again, hopefully the next time it goes in it will be in for good.
Removed the frame from the car and stripped it down. Welded up the front mounts, welded my tabs on for the braided brake lines and generally tidied it up ready to be sent for powder coating.
Next I have some of the bulkhead to re-paint as I'm not 100% happy with it and then get the drive shafts built up.
Finally feels like I'm making some progress.
Not looked at the boot lid again yet though!!
So stripped the hubs off and fitted the droppers first, as I was not convinced the limiters would solve the problem.
Got it all build back up and have worked a treat. Loads of clearance now both sides on full lock.

Then went on to angle the front tie rod mounts.


With the droppers fitted and the plates angled I thought I'd try and fit my straight tie bars and great news they fit fine. Plenty of clearance both sides.

So have now removed the engine.....again, hopefully the next time it goes in it will be in for good.
Removed the frame from the car and stripped it down. Welded up the front mounts, welded my tabs on for the braided brake lines and generally tidied it up ready to be sent for powder coating.
Next I have some of the bulkhead to re-paint as I'm not 100% happy with it and then get the drive shafts built up.
Finally feels like I'm making some progress.
Not looked at the boot lid again yet though!!
#30
jamus
-
- Noobies
-
- 44 posts
On The Road
- Location: Telford
Posted 25 October 2016 - 07:34 PM
Update time.
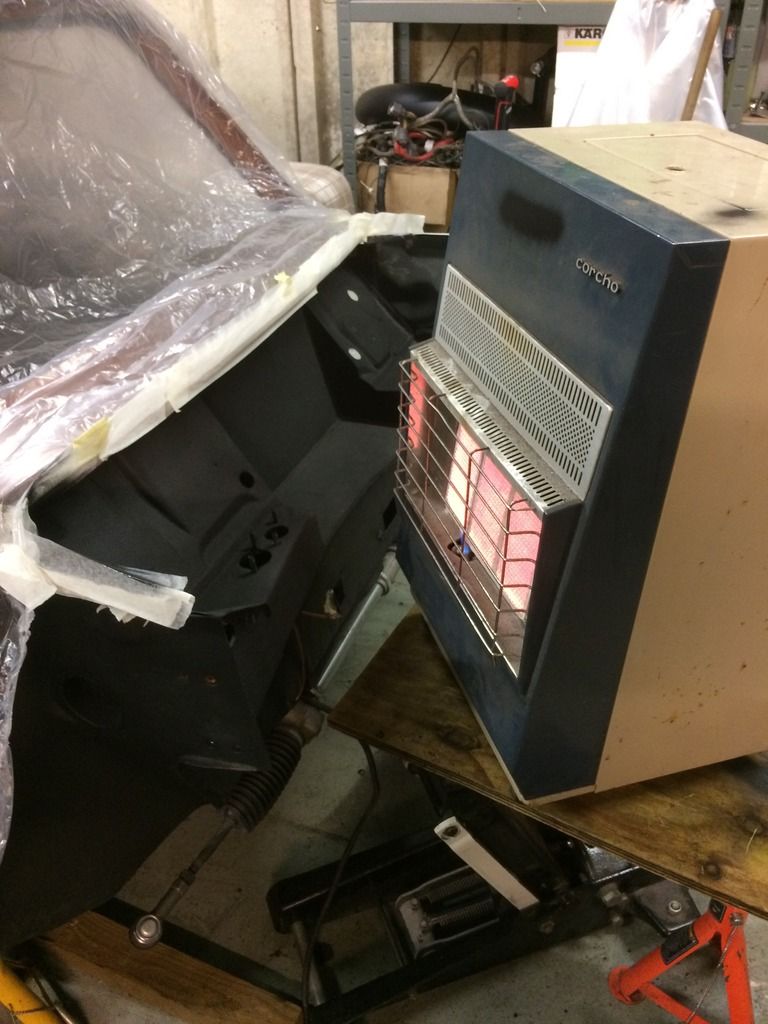
While waiting for the frame to come back I painted some of the bulk head again in the wrinkle finish paint as I wasn't happy with some areas. As before needed heat to help wrinkle and cure the paint.
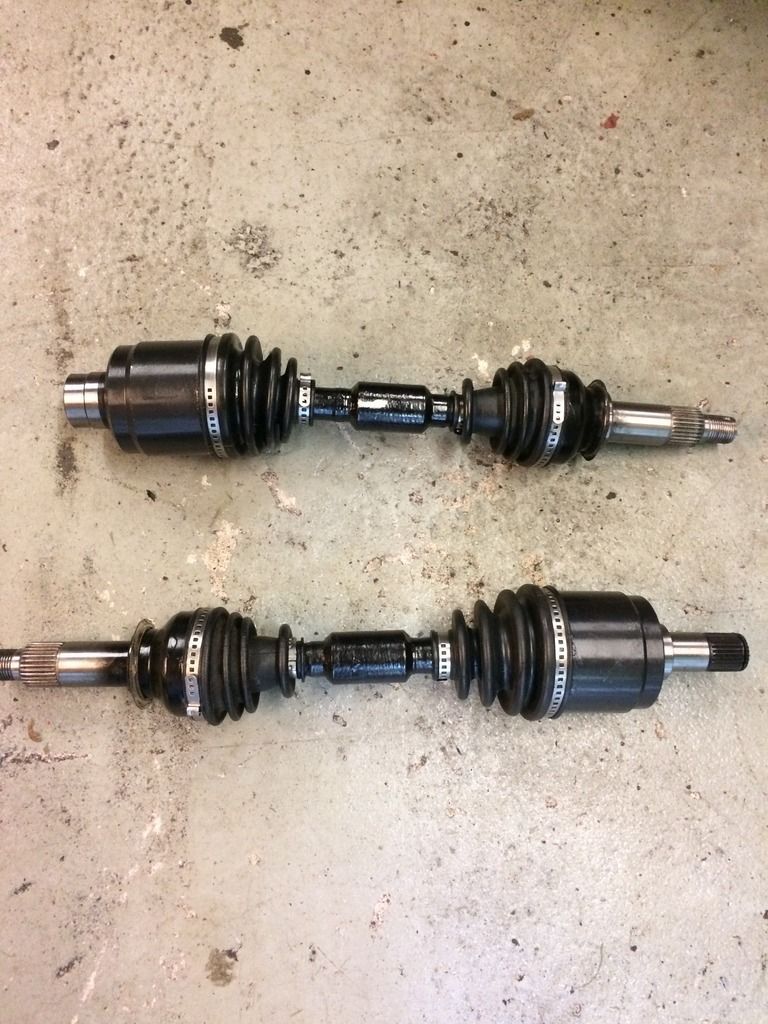
Also got the drive shafts built up.
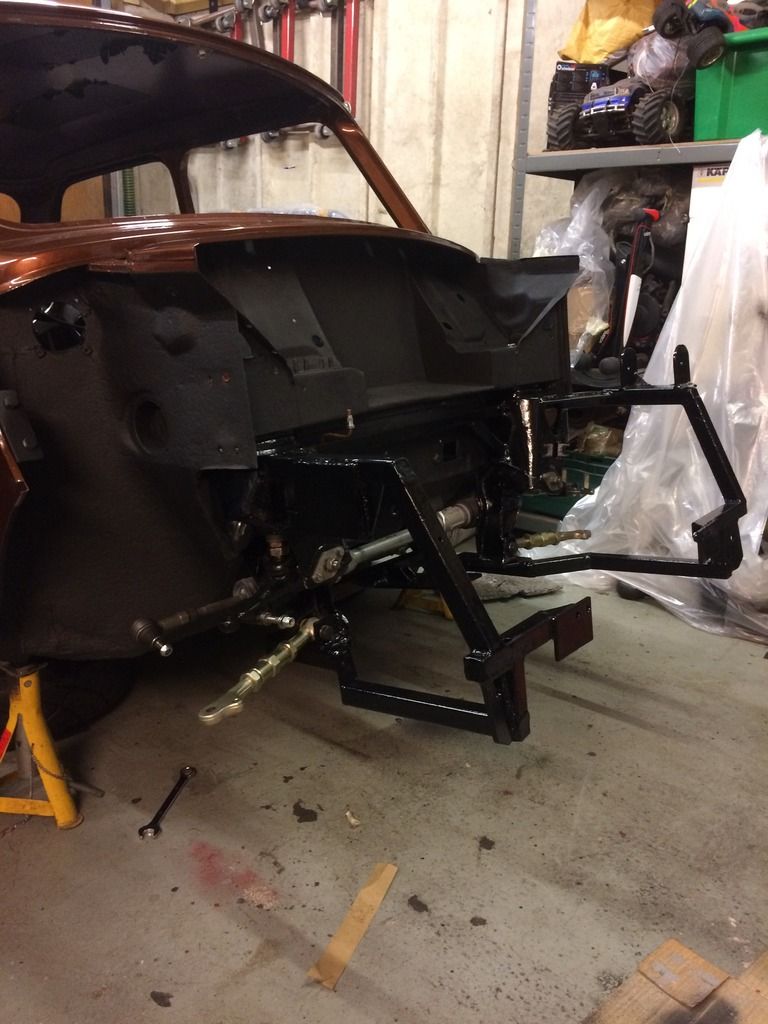
Got the front frame back from the powder coaters, looks great. A bargain at £30!!

So assembly began. Secured the frame to the car and built upper and lower arms up. As with the rest of the car, using stainless fixings wherever possible.
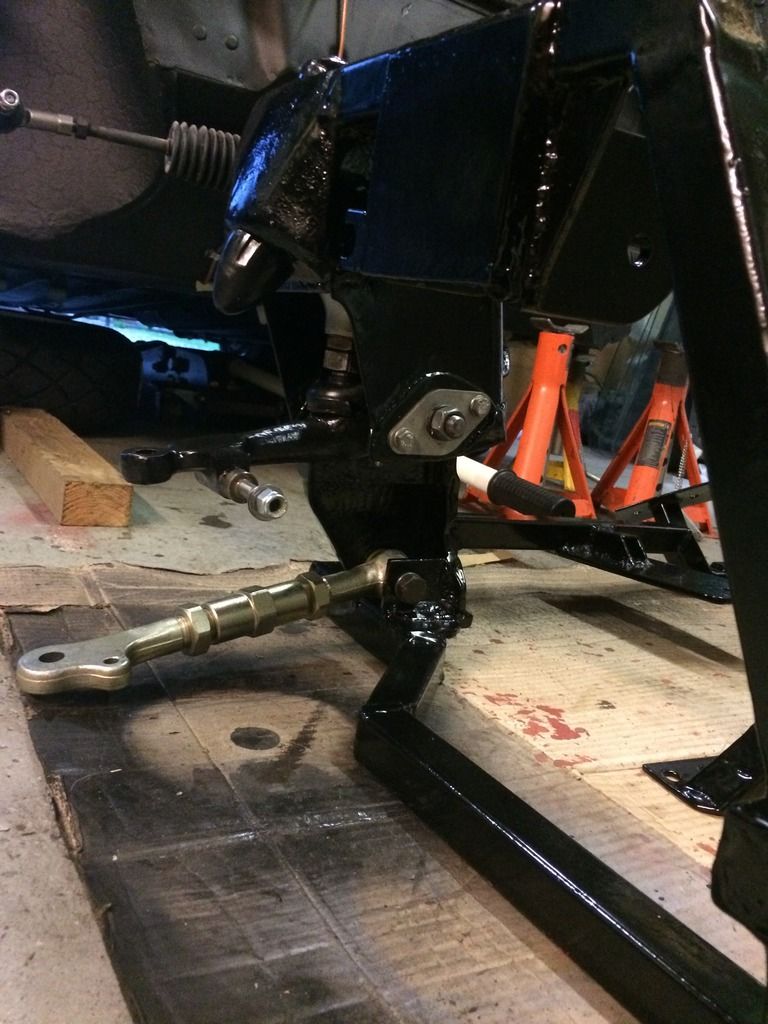
Then started on the brake lines. Ridged into braided lines.
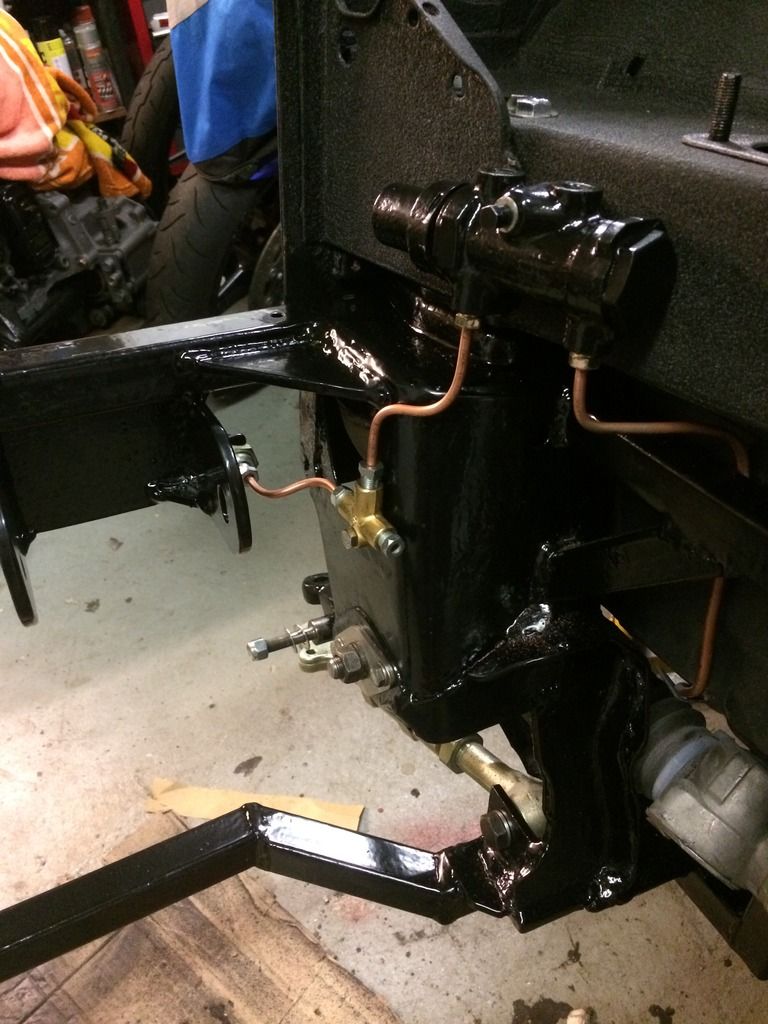

Pretty happy on how it's going together.
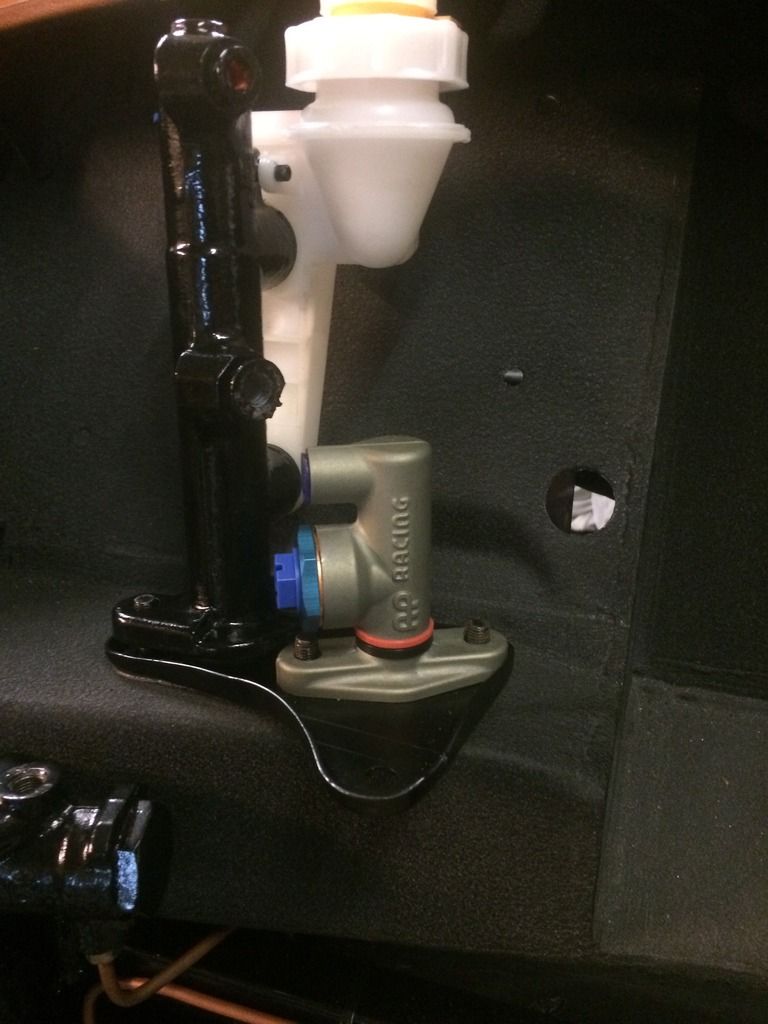
Ordered a new ap racing 14mm bore clutch master and mocked this up. Only needed to cut the rod to length and a small bit of fettling to fit, just waiting for some clevis pins and will get it in properly.
As it stands now.
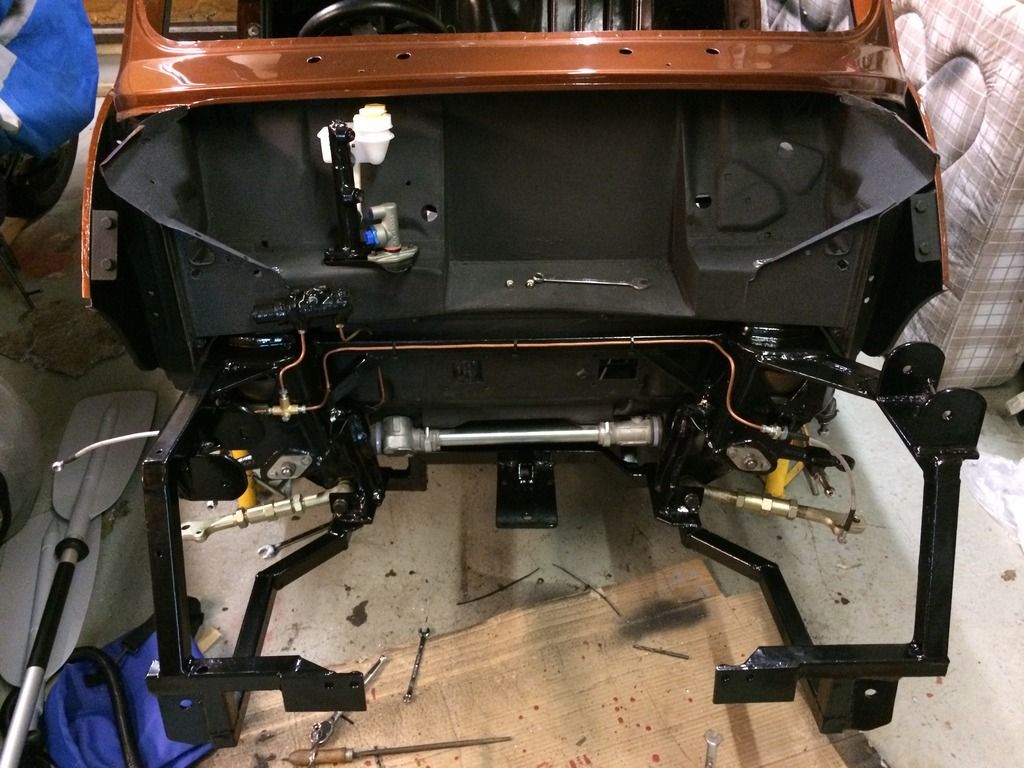
Really happy with it. Dropped a clanger though and forgot to order some new engine mounts. So just waiting for these to come and I can get the engine in, hopefully for the final time. Have gone for some hasport billet mounts, these are a lot more ridged than standard which will hopefully prevent any excessive movement.
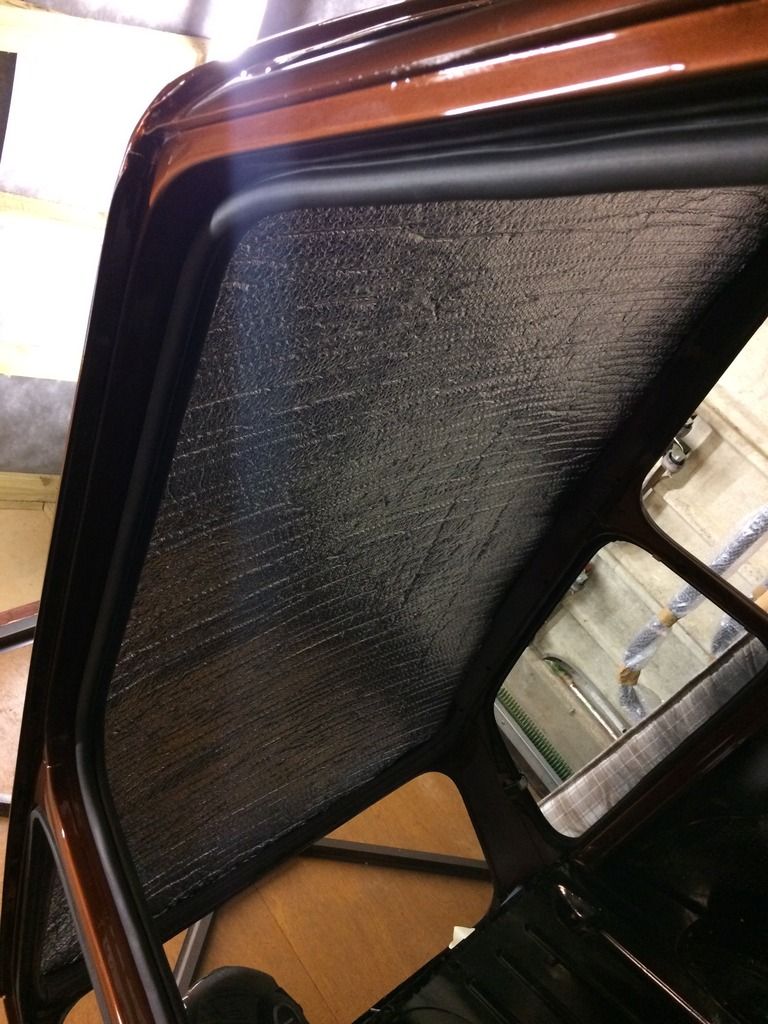
I have also added some sound proofing to the roof ready for the New head lining to go in.
I'd love to have it finished for Xmas but maybe asking a lot. I've promised myself a treat if I can get it done in the form of some specialist components split rims.
Best get working then!!!!!
While waiting for the frame to come back I painted some of the bulk head again in the wrinkle finish paint as I wasn't happy with some areas. As before needed heat to help wrinkle and cure the paint.

Also got the drive shafts built up.

Got the front frame back from the powder coaters, looks great. A bargain at £30!!

So assembly began. Secured the frame to the car and built upper and lower arms up. As with the rest of the car, using stainless fixings wherever possible.


Then started on the brake lines. Ridged into braided lines.


Pretty happy on how it's going together.
Ordered a new ap racing 14mm bore clutch master and mocked this up. Only needed to cut the rod to length and a small bit of fettling to fit, just waiting for some clevis pins and will get it in properly.

As it stands now.

Really happy with it. Dropped a clanger though and forgot to order some new engine mounts. So just waiting for these to come and I can get the engine in, hopefully for the final time. Have gone for some hasport billet mounts, these are a lot more ridged than standard which will hopefully prevent any excessive movement.
I have also added some sound proofing to the roof ready for the New head lining to go in.

I'd love to have it finished for Xmas but maybe asking a lot. I've promised myself a treat if I can get it done in the form of some specialist components split rims.
Best get working then!!!!!


2 user(s) are reading this topic
0 members, 2 guests, 0 anonymous users


