


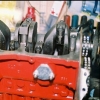

Hi Paddy. Thanks. I just tried this and there's definitely no gap. I took the opportunity to sand stuff down too (there was black on the rotor arm, but it appeared to be melted plastic rather than carbon from the distributor cap, which is pretty new). Tried to start and again, no luck.
As I am short on equipment (eg, checking the gaps) I hope someone who knows more than me will go through it while I shadow them. I'll update this again soon!
Not always a good idea to sand things as those can open up the very critical gaps between the rotor arm and cap segments.
Have you changed the points? One mistake a lot of new owners make it to put the insulating caps/washers under the wires and the locating nut in the wrong order. The caps go either side of the spring with the wires on top and under the washer/nut. Check also the second small wire that runs from the points to inside distributor. These are fine wires and can be easily broken.
The black melted plastic on the rotor arm sounds wrong ...


