

Unfortunately alot of new parts these days are just garbage. I recently decided to change my start solenoid as I noticed the terminals were getting rusty on my old one. I ordered a new one from the local motor factors, turned up with 'made in China' stamped on it, oh dear...
Fitted it, it lasted 5 days when my car cut out outside my house and wouldn't start. Not what you want at 4.30am when your leaving for work...
Turned out the new solenoid had failed and was shorting the coil to ground so no spark.
A new unit was sourced from a well known mini parts supplier, I fitted it, was dead straight out of the box, engine wouldn't even turn over. I ended up cleaning my original unit with a wire brush, refitted that and all is well. The mini supplier has sent me a replacement which is still in the box in the garage. I'll keep the old one till it fails I think.


Now About That "gift Horse" That You Shouldn't Look In The Mouth.
Started by
DClarke1954
, Dec 16 2025 04:26 PM
67 replies to this topic
#62

timmy850
-

- Members
-

- 3,607 posts
Up Into Fourth
- Location: NSW, Australia
- Local Club: MITG
Posted 10 May 2026 - 08:13 PM
I had a par of those new CV split washers, and they both disintegrated like that before I’d even made it on the road

#63
DClarke1954
-
- TMF+ Member
-
- 152 posts
Mini Mad
- Location: Essex
- Local Club: Essex Mini Club
Posted 12 May 2026 - 01:49 PM
I put the refurbished swivel hub back on the car today. New ball-joints and all new timken bearings. I have to say the old bearings I removed looked fine and undamaged in any way so maybe replacement is/was overkill.
Then I went over to the other side and took the wheel off. Yup this side has a loose hub-nut also! Take the hub-nut off and what do we find?
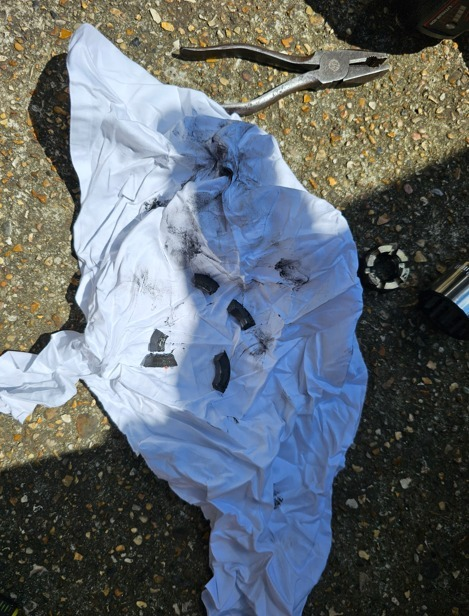
Same as the other side, a split-washer in many pieces. Looking at the broken ends it looks grainy and I think it was a sintered split-washer. Rather than go to all the trouble of a complete refurbishment I just put a new steel split-washer in and torqued to 190ft-lbs. No more wheel knocking and all OK.
Same as the other side, a split-washer in many pieces. Looking at the broken ends it looks grainy and I think it was a sintered split-washer. Rather than go to all the trouble of a complete refurbishment I just put a new steel split-washer in and torqued to 190ft-lbs. No more wheel knocking and all OK.
Does hitting potholes at speed on our Essex roads shatter the sintered split-washers I wonder?
Car all good and drives fine again. 
#64
timmy850
-
- Members
-
- 3,607 posts
Up Into Fourth
- Location: NSW, Australia
- Local Club: MITG
Posted 12 May 2026 - 08:57 PM
The sintered washers are just not fit for purpose
I don’t know why the shops bother selling a cheap dodgy part, then have the good quality ones for a small amount more. Just sell the good ones
I don’t know why the shops bother selling a cheap dodgy part, then have the good quality ones for a small amount more. Just sell the good ones
#65
DClarke1954
-
- TMF+ Member
-
- 152 posts
Mini Mad
- Location: Essex
- Local Club: Essex Mini Club
Posted 13 August 2026 - 09:15 AM
The pain continued as I strove manfully to identify the reason that there was an awful lot of oil ending up on my driveway.
I mean, it was an embarrassment to have this much oil dripping into the catch tray so frequently.
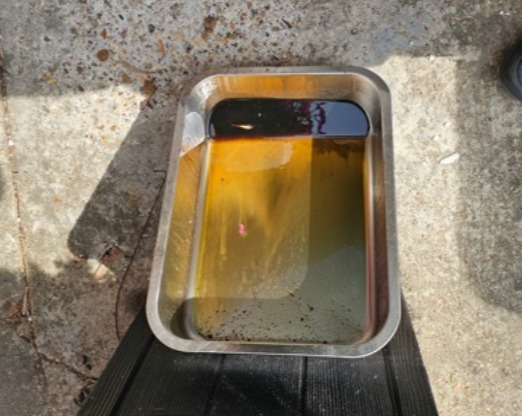
I can put more oil in the top at a faster rate than it is coming out of course but that isn't the point is it?
I put the thing up on axle stands and clambered underneath armed with a big aerosol of brake & clutch cleaner and some clean rags. "Spotless".
Within about 30 minutes another drip had formed on the underside of the gearbox. Tracking the oil trail backwards it was clear that it was dripping down a web of the casting that is the speedo pinion gear case.
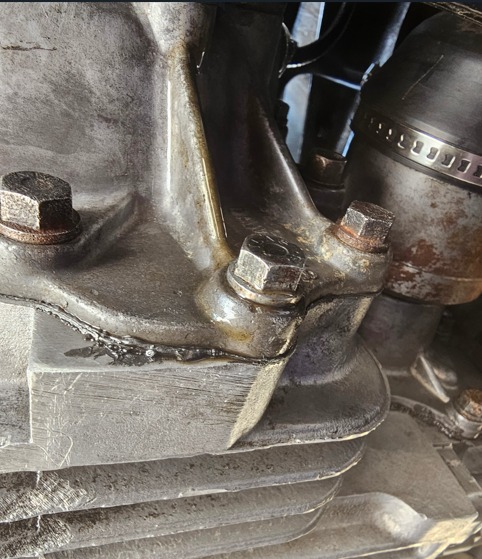
Hmmmm..... that pinion gear cover plate doesn't appear to have a gasket, what plank put it on there without one (please don't answer this rhetorical question). 🫣
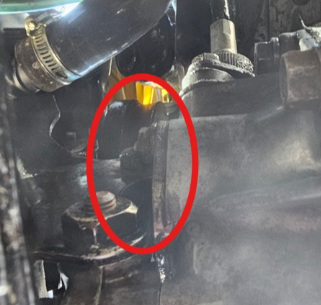
You cannot access that plate without first removing the extension casting and engine mount, and that means removing the radiator and , and , and.
So I removed the radiator, N/S engine mount while supporting the gearbox/engine on a block of wood and a bottle-jack and while you cannot remove the bolts from the extension casting and gearbox you can create a tiny 2" gap into which you can insert your gynaecologist fingers and a spanner. Look! no sign of a gasket between cover plate and casing!!!
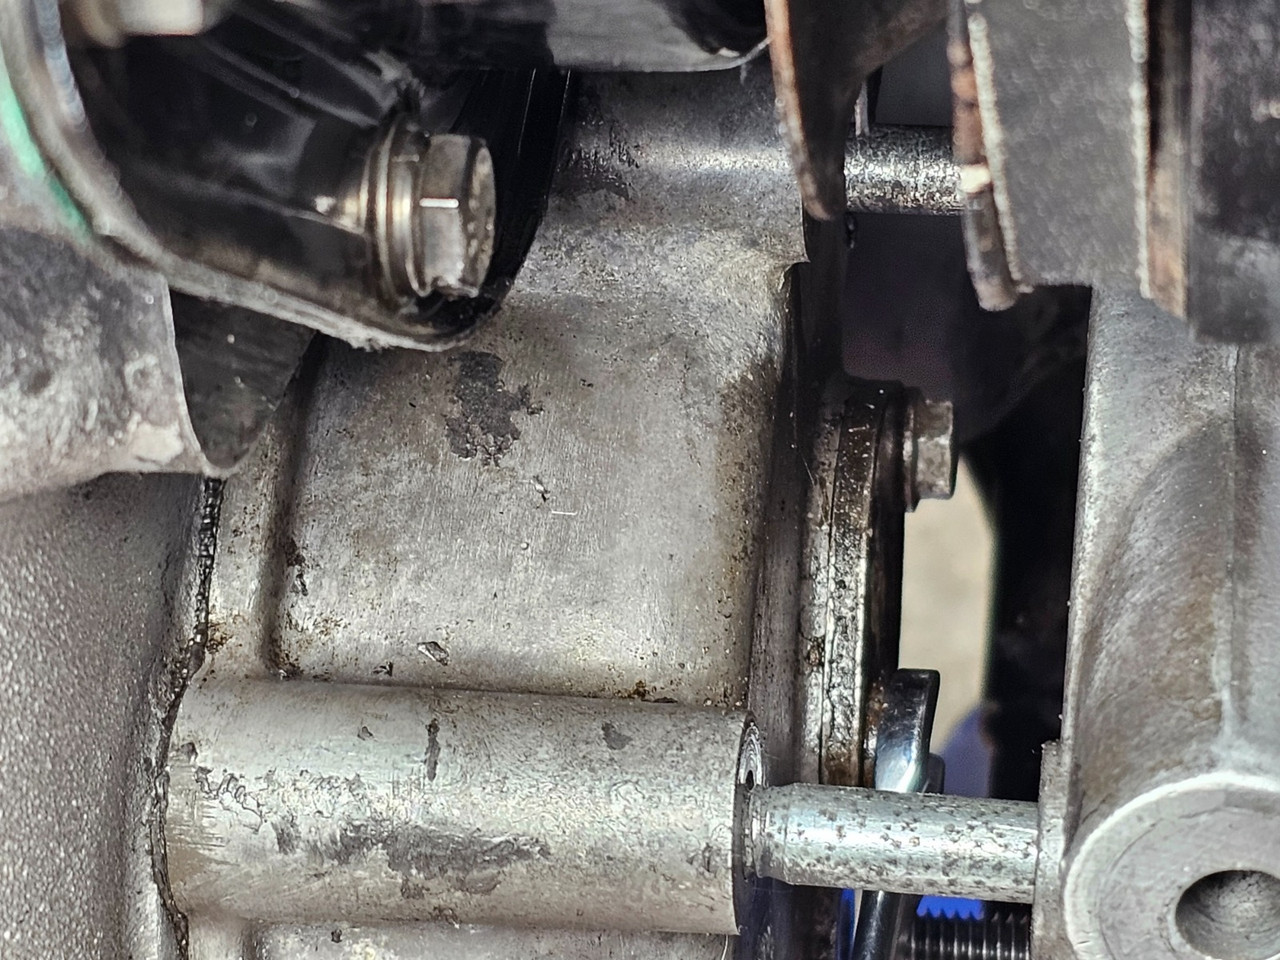
After much swearing both bolts were undone (one was only finger tight) and yes there was no gasket on the cover plate.
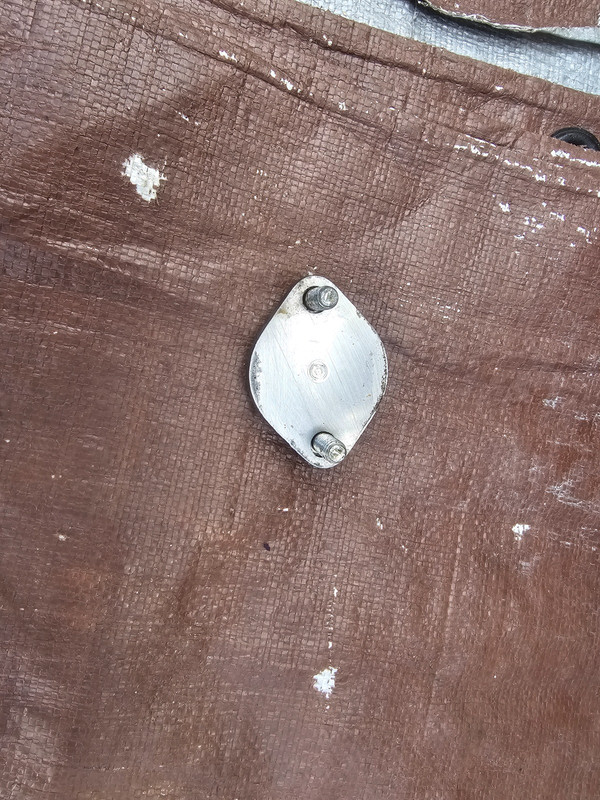
One gasket and a generous helping of Reinzoseal later and all put back together again and we now have a much improved leak/drip situation.
Hardly visible, just a few drips that had spread to an invisible sheen that wiped up with a paper towel. Look how little oil is on there.
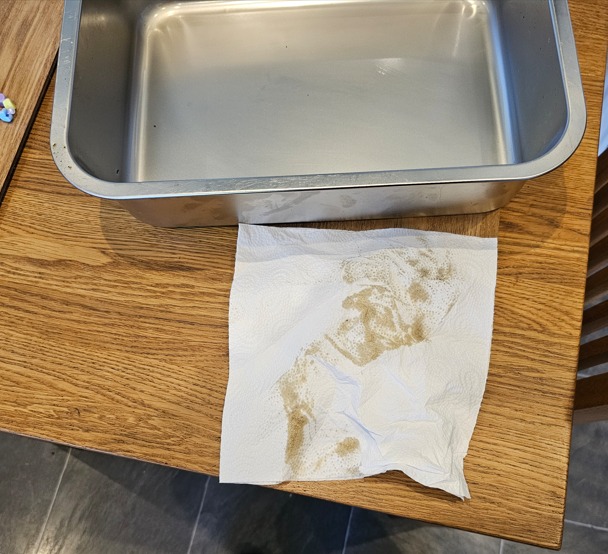
Thank goodness for that!
Yes, I shot myself in the foot by not putting that gasket on in the rebuild process (silly old fool).
But thankfully I was able to remedy the situation without resorting to pulling the whole engine/gearbox back out.
Happy days!
#66
DClarke1954
-
- TMF+ Member
-
- 152 posts
Mini Mad
- Location: Essex
- Local Club: Essex Mini Club
Posted 19 September 2026 - 04:38 PM
I fitted an AFR/Lambda gauge and I found I was running 10% lean on cruise which might lead to a cracked head due to overheating.
I redid my baseline setting and now I am am please to find that at all cruising speeds I am +/- 2% of Lambda 1.0 as we bimble along and I am happy to be getting 42MPG.
I was browsing the UK-Minis site and past "winners" there and was surprised to see my "win" there under a different name in an earlier year (2023).
Still with the same old claptrap about a recent fully rebuilt engine & gearbox (was it hell as like). The engine was devoid of any honing in any of the bores, and the diff-pin was worn through when I rebuilt the engine and replaced the diff with a x-pin.
Still glad to have the car and it gives me a lot of "S-miles".
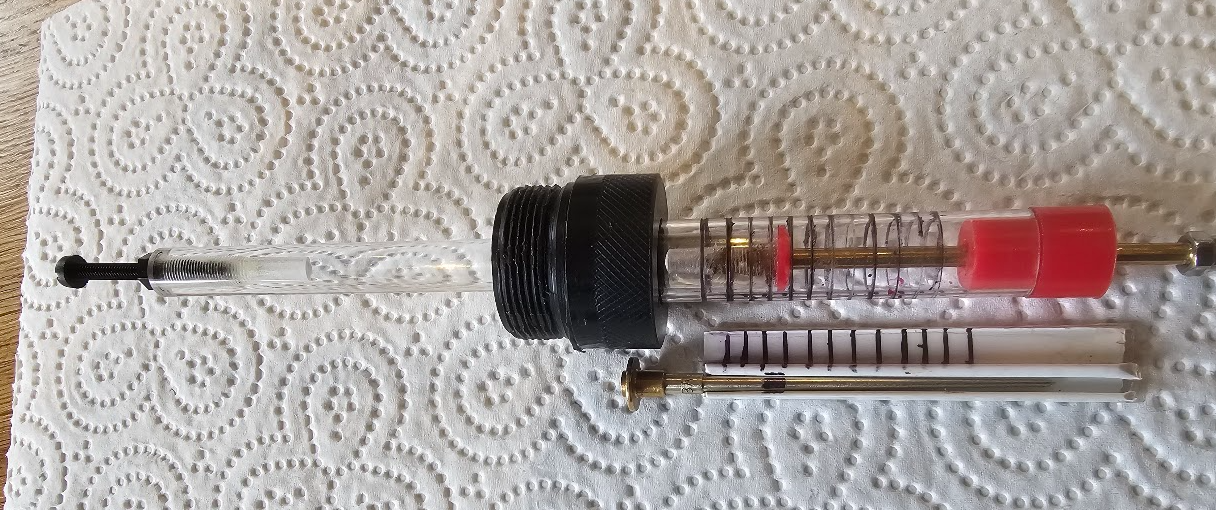
by the way, I made myself a "needle-station" finder for tuning.
#67
jonlad
-

- TMF+ Member
-
- 328 posts
Speeding Along Now
- Location: Cheshire
Posted 02 October 2026 - 11:54 AM
by the way, I made myself a "needle-station" finder for tuning.
Looks interesting do you have a link to what it is/how it works or could you explain a little bit please? (I understand the idea of tuning different parts of the needle, just not what the gadget is or how it works)
thank you!
#68
DClarke1954
-
- TMF+ Member
-
- 152 posts
Mini Mad
- Location: Essex
- Local Club: Essex Mini Club
Posted 03 October 2026 - 08:19 AM
by the way, I made myself a "needle-station" finder for tuning.
Looks interesting do you have a link to what it is/how it works or could you explain a little bit please? (I understand the idea of tuning different parts of the needle, just not what the gadget is or how it works)
thank you!
HI,
The idea on this one is that the adjustable foot allows you to represent the actual height of the needle with the engine off (where the jet is wound down to and the bump stop of the carb piston typically 60 + 12..15 thou').
Then when you run the engine the indicator rises to show you what station of the needle the engine is fuelling from. What you do is slowly increase your revs to half-throttle and note any point where the engine "stumbles", that station is where you adjust your needle by polishing with 1/8" wet & dry strip. The whole process is documented by Des Hammill in his book "How to Powertune SU Carbs". He just used a bamboo stick with a paper taped to it. I tried to be a bit more elegant is all.

So far I have made 4 for HIF38/44 carbs and 2 for HS carbs. Only because the project fascinated me and I had the materials and the lathe all ready to do it.
I am not sure whether the engraving on the sight glass and the adjustable foot is best or just having a printed slip-sleeve over the sight glass for initial position set-up.
It has all been prototyping and experiment. But it does indeed work and bob up and down as you alter the rev's/throttle.
Attached Files
-
 Needle Station Finder guide V1.1.pdf 1.33MB
11 downloads
Needle Station Finder guide V1.1.pdf 1.33MB
11 downloads
Edited by DClarke1954, 03 October 2026 - 08:56 AM.


2 user(s) are reading this topic
0 members, 2 guests, 0 anonymous users


